


Android百度推送使用详解
ONE Goal ,ONE Passion!
  现在个项目都希望有推送功能,各种推送平台也是很多.不过用起来都是大同小异.公司项目使用的百度推送,去百度官网快速集成demo可以搞定.不过使用自己集成是就出现一一下小问题,终于找出问题了.就把一些集成百度推送SDK的细节记录下来吧.
  使用android studio和eclipse时有一些不同.eclipse的集成有很多demo.我只给出studio的一些细节.
开发指南:
第1步: 集成SDK
下载最新的Android SDK压缩包并解压,在新建工程或已有工程中增加百度云推送功能,注意:建议使用Android SDK API level 21以下的版本编译工程,否则在Android5.0机器上通知图标可能会变成白色的方块。
导入云推送jar包和so文件:
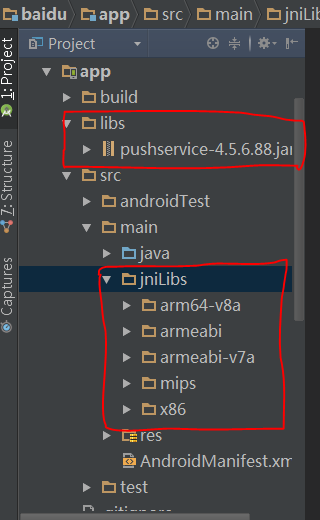
如果你使用的Android开发环境是Android Stutio,在工程中“src/main”目录中新建名为jniLibs的目录,将libs文件夹中文件拷贝到“jniLibs”目录内。(这是百度官方文档的描述)
这里要特别注意: 导入云推送jar包和so文件时——
1,将studio切换至Project模式,将压缩包中的pushservice-1.5.6.88.jar复制到libs目录下.并且build path
2,在工程中“src/main”目录中新建名为jniLibs的目录,将5个so文件拷贝到“jniLibs”目录内
如图:
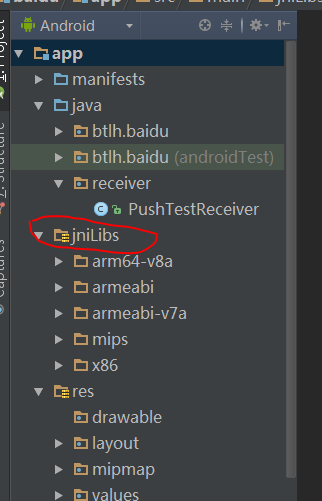
切换到android模式时会看到这样:
第2步 配置AndroidManifest文件:
配置AndroidManifest文件:

在当前工程的AndroidManifest.xml文件中,添加权限和声明信息(请勿修改):


<!-- Push service 运行需要的权限 -->
<uses-permission android:name="android.permission.INTERNET" />
<uses-permission android:name="android.permission.READ_PHONE_STATE" />
<uses-permission android:name="android.permission.ACCESS_NETWORK_STATE" />
<uses-permission android:name="android.permission.RECEIVE_BOOT_COMPLETED" />
<uses-permission android:name="android.permission.WRITE_SETTINGS" />
<uses-permission android:name="android.permission.VIBRATE" />
<uses-permission android:name="android.permission.WRITE_EXTERNAL_STORAGE" />
<uses-permission android:name="android.permission.ACCESS_DOWNLOAD_MANAGER"/>
<uses-permission android:name="android.permission.DOWNLOAD_WITHOUT_NOTIFICATION" />
<uses-permission android:name="android.permission.DISABLE_KEYGUARD" />
<uses-permission android:name="android.permission.ACCESS_COARSE_LOCATION" />
<uses-permission android:name="android.permission.ACCESS_WIFI_STATE" />

<!-- push service start -->
<!-- 用于接收系统消息以保证PushService正常运行 -->
<receiver android:name="com.baidu.android.pushservice.PushServiceReceiver"
    android:process=":bdservice_v1" >
    <intent-filter>
        <action android:name="android.intent.action.BOOT_COMPLETED" />
        <action android:name="android.net.conn.CONNECTIVITY_CHANGE" />
        <action android:name="com.baidu.android.pushservice.action.notification.SHOW" />
        <action android:name="com.baidu.android.pushservice.action.media.CLICK" />
        <!-- 以下四项为可选的action声明,可大大提高service存活率和消息到达速度 -->
        <action android:name="android.intent.action.MEDIA_MOUNTED" />
        <action android:name="android.intent.action.USER_PRESENT" />
        <action android:name="android.intent.action.ACTION_POWER_CONNECTED" />
        <action android:name="android.intent.action.ACTION_POWER_DISCONNECTED" />
    </intent-filter>
</receiver>
<!-- Push服务接收客户端发送的各种请求-->
<receiver android:name="com.baidu.android.pushservice.RegistrationReceiver"
    android:process=":bdservice_v1" >
    <intent-filter>
        <action android:name="com.baidu.android.pushservice.action.METHOD" />
        <action android:name="com.baidu.android.pushservice.action.BIND_SYNC" />
    </intent-filter>
    <intent-filter>
        <action android:name="android.intent.action.PACKAGE_REMOVED" />
        <data android:scheme="package" />
    </intent-filter>
</receiver>
<service android:name="com.baidu.android.pushservice.PushService" android:exported="true"
    android:process=":bdservice_v1" >
    <intent-filter >
            <action android:name="com.baidu.android.pushservice.action.PUSH_SERVICE" />
    </intent-filter>
</service>
<!-- 4.4版本新增的CommandService声明,提升小米和魅族手机上的实际推送到达率 -->
<service android:name="com.baidu.android.pushservice.CommandService"
    android:exported="true" />
<!-- push结束 -->
第3步 启动云推送
在当前工程的主Activity的onCreate函数中,添加以下代码:
PushManager.startWork(getApplicationContext(),PushConstants.LOGIN_TYPE_API_KEY,"api_key")
其中的“API Key“需要手动修改为指定应用的API Key。
public class MainActivity extends Activity {
public final String API_KEY = "vsYLbOzxW2iNI95pfpoaXUBx";
@Override
protected void onCreate(Bundle savedInstanceState) {
super.onCreate(savedInstanceState);
setContentView(R.layout.activity_main);
PushManager.startWork(getApplicationContext(), PushConstants.LOGIN_TYPE_API_KEY, API_KEY);
}
}第4步 自定义回调类
在当前工程中新建一个类,右键点击选择new –> Class,填写接收云推送回调信息和推送到达信息的类的类名,并点击Finish创建该类文件(本例中使用PushTestReceiver)。
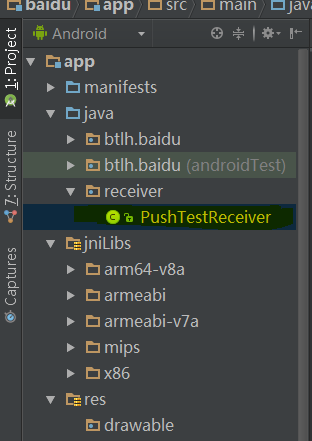
打开新创建的类,继承PushMessageReceiver,此时类名飘红,移动到类名上,点击 Add unimplemented methods,重载所有的回调函数,并打印对应信息,如图所示:
public class PushTestReceiver extends PushMessageReceiver {
    /**
     * TAG to Log
     */
    public static final String TAG = "fy";

    /**
     * 调用PushManager.startWork后,sdk将对push
     * server发起绑定请求,这个过程是异步的。绑定请求的结果通过onBind返回。 如果您需要用单播推送,需要把这里获取的channel
     * id和user id上传到应用server中,再调用server接口用channel id和user id给单个手机或者用户推送。
     *
     * @param context   BroadcastReceiver的执行Context
     * @param errorCode 绑定接口返回值,0 - 成功
     * @param appid     应用id。errorCode非0时为null
     * @param userId    应用user id。errorCode非0时为null
     * @param channelId 应用channel id。errorCode非0时为null
     * @param requestId 向服务端发起的请求id。在追查问题时有用;
     * @return none
     */
    @Override
    public void onBind(Context context, int errorCode, String appid,
                       String userId, String channelId, String requestId) {
        String responseString = "onBind errorCode=" + errorCode + " appid="
                + appid + " userId=" + userId + " channelId=" + channelId
                + " requestId=" + requestId;
        Log.d(TAG, responseString);

        if (errorCode == 0) {
            // 绑定成功
            Log.d(TAG, "绑定成功");
        }

    }

    /**
     * 接收透传消息的函数。
     *
     * @param context             上下文
     * @param message             推送的消息
     * @param customContentString 自定义内容,为空或者json字符串
     */
    @Override
    public void onMessage(Context context, String message,
                          String customContentString) {
        String messageString = "透传消息 message=\"" + message
                + "\" customContentString=" + customContentString;
        Log.d(TAG, messageString);

        // 自定义内容获取方式,mykey和myvalue对应透传消息推送时自定义内容中设置的键和值
        if (!TextUtils.isEmpty(customContentString)) {
            JSONObject customJson = null;
            try {
                customJson = new JSONObject(customContentString);
                String myvalue = null;
                if (!customJson.isNull("mykey")) {
                    myvalue = customJson.getString("mykey");
                }
            } catch (JSONException e) {
                // TODO Auto-generated catch block
                e.printStackTrace();
            }
        }


    }

    /**
     * 接收通知点击的函数。
     *
     * @param context             上下文
     * @param title               推送的通知的标题
     * @param description         推送的通知的描述
     * @param customContentString 自定义内容,为空或者json字符串
     */
    @Override
    public void onNotificationClicked(Context context, String title,
                                      String description, String customContentString) {
        String notifyString = "通知点击 title=\"" + title + "\" description=\""
                + description + "\" customContent=" + customContentString;
        Log.d(TAG, notifyString);

        // 自定义内容获取方式,mykey和myvalue对应通知推送时自定义内容中设置的键和值
        if (!TextUtils.isEmpty(customContentString)) {
            JSONObject customJson = null;
            try {
                customJson = new JSONObject(customContentString);
                String myvalue = null;
                if (!customJson.isNull("mykey")) {
                    myvalue = customJson.getString("mykey");
                }
            } catch (JSONException e) {
                // TODO Auto-generated catch block
                e.printStackTrace();
            }
        }


    }

    /**
     * 接收通知到达的函数。
     *
     * @param context             上下文
     * @param title               推送的通知的标题
     * @param description         推送的通知的描述
     * @param customContentString 自定义内容,为空或者json字符串
     */

    @Override
    public void onNotificationArrived(Context context, String title,
                                      String description, String customContentString) {

        String notifyString = "onNotificationArrived  title=\"" + title
                + "\" description=\"" + description + "\" customContent="
                + customContentString;
        Log.d(TAG, notifyString);

        // 自定义内容获取方式,mykey和myvalue对应通知推送时自定义内容中设置的键和值
        if (!TextUtils.isEmpty(customContentString)) {
            JSONObject customJson = null;
            try {
                customJson = new JSONObject(customContentString);
                String myvalue = null;
                if (!customJson.isNull("mykey")) {
                    myvalue = customJson.getString("mykey");
                }
            } catch (JSONException e) {
                // TODO Auto-generated catch block
                e.printStackTrace();
            }
        }


    }

    /**
     * setTags() 的回调函数。
     *
     * @param context   上下文
     * @param errorCode 错误码。0表示某些tag已经设置成功;非0表示所有tag的设置均失败。
     * @param failTags  设置失败的tag
     * @param requestId 分配给对云推送的请求的id
     */
    @Override
    public void onSetTags(Context context, int errorCode,
                          List<String> sucessTags, List<String> failTags, String requestId) {
        String responseString = "onSetTags errorCode=" + errorCode
                + " sucessTags=" + sucessTags + " failTags=" + failTags
                + " requestId=" + requestId;
        Log.d(TAG, responseString);


    }

    /**
     * delTags() 的回调函数。
     *
     * @param context   上下文
     * @param errorCode 错误码。0表示某些tag已经删除成功;非0表示所有tag均删除失败。
     * @param failTags  删除失败的tag
     * @param requestId 分配给对云推送的请求的id
     */
    @Override
    public void onDelTags(Context context, int errorCode,
                          List<String> sucessTags, List<String> failTags, String requestId) {
        String responseString = "onDelTags errorCode=" + errorCode
                + " sucessTags=" + sucessTags + " failTags=" + failTags
                + " requestId=" + requestId;
        Log.d(TAG, responseString);


    }

    /**
     * listTags() 的回调函数。
     *
     * @param context   上下文
     * @param errorCode 错误码。0表示列举tag成功;非0表示失败。
     * @param tags      当前应用设置的所有tag。
     * @param requestId 分配给对云推送的请求的id
     */
    @Override
    public void onListTags(Context context, int errorCode, List<String> tags,
                           String requestId) {
        String responseString = "onListTags errorCode=" + errorCode + " tags="
                + tags;
        Log.d(TAG, responseString);


    }

    /**
     * PushManager.stopWork() 的回调函数。
     *
     * @param context   上下文
     * @param errorCode 错误码。0表示从云推送解绑定成功;非0表示失败。
     * @param requestId 分配给对云推送的请求的id
     */
    @Override
    public void onUnbind(Context context, int errorCode, String requestId) {
        String responseString = "onUnbind errorCode=" + errorCode
                + " requestId = " + requestId;
        Log.d(TAG, responseString);

        if (errorCode == 0) {
            // 解绑定成功
            Log.d(TAG, "解绑成功");
        }

    }


}
在当前工程的AndroidManifest.xml文件中,添加自定义Receiver信息如下:
<!-- 此处Receiver名字修改为当前包名路径 -->
<receiver android:name="自己的PushTestReceiver路径">
    <intent-filter>
        <!-- 接收push消息 -->
        <action android:name="com.baidu.android.pushservice.action.MESSAGE" />
        <!-- 接收bind、setTags等method的返回结果-->
        <action android:name="com.baidu.android.pushservice.action.RECEIVE" />
        <!-- 接收通知点击事件,和通知自定义内容 -->
        <action android:name="com.baidu.android.pushservice.action.notification.CLICK" />
    </intent-filter>
</receiver>
第5步 运行App
右键点击当前工程,选择Run As –> Android Application,选中已连接的设备或Android虚拟机,运行该程序。如果在logcat中的回调函数中的errorCode为0,说明已经绑定成功,并返回userid和channelid,我们就可以在云控制台推送通知和透传消息到该app了。
可以看到log日志:
12-16 14:37:04.388 24229-24229/btlh.baidu D/fy: onBind errorCode=0 appid=7499045 userId=978848367305825538 channelId=3472447811702144140 requestId=539287243
12-16 14:37:04.388 24229-24229/btlh.baidu D/fy: 绑定成功
第6步 处理推送消息(参见百度文档即可)
推送
在集成SDK后,可以通过以下两种方式推送消息。
通过控制台推送消息。参见:管理控制台
通过服务端SDK推送消息,目前服务端提供 Java 和 PHP 两种语言的SDK,其它语言可以通过包装RestAPI使用云推送服务,具体可参见 SDK开发指南。
接收通知消息
当设备接收到通知消息后,查看手机的通知栏,可以看到通知栏内的新通知展示。如图:
通知到达时,当通知被用户点击时,会回调onNotificationClicked函数。
推送透传消息
当设备接收到透传消息时,消息不会在通知栏展示,只是静默回调开发者自定义Receiver中的onMessage函数。手机收到消息后不会有任何现象,因为透传消息对用户完全透明,用户无法感知,便于开发者在不影响用户的情况下对app进行操作。开发者可以通过log内容和自定义的回调函数onMessage中打印该内容,确认消息到达,并执行开发者指定操作。
错误码说明
error_code 描述
0 绑定成功
10001 当前网络不可用,请检查网络
10002 服务不可用,连接server失败
10003 服务不可用,503错误
10101 应用集成方式错误,请检查各项声明和权限
20001 未知错误
30600 服务内部错误
30601 非法函数请求,请检查您的请求内容
30602 请求参数错误,请检查您的参数
30603 非法构造请求,服务端验证失败
30605 请求的数据在服务端不存在
30608 绑定关系不存在或未找到
30609 一个百度账户绑定设备超出个数限制(多台设备登录同一个百度账户)
30612 百度账户绑定应用时被禁止,需要白名单授权
混淆说明
如果需要混淆app,请在混淆文件(一般默认为Android工程下proguard-project.txt或者proguard.cfg)中添加以下说明(pushservice-VERSION.jar为集成的jar包名字,VERSION为版本名称),防止SDK内容被二次混淆,无法收到消息。
 -libraryjars libs/pushservice-VERSION.jar
 -dontwarn com.baidu.**
 -keep class com.baidu.**{*; }
好了,studio的集成算搞定了.其实并不难只是有很多地方容易出错.主要的就是继承sdk时那些包的导入.快去试试自己推送吧.


 1万+
1万+


 被折叠的 条评论
为什么被折叠?
被折叠的 条评论
为什么被折叠?
 到【灌水乐园】发言


