


博主最近在项目中多次运用多ajaxfileupload上传图片技术,并带有图片回显功能,后台java也用到了自己封装得处理文件得方法,分享给大家,一起学习应用,我们不止会New
前言
先说一下整体得流程,首先需求为给角色上传头像,通过添加页面对用户添加头像并回显,然后填写信息后进行表单提交,发送ajaxfileupload请求给java,java处理相应请求后,将图片上传tomcat服务器,最后将真实路径存入数据库,并在前台JSP调取相对应得img真实路径,最后显示在前台页面,整体需求完成。
上传成功与未上传:

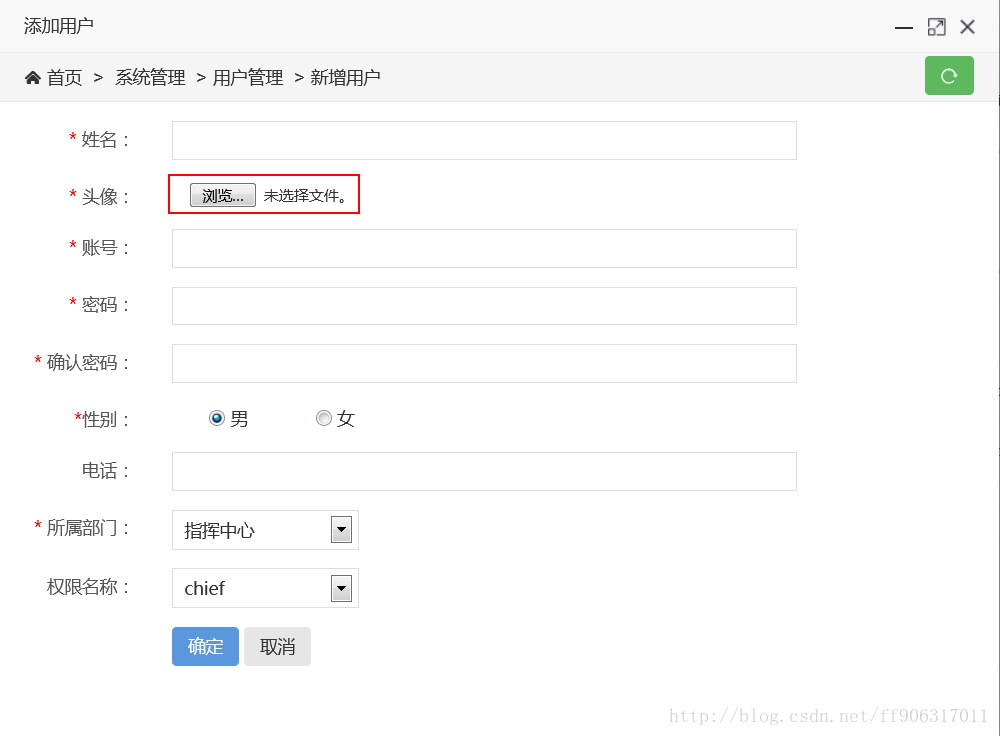
1.通过添加用户页面进行图片选择,回显功能
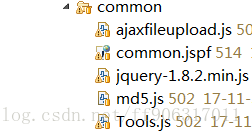
首先,引入功能所需jar包,基础包在此不再重复,下面只列出关键jar包:
下来进入添加页面,并进行选择图片操作:
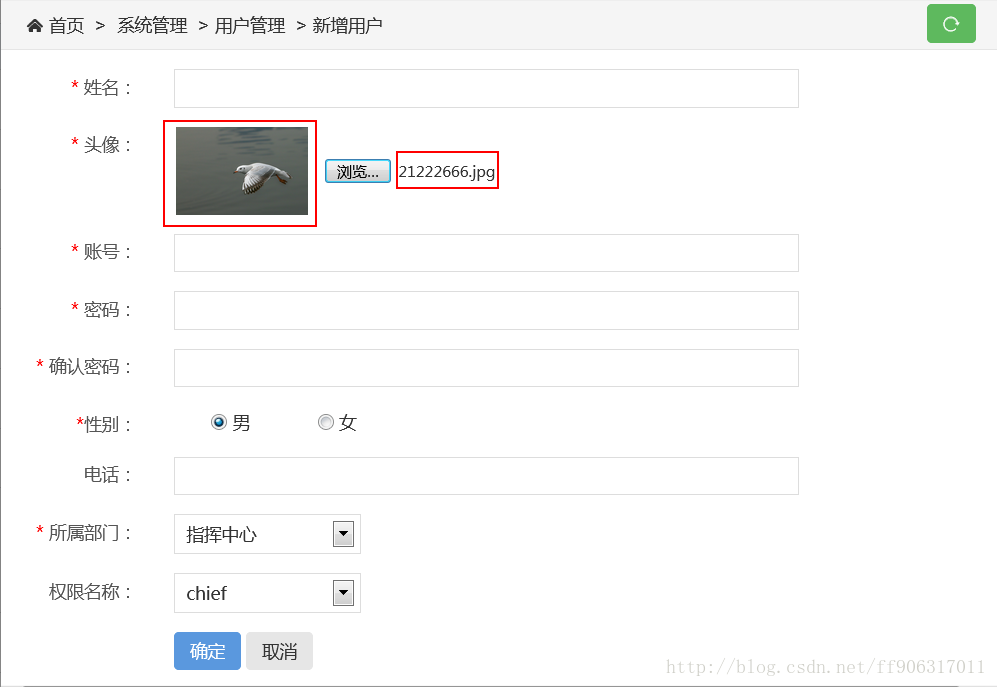
选择图片后,进行图片与图片信息回显:
jsp代码:
<div class="row cl">
<label class="form-label col-xs-4 col-sm-2">
<span class="c-red">*</span> 头像:
</label>
<img id="pic3" src="" width="106" alt="">
<input type='file' style="width: 200px;" name='picPaths3'id='picPaths3'
onchange="showPic(this, 3);" />
</div> 创建Onchange事件写JS代码:
//图片回显+图片格式+文件类型
function showPic(obj, id) {
        var newPreview = document.getElementById('pic'+id);
        if (obj) {
            //ie浏览器兼容
            if (window.navigator.userAgent.indexOf("MSIE") >= 1) {
                obj.select();
                newPreview.style.filter = "progid:DXImageTransform.Microsoft.AlphaImageLoader(sizingMethod=scale);";

                var path = document.selection.createRange().text;
                var flag = judgeImgSuffix(path);
                if(flag){
                    newPreview.filters.item("DXImageTransform.Microsoft.AlphaImageLoader").src = document.selection.createRange().text;
                }else{
                    alert("要求图片格式为png,jpg,jpeg,bmp");
                }

                return;
            }
            //firefox浏览器兼容
            else if (window.navigator.userAgent.indexOf("Firefox") >= 1) {
                if (obj.files) {
                    newPreview.src = window.URL.createObjectURL(obj.files.item(0));
                    return;
                }
                newPreview.src = obj.value;
                        return;
                    }
                    newPreview.src = obj.value;
                    return;
                }
            }

            function judgeImgSuffix(path){
                var index = path.lastIndexOf('.');
                var suffix = "";
                if(index > 0){
                    suffix = path.substring(index+1);
                }
                if("png"==suffix || "jpg"==suffix || "jpeg"==suffix || "bmp"==suffix || "PNG"==suffix || "JPG"==suffix || "JPEG"==suffix || "BMP"==suffix){
                    return true;
                }else{
                    return false;
                }

            }
注:此处的方法及参数可以根据实际开发情况进行修改,因博主pic较多,所以使用pic+id得方法进行区分
2.发送ajaxfileupload请求,后台接受请求,上传图片,提交表单信息
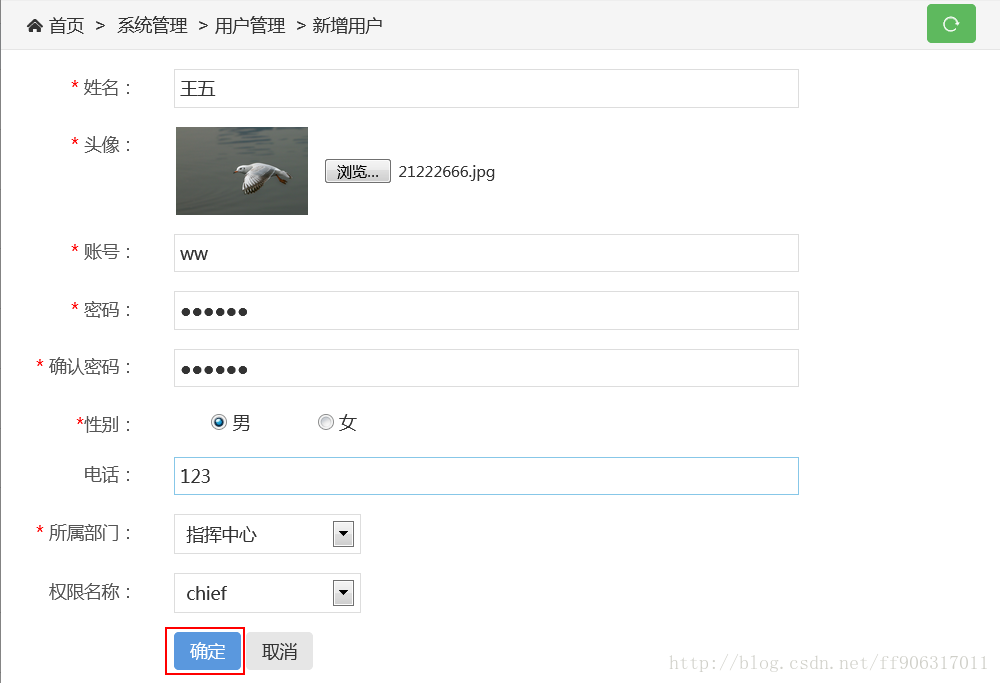
填写表单信息,进行提交确认:
Ajaxfileupload:
//异步上传图片
$.ajaxFileUpload({
                        type:"post",
                        url:contextPath+"/user/addUserInfo.action",
                        secureuri:false,
                        data:{userName:userName, account:account, sex:sex,
                        password:password,
                        telephone:telephone, unitId:unitId, groupId:groupId
                        },
                        dataType: 'text',
                        fileElementId:"picPaths3",
                        cache:false,
                        async:false,
                        success:function(data,textStatus,jqXHR){
                            //data是返回的数据
                            //textStatus 可能为"success","notmodified"等
                            //jqXHR 是通过jQuery封装的XMLHttpRequest对象
                            if(data==1){
                                var msg="信息新增成功!";
                                var option = {
                                    title: "提示",
                                    btn:parseInt("0011",2),
                                    onOk:function(){

                                    var index = parent.layer.getFrameIndex(
                                    window.name);
                                    parent.location.replace(parent.location
                                    .href);
                                    parent.layer.close(index);

                                    }
                                }
                                window.wxc.xcConfirm(msg, "success", option
                                );
                                }else{
                                window.wxc.xcConfirm("新增信息时出现异常! ","
                                info");
                                    }
                        },
                        error:function(XMLHttpRequest,textStatus,errorThrow
                        n){
                            window.wxc.xcConfirm("新增信息时出现异常,异常信息:
                            "+textStatus,"error");
                            return false;
                            }
                        });
跳转URL方法后,进入后台:
/**
     * 用户信息头像上传功能
     *
     * @param model
     * @param jspUserCustom
     * @return
     */
    @RequestMapping("addUserInfo")
    public void addUserInfo(PfUserCustom jspUserCustom, String userName,
            String account, String password, Integer sex, String telephone,
            Integer unitId, Integer groupId, HttpSession session,
            HttpServletResponse response, HttpServletRequest request) {
        response.setContentType("text/html;charset=UTF-8");
        int result;
        boolean executeResult = false;
        try {
            jspUserCustom.setUnitName(userName);
            jspUserCustom.setAccount(account);
            jspUserCustom.setSex(sex);
            jspUserCustom.setTelephone(telephone);
            jspUserCustom.setUnitId(unitId);
            jspUserCustom.setGroupId(groupId);
            jspUserCustom.setPassword(Md5Util.string2MD5(
            jspUserCustom.getPassword()).toUpperCase());
            MultipartHttpServletRequest multipartRequest = (MultipartHttpSe
            rvletRequest) request;
            String fileName = "";
            String uploadPath = "wyInFile\\";
            String path = request.getSession().getServletContext().getRealP
            ath(
                    "/")
                    + uploadPath;
            path=path.substring(0,path.indexOf("\\wyin"))+ "\\" + uploadPat
            h;
            /*
             * File uploadPathFile = new File(path); if
             * (!uploadPathFile.exists()) { uploadPathFile.mkdir(); }
             */
            String realPath = "";
            for (Iterator it = multipartRequest.getFileNames(); it.hasNext(
            );) {
                String key = (String) it.next();
                MultipartFile mulfile = multipartRequest.getFile(key);
                //封装处理文件工具类Tools
                String pathTmp = Tools.saveFile2(multipartRequest, mulfile)
                ;
                if(!"".equals(pathTmp)){
                    realPath += pathTmp;
                }
            }
            jspUserCustom.setImage(realPath);
            userService.insertSelective(jspUserCustom);
            result = 1;// 新增成功
            response.getWriter().print(result);
            executeResult = true;
        } catch (Exception e) {
            result = 2;// 出现异常
            try {
                response.getWriter().print(result);
            } catch (IOException e1) {
                e1.printStackTrace();
            }
            executeResult = false;
            e.printStackTrace();
        } finally {
            //插入操作日志
            Integer loginUserId = (Integer) session.getAttribute("userId");
            operationLogService.insertOperateLog(loginUserId, 3, executeRes
            ult,request);
        }
    }
注:大家看清楚uploadpath和realpath,一个为访问图片路径,一个为真实服务器路径
3.文件处理工具类
此工具类已封装完毕,大家可以放心使用,其中的WyInFile为服务器保存图片的路径
    /**
     * 工具类:上传文件:改名字
     */
    public static String saveFile(HttpServletRequest request, MultipartFile file) {
        // 判断文件是否为空
        if (!file.isEmpty()) {
            try {
                CommonInfo cmmInfo = new CommonInfo();
                String separator = File.separator;
                String picPath2 = System.getProperty("user.dir").replace("b
                in","webapps")+ File.separator;
                String directory = picPath2 + "wyInFile" + separator+ cmmInfo.getDateStr() + separator;
                String newPicName = "";
                if (file.getSize() != 0) {
                String originalFileNameLeft = file.getOriginalFilename();
                    // 新的图片名称
                    newPicName = UUID.randomUUID()
                            + originalFileNameLeft
                                    .substring(originalFileNameLeft
                                            .lastIndexOf("."));
                    // 新图片,写入磁盘
                    File f = new File(directory, newPicName);
                    if (!f.exists()) {
                        // 先创建文件所在的目录
                        f.getParentFile().mkdirs();
                    }
                    file.transferTo(f);
                }
                return cmmInfo.getDateStr() + separator + newPicName;
            } catch (Exception e) {
                e.printStackTrace();
            }
        }
        return "";
    }

    /**
     * 工具类:上传文件:不改名字
     */
    public static String saveFile2(HttpServletRequest request,
            MultipartFile file) {
        // 判断文件是否为空
        if (!file.isEmpty()) {
            try {
                CommonInfo cmmInfo = new CommonInfo();
                String separator = File.separator;
                String picPath2 = System.getProperty("user.dir").replace("b
                in","webapps")+ File.separator;
                String directory = picPath2 + "wyInFile" + separator+ cmmInfo.getDateStr() + separator;
                String newPicName = "";
                if (file.getSize() != 0) {
                    String originalFileNameLeft = file.getOriginalFilename();
                    // 新的图片名称
                    int index = originalFileNameLeft.lastIndexOf(".");
                    newPicName = originalFileNameLeft.substring(0, index)
                            + cmmInfo.getTimeStr()
                            + originalFileNameLeft.substring(index);
                    // 新图片,写入磁盘
                    File f = new File(directory, newPicName);
                    if (!f.exists()) {
                        // 先创建文件所在的目录
                        f.getParentFile().mkdirs();
                    } else {
                        f.delete();
                    }

                    file.transferTo(f);
                }
                return cmmInfo.getDateStr() + separator + newPicName;
            } catch (Exception e) {
                e.printStackTrace();
            }
        }
        return "";
    }
3.提交表单,查看页面显示功能,服务器内图片保存情况
提交后页面显示:

服务器文件保存情况:
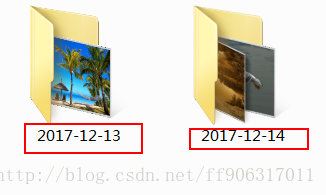
我们可以看到在tomcat下的WyInFile文件下有一个以时间命名的文件夹。
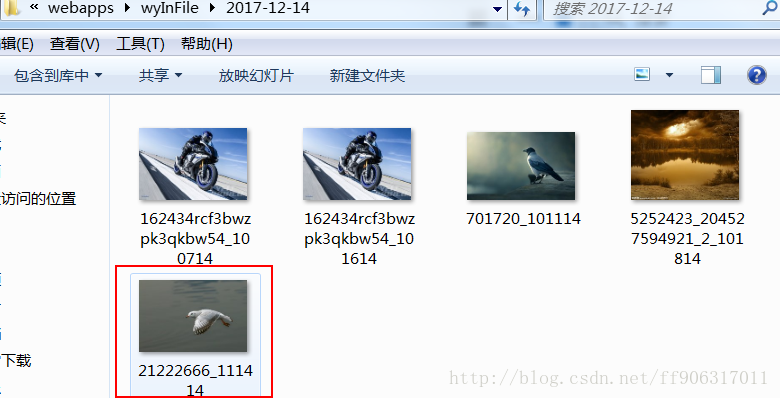
点击进入后,发现我们刚才上传的图片就在其中,并且命名也已UUID进行修改,此时说明图片上传完成。
下来就是在jsp中的img src属性中加入 图片文件夹名/${jstl中图片的属性 例:item.img},就可将图片从服务器中访问在JSP页面中了。
结语
各位看到这里,整个ajaxFileupload上传和回显功能就完成了,最后总结几点博主开发时的问题,希望可以帮到大家:
1. 回显示时调用方法参数容易出错,浏览器兼容问题
2. ajaxFileupload中参数的传递,data值
3. java方法中的真实路径和访问路径混淆
4. 调用工具类处理方法后的返回值处理
5. 最后img src中的路径访问
谦卑若愚,好学若饥。此方法不止局限于上传头像,还可以上传文件例如word和Excel表格,也可上传多文件,要在realpath处进行分隔符加载,以上问题都可以回复博主进行讨论,最后,我们不止会New!


 7万+
7万+


 被折叠的 条评论
为什么被折叠?
被折叠的 条评论
为什么被折叠?
 到【灌水乐园】发言


