


对三种方式创建和使用Spring容器的学习
- 第一种 在独立的环境中通过使用基于Java的配置创建和使用Spring容器
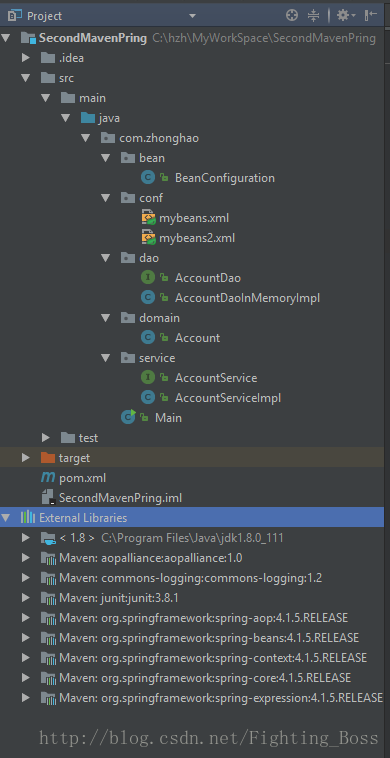
首先在IDE 中新建Maven管理的Spring工程。
最终的包结构如图:
首先创建一个Account的域类。
public class Account {
    private  long id ;
    private double balance;
    private Date accessTime;
    private String owenerName;

    public String getOwenerName() {
        return owenerName;
    }

    public void setOwenerName(String owenerName) {
        this.owenerName = owenerName;
    }

    public long getId() {
        return id;
    }

    public void setId(long id) {
        this.id = id;
    }

    public double getBalance() {
        return balance;
    }

    public void setBalance(double balance) {
        this.balance = balance;
    }

    public Date getAccessTime() {
        return accessTime;
    }

    public void setAccessTime(Date accessTime) {
        this.accessTime = accessTime;
    }
}
然后创建Dao的接口和实现类,以及Service的接口和实现类
public interface AccountDao {
    void insert(Account account);

    void delete(Account account);

    void update(Account account);

    void update(List<Account> accounts);

    Account find(long accountId);

    List<Account> find(List<Long> accountIds);

    List<Account> find(String ownerName);

    List<Account> find(boolean locked);


}
public class AccountDaoInMemoryImpl implements AccountDao {
private Map<Long,Account> accountMap = new HashMap();
{
Account account1 = new Account();
account1.setId(1L);
account1.setOwenerName("John");
account1.setBalance(10.0);
Account account2 = new Account();
account2.setId(2L);
account2.setOwenerName("Mary");
account2.setBalance(20.0);
accountMap.put(account1.getId(),account1);
accountMap.put(account2.getId(),account2);
}
public void update(Account account) {
accountMap.put(account.getId(),account);
}
public Account find(long accountId) {
return accountMap.get(accountId);
}
public void insert(Account account) {
}
public void delete(Account account) {
}
public void update(List<Account> accounts) {
}
public List<Account> find(List<Long> accountIds) {
return null;
}
public List<Account> find(String ownerName) {
return null;
}
public List<Account> find(boolean locked) {
return null;
}
}
public interface AccountService {
    void transferMoney(long sourceAccountId, long targetAccountID, double amount);

    void depositMoney(long accountId, double amount) throws Exception;

    Account getAccount(long accountId);
}
public class AccountServiceImpl implements AccountService {
private AccountDao accountDao;
public void setAccountDao(AccountDao accountDao) {
this.accountDao = accountDao;
}
public void transferMoney(long sourceAccountId, long targetAccountID, double amount) {
Account sourceAccount = accountDao.find(sourceAccountId);
Account targetAccount = accountDao.find(targetAccountID);
sourceAccount.setBalance(sourceAccount.getBalance() - amount);
targetAccount.setBalance(targetAccount.getBalance() + amount);
accountDao.update(sourceAccount);
accountDao.update(targetAccount);
}
public void depositMoney(long accountId, double amount) throws Exception {
Account account = accountDao.find(accountId);
account.setBalance(account.getBalance() + amount);
accountDao.update(account);
}
public Account getAccount(long accountID) {
return accountDao.find(accountID);
}
}
最后创建Spring Bean定义类。该类是一个Bean,并且包含配置元数据。在该配置类中,创建了两个工厂方法并使用@Bean注解。方法在启动器件被Spring调用,而返回值则被视为Spring管理的Bean.默认情况下,方法的名称就是Bean的名称。而在工厂方法中,首先通过调用setter方法设置所需的依赖项,然后使用具体类创建一个Bean并将其返回。
@Configuration
public class BeanConfiguration {

    @Bean
    public AccountService accountService(){
        AccountServiceImpl bean = new AccountServiceImpl();
        bean.setAccountDao(accountDao());
        return bean;
    }

    @Bean
    public AccountDao accountDao() {
        AccountDaoInMemoryImpl bean = new AccountDaoInMemoryImpl();
        return bean;
    }
}
最终创建Spring容器实例。Spring容器(ApplicationContext)在创建之后就可以使用了。
public class Main {
    public static void main(String[] args) {
        AnnotationConfigApplicationContext applicationContext = new AnnotationConfigApplicationContext(BeanConfiguration.class);

        AccountService accountService = applicationContext.getBean("accountService", AccountService.class);
        System.out.println("Before money transfer");
        System.out.println("Account 1 balance:" +
                accountService.getAccount(1).getBalance());
        System.out.println("Account 1 balance:" +
                accountService.getAccount(2).getBalance());

        accountService.transferMoney(1, 2, 5.0);

        System.out.println("After money transfer");
        System.out.println("Account 1 balance:" +
                accountService.getAccount(1).getBalance());
        System.out.println("Account 1 balance:" +
                accountService.getAccount(2).getBalance());
    }
}
以上就是第一种方式
- 第二种 在独立的环境中通过使用基于XML的配置来创建和使用Spring容器
第二种,首先创建XML文件,新建包conf.
<?xml version="1.0" encoding="UTF-8"?>
<beans xmlns="http://www.springframework.org/schema/beans"
       xmlns:xsi="http://www.w3.org/2001/XMLSchema-instance"
       xsi:schemaLocation="http://www.springframework.org/schema/beans
       http://www.springframework.org/schema/beans/spring-beans.xsd">
    <bean id="accountService" class="com.zhonghao.service.AccountServiceImpl">
        <property name="accountDao" ref="accountDao"/>
    </bean>

    <bean id="accountDao" class="com.zhonghao.dao.AccountDaoInMemoryImpl"></bean>
</beans>
然后修改不需要写Spring Bean的定义类。只需要修改main方法即可
public class Main {
public static void main(String[] args) {
// AnnotationConfigApplicationContext applicationContext = new //AnnotationConfigApplicationContext(BeanConfiguration.class);
**重点内容** ClassPathXmlApplicationContext applicationContext=new ClassPathXmlApplicationContext("com/zhonghao/conf/mybeans.xml");
AccountService accountService = applicationContext.getBean("accountService", AccountService.class);
System.out.println("Before money transfer");
System.out.println("Account 1 balance:" +
accountService.getAccount(1).getBalance());
System.out.println("Account 1 balance:" +
accountService.getAccount(2).getBalance());
accountService.transferMoney(1, 2, 5.0);
System.out.println("After money transfer");
System.out.println("Account 1 balance:" +
accountService.getAccount(1).getBalance());
System.out.println("Account 1 balance:" +
accountService.getAccount(2).getBalance());
}
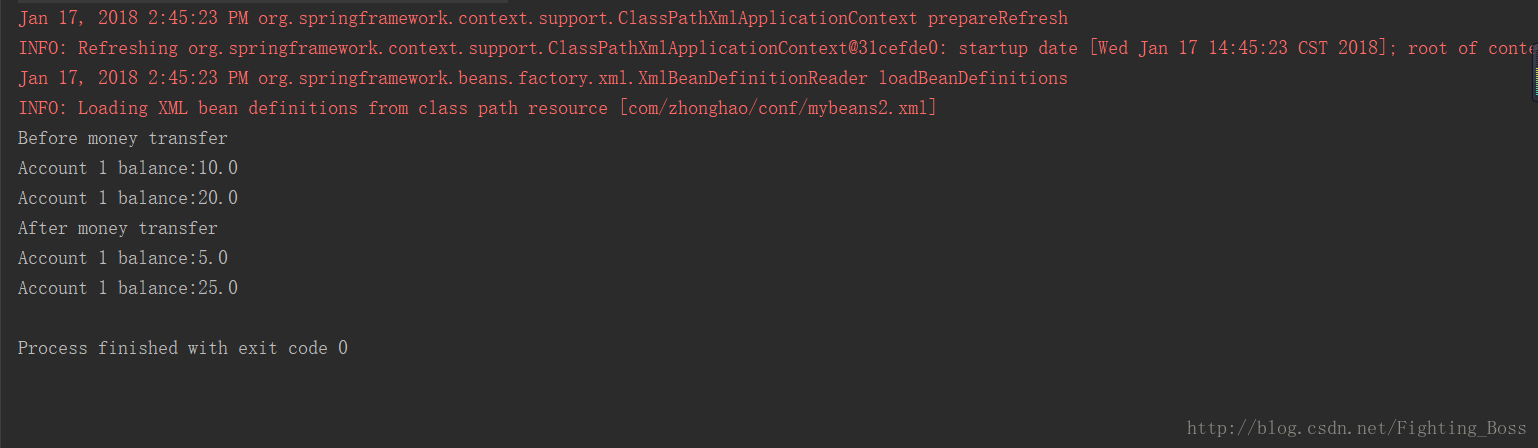
}我们使用一个XML Bean定义的文件创建了ApplicationContext实例。在这种情况下,需要使用ClassPathXmlApplicationContext加载XML配置元数据文件,该类位于应用程序的类路径中,。创建了了ApplicationContext之后,通过调用APPlicationContext.getBean()方法执行一次Bean查找,并获取accountService Bean.最后像前一个示例所是那样使用该Bean。
重点内容而第二种方法需要注意的地方是:需要在Maven的pom.xml里加这个样一个配置。
<build>
<resources>
            <resource>
                <directory>src/main/resource</directory>
                <includes>
                    <include>**/*.properties</include>
                    <include>**/*.xml</include>
                </includes>
                <filtering>false</filtering>
            </resource>
        </resources>
</build>
如果不添加上面的语句,maven在编译的时候就会打.xml和.properties最为后缀的文件过滤掉,所以就会报错了
报如下的错误:
Caused by: java.io.FileNotFoundException: class path resource [com/zhonghao/conf/mybeans.xml] cannot be opened because it does not exist这个错误我找了很久才解决,因为我发现target目录下并没有编译我的xml文件,所以最终解决了这个问题还是很高兴的。
以上是第二种方式。
- 第三种 在独立的环境中通过使用基于Java注解的配置来创建和使用Spring容器
第一部分别将注解@Service和@Repository放置到AccountServiceImpl和AccountDaoInMemoryImpl类的上面。
@Service
public class AccountServiceImpl implements AccountService {
    private AccountDao accountDao;

    public void setAccountDao(AccountDao accountDao) {
        this.accountDao = accountDao;
    }
....
}
@Repository
public class AccountDaoInMemoryImpl implements AccountDao {
    private Map<Long,Account> accountMap = new HashMap();

  ....
  }
将注解@AutoWired放到类AccountServiceImpl的setAccountDao()方法的上边。
@Service
public class AccountServiceImpl implements AccountService {
    private AccountDao accountDao;

    @AutoWired
    public void setAccountDao(AccountDao accountDao) {
        this.accountDao = accountDao;
    }
....
}
在conf包下创建一个基于XML的Spring Bean配置文件,并添加以下内容
<?xml version="1.0" encoding="UTF-8"?>
<beans xmlns="http://www.springframework.org/schema/beans"
       xmlns:xsi="http://www.w3.org/2001/XMLSchema-instance"
       xmlns:context="http://www.springframework.org/schema/context"
       xsi:schemaLocation="http://www.springframework.org/schema/beans
       http://www.springframework.org/schema/beans/spring-beans.xsd
       http://www.springframework.org/schema/context
        http://www.springframework.org/schema/context/spring-context-4.0.xsd">
    <context:component-scan base-package="com.zhonghao"/>
</beans>
最后一步修改Main类中的配置文件名称
ClassPathXmlApplicationContext applicationContext=new ClassPathXmlApplicationContext("com/zhonghao/conf/mybeans2.xml");
运行! 三种方式运行的结构都如下图
我们使用注解@Service和@Repository定义了Spring管理的Beans.这两个注解都扩展自注解@Component.注解@Service除了将一个类定义为一个Bean之外,再无其他特殊含义。而注解@Repository能够启用与Spring数据访问相关联的功能。默认情况下,Bean的名称派生自简单的类名但首字符为小写。
使用@AutoWired告诉Spring,如果在容器中指定的依赖项可用,则应满足次依赖项,就是自动装配。
而在配置文件中的 <context:component-scan base-package="com.zhonghao"/>
的作用是扫描类路径中的类,通过相关联的注解创建Bean并注入器依赖项。
以上就是三种方式创建和使用Spring容器的方式。
PS: Spring的发展
2.1. Spring1.x 时代
在Spring1.x时代,都是通过xml文件配置bean,随着项目的不断扩大,需要将xml配置分放到不同的配置文件中,需要频繁的在java类和xml配置文件中切换。
2.2. Spring2.x时代
随着JDK 1.5带来的注解支持,Spring2.x可以使用注解对Bean进行申明和注入,大大的减少了xml配置文件,同时也大大简化了项目的开发。
那么,问题来了,究竟是应该使用xml还是注解呢?
最佳实践:
1、 应用的基本配置用xml,比如:数据源、资源文件等;
2、 业务开发用注解,比如:Service中注入bean等;
2.3. Spring3.x到Spring4.x
从Spring3.x开始提供了Java配置方式,使用Java配置方式可以更好的理解你配置的Bean,现在我们就处于这个时代,并且Spring4.x和Spring boot都推荐使用java配置的方式。
3. Spring的Java配置方式
Java配置是Spring4.x推荐的配置方式,可以完全替代xml配置。
3.1. @Configuration 和 @Bean
Spring的Java配置方式是通过 @Configuration 和 @Bean 这两个注解实现的:
1、@Configuration 作用于类上,相当于一个xml配置文件;
2、@Bean 作用于方法上,相当于xml配置中的;
3.2. 示例
该示例演示了通过Java配置的方式进行配置Spring,并且实现了Spring IOC功能。
3.2.1. 创建工程以及导入依赖
<project xmlns="http://maven.apache.org/POM/4.0.0" xmlns:xsi="http://www.w3.org/2001/XMLSchema-instance"
    xsi:schemaLocation="http://maven.apache.org/POM/4.0.0 http://maven.apache.org/xsd/maven-4.0.0.xsd">
    <modelVersion>4.0.0</modelVersion>
    <groupId>cn.itcast.springboot</groupId>
    <artifactId>itcast-springboot</artifactId>
    <version>1.0.0-SNAPSHOT</version>
    <packaging>war</packaging>

    <dependencies>
        <dependency>
            <groupId>org.springframework</groupId>
            <artifactId>spring-webmvc</artifactId>
            <version>4.3.7.RELEASE</version>
        </dependency>
        <!-- 连接池 -->
        <dependency>
            <groupId>com.jolbox</groupId>
            <artifactId>bonecp-spring</artifactId>
            <version>0.8.0.RELEASE</version>
        </dependency>
    </dependencies>
    <build>
        <finalName>${project.artifactId}</finalName>
        <plugins>
            <!-- 资源文件拷贝插件 -->
            <plugin>
                <groupId>org.apache.maven.plugins</groupId>
                <artifactId>maven-resources-plugin</artifactId>
                <configuration>
                    <encoding>UTF-8</encoding>
                </configuration>
            </plugin>
            <!-- java编译插件 -->
            <plugin>
                <groupId>org.apache.maven.plugins</groupId>
                <artifactId>maven-compiler-plugin</artifactId>
                <configuration>
                    <source>1.7</source>
                    <target>1.7</target>
                    <encoding>UTF-8</encoding>
                </configuration>
            </plugin>
        </plugins>
        <pluginManagement>
            <plugins>
                <!-- 配置Tomcat插件 -->
                <plugin>
                    <groupId>org.apache.tomcat.maven</groupId>
                    <artifactId>tomcat7-maven-plugin</artifactId>
                    <version>2.2</version>
                </plugin>
            </plugins>
        </pluginManagement>
    </build>
</project>
3.2.2. 编写User对象
public class User {

    private String username;

    private String password;

    private Integer age;

    public String getUsername() {
        return username;
    }

    public void setUsername(String username) {
        this.username = username;
    }

    public String getPassword() {
        return password;
    }

    public void setPassword(String password) {
        this.password = password;
    }

    public Integer getAge() {
        return age;
    }

    public void setAge(Integer age) {
        this.age = age;
    }

}
3.2.3. 编写UserDAO 用于模拟与数据库的交互
public class UserDAO {

    public List<User> queryUserList(){
        List<User> result = new ArrayList<User>();
        // 模拟数据库的查询
        for (int i = 0; i < 10; i++) {
            User user = new User();
            user.setUsername("username_" + i);
            user.setPassword("password_" + i);
            user.setAge(i + 1);
            result.add(user);
        }
        return result;
    }

}
3.2.4. 编写UserService 用于实现User数据操作业务逻辑
@Service
public class UserService {

    @Autowired // 注入Spring容器中的bean对象
    private UserDAO userDAO;

    public List<User> queryUserList() {
        // 调用userDAO中的方法进行查询
        return this.userDAO.queryUserList();
    }

}
3.2.5. 编写SpringConfig 用于实例化Spring容器
@Configuration //通过该注解来表明该类是一个Spring的配置,相当于一个xml文件
@ComponentScan(basePackages = "cn.itcast.springboot.javaconfig") //配置扫描包
public class SpringConfig {

    @Bean // 通过该注解来表明是一个Bean对象,相当于xml中的<bean>
    public UserDAO getUserDAO(){
        return new UserDAO(); // 直接new对象做演示
    }

}
3.2.6. 编写测试方法 用于启动Spring容器
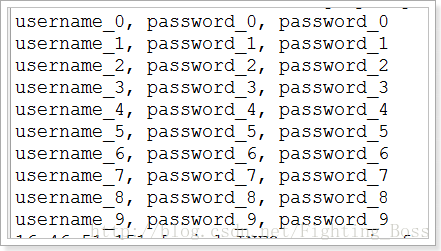
public class Main {

    public static void main(String[] args) {
        // 通过Java配置来实例化Spring容器
        AnnotationConfigApplicationContext context = new AnnotationConfigApplicationContext(SpringConfig.class);

        // 在Spring容器中获取Bean对象
        UserService userService = context.getBean(UserService.class);

        // 调用对象中的方法
        List<User> list = userService.queryUserList();
        for (User user : list) {
            System.out.println(user.getUsername() + ", " + user.getPassword() + ", " + user.getPassword());
        }

        // 销毁该容器
        context.destroy();
    }

}
3.2.7. 测试效果
3.2.8. 小结
从以上的示例中可以看出,使用Java代码就完美的替代xml配置文件,并且结构更加的清晰。


 626
626


 被折叠的 条评论
为什么被折叠?
被折叠的 条评论
为什么被折叠?
 到【灌水乐园】发言


