


项目中需要设备报警的推送
因此需要极光推送
1.注册一个极光的账号
2.注册一个APNS推送证书
这两步都做过了。因此下载推送证书,双击用钥匙串打开
导出 .p12 证书文件 并设置密码

第一个选择apns development 证书,选择上传
新版本是反过来的,开发证书和生产证书。。。

发现只做了开发证书 没有做生产证书
那我自己添加

在这里选择你自己那个app的证书点击编辑
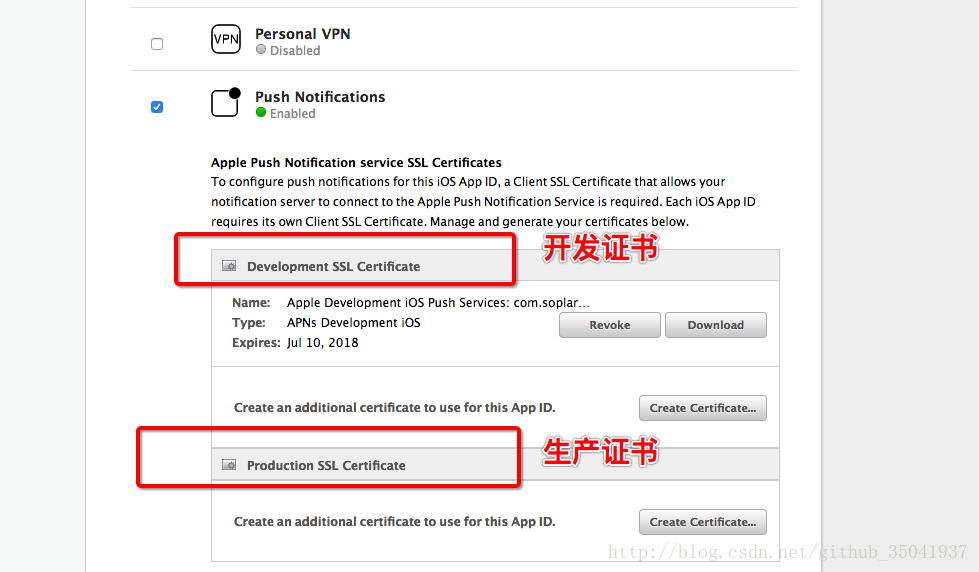
是少了生产证书 ,添加就好了
关于创建证书签名请求(CSR)
要手动生成证书,您需要从Mac中获取证书签名请求(CSR)文件。要创建CSR文件,请按照以下说明使用Keychain Access创建一个。
创建CSR文件。
在Mac上的Applications文件夹中,打开Utilities文件夹并启动Keychain Access。
在钥匙串访问下拉菜单中,选择钥匙串访问>证书助理>从证书颁发机构请求证书。
在“证书信息”窗口中,输入以下信息:
    在“用户电子邮件地址”字段中,输入您的电子邮件地址。
    在“公用名称”字段中,为您的私钥创建一个名称(例如,John Doe Dev Key)。
    “CA电子邮件地址”字段应为空。
    在“请求是”组中,选择“保存到磁盘”选项。
单击Keychain Access中的Continue继续完成CSR生成过程。
创建CSR文件时,会自动生成公钥和私钥对。您的私钥存储在您的计算机上。在Mac上,它默认存储在登录钥匙串中,可以在“钥匙”类别的钥匙串访问应用程序中查看。您所要求的证书是密钥对的公开一半。
上传CSR文件
选择保存在Mac上的.certSigningRequest文件。
这段话的意思是要你本地钥匙串->证书助理->从证书颁发机构请求证书 保存到本地 .certSigningRequest文件 然后上传到这里
再点继续,就创建完成了。接下来就可以下载证书并导出
p12文件给极光了。
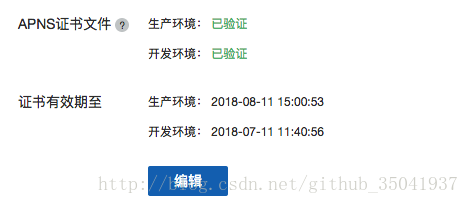
上传完成以后就可以开始验证了
接下来就是cocopod 了
pod ‘JPush’

添加plist http字段
    <key>NSAppTransportSecurity</key>
    <dict>
        <key>NSAllowsArbitraryLoads</key>
        <true/>
        <key>NSExceptionDomains</key>
        <dict>
            <key>jpush.com</key>
            <dict>
                <key>NSIncludesSubdomains</key>
                <true/>
                <key>NSTemporaryExceptionAllowsInsecureHTTPLoads</key>
                <true/>
                <key>NSTemporaryExceptionMinimumTLSVersion</key>
                <string>TLSv1.1</string>
            </dict>
        </dict>
    </dict>
appdelegate 添加对应的内存,真机调试
2017-07-12 15:49:06.487271+0800 JPushTest[497:106633]  | JIGUANG | I - [JIGUANGService]
--------------------------- JPush Log ----------------------------
--------------------JPush SDK Version:3.0.3--build:34----------
--------------------JCore Lib Version:1.1.2--build:18----------
-----------------AppKey: ----------------
----------------------------------------------------------------
2017-07-12 15:49:06.492023+0800 JPushTest[497:106633]  | JIGUANG | I - [JIGUANGClientController] Action - jpush setup
2017-07-12 15:49:06.493862+0800 JPushTest[497:106633]  | JIGUANG | I - [JIGUANGClientController] Action - setup
2017-07-12 15:49:08.681652+0800 JPushTest[497:106633]  | JIGUANG | W - [JIGUANGClientController] Not get deviceToken yet. Maybe: your certificate not configured APNs? or current network is not so good so APNs registration failed?  or there is no APNs register code? Please refer to JPush docs.
2017-07-12 15:49:15.895618+0800 JPushTest[497:106633]  | JIGUANG | I - [JIGUANGSessionController] connecting with coreAddr 114.67.46.69,port 7004
2017-07-12 15:49:16.128520+0800 JPushTest[497:106633]  | JIGUANG | I - [JIGUANGRegistration]
----- register info -----
Appkey:
token:
2017-07-12 15:49:16.629764+0800 JPushTest[497:106634]  | JIGUANG | I - [JIGUANGRegistration]
----- register result -----
uid:
registrationID:
2017-07-12 15:49:16.763230+0800 JPushTest[497:106633]  | JIGUANG | I - [JIGUANGLogin]
----- login result -----
uid:
registrationID:
2017-07-12 15:49:16.899781+0800 JPushTest[497:106662]  | JIGUANG | I - [JIGUANGDeviceTokenReport] try to upload device token:
2017-07-12 15:49:17.792062+0800 JPushTest[497:106755]  | JIGUANG | I - [JIGUANGDeviceTokenReport] upload device token success
看起来是注册成功了,只有点击到了允许通知,才能够收到注册成功。
添加一个后台推送开关

- (void)testAddNotification {
    JPushNotificationContent *content = [[JPushNotificationContent alloc] init];
    content.title = @"Test Notifications";
    content.subtitle = @"2016";
    content.body = @"This is a test code";
    content.badge = @1;
    content.categoryIdentifier = @"Custom Category Name";

    // 5s后提醒 iOS 10 以上支持
    JPushNotificationTrigger *trigger1 = [[JPushNotificationTrigger alloc] init];
    trigger1.timeInterval = 5;
    //每小时重复 1 次 iOS 10 以上支持
    JPushNotificationTrigger *trigger2 = [[JPushNotificationTrigger alloc] init];
    trigger2.timeInterval = 3600;
    trigger2.repeat = YES;

    //每周一早上8:00提醒,iOS10以上支持
    NSDateComponents *components = [[NSDateComponents alloc] init];
    components.weekday = 2;
    components.hour = 8;
    JPushNotificationTrigger *trigger3 = [[JPushNotificationTrigger alloc] init];
    trigger3.dateComponents = components;
    trigger3.repeat = YES;

    //#import <CoreLocation/CoreLocation.h>
    //一到某地点提醒,iOS8以上支持
    CLRegion *region = [[CLRegion alloc] initCircularRegionWithCenter:CLLocationCoordinate2DMake(0, 0) radius:0 identifier:@"test"];
    JPushNotificationTrigger *trigger4 = [[JPushNotificationTrigger alloc] init];
    trigger4.region = region;

    //5s后提醒,iOS10以下支持
    JPushNotificationTrigger *trigger5 = [[JPushNotificationTrigger alloc] init];
    trigger5.fireDate = [NSDate dateWithTimeIntervalSinceNow:5];

    JPushNotificationRequest *request = [[JPushNotificationRequest alloc] init];
    request.requestIdentifier = @"sampleRequest";
    request.content = content;
    request.trigger = trigger1;//trigger2;//trigger3;//trigger4;//trigger5;
    request.completionHandler = ^(id result) {
        NSLog(@"结果返回:%@", result);
    };
    [JPUSHService addNotification:request];
}
好了 推送成功。
参考文档


 638
638


 被折叠的 条评论
为什么被折叠?
被折叠的 条评论
为什么被折叠?
 到【灌水乐园】发言


