


摘要:contentprivoder好像自己没有遇到过,不过通常使用 联系人,日历等等之类系统自身提供的。简略的摘抄一下网上各位的资料以作为自己记录。对 其中 getType(Uri uri)方法还是不知道具体使用方法,暂且留在这里。等后面看能不能搜集到具体使用
概述
ContentProvider的主要用途我认为是对一些数据进行管理,而对于数据的实现也有非常多。因此,实际的应用中要自行取舍。在每一个应用中数据库都允许创建它的应用自己来读写,那其它应用要访问这个数据库就需要使用 ContentProvider对数据共享。
在学习使用ContentProvider的时候,里面面涉及了SQLite、Uri等等系列的操作等等,前面通过摘抄了一下记录:Android SQLite的使用 和 记录:URI、URL和Uri 的使用。还有很零碎的点边在这里记录一下。
UriMatcher
UriMatcher是一个工具类,主要是用于 ContentProvider中匹配 URI。实际上相当于一棵树,实例化的UriMatcher对象,相对于树的根节点。
使用方法如下:
首先第一步,初始化:
//UriMatcher.NO_MATCH,是一个常量,如果不匹配就返回 -1
UriMatcher sURIMatcher = new UriMatcher(UriMatcher.NO_MATCH); /**
*authority:就是 contentprivoder 的authority参数,这参数必须与 androidmanifest.xml中对应privoder的authorities值一样
*path:就是完整uri中,authority后的一长串
*code:对应码
*/
//addURI 添加一个 uri,如果这个 uri匹配成功则返回匹配吗,不匹配则返回 -1
public void addURI(String authority, String path, int code)//从以创建的uri树中去匹配传进来的uri,如果匹配成功,则返回匹配码,否则-1
public int match(Uri uri)ContentUris ContentUris是一个工具类,主要是用来处理“Content”约束的 Uri 对象。 contentUris对象的语法格式是:“content://authority/path/id“ 常用方法介绍:
public static long parseId(Uri contentUri) public static Uri withAppendedId(Uri contentUri, long id) private static final String AUTHORITY = "com.smaple.hu";
private static final int PEOPLE = 1;
private static final int PEOPLE_ID = 2;
private static final UriMatcher sURIMatcher = new UriMatcher(UriMatcher.NO_MATCH);
static {
sURIMatcher.addURI(AUTHORITY,"people",PEOPLE);
//这里的#代表匹配任意数字,另外还可以用*来匹配任意文本
sURIMatcher.addURI(AUTHORITY,"people/#",PEOPLE_ID);
}
private void testUriMatcher() {
Uri uriExact = Uri.parse("content://"+AUTHORITY+"/people");
Log.i("info","uriExact: = "+uriExact) ;
Log.i("info","match excat = "+getType(uriExact));
Uri uriNumber = Uri.parse("content://"+AUTHORITY+"/people"+"/2");
Log.i("info","uriNumber: = "+uriNumber) ;
Log.i("info","match number = "+getType(uriNumber));
//拼接Uri
Uri newUri = ContentUris.withAppendedId(uriExact,15);
Log.i("info","newUri: = "+newUri) ;
//获取 ID
long id = ContentUris.parseId(newUri) ;
Log.i("info","ID = "+id);
Log.i("info","getPathSegments = "+newUri.getPathSegments());
}
private String getType(Uri uri){
int match = sURIMatcher.match(uri);
switch (match){
case PEOPLE:
return "vnd.android.cursor.dir/person";
case PEOPLE_ID:
return "vnd.android.cursor.item/person";
default:
return null;
}
}I/info: uriExact: = content://com.smaple.hu/people I/info: match excat = vnd.android.cursor.dir/person I/info: uriNumber: = content://com.smaple.hu/people/2 I/info: match number = vnd.android.cursor.item/person I/info: newUri: = content://com.smaple.hu/people/15 I/info: ID = 15 I/info: getPathSegments = [people, 15]在UriMatcher的 math( )方法中有一个 uri.getPathSegments( ),大致的意思就是按“/”进行切分。和下面的参考资料有所差异 想要实现自己的 contentprovider,需要继承 “android.content.ContentProvider“ 抽象类,在继承之后必须覆写以下几个方法。
- oncreate( ): 构造方法,运行在 UI线程中,因此不能做一些耗时操作,一般用作属性初始化(比如数据库初始化)
- getType(Uri uri):返回 uri对应的资源 MIME类型
- insert():插入一条数据,返回插入数据的资源定位符
- delete():使用给定的条件删除数据库信息,返回收受影响的记录数
- update():使用给定的条件更新数据库信息,返回受影响的记录数
- query():使用条件查询,最基本的也是最常用的方法,其实返回一个数据库游标
        <provider
            android:authorities="com.hu.smaple.provider"
            android:name=".hu.provider.TestProvider"
            android:exported="true"
/>- authorities:的值为 provider 对外暴露的 Uri地址,其必须保证全系统唯一性。即无论你的应用内部还是 android系统中都不能出现两个 authorities 值相同的 privoder声明
- name:的属性则是真正 privoder类的位置。(恩,自己看着戳它)
contentprivoder的使用示例
可以看见contentprivoder的基本操作方法都需要传入一个 Uri才能够使用。通过下面的摘抄的 demo,阅读起来可以更好的理解具体使用方法步骤:首先创建一个数据库,(为了方便把 记录:Android SQLite的使用 里面的直接copy使用。在这里还遇到了一个问题,初始的时候,两个不同的 activity去分别创建一张在 test.db下的表。这样会只有一个能够正常使用,后面修改成不通的数据库,两者才可以同时使用。由于是小白,希望知道的朋友些能帮忙一下,是因为一个SQLiteOpenHelper创建 数据库之后,同一应用中再次创建相同名称数据库的时候,不是在其后面追加表。而是,抛出异常)
public class TestSQLite extends SQLiteOpenHelper {

    private static final String DB_NAME = "provider.db";
    private static final int DB_VERSION = 1;
    private final String TABLE_NAME= "providertable";
    private final String COL_ID = "_id";
    private final String COL_NAME = "name" ;
    private final String COL_AGE = "age" ;
    private final String COL_INFO = "info" ;


    public TestSQLite(Context context) {
        super(context, DB_NAME, null, DB_VERSION);
    }

    @Override
    public void onCreate(SQLiteDatabase db) {


        String sql = "create table if not exists ["+TABLE_NAME+"] "+"("+COL_ID+" integer primary key autoincrement, "
                +COL_NAME+" varchar, "
                +COL_AGE+" integer, "
                +COL_INFO+" text)" ;

        Log.i("info","create table = "+sql) ;
        db.execSQL(sql);
    }

    @Override
    public void onUpgrade(SQLiteDatabase db, int oldVersion, int newVersion) {
        db.execSQL("ALTER TABLE person ADD COLUMN other STRING");
    }
}public class TestProvider extends ContentProvider {
private static final UriMatcher sUriMatcher ;
private static final int MATCHER_TABLE = 1;
private static final String AUTHORITY = "com.hu.smaple.provider" ;
private static final String TABLE_NAME = "providertable" ;
private static final Uri CONTENT_URI_PROVIDERTABLE = Uri.parse("content://"+AUTHORITY+"/"+TABLE_NAME);
private TestSQLite testSQLite ;
private static final String CONTENT_PROVIDER_TABLE = "com.hu.smaple.provider.type" ;
static {
sUriMatcher = new UriMatcher(UriMatcher.NO_MATCH);
sUriMatcher.addURI(AUTHORITY,TABLE_NAME,MATCHER_TABLE);
}
@Override
public boolean onCreate() {
testSQLite = new TestSQLite(getContext());
return false;
}
@Nullable
@Override
public Cursor query(Uri uri, String[] projection, String selection, String[] selectionArgs, String sortOrder) {
Log.i("info","query uri = "+uri);
SQLiteQueryBuilder queryBuilder = new SQLiteQueryBuilder();
switch (sUriMatcher.match(uri)){
case MATCHER_TABLE:
//设置查询的表
queryBuilder.setTables(TABLE_NAME);
break;
default:
throw new IllegalArgumentException("Unknow URI: " +uri);
}
SQLiteDatabase db = testSQLite.getWritableDatabase();
Cursor c = queryBuilder.query(db,projection,selection,selectionArgs,null,null,sortOrder);
return c;
}
@Nullable
@Override
public String getType(Uri uri) {
Log.i("info","getType uri = "+uri);
return null;
}
@Nullable
@Override
public Uri insert(Uri uri, ContentValues values) {
Log.i("info","insert uri = "+uri);
String tableName = null ;
switch (sUriMatcher.match(uri)){
case MATCHER_TABLE:tableName = TABLE_NAME ;
break;
default:
throw new IllegalArgumentException("Unknown URI: "+uri);
}
SQLiteDatabase db = testSQLite.getWritableDatabase();
long rowId = db.insert(tableName,null,values);
Uri result = ContentUris.withAppendedId(uri,rowId);
notifyChange(result);
return result;
}
@Override
public int delete(Uri uri, String selection, String[] selectionArgs) {
Log.i("info","delete uri = "+uri);
String tableName = null ;;
switch (sUriMatcher.match(uri)){
case MATCHER_TABLE:
tableName = TABLE_NAME ;
break;
default:
throw new IllegalArgumentException("Unknown URI " + uri);
}
SQLiteDatabase db = testSQLite.getWritableDatabase() ;
int count = db.delete(tableName,selection,selectionArgs);
// 更新数据时,通知其他ContentObserver
if(count > 0){
notifyChange(uri);
}
return count;
}
@Override
public int update(Uri uri, ContentValues values, String selection, String[] selectionArgs) {
Log.i("info","update uri = "+uri);
String tableName = null;
switch (sUriMatcher.match(uri)){
case MATCHER_TABLE:
tableName = TABLE_NAME ;
break;
default:
throw new IllegalArgumentException("Unknown URI " + uri);
}
SQLiteDatabase db = testSQLite.getWritableDatabase();
int count = db.update(tableName,values,selection,selectionArgs);
if(count > 0 ){
notifyChange(uri);
}
return count;
}
private void notifyChange(Uri uri){
Context context = getContext() ;
if(context == null) return;
ContentResolver resolver = context.getContentResolver();
if(resolver == null) return;
resolver.notifyChange(uri,null);
}
}第三步,在其它 app中通过context.getContentResolver( )使用这个共享的数据
public class MainActivity extends AppCompatActivity {
private ListView listView ;
private static final String AUTHORITY = "com.hu.smaple.provider" ;
private static final String TABLENAME = "providertable";
private static final Uri CONTENT_URI_TABLE = Uri.parse(
"content://"+AUTHORITY+"/"+TABLENAME
);
@Override
protected void onCreate(Bundle savedInstanceState) {
super.onCreate(savedInstanceState);
setContentView(R.layout.activity_main);
listView = (ListView) findViewById(R.id.listView);
}
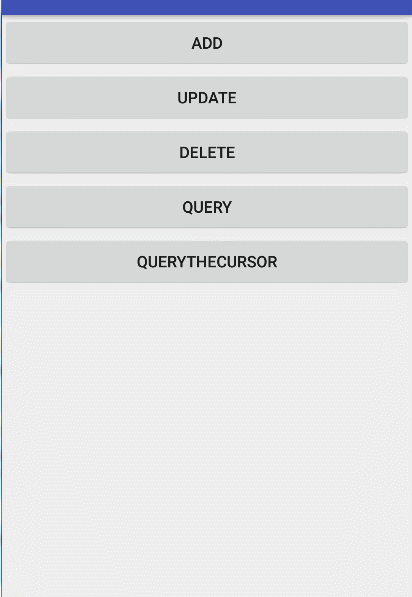
public void add(View view){
ArrayList<Person> persons = new ArrayList<Person>();
Person person = new Person("Ella"+System.currentTimeMillis(), 22, "lively girl insert other app");
ContentValues cv = new ContentValues();
cv.put("name",person.name);
cv.put("age",person.age);
cv.put("info",person.info);
Uri uri = this.getContentResolver().insert(CONTENT_URI_TABLE,cv);
Log.i("info ", "insert uri =" + uri);
}
public void update(View view){
Person person = new Person() ;
person.name = "Jane";
person.age = 30 ;
person.info = "updata form other app";
ContentValues cv =new ContentValues() ;
cv.put("name",person.name);
cv.put("age",person.age);
cv.put("info",person.info);
int count = this.getContentResolver().update(CONTENT_URI_TABLE,cv,"name = ?",new String[]{"Jane"});
Log.i("info ", "update count=" + count);
}
public void delete(View view) {
int count = this.getContentResolver().delete(CONTENT_URI_TABLE,"name = ?",new String[]{"Jane"});
Log.i("info ", "delete count=" + count);
}
public void query(View view){
List<Person> persons = new ArrayList<>();
Cursor c = getContentResolver().query(CONTENT_URI_TABLE,null,null,null,null);
if(c.getCount() > 0 && null != c){
while(c.moveToNext()){
Person person = new Person() ;
person._id = c.getInt(c.getColumnIndex("_id"));
person.name = c.getString(c.getColumnIndex("name"));
person.age = c.getInt(c.getColumnIndex("age"));
person.info = c.getString(c.getColumnIndex("info"));
persons.add(person);
}
}
ArrayList<Map<String,String>> list =
new ArrayList<>() ;
for (Person person : persons) {
HashMap<String,String> map = new HashMap<>() ;
map.put("name",person.name);
map.put("info", person.age + " years old, " + person.info);
list.add(map);
}
SimpleAdapter adapter = new SimpleAdapter(this, list, android.R.layout.simple_list_item_2,
new String[]{"name", "info"}, new int[]{android.R.id.text1, android.R.id.text2});
listView.setAdapter(adapter);
}
} Person person1 = new Person("Ella", 22, "lively girl");
Person person2 = new Person("Jenny", 22, "beautiful girl");
Person person3 = new Person("Jessica", 23, "sexy girl");
Person person4 = new Person("Kelly", 23, "hot baby");
Person person5 = new Person("Jane", 25, "a pretty woman");
可以看出在初始的时候,两个程序中都没有数据,在添加数据后,两个都有对应的数据显示。相关的 insert(),delete(),update()方法只有,两者app都会在查询的时候变化。
contentprivoder的权限
在Androidmanifest.xml中 provider标签有三个额外的参数 permission、readPermissin、writePermiss。 对于privoder标签的几个重要参数注意一下:- exported:用于指示该服务是否呢过被其它程序应用组件调用或跟它交互;取值为(true | fasle)。如果设置为 true,则能够被调用或交互;设置为发false时,只有同一个应用程序的组件或者带有相同用户的 ID的应用程序才能启动或绑定服务。
- readPermission:使用ContentProvider的查询功能所必须得权限,即使用 query( )函数的权限
- writePermission:使用contentprivoder的修改功能所必须得权限,即使用使用 insert( )、update( )、delete( )函数的权限
- permission:客服端读、写 contentprivoder中的数据所必须得权限名称。本属性为一次性设置读和写权限提供了快捷途径。
不过,readPermission和writePremission属性优先于本设置。 如果同时设置了readPermission属性,则其将控制对 Content Provider 的读取。 如果设置了writePermission属性,则其也将控制对 Content Provider 数据的修改。也就是说如果只设置permission权限,那么拥有这个权限的应用就可以实现对这里的ContentProvider进行读写。
如果同时设置了permission和readPermission那么具有readPermission权限的应用才可以读,拥有permission权限的才能写!也就是说只拥有permission权限是不能读的,因为readPermission的优先级要高于permission。
如果同时设置了readPermission、writePermission、permission那么permission就无效了。
        <provider
            android:authorities="com.hu.smaple.provider"
            android:name=".hu.provider.TestProvider"
            android:exported="true"
            android:writePermission="com.hu.smaple.privoder.write"
/> <permission android:name="com.hu.smaple.privoder.write"
android:label="privoder permissin"
android:protectionLevel="normal"
/>
<application
...| 属性 | 含义 | 是否必须 |
| name | 自定义的权限名称,通常需要遵循 Android权限定义命名方案:*.permission.* | 是 |
| protectionLevel | 定义与权限相关的“风险级别”。必须是以下值之一,在确定是否授予权限时,系统可能采取不同的操作
| 是 |
| permissionGroup | 可以将权限放在一个组中,但对于自定期义权限,应该避免设置此属性。如果确实希望设置此属性,可能使用以下属性代替:android.permisson-group.SYSTEM_TOOLS | 否 |
| label | 可使用它对权限进行简短描述 | 否 |
| description | 使用它提供对权限用途和所保护对象的更有用的描述 | 否 |
| icon | 权限可以与资源目录以外的图标相关联 ( 比如@drawable/myicon) | 否 |
进行一写入操作就错误,log出的错误为:
java.lang.SecurityException: Permission Denial: writing com.hu.smaple.hu.provider.TestProvider uri content://com.hu.smaple.provider/providertable from pid=10690, uid=10102 requires com.hu.smaple.write, or grantUriPermission()
当我们Androidmanifest.xml中像申请系统权限一样的方式把 writepermission权限申请一下,就又能愉快的玩耍了
<uses-permission android:name="com.hu.smaple.privoder.write"/>对于数据变化时候监听,打印log测试后我在一个app里面使用注册 ContentObserver 实现类后,只用在自身 app,数据变化的时候,才会调用 onChange( )方法。
在使用ContentProvider时由于我们无法得知数据的实际来源和数据操作的复杂度,如可能是读磁盘甚至是读网络,亦或有比较耗时的计算,所以我们无法保障数据返回的时间。因此就有必要使用异步查询来将耗时操作切换至后台线程,并在执行完成后切回到UI线程。对于直接使用Thread/Runnable - Handler这种情况实际上考虑的事情非常多,最关键的是写出来不优雅,用起来难受。我们可以使用Loader/LoaderManager和AsyncQuery
参考链接
- Android Content Provider
- Android应用程序组件Content Provider简要介绍和学习计划 (备注:这是多篇文章)
- Android contacts 联系人 通讯录 源码 完全解析
- ContentProvider从入门到精通
- ContentProvider数据库共享之——读写权限与数据监听
- Content Provider的权限
- Android 监听ContentProvider中数据的变化
- ContentUris详解及使用案例
- 【Android】Uri、UriMatcher、ContentUris详解
- http://bbs.csdn.net/topics/391902152(备注:我打印出来不是,api 24)


 1010
1010


 被折叠的 条评论
为什么被折叠?
被折叠的 条评论
为什么被折叠?
 到【灌水乐园】发言


