微信小程序实战篇-个人中心


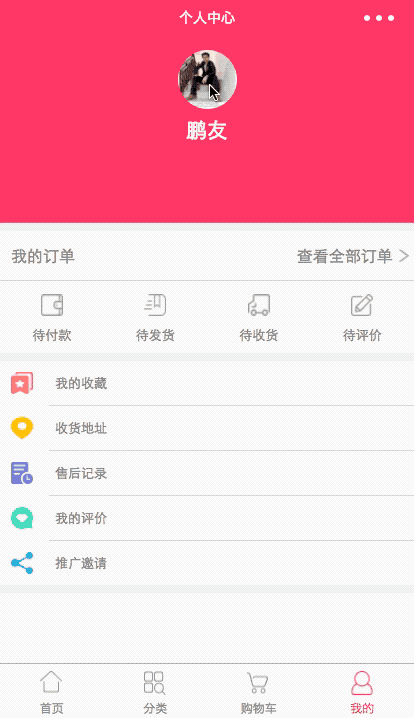
哈喽,大家好,又到周五啦,有木有期待今天的更新呀~今天要教大家的是制作个人中心界面,先上效果图


个人中心制作
  • 0
    点赞
  • 15
    收藏
    觉得还不错? 一键收藏
  • 0
    评论
好的,让我们开始微信小程序实战篇-个人中心、订单制作的教程。 ## 1. 创建个人中心页面 首先,我们需要在小程序中创建一个个人中心页面。可以在 app.json 中添加一个 tab 标签,在 pages 数组中添加个人中心页面的路径: ```json { "tabBar": { "list": [ { "pagePath": "pages/index/index", "text": "首页" }, { "pagePath": "pages/personal/personal", "text": "个人中心" } ] }, "pages": [ "pages/index/index", "pages/personal/personal" ] } ``` 接下来,在 pages 文件夹中创建 personal 文件夹,并创建 personal.wxml、personal.wxss、personal.js、personal.json 四个文件。在 personal.wxml 文件中添加以下代码: ```html <view class="personal"> <view class="avatar"> <image class="avatar-img" src="{{avatarUrl}}"></image> <text class="nickname">{{nickname}}</text> </view> <view class="order"> <view class="order-item" bindtap="goToOrder"> <image class="order-icon" src="/images/personal/order.png"></image> <text class="order-text">我的订单</text> <image class="order-arrow" src="/images/personal/arrow.png"></image> </view> </view> </view> ``` 这里我们创建了一个包含头像、昵称、我的订单等模块的页面。其中,头像和昵称是从后端接口获取的数据。 ```javascript // personal.js Page({ data: { avatarUrl: '', nickname: '' }, onLoad: function () { // 从后端接口获取用户信息 wx.request({ url: 'https://example.com/userinfo', success: (res) => { this.setData({ avatarUrl: res.data.avatarUrl, nickname: res.data.nickname }) } }) }, goToOrder: function () { // 跳转到订单页面 wx.navigateTo({ url: '/pages/order/order' }) } }) ``` 在 personal.js 文件中,我们编写了 onLoad 和 goToOrder 两个函数。onLoad 函数用于从后端接口获取用户信息并在页面上显示,goToOrder 函数用于跳转到订单页面。 ## 2. 创建订单页面 接下来,我们需要创建一个订单页面。在 pages 文件夹中创建 order 文件夹,并创建 order.wxml、order.wxss、order.js、order.json 四个文件。在 order.wxml 文件中添加以下代码: ```html <view class="order"> <view class="order-header"> <text class="order-title">我的订单</text> <text class="order-more">查看更多</text> </view> <view class="order-list"> <view class="order-item" wx:for="{{orders}}" wx:key="index"> <image class="order-img" src="{{item.imgUrl}}"></image> <view class="order-info"> <text class="order-name">{{item.name}}</text> <text class="order-price">¥{{item.price}}</text> </view> </view> </view> </view> ``` 这里我们创建了一个包含订单标题、订单列表等模块的页面。其中,订单列表是从后端接口获取的数据。 ```javascript // order.js Page({ data: { orders: [] }, onLoad: function () { // 从后端接口获取订单列表 wx.request({ url: 'https://example.com/orders', success: (res) => { this.setData({ orders: res.data }) } }) } }) ``` 在 order.js 文件中,我们编写了 onLoad 函数用于从后端接口获取订单列表并在页面上显示。 ## 3. 页面样式 最后,我们需要编写页面的样式。在 app.wxss 中添加以下代码: ```css .tab-bar { position: fixed; bottom: 0; left: 0; width: 100%; height: 50rpx; background-color: #fff; border-top: 1rpx solid #e5e5e5; box-shadow: 0 -2rpx 6rpx rgba(0, 0, 0, 0.05); } .tab-bar-item { display: flex; flex-direction: column; align-items: center; justify-content: center; height: 100%; font-size: 20rpx; color: #8a8a8a; } .tab-bar-item.active { color: #007aff; } .personal { display: flex; flex-direction: column; align-items: center; justify-content: center; margin-top: 20rpx; } .avatar { display: flex; flex-direction: column; align-items: center; justify-content: center; } .avatar-img { width: 80rpx; height: 80rpx; border-radius: 50%; } .nickname { margin-top: 10rpx; font-size: 24rpx; font-weight: bold; } .order { margin-top: 20rpx; } .order-item { display: flex; flex-direction: row; align-items: center; justify-content: space-between; width: 90%; height: 80rpx; background-color: #fff; border-radius: 10rpx; box-shadow: 0 2rpx 6rpx rgba(0, 0, 0, 0.05); padding: 20rpx; margin-bottom: 20rpx; } .order-icon { width: 40rpx; height: 40rpx; } .order-text { font-size: 28rpx; font-weight: bold; } .order-arrow { width: 20rpx; height: 20rpx; } ``` 在 order.wxss 中添加以下代码: ```css .order { margin-top: 20rpx; } .order-header { display: flex; flex-direction: row; align-items: center; justify-content: space-between; padding: 20rpx; background-color: #fff; border-radius: 10rpx; box-shadow: 0 2rpx 6rpx rgba(0, 0, 0, 0.05); margin-bottom: 20rpx; } .order-title { font-size: 32rpx; font-weight: bold; } .order-more { font-size: 24rpx; color: #007aff; } .order-list { display: flex; flex-direction: column; align-items: center; justify-content: center; } .order-item { display: flex; flex-direction: row; align-items: center; justify-content: space-between; width: 90%; height: 120rpx; background-color: #fff; border-radius: 10rpx; box-shadow: 0 2rpx 6rpx rgba(0, 0, 0, 0.05); padding: 20rpx; margin-bottom: 20rpx; } .order-img { width: 80rpx; height: 80rpx; border-radius: 10rpx; } .order-info { display: flex; flex-direction: column; align-items: flex-start; justify-content: center; margin-left: 20rpx; } .order-name { font-size: 28rpx; font-weight: bold; } .order-price { margin-top: 10rpx; font-size: 24rpx; color: #007aff; } ``` 至此,我们完成了微信小程序实战篇-个人中心、订单制作的教程。希望对你有所帮助!

“相关推荐”对你有帮助么?

  • 非常没帮助
  • 没帮助
  • 一般
  • 有帮助
  • 非常有帮助
提交
评论
添加红包

请填写红包祝福语或标题

红包个数最小为10个

红包金额最低5元

当前余额3.43前往充值 >
需支付:10.00
成就一亿技术人!
领取后你会自动成为博主和红包主的粉丝 规则
hope_wisdom
发出的红包
实付
使用余额支付
点击重新获取
扫码支付
钱包余额 0

抵扣说明:

1.余额是钱包充值的虚拟货币,按照1:1的比例进行支付金额的抵扣。
2.余额无法直接购买下载,可以购买VIP、付费专栏及课程。

余额充值