


之前获取canon相机与镜头协议采用逻辑分析仪进行协议数据波形的获取,可以导出为txt文档,由于canon协议不是标准的通信协议,只有通过编写逻辑分析仪的解析程序才能进行相应的数据解析,对我做硬件来说,难度挺高。这几天正在学习python,所以决定用python编写相应的解析程序,通过对导出数据进行观察,找到相应的规律,通过百度,目前程序能够按照我的要求,直接输出格式化后的协议,具体代码如下:
'''
Created on 2016年11月1日
@author: pc-zmx
function:用于将逻辑分析仪抓取的txt数据格式化为HEX数据,并保存在txt中
获取source.txt的数据转化为target.txt文件
'''
import PyQt5.QtWidgets as Ui
import PyQt5.QtCore as QCore
import PyQt5.QtGui as QGui
import sys
'''
转换数据处理
'''
class CanonPyTxtClass(object):
def __init__(self,f):
self.start = False #开始标识
self.sample = False #采样数据标识
self.clkbit = 1
self.dclbit = 1
self.dlcbit = 1
self.samplecount=0
self.dcl = 0
self.dlc = 0
self.outfile = f
def LineDatProcess(self, strr):
a = strr.split(",")
self.clkbit,self.dclbit,self.dlcbit=int(a[1]),int(a[2]),int(a[3])
if(True==self.start):
if(True == self.sample):
if(1 == self.clkbit):
self.sampleDat() #上升沿获取数据
self.sample = False
else:
if(0 == self.clkbit):
self.sample = True
else:
if(0 == self.clkbit):
self.start=True
self.sample=True
def sampleDat(self):
self.samplecount = self.samplecount +1
if(self.samplecount <9):
self.dcl +=self.dclbit<<(8-self.samplecount)
self.dlc +=self.dlcbit<<(8-self.samplecount)
if(self.samplecount ==9):
self.samplecount=0
self.ProcessDat()
self.dcl =0
self.dlc =0
def ProcessDat(self):
if(self.dcl <17):
a = hex(self.dcl)
b = a[2:]
c='0'+b
else:
a = hex(self.dcl)
c = a[2:]
if(self.dlc <17):
d = hex(self.dlc)
e = d[2:]
f='0'+e
else:
d = hex(self.dlc)
f = d[2:]
#print(c.upper(),f.upper())
strr =c.upper()+ ' ' + f.upper()+ ' '+';'
self.outfile.writelines(strr+'\n')
'''
转换界面设计
'''
class FileSelDlg(Ui.QDialog):
def __init__(self, parent=None):
super(FileSelDlg, self).__init__(parent)
FileLable = Ui.QLabel("转换源文件:")
self.filepathLineEdit = Ui.QLineEdit()
openfileBtn = Ui.QPushButton("打开")
#self.SourceFilePath = Ui.QFileDialog()
gridLayout = Ui.QGridLayout()
gridLayout.addWidget(FileLable, 0, 0, 1, 1)
gridLayout.addWidget(self.filepathLineEdit, 0, 1, 1, 4)
gridLayout.addWidget(openfileBtn, 0, 5, 1, 1)
startBtn = Ui.QPushButton("转换")
completeBtn = Ui.QPushButton("完成")
btnLayout = Ui.QHBoxLayout()
btnLayout.setSpacing(50)
btnLayout.addWidget(startBtn)
btnLayout.addWidget(completeBtn)
dlgLayout = Ui.QVBoxLayout() #垂直布局器
dlgLayout.setContentsMargins(20, 20, 20, 20)
dlgLayout.addLayout(gridLayout)
dlgLayout.addStretch(200) #平均分配
dlgLayout.addLayout(btnLayout)
self.setLayout(dlgLayout)
openfileBtn.clicked.connect(self.openfileBtnclicked)
startBtn.clicked.connect(self.startBtnclicked)
completeBtn.clicked.connect(self.reject)
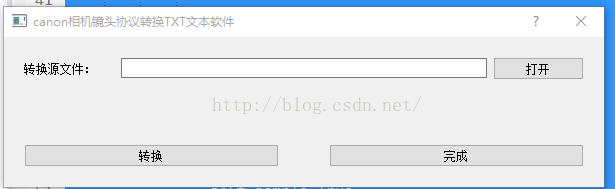
self.setWindowTitle("canon相机镜头协议转换TXT文本软件")
self.resize(600, 150)
def openfileBtnclicked(self):
self.files,ok1 = Ui.QFileDialog.getOpenFileName(
self,
"Open Document",
"C:/Users/pc-zmx/Desktop/pytxt",
"Document files (*.txt)")
#"Document files (*.txt);;All files(*.*)")
if ok1:
self.filepathLineEdit.setText(self.files)
print(self.files)
def startBtnclicked(self):
if self.filepathLineEdit.text(): #判断文件是否存在
sourcefilename = self.filepathLineEdit.text()
pos = sourcefilename.find(".txt")
targetfilename = sourcefilename[:pos] + "_格式化数据" + sourcefilename[pos:]
f = open(sourcefilename, "r")
line1 = f.readline()
a = line1.split(",")
if a[0][:4] != "Time":
Ui.QMessageBox.information(self, #使用infomation信息框
"警告",
"源文件错误",
Ui.QMessageBox.Yes)
else:
ff = open(targetfilename,'w')
canonpy = CanonPyTxtClass(ff)
while True:
line = f.readline()
if line:
canonpy.LineDatProcess(line)
else:
break
Ui.QMessageBox.information(self, #使用infomation信息框
"提示",
"格式化完成",
Ui.QMessageBox.Yes)
print('格式化完成')
ff.close()
f.close()
else:
Ui.QMessageBox.information(self, #使用infomation信息框
"警告",
"文件不能为空",
Ui.QMessageBox.Yes)
if __name__ == '__main__':
app = Ui.QApplication(sys.argv)
dlg = FileSelDlg()
dlg.show()
dlg.exec_()
app.exit()
程序功能比较简单,这里就不多做解释了,python3.5,pyqt5,运行界面如下所示:


 1571
1571


 被折叠的 条评论
为什么被折叠?
被折叠的 条评论
为什么被折叠?
 到【灌水乐园】发言


