


-------------------自己的实践方案
今天开始学习C#使用Excel。
首先,要先添加引用:

放大了看就是这个:
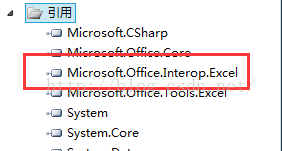
若发现没有这个项,可以默认安装office,我这里使用的是office2013:
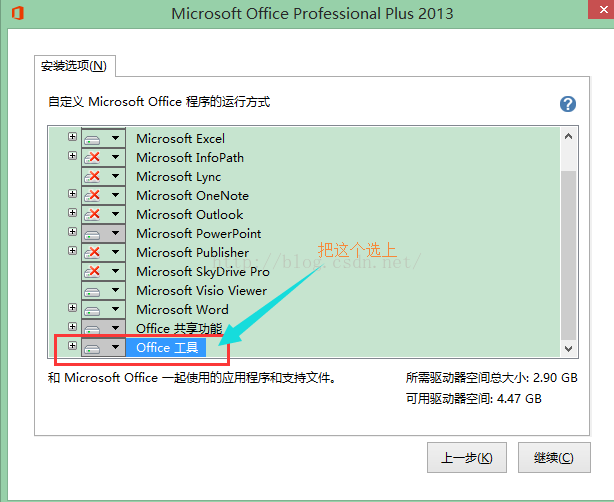
若发现还是没有在引用中找到对应的项,可尝试添加VS的功能:关于office的功能组件。
-------------网上找到的资料
[C# .Net] Microsoft.Office.Interop.Excel 讀 / 寫 Excel 語法概全 這篇當時是使用Excel2003所完成,距離現在2010的版本已經有點久遠了,版本不同寫法也有點不同,今天就來更新一下用法。
首先要先加入Excel.exe參考

再來匯入 using Excel = Microsoft.Office.Interop.Excel;
http://www.dotblogs.com.tw/yc421206/archive/2009/12/06/12297.aspx
再來瞭解一下我們會用到以下類別,這已經跟舊版的Excel名稱不同了。
Excel.Application:Excel應用程式
Excel.Workbook:應用程式裡的活頁簿,預設情況下,不管你開幾個Excel檔案,在工作管理員裡只會出現一個Excel.exe
Excel.Worksheet:活頁簿裡的工作表
Excel.Range:工作表裡的儲存格,一格也是Range,多格也是Range,用法Excel.Range[“A1”];
Excel.Range.Cells:這是儲存格的最小單位,代表一格的Range,用法Excel.Range.Cells[1,1];


接下來實作,initailExcel方法會檢查有無Excel.exe執行,若有則引用舊有Excel
Excel.Application _Excel = null;void initailExcel() { //檢查PC有無Excel在執行 bool flag = false; foreach (var item in Process.GetProcesses()) { if (item.ProcessName == "EXCEL") { flag = true; break; } } if (!flag) { this._Excel = new Excel.Application(); } else { object obj = Marshal.GetActiveObject("Excel.Application");//引用已在執行的Excel _Excel = obj as Excel.Application; } this._Excel.Visible = true;//設false效能會比較好 } ///------初始化Excel.Application在.NET裡沒有版本之分,但下列Method就有了 ///-----@VS2010以前的版本VS2005 C#2.0~VS2008 C#3.0 private void button1_Click(object sender, EventArgs e) { initailExcel(); operExcel(); } private void button2_Click(object sender, EventArgs e) { this._Excel.Quit(); this._Excel = null; //確認已經沒有excel工作再回收 GC.Collect(); } void operExcel() { Excel.Workbook book = null; Excel.Worksheet sheet = null; Excel.Range range = null; string path = Application.StartupPath + "\\test.xlsx"; try { book = _Excel.Workbooks.Open(path, Type.Missing, Type.Missing, Type.Missing, Type.Missing, Type.Missing, Type.Missing, Type.Missing, Type.Missing, Type.Missing, Type.Missing, Type.Missing, Type.Missing, Type.Missing, Type.Missing);//開啟舊檔案 sheet = (Excel.Worksheet)book.Sheets[1]; range = sheet.get_Range("A5", "D23"); foreach (Excel.Range item in range) { Console.WriteLine(item.Cells.Formula); Console.WriteLine(item.Cells.Value2); Console.WriteLine(item.Cells.Text); } book.Sheets.Add(Type.Missing, sheet, 1, Type.Missing); sheet = (Excel.Worksheet)book.Worksheets[2]; sheet.Name = "新的工作表"; //另存活頁簿 book.SaveAs(Application.StartupPath + "\\test1.xls", Type.Missing, Type.Missing, Type.Missing, Type.Missing, Type.Missing, Excel.XlSaveAsAccessMode.xlNoChange, Type.Missing, Type.Missing, Type.Missing, Type.Missing, Type.Missing); } finally { book.Close(Type.Missing, Type.Missing, Type.Missing); book = null; } }
@VS2010 C# 4.0 版本:因為C# 4.0新增了選擇性參數,不在像舊版那樣必須強制代入無用的參數Type.Missing
另外:
在.NET4.0的專案中可以不必轉型
sheet = book.Sheets["Sheet1"];
在.NET2.0~3.5的專案中要轉型
sheet = (Excel.Worksheet)book.Sheets["Sheet1"];
private void button1_Click(object sender, EventArgs e)
{
    initailExcel();
    operExcel();
}

private void button2_Click(object sender, EventArgs e)
{
    this._Excel.Quit();
    this._Excel = null;
    //確認已經沒有excel工作再回收
    GC.Collect();
}


void operExcel()
{
    Excel.Workbook book = null;
    Excel.Worksheet sheet = null;
    Excel.Range range = null;
    string path = Application.StartupPath + \\test.xlsx;
    try
    {
        book = _Excel.Workbooks.Open(path);//開啟舊檔案
        //sheet = (Excel.Worksheet)book.Sheets[1];//指定活頁簿,代表Sheet1
        sheet = (Excel.Worksheet)book.Sheets["Sheet1"];//也可以直接指定工作表名稱

        range = sheet.get_Range("A5", "D23");
        foreach (Excel.Range item in range)
        {
            Console.WriteLine(item.Cells.Formula);
            Console.WriteLine(item.Cells.Value);
            Console.WriteLine(item.Cells.Value2);
            Console.WriteLine(item.Cells.Text);
        }

        book.Sheets.Add(After: sheet, Count: 1);
        sheet = (Excel.Worksheet)book.Worksheets[2];
        sheet.Name = "新的工作表";
        //另存活頁簿
        book.SaveAs(Filename: Application.StartupPath + "\\test1.xls", FileFormat: Excel.XlFileFormat.xlXMLSpreadsheet, AccessMode: Excel.XlSaveAsAccessMode.xlNoChange);
    }
    finally
    {
        book.Close();
        book = null;
    }
}
延伸閱讀
http://www.dotblogs.com.tw/yc421206/archive/2008/12/20/6470.aspx
---------来自微软官方的文档信息
下面的代码示例演示如何使用 COM interop 创建 Excel 电子表格。有关 Excel 的更多信息,请参见“Microsoft Excel Objects”(Microsoft Excel 对象)和“Open Method”(Open 方法)
此示例演示如何在 C# 中使用 .NET Framework COM interop 功能打开现有的 Excel 电子表格。使用 Excel 程序集来打开 Excel 电子表格中一定范围内的单元格并向其中输入数据。
| 注意 |
|---|
| 为使此代码正常运行,必须在系统中安装 Excel。 |
| 注意 |
|---|
| 显示的对话框和菜单命令可能会与“帮助”中描述的不同,具体取决于您现用的设置或版本。若要更改设置,请在“工具”菜单上选择“导入和导出设置”。有关更多信息,请参见 Visual Studio 设置。 |
使用 COM interop 创建 Excel 电子表格
-
在 Visual Studio 中创建新的 C# 控制台应用程序,将其命名为 CreateExcelWorksheet。
-
将 Excel 程序集作为引用添加到项目中:右键单击项目,选择“添加引用”。
-
单击“添加引用”对话框的“COM”选项卡,找到“Microsoft Excel 11 对象库”。
-
双击“Microsoft Excel 11 对象库”,然后按“确定”。
注意 根据安装的 Office 版本的不同,Excel 程序集可能名为“Excel 10 对象库”或“Excel 11 对象库”。
-
复制下面的代码并将其粘贴到 Program.cs 文件中覆盖原有内容。
using System;
using System.Reflection;
using Microsoft.Office.Interop.Excel;

public class CreateExcelWorksheet
{
    static void Main()
    {
        Microsoft.Office.Interop.Excel.Application xlApp = new Microsoft.Office.Interop.Excel.Application();

        if (xlApp == null)
        {
            Console.WriteLine("EXCEL could not be started. Check that your office installation and project references are correct.");
            return;
        }
        xlApp.Visible = true;

        Workbook wb = xlApp.Workbooks.Add(XlWBATemplate.xlWBATWorksheet);
        Worksheet ws = (Worksheet)wb.Worksheets[1];

        if (ws == null)
        {
            Console.WriteLine("Worksheet could not be created. Check that your office installation and project references are correct.");
        }

        // Select the Excel cells, in the range c1 to c7 in the worksheet.
        Range aRange = ws.get_Range("C1", "C7");

        if (aRange == null)
        {
            Console.WriteLine("Could not get a range. Check to be sure you have the correct versions of the office DLLs.");
        }

        // Fill the cells in the C1 to C7 range of the worksheet with the number 6.
        Object[] args = new Object[1];
        args[0] = 6;
        aRange.GetType().InvokeMember("Value", BindingFlags.SetProperty, null, aRange, args);

        // Change the cells in the C1 to C7 range of the worksheet to the number 8.
        aRange.Value2 = 8;
    }
}


 1万+
1万+


 被折叠的 条评论
为什么被折叠?
被折叠的 条评论
为什么被折叠?
 到【灌水乐园】发言


