http://linux.chinaunix.net/techdoc/install/2008/12/20/1053972.shtml
| 使用cygwin X server实现Linux远程桌面 (for windows) | |
|
| |
| 来源: ChinaUnix博客 日期: 2008.12.20 13:08 (共有条评论) 我要评论 | |
在windows上访问linux有多种方法: 对于习惯使用命令行的人来说,可以使用终端的方式进行访问,也就是通过telnet, ssh等方法远程登录到linux主机,对其进行访问。至于登录软件,既可以使用windows自带的命令行界面,也可以使用专门的终端软件,例如putty, secureCRT等。其中putty是免费软件,而secureCRT并不是。 对于习惯使用图形界面的人来说,更希望以图形界面的方式来访问linux主机。主要有以下几种方法: - 使用vnc技术。网上这方面的文档很多,我也写过一篇: 用VNC实现远程桌面共享(支持Windows, Linux, ...) - windows上提供一个X server,linux主机上X client程序通过XDMCP协议 (X Display Manager Control Protocol)使自己显示在windows上。 今天我主要介绍第二种方法。 有很多软件在windows上实现了X server的功能,例如 Xmanager , Hummingbird Exceed , cygwin X server ,以及 Xming X Server for Windows 。前两个都是商业软件,需要付费使用;cygwin和Xming是免费软件。本文主要介绍如何使用cygwin X实现Linux的远程桌面。关于Xming X server的使用请参见其主页。 先调动一下大家的积极性,看看最终的效果图: 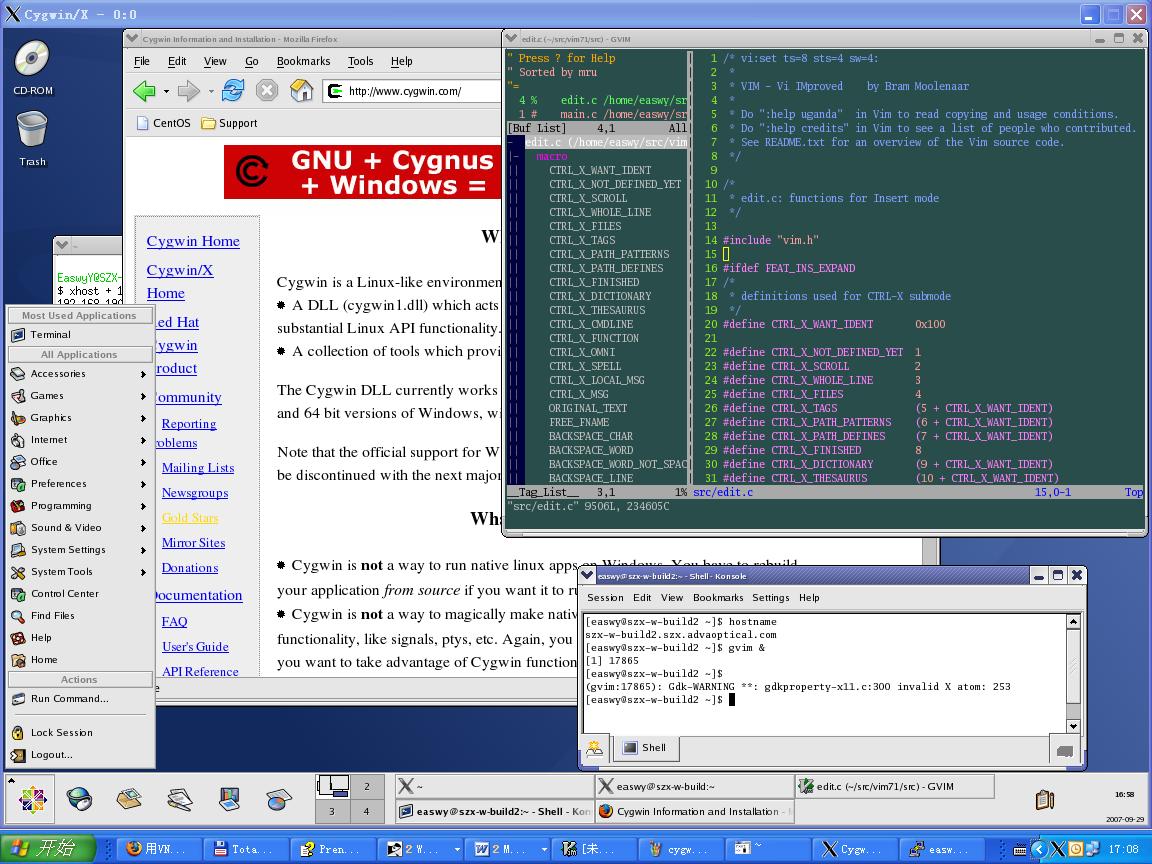 [ 背景知识 ] 网络上有很多关于X的背景知识,如果你想对X了解的深入一些,去网上搜索一下吧。 这里是王垠写的“ 理解 Xwindow ”,介绍了X server, X client, 窗口管理器,桌面环境相关的知识。了解X window对理解本文有帮助。 好了,现在我们开始配置。 [ 安装cygwin ] Cygwin项目的目的是在windows主机上提供一个类UNIX的环境,网络也有很多相关的资料。大家可以看一下这一篇:“ Cygwin使用指南 ”,这篇文章在网络上流行比较广,作者未知,上面提供的仅是其中一个链接。 如果你的计算机上还没有cygwin,首先需要安装它。 这个过程很简单,先到cygwin的主页 http://www.cygwin.com/ 去下载setup.exe,然后使用setup.exe进行安装。在安装的过程中需要选择要安装的组件,此时需要把X server组件选上。 在 http://x.cygwin.com/docs/ug/setup-cygwin-x-installing.html 有一个安装指南,虽然是英文的,不过看抓图就可以了。 选择X server组件时,其实只需要选择xorg-x11-base,选中它之后,其它相关组件会自动被选中。 在安装cygwin时,记得把expect这个软件装上,它位于interpreters类别下面。我会在后面的章节中说明为什么要安装这个组件。 [ 运行cygwin X server] 在运行X server前,先假定一下我们的组网。 我们假设X server运行在一台windows XP计算机上,此机器的IP地址是192.168.190.91。 我们的Linux主机上将运行X client程序,它的IP地址是192.168.190.15。 在你的安装目录中找到c:\cygwin\usr\X11R6\bin\startxwin.bat (假设你把cygwin安装在c:\cygwin目录),双击它就会启动X server,同时会启动一个终端(这个终端运行在Windows本地),效果如下图: 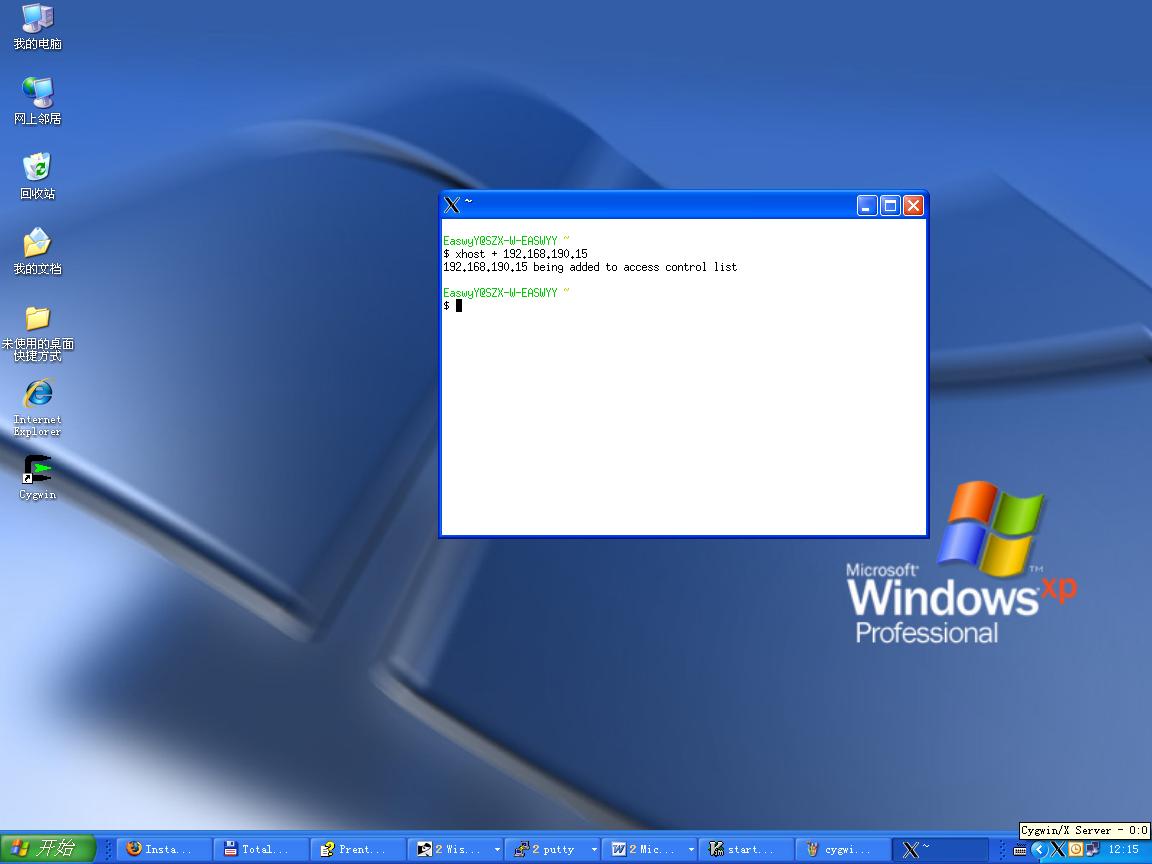 现在,我们要允许远程的X client对X server进行访问,因此,在刚才启动的终端中输入下面的命令, xhost + 192.168.190.15 接下来,我们要到X client所在的计算机上进行配置,使用telnet或ssh登录Linex主机(192.168.190.15),然后运行下面的命令, export DISPLAY=192.168.190.91:0.0 xterm & gvim & 上面第一条命令设置DISPLAY变量,它表示X客户端将使用192.168.190.91上的0.0来显示自己。192.168.190.91是运行X server的Windows计算机(它的防火墙要打开X server所监听的端口,通常为6000)。 后面两条命令则在Linux主机上(192.168.190.15)启动了两个程序,一个是xterm,另外一个是gvim,我们发现这两个程序启动后,并没有显示在Linux主机上,相反,它们显示在了windows主机上。下图是执行完上述命令的效果图,我使用putty远程登录到Linux主机上,然后执行上述命令: 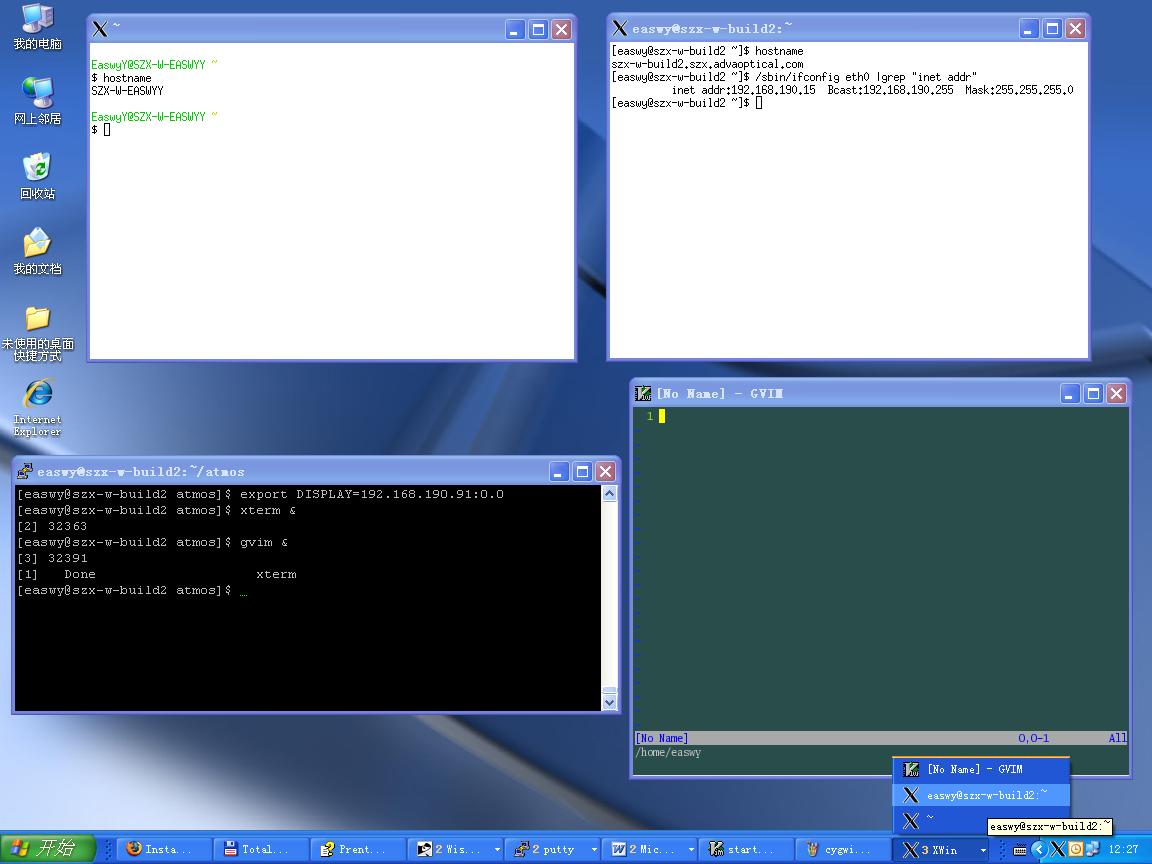 用这种方法,你可以在Linux主机上运行任何图形程序,并把它显示到windows上。 如果你想把诸如KDE、GNOME这样的桌面环境也显示到windows上,就需要做些调整。 [ 运行桌面环境 ] 在此我以KDE桌面为例。要把KDE桌面环境显示到windows上的X server中,需要更改一下X server的启动批处理。 首先备份一下c:\cygwin\usr\X11R6\bin\startxwin.bat,然后使用文本编辑器打开此文件,找到下面这行: %RUN% XWin -multiwindow -clipboard -silent-dup-error 去掉"-multiwindow"参数: %RUN% XWin -clipboard -silent-dup-error 我们通常不需要启动一个xterm窗口,因此找到下面这行: %RUN% xterm -e /usr/bin/bash –l 把它注释掉: REM %RUN% xterm -e /usr/bin/bash –l 好了,批处理文件改完了。 回想一下上面的操作,在启动了X server后,我们执行了xhost命令来设置允许哪些计算机连接到X server,现在我们可以在配置文件中设置它。打开一个cygwin窗口,输入下面的命令: echo "192.168.190.15" >> /etc/X0.hosts 上面的命令会在/etc/X0.hosts文件中加入你想允许的X client,你可以在此文件中加入你的X客户端。因为我们使用的DISPLAY是0,所以在文件/etc/X0.hosts中增加;如果使用DISPLAY 1,则需要修改文件/etc/X1.hosts文件。现在启动X server后,192.168.190.15就被自动允许接入了。 现在我们再次双击startxwin.bat批处理,执行后就会出现一个丑陋的空白窗口,这就是所谓的根窗口。之所以是空白的,是因为现在还没有运行任何窗口管理器。别急,我们使用telnet或ssh远程登录Linux主机,执行命令: startkde & 哈哈~~~本文开头所展示的KDE窗口出来了!!!现在你在KDE中运行任何程序,它们都运行在Linux主机上,却把结果显示在Windows主机上。 [ 创建快捷方式 ] 在上面的操作中,启动X server后,需要使用telnet或ssh登录到Linux主机,才能启动自己想要的X client程序,有没有更简单的方法? 现在我们就需要用到expect软件了。这是一个如此有用的软件,以至于我忍不住要在这里插一段广告。 Expect为用户提供一种机制,使用户能够自动执行一些交互式的任务。例如,通常我们在使用telnet的时候,都需要手动输入用户名、密码才能登录。而使用Expect,我们就可以实现全自动的telnet交互,不需用户干预。Expect由 Don Libes 开发,基于TCL内核,它的主页在 http://expect.nist.gov/ 。 广告时间结束,我们继续。 我使用expect编写了如下的TCL/EXPECT脚本,它可以使用ssh自动登录到指定Linux主机,然后启动我们需要的程序。程序如下: #! /bin/expect -f # Change these variable to yours set user {easwy} set host {192.168.190.15} set xserver {192.168.190.91} set password {123456} set program {startkde} set timeout 5 set done 0 spawn ssh "$user@$host" while {!$done} { expect { "*(yes/no)?*" { # If the 1st time run ssh, it will prompt continue or not # answer yes exp_send "yes\n" } "assword*" { # Answer password exp_send "$password\n" } "\$*" { # Exit the loop incr done } "#*" { # Exit the loop incr done } timeout { # Timeout exp_send_user "Login timeout, please check!" } } } # Set DISPLAY environment variable exp_send "export DISPLAY=$xserver:0\n" # Start your program exp_send "nohup $program &\n" expect -regexp {\[[0-9]*\] [0-9]*} exp_send "\n" # Finished把上面的内容保存为一个文件,例如,保存为cygwin的~/login.exp。注意把脚本起始处的5个变量替换成你自己的,只需要替换大括号中间的内容。使用telnet的朋友请自行修改此脚本。 下面我们再改一下c:\cygwin\usr\X11R6\bin\startxwin.bat文件,在此文件的最后增加: REM Start your X client program %CYGWIN_ROOT%\bin\run -p /bin expect -f ~/login.exp 我们使用expect来执行刚才保存的~/login.exp。 现在,我们右击startxwin.bat文件,选择“发送到桌面快捷方式”。以后,只要你双击此快捷方式,就能立刻在Windows上使用Linux主机上的程序了。 我们再来看一个有趣的例子。 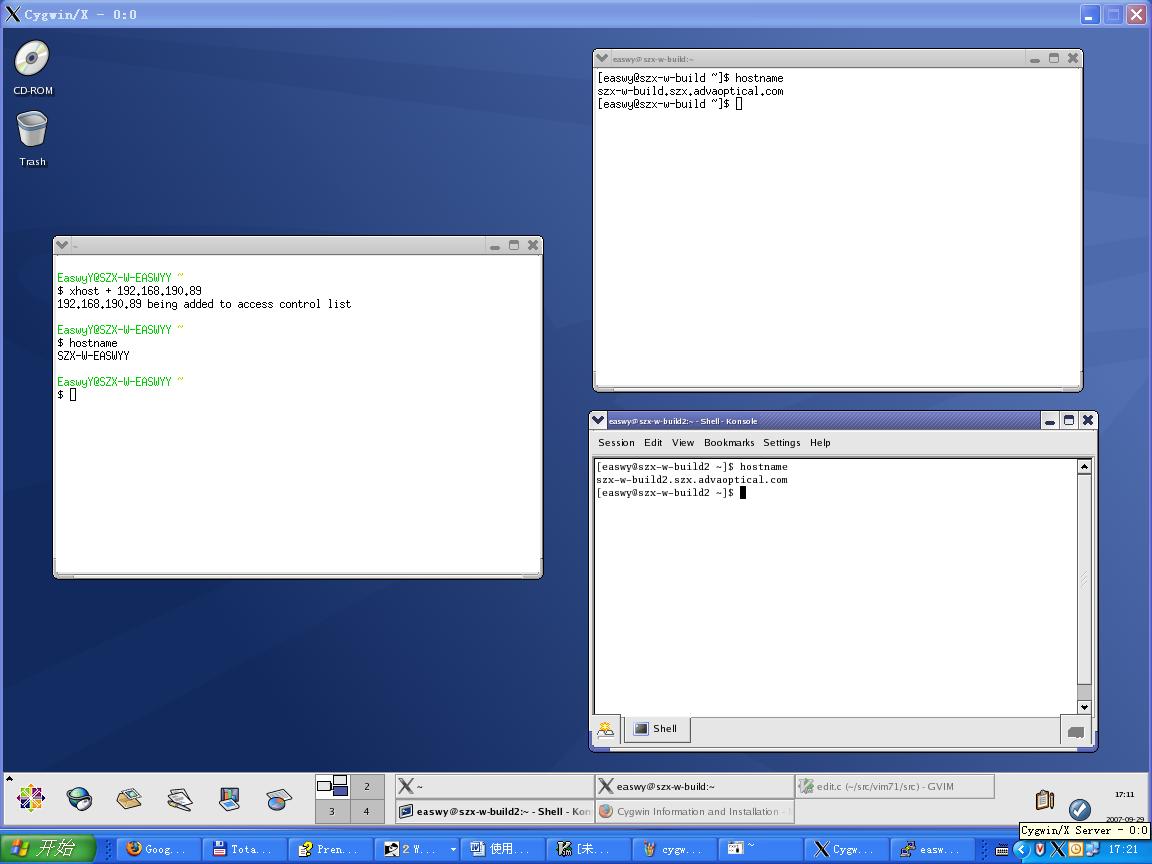 在上图中共开了三个终端,它们分别运行在不同的主机上,却都在Windows主机上进行输入输出。这就是X window的魅力了,如果你愿意,你还可以把其它Windows及Linux主机上的程序显示到这个X server中,正所谓一“桥”飞架南北,天堑变通途。 在本文完成后,经网友jiachunyu介绍,才知道有一个名为XWin |
Installing Cygwin/X
Cygwin tools are, in the words of the Cygwin development homepage, http://cygwin.com/, "ports of the popular GNU development tools and utilities for Windows 95, 98, and NT. They function by using the Cygwin library which provides a UNIX-like API on top of the Win32 API." Cygwin allows the compilation of the X Window System source on Win32; several patches were made to the X Window System source to make it actually compile and run under Cygwin.
Cygwin has a nice setup program that downloads and installs the necessary Cygwin packages for you.
-
Open the Cygwin, http://cygwin.com/ page in your web browser
-
Click the "Install Cygwin Now" link in the upper-right hand corner of the page. This link downloads setup.exe from the primary Cygwin server; save setup.exe to the directory that you would like to store the downloaded packages in (e.g. c:\download); do not save setup.exe to c:\cygwin, as that is the default directory for the extraction and installation of the downloaded packages.
-
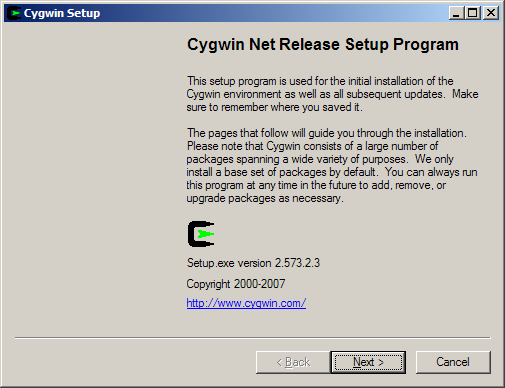
Run setup.exe, you will see the welcome screen:
-
Click to proceed to the next screen.
-
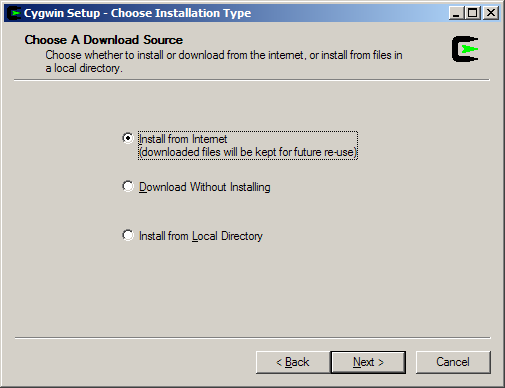
Choose, Install from Internet, this will still save the package files to your download directory so that you can install Cygwin on any number of machines:
-
Click to proceed to the next screen.
-
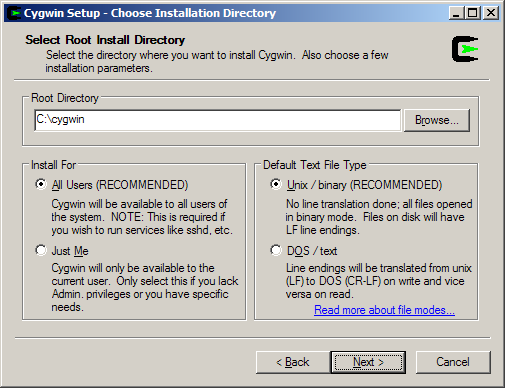
The default Install Root is c:\cygwin which should be fine for most installations. Leave Default Text File Type as UNIX. Leave Install For set to All unless you lack local administrative privileges.
-
Click to proceed to the next screen.
-
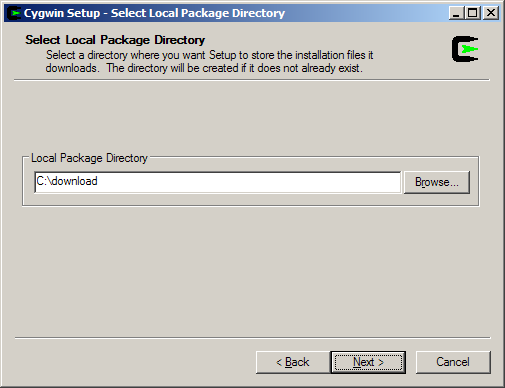
Local Package Directory should default to the directory that you ran setup.exe from:
-
Click to proceed to the next screen.
-
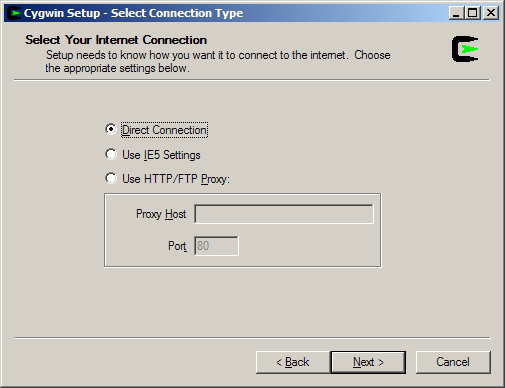
Choose your proxy setup, or, just choose Direct Connection if no proxy is needed:
-
Click to proceed to the next screen.
-
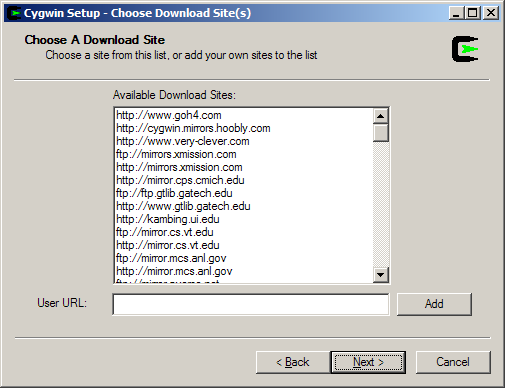
Select your nearest mirror for downloading:
-
Click to proceed to the next screen; setup will download a list of available packages as it moves to the next screen.
-
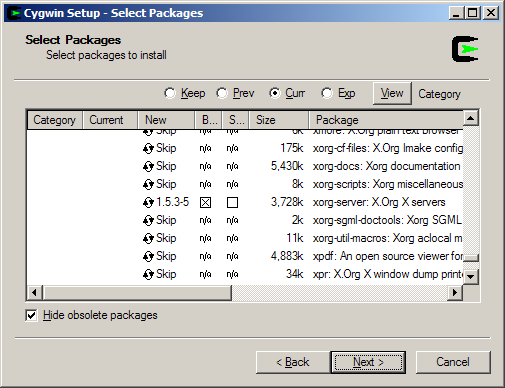
On the next screen you will select the packages that will be downloaded and installed. A listing of the Cygwin/X packages is given below; a listing of the general Cygwin packages would be beyond the scope of this document.
Cygwin/X packages are located in the X11 category.
-
xorg-server (required, the Cygwin/X X Server)
-
xinit (required, scripts for starting the X server: xinit, startx, startwin (and a shortcut on the Start Menu to run it), startxdmcp.bat )
-
xorg-docs (optional, man pages)
-
X-start-menu-icons (optional, adds icons for X Clients to the Start menu)
-
You may also select any X client programs you want to use, and any fonts you would like to have available.
-
You may also want to ensure that the inetutils or openssh packages are selected if you wish to use telnet or ssh connections to run remote X clients.
-
-
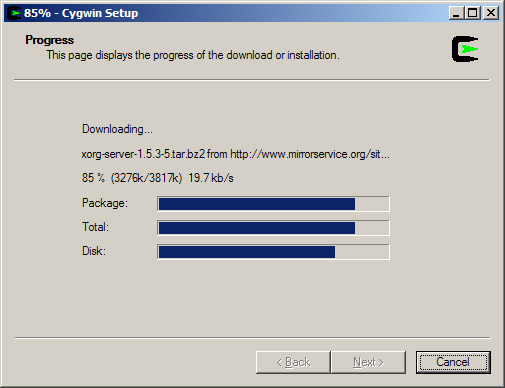
Click to begin the download process, you may want to try another mirror if you see a "Connecting" message on this screen for a long period of time:
-
After the packages are downloaded, setup will automatically begin to install them:
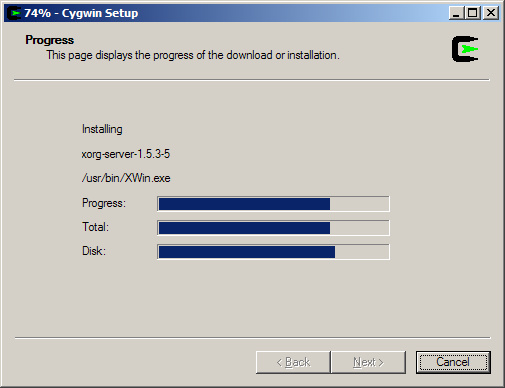
-
I highly recommend allowing Cygwin Setup to create Desktop and Start Menu icons for you; these icons simply launch a bash shell:
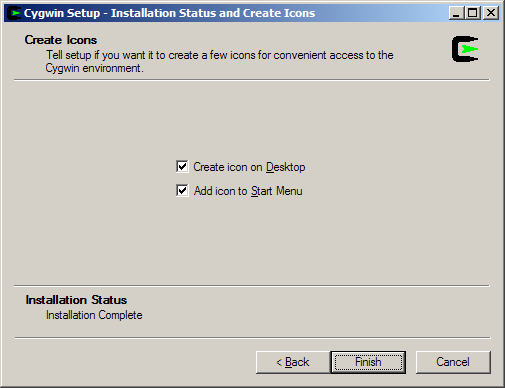
-
Click to close the setup program.
You have now successfully installed Cygwin/X. Proceed to Chapter 4 for instructions on how to use Cygwin/X.


 1745
1745


 被折叠的 条评论
为什么被折叠?


