


--类型:.storyboard or .xib;
--结构:the dock and the canvas;
--存储:stored by Xcode in XML format-->At build time, binary files known as nibs.-->At runtime, nibs are loaded and instantiated to create new views.
==================xib=================
xib在程序中扮演一个重要角色,通过它你可以“可视化的“的管理你的界面,而不是编程式的。因为这种"可视化",你可以快速的设计修改、配置你的界面而不用重写相关代码。
A nib file describes the visual elements of your application’s user interface, including windows, views, controls, and many others. It can also describe non-visual elements, such as the objects in your application that manage your windows and views. Most importantly, a nib file describes these objects exactly as they were configured in Xcode. At runtime, these descriptions are used to recreate the objects and their configuration inside your application. When you load a nib file at runtime, you get an exact replica of the objects that were in your Xcode document. The nib-loading codeinstantiates the objects, configures them, and reestablishes any inter-object connections that you created in your nib file .
也就是说,Xib就是一个描述文档,这里面包含了可见的用户界面元素,也包括不可见的对象。在运行的时候,通过加载xib文件,你可以创建xib里面的对象、配置以及对象间的关系。
------------相关概念------------
--File's Owner概念:是nib中非常重要的对象。Unlike interface objects, 它是a placeholder object that isnot created when the nib file is loaded. Instead, youcreate this object in your code and pass it to the nib-loading code. 它之所以重要,是因为它是your application code和contents of the nib file的关联的关键。更具体的说,it is the controller object that is responsible for the contents of the nib file。(xib中对象事件(IBAction)/ 所属(IBOutlet)对应的控制器)
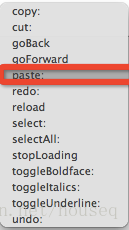
--First Responder概念:它也是一个placeholder object,代表着程序当前的First Responder。如果程序不在乎谁是First Responder,都让First Responder执行某个action(注:它的action是一些特定的,见下图),那么我们就可以把event发给First Responder。例如:某个button的touch down event指向Frist Responder 的paste:action。当点击button的时候,当前first responder就会执行粘贴操作。
--Top-Level Objects:就是nib中没有parent object 的对象(上文俩个placeholder object不属于Top-LevelObject)。注意:如果不是用outlets in the File’s Owner object to store references to the top-level objects,那么你应该is responsible for them。
--关于Image and Sound Resources:在nib中使用的图片或者音频,nib并不保存这些资源,只是保存他们的名字以便之后能够找到它们。
------Nib File设计原则:When creating your nib files, it is important to think carefully abouthow you intend to use the objects in that file. A very simple application might be able to store all of its user interface components in a single nib file, but for most applications, it is better todistribute components across multiple nib files. Creating smaller nib files lets youload only those portions of your interface that you need immediately. They also make iteasier to debug any problems you might encounter, since there are fewer places to look for problems。nib包含的都是你需要的,每个nib有不同用处。
------------The Object Loading Process------------
当使用NSBundle/ 方法去load and instantiate the objects in a nib file,遵循如下顺序:
***1.It loads the contents of the nib file and any referenced resource files into memory:
a.The raw data for the entire nib object graph is loaded into memory but is not unarchived.
b.Any custom image resources associated with the nib file are loaded and added to the Cocoa image cache;
c.Any custom sound resources associated with the nib file are loaded and added to the Cocoa sound cache;
***2.It unarchives the nib object graph data and instantiates the objects. How it initializes each new object depends on the type of the object and how it was encoded in the archive. The nib-loading code uses the following rules (in order) to determine which initialization method to use:
a.By default, objects receive an initWithCoder: message.
In iOS, any object that conforms to the NSCoding protocol is initialized using the initWithCoder: method. This includes all subclasses of UIView and UIViewController whether they are part of the default Xcode library or custom classes you define.(ios基本都是这种情况)
b.Custom views in OS X receive an initWithFrame: message.(OS X的情况)
Custom views in iOS do not use the initWithFrame: method for initialization.
c.Custom objects other than those described in the preceding steps receive an init message.(剩余的情况)
***3.It reestablishes all connections (actions, outlets, and bindings) between objects in the nib file. This includes connections to File’s Owner and other placeholder objects. The approach for establishing connections differs depending on the platform:
a.Outlet connections
In iOS, the nib-loading code uses the setValue:forKey: method to reconnect each outlet. That method similarly looks for an appropriate accessor method and falls back on other means when that fails.Setting an outlet in iOS also generates a KVO notification for any registered observers. These notifications may occur before all inter-object connections are reestablished and definitely occur before any awakeFromNib methods of the objects have been called.
OS X 情况不讨论
b.Action connections
In iOS, the nib-loading code uses the addTarget:action:forControlEvents: method of the UIControl object to configure the action. If the target is nil, the action is handled by the responder chain.
OS X 情况不讨论
c.Bindings
Bindings are not supported in iOS. OS X 情况不讨论
***4.It sends an awakeFromNib message to the appropriate objects in the nib file that define the matching selector:
In iOS, this message is sent only to the interface objects that were instantiated by the nib-loading code. It is not sent to File’s Owner, First Responder, or any other placeholder objects. OS X 情况不讨论
***5.It displays any windows whose “Visible at launch time” attribute was enabled in the nib file.
注意:The order in which the nib-loading code calls the awakeFromNib methods of objects is not guaranteed. If you need to configure the objects in your nib file further at load time, the most appropriate time to do so is after your nib-loading call returns. At that point, all of the objects are created, initialized, and ready for use.
------------nib对象的Lifetimes------------
之前"属性ARC"文章中也说过,当你用NSBundle class to load a nib file,它creates a new copy of the objects in that file。你应该确保你maintain the new object graph 当你需要它的时候,并且disown it when you are finished with it。通常你需要strong references to top-level objects to ensure that they are not deallocated。不需要strong references to objects lower down in the graph because they’re owned by their parents,并且应该minimize the risk of creating strong reference cycles。
@property (weak) IBOutlet MyView *viewContainerSubview;
@property (strong) IBOutlet MyOtherClass *topLevelObject;---公开还是私有:
一般Outlets are generally considered private to the defining class; unless there is a reason to expose the property publicly, hide the property declarations a class extension.例:
// MyClass.h
@interface MyClass : MySuperclass
@end
// MyClass.m
@interface MyClass ()
@property (weak) IBOutlet MyView *viewContainerSubview;
@property (strong) IBOutlet MyOtherClass *topLevelObject;
@end // MyClass.h
@interface MyClass : UITableViewCell
@property (weak, readonly) MyType *outletName;
@end
// MyClass.m
@interface MyClass ()
@property (weak, readwrite) IBOutlet MyType *outletName;
@end
------------action methods------------
概念:Broadly speaking, action methods are methods that are typically invoked by another object in a nib file. Action methods use type qualifier IBAction, which is used in place of the void return type, to flag the declared method as an action so that Xcode is aware of it: 格式:- (IBAction)myActionMethod:(id)sender;
通常认为action methods作为private,所以在public @interface 中不declare:
// MyClass.h
@interface MyClass
@end
// MyClass.m
@implementation MyClass
- (IBAction)myActionMethod:(id)sender {
    // Implementation.
}
@end// MyClass.h
@interface MyClass
@end
// MyClass.m
@interface MyClass (PrivateMethods)
- (void)doSomething;
- (void)doWorkThatRequiresMeToDoSomething;
@end
@implementation MyClass
- (IBAction)myActionMethod:(id)sender {
[self doSomething];
}
- (void)doSomething {
// Implementation.
}
- (void)doWorkThatRequiresMeToDoSomething {
// Pre-processing.
[self doSomething];
// Post-processing.
}
@end
------------Built-In Support For Nib Files------------
1.Application Loads the Main Nib File:应用程序加载的时候,会查找Info.plist文件,加载相应nib。详见程序启动 跟 IB相关;
2.View Controller Manages its Own Nib File:可以参考<UIViewController 文章>中loadView方法(loadView方法相当调用了[[NSBundle mainBundle] loadNibNamed:@"NibFile" owner:self options:nil]),Any connections between the view controller and the nib file objects are created automatically, and in iOS, the UIViewController object also receives additional notifications when the views are finally loaded and displayed on screen。
相当于在loadView方法中调用了loadNibNamed:@“xxxx” owner:self options: 方法(File‘ Owner为self),该方法创建了xib中所有对象,所有的连接关系(为控制器的相关属性赋了值、xib中一些对象的点击事件也都关联相应方法)。
------------Loading Nib Files Programmatically-----------
一.Loading Nib Files Using NSBundle:(ios中)loadNibNamed:owner:options: 方法。
参数说明:
a.nibName:不用带.xib后缀
b.owner:对应xib中File's Owner;
c.options:字典,可以为xib添加新的placeholder;
例子:有的时候只需要执行loadNibNamed:owner:options即可,不需要在代码中赋值,因为在创建xib中可以已经做好了!,如下:
- (BOOL)loadMyNibFile
{
    NSArray*    topLevelObjs = nil;
    topLevelObjs = [[NSBundle mainBundle] loadNibNamed:@"myNib" owner:self options:nil];
    if (topLevelObjs == nil)
    {
        NSLog(@"Error! Could not load myNib file.\n");
        return NO;
    }
    return YES;
}(个人理解)nib文件就是用来创建一堆对象和它们之间的"连接关系"。具体:利用xib可视化界面,添加、配置一些对象(界面)、以及它们之间的关系(层次、属性、动作Event)。当加载nib文件时,生产这些对象,并创建相应的连接(之前配置的关系)。xib中不同的对象可以对应代码中不同的类(根据identify inspector里确定),所以xib中可以创建任何对象,具体创建这些对象的时候,也创建好它们之间的关系(谁是谁属性,谁是谁子视图,谁点击对应什么方法),则需要用到IBOutlet、IBAction了,想要给某对象属性赋值,则声明IBOutlet且将它连接要赋值的对象上;想要给某对象关联点击事件,则在某对象中声明IBAction,并且连接它们。 现在nib内部中各对象的所属关系可以确定了,谁是谁的属性,但经常我们在xib中创建的对象是外部某些对象的属性,这就需要用到File's Owner了,表示一个外部对象,IBOutlet、IBAction在它里面使用一样,可以用它去确定跟xib中对象的关系,但它不是xib创建的,由外部传入。
xib通常都是用来生成试图、里面也可以创建一些nsobject对象,File's Owner通常代表着控制器。
Note: If you are developing a Universal application for iOS, you can use the device-specific naming conventions to load the correct nib file for the underlying device automatically // 具体详见《界面适配(一)--iPhone/iPad适配》--常见使用:
1.xib仅仅用来创建一些视图对象:只是往xib中添加一些类,并配置大小、外观等属性;
NSArray *nibContents = [[NSBundle mainBundle] loadNibNamed:@"EPPZPlainView" owner:nil options:nil];
UIView *plainView = [nibContents lastObject];
[self.view addSubview:plainView];@interface XXView ()
@property (weak, nonatomic) IBOutlet UIButton *viewOutlet;
@property (weak, nonatomic) IBOutlet UILabel *label;
@end
- (IBAction)viewbutton:(id)sender {
self.label.text =@"you";
}
// 使用的时候
NSArray * nibContents = [[NSBundle mainBundle]loadNibNamed:@"Seexib" owner:viewOwner options:nil];
[self.view addSubview:[nibContents objectAtIndex:0]];- (id)initWithNibName:(NSString *)nibNameOrNil bundle:(NSBundle *)nibBundleOrNil; //也可以通过loadview自动加载,xib名字和类名一样@interface ViewOwner : NSObject
@property(nonatomic,strong)IBOutlet XXView *view;
@end
// XXView.h
@interface XXView : UIView
@property(nonatomic,weak)IBOutlet ViewOwner *owner;
@end
// XXView.m
@interface XXView ()
@property (weak, nonatomic) IBOutlet UIButton *viewOutlet;
@property (weak, nonatomic) IBOutlet UILabel *label;
@end
- (IBAction)buttonClicked:(id)sender {
self.label.text =@"you";
NSLog(@"self:%@",self);
NSLog(@"owner.view:%@",self.owner.view);
}
// 使用的时候
viewOwner = [[ViewOwner alloc]init];
NSArray * nibContents = [[NSBundle mainBundle]loadNibNamed:@"Seexib" owner:viewOwner options:nil];
[self.view addSubview:[nibContents objectAtIndex:0]];二. 使用UINib
使用UINib的作用就是加速频繁使用的NIB文件的加载。在第一次从硬盘加载NIB时,它在内存中缓存NIB文件对象。之后加载NIB文件时就会从内存拷贝而避免了较慢的硬盘访问。
跟使用NSBundle(上一种)的区别:从上文可以看出-The Object Loading Process,xib文件加载过程可以分为4步骤:1.将xib文件从磁盘载入内存;2.执行unarchive和initialize操作;3.建立connections:Outlets和Actions;4.调用awakeFromNib方法。将xib文件从磁盘载入内存,有两种技术:NSBundle和UINib。不同的是,NSBundle加载xib每次都是1-4步骤,而UINib则只是第一次需执行1步骤,之后都是2-4步。所以性能上会有很大的提升,对于那些重复使用的xib文件使用UINib 加载技术,当收到低内存警告时,会从内从中卸载xib文件,当再次访问的时候会从磁盘中载入。
主要方法:
+ (UINib *)nibWithNibName:(NSString *)name bundle:(NSBundle *)bundleOrNil;

// If the bundle parameter is nil, the main bundle is used.
+ (UINib *)nibWithData:(NSData *)data bundle:(NSBundle *)bundleOrNil;

// Returns an array containing the top-level objects from the NIB.
// The owner and options parameters may both be nil.
// If the owner parameter is nil, connections to File's Owner are not permitted.
// Options are identical to the options specified with -[NSBundle loadNibNamed:owner:options:]
- (NSArray *)instantiateWithOwner:(id)ownerOrNil options:(NSDictionary *)optionsOrNil;例如:创建新Cell时从NIB文件中加载前后例子:
- (UITableViewCell *)tableView:(UITableView *)tableView cellForRowAtIndexPath:(NSIndexPath *)indexPath {
    static NSString *CellIdentifier = @"LabelCell";
    UITableViewCell *cell = [tableView dequeueReusableCellWithIdentifier:CellIdentifier];
    if (cell == nil) {
        cell = [[[NSBundle mainBundle] loadNibNamed:@"LabelCell" owner:self options:nil]objectAtIndex:0];
        // cell = [[[UITableViewCell alloc] initWithStyle:UITableViewCellStyleDefault  代码方式
    }
……
}- (id)labelCellNib {
if (!_labelCellNib) {
Class cls = NSClassFromString(@"UINib");
if ([cls respondsToSelector:@selector(nibWithNibName:bundle:)]) {
_labelCellNib = [[cls nibWithNibName:@"LabelCell" bundle:[NSBundle mainBundle]] retain];
}
}
return _labelCellNib;
}
// 注意nib变量一般都会声明为属性,保存起来self.nib = [UINib nibWithNibName:@"xx" bundle:nil]; 一次加载,之后用直接实例化
- (UITableViewCell *)tableView:(UITableView *)tableView cellForRowAtIndexPath:(NSIndexPath *)indexPath {
static NSString *CellIdentifier = @"LabelCell";
UITableViewCell *cell = [tableView dequeueReusableCellWithIdentifier:CellIdentifier];
if (cell == nil) {
if ([self labelCellNib]) {
cell = [[[self labelCellNib] instantiateWithOwner:self options:nil]objectAtIndex:0];
} else {
cell = [[[NSBundle mainBundle] loadNibNamed:@"LabelCell" owner:self options:nil]objectAtIndex:0];
}
}
...
} 1.configured outlets to point to nib file objects(通过outlets)
2.obtain a reference to the top-level objects in some manner(通过top-level objects)
------------Getting a Nib File’s Top-Level Objects----------
如果在ios中,非常简单, In the UIKit framework, the loadNibNamed:owner:options: method of NSBundle automatically returns an array with the top-level objects.
------------Replacing Proxy Objects at Load Time----------
In iOS, it is possible to create nib files that include placeholder objects besides the File’s Owner.Proxy objects represent objects created outside of the nib file but which have some connection to the nib file’s contents.
Proxies are commonly used to support navigation controllers in iPhone applications. When working with navigation controllers, you typically connect the File’s Owner object to some common object such as your application delegate. Proxy objects therefore represent the parts of the navigation controller object hierarchy that are already loaded in memory, because they were created programmatically or loaded from a different nib file.
方法:When you are ready to load a nib file containing placeholder objects, you must specify the replacement objects for any proxies when you call the loadNibNamed:owner:options: method. The options parameter of this method accepts a dictionary of additional information. You use this dictionary to pass in the information about your placeholder objects. The dictionary must contain the UINibExternalObjects key whose value is another dictionary containing the name and object for each placeholder replacement.
例子:a sample version of an applicationDidFinishLaunching: method that loads the application’s main nib file manually. Because the application’s delegate object is created by the UIApplicationMain function, this method uses a placeholder (with the name “AppDelegate”) in the main nib file to represent that object. The proxies dictionary stores the placeholder object information and the options dictionary wraps that dictionary.
- (void)applicationDidFinishLaunching:(UIApplication *)application
{
    NSArray*    topLevelObjs = nil;
    NSDictionary*    proxies = [NSDictionary dictionaryWithObject:self forKey:@"AppDelegate"];
    NSDictionary*    options = [NSDictionary dictionaryWithObject:proxies forKey:UINibExternalObjects];

    topLevelObjs = [[NSBundle mainBundle] loadNibNamed:@"Main" owner:self options:options];
    if ([topLevelObjs count] == 0)
    {
        NSLog(@"Warning! Could not load myNib file.\n");
        return;
    }
    // Show window
    [window makeKeyAndVisible];
}注意:proxy object 跟file 's owner里面的first level object不同,它虽然也可以custom object,但用处不一样。在老板的main.xib中能看到多个placeholder,有Appdelegate、UIWindow等,上例子显示load main xib manually中Appdelegate部分,目前没发现怎么add一个placeholder。
------------------备注:
1.nib和xib区别:前者是一个 XML 文档,而后者则是一个二进制文件。Interface Builder 3 之后,引入了新的文档格式:XIB。它是单一的 XML 文档,也就是一个纯文本文件。纯文本文件的好处是显而易见的,就是便于源代码版本管理。不论在 Interface Builder 中选择的是 NIB 还是 XIB 格式,Xcode 编译后都将得到一个供程序运行时使用的经过编译的 NIB 文件。(见上文 存储说明)
2.xib中不仅可以添加view,也可以添加一些custom object;
3.对不同对象之间添加”连接“,可以右键按住拖动,也可以Control+左键。注意的是:Action Connection 和Outlet Connection可以通过拖动快速添加(Assistant Editor View中)。
4.参考:Interface Builder的8个技巧:http://beyondvincent.com/blog/2014/03/19/18-tips-for-working-effectively-with-interface-builder/
-----------------------------------
参考:
<<Interface Builder Help>> https://developer.apple.com/library/ios/recipes/xcode_help-interface_builder/AboutInterfaceBuilder/AboutInterfaceBuilder.html
<Resource Programming Guide>https://developer.apple.com/library/ios/documentation/Cocoa/Conceptual/LoadingResources/CocoaNibs/CocoaNibs.html
<5 approach to load UIView from Xib>:http://eppz.eu/blog/uiview-from-xib/


 1508
1508


 被折叠的 条评论
为什么被折叠?
被折叠的 条评论
为什么被折叠?
 到【灌水乐园】发言


