


使用webservice 在一个服务中调用另外一个服务。
1、准备工作
使用elicpse的maven插件分别建立:
axis2-test
axis2-testServer

其中axis2-test中pom的依赖如下:
<dependencies>
<dependency>
<groupId>org.apache.axis2</groupId>
<artifactId>axis2-kernel</artifactId>
<version>1.6.1</version>
</dependency>
<dependency>
<groupId>org.apache.axis2</groupId>
<artifactId>axis2-codegen</artifactId>
<version>1.6.1</version>
</dependency>
<dependency>
<groupId>org.apache.axis2</groupId>
<artifactId>axis2-adb</artifactId>
<version>1.6.1</version>
</dependency>
<dependency>
<groupId>org.apache.axis2</groupId>
<artifactId>axis2-transport-local</artifactId>
<version>1.6.1</version>
</dependency>
<dependency>
<groupId>org.apache.axis2</groupId>
<artifactId>axis2-transport-http</artifactId>
<version>1.6.1</version>
</dependency>
</dependencies>
2、在aix2-test中编写服务器类并使用eclipse插件部署服务器代码。
客户端类OprationClient 调用服务类OprationServiceImpl,服务类定义了一个接口OprationService。
服务类:
package com.hualom.axis.service;
/**
 * @deprecated(操作接口)
 * @author Administrator
 *
 */
public interface OprationService {
	/**
	 * @deprecated(查询操作)
	 * @param message
	 * @return
	 */
	public String search(String message);

	/**
	 * @deprecated(非查询操作)
	 * @param message
	 * @return
	 */
	public String noSearch(String message);
}


package com.hualom.axis.service.impl;

import com.hualom.axis.service.OprationService;

public class OprationServiceImpl implements OprationService {

	public String search(String message) {

		return message+"  search finish!";
	}

	public String noSearch(String message) {
		return message+" noSearch finish!";
	}

}
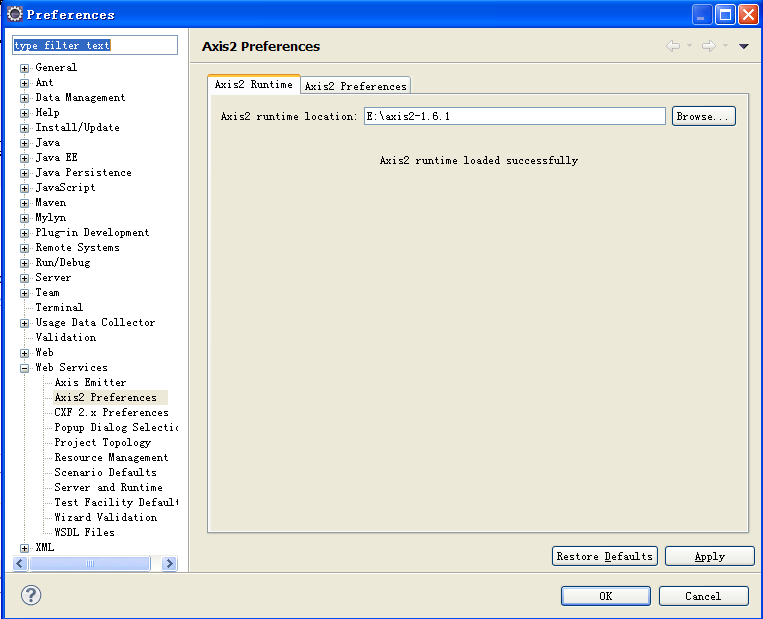
部署的时候需要导入新版的axis2 http://axis.apache.org/axis2/java/core/download.cgi 并解压。
在eclipse的菜单栏中选择 window-->preferences-->web service -->axis2 preferences 在axis2 runtime 下的 axis2 runtime location中指定解压目录
右击oprationServiceImpl--->webservice --->create webservice 如下:
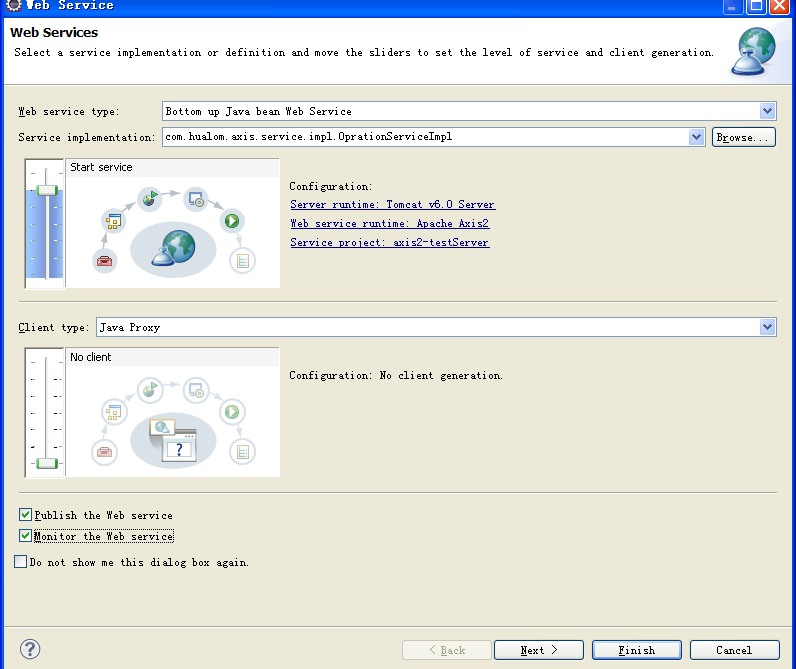
在service implemention中出现需要部署的服务类 将服务器的运行状态设置为start service 并且设置 service runtime (web服务器) web service runtime (axis的版本)
对应的web项目。勾选publish the web service 和monitor the service ---> next --->next直到:
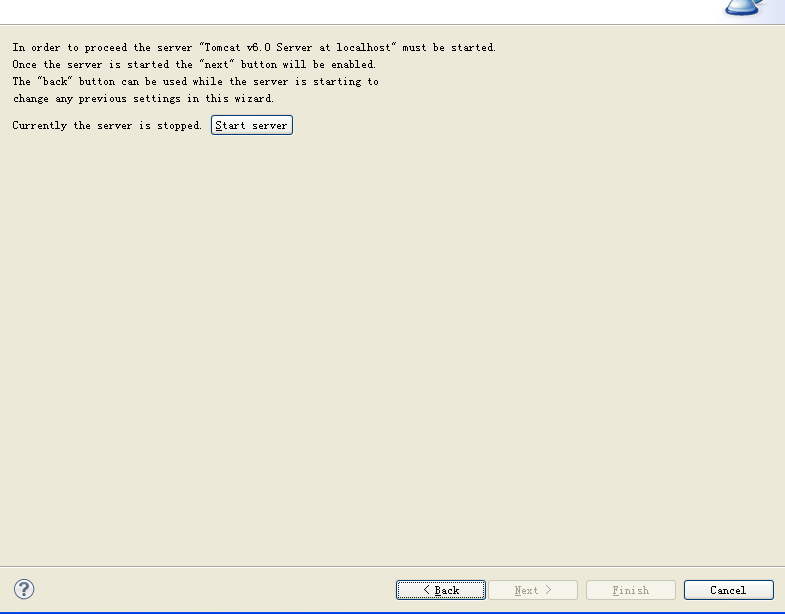
点击 start server 启动刚刚部署的web项目 --->next 直到 finish 此时部署就已经完成了。
3、在axis-test中编写客户端代码并调用服务器程序
package com.hualom.axis.client;

import javax.xml.namespace.QName;

import org.apache.axis2.AxisFault;
import org.apache.axis2.addressing.EndpointReference;
import org.apache.axis2.client.Options;
import org.apache.axis2.rpc.client.RPCServiceClient;

public class OprationClient {
    /**
     * @param args
     * @throws AxisFault
     */
    public static void main(String[] args) throws AxisFault {
        // 使用RPC方式调用WebService
        RPCServiceClient serviceClient = new RPCServiceClient();
        Options options = serviceClient.getOptions();
        // 指定调用WebService的URL
        EndpointReference targetEPR = new EndpointReference("http://localhost:8080/axis2-testServer/services/OprationServiceImpl");
        options.setTo(targetEPR);
        // 指定要调用的计算机器中的方法及WSDL文件的命名空间:impl.service.axis.hualom.com 服务类的包名称。
        QName searchResult = new QName("http://impl.service.axis.hualom.com","search");
        QName noSearchResult = new QName("http://impl.service.axis.hualom.com","noSearch");
        // 设置发送到服务器的内容
        Object[] opAddEntryArgs = new Object[] { "你好 server"};
        // 指定返回值的类型
        Class[] classes = new Class[] { String.class };
        // 调用服务器开放的接口并且返回结果   如果没有返回值可以直接调用  serviceClient.invokeRobust(opName, opAddEntryArgs)
        System.out.println(serviceClient.invokeBlocking(searchResult,opAddEntryArgs, classes)[0]);
    }
}
总结:
服务器访问路径默认
http://localhost:8080/axis2-testServer/services/OprationServiceImpl
实际是http://localhost:8080/axis2-testServer/services+刚才部署的服务类名称OprationServiceImpl
调用服务器的方法需要指定 命名空间:"http://impl.service.axis.hualom.com" 这个空间一般就是服务类包名称倒过来写。
注意:
如果部署服务类的时候出现问题
1、将服务器中部署的项目删除
2、可以为eclipse换一个 工作空间。


 2万+
2万+


 被折叠的 条评论
为什么被折叠?
被折叠的 条评论
为什么被折叠?
 到【灌水乐园】发言


