


TensorFlow MNIST 测试
昨天在安装好了TensorFlow后,迫不及待来了一次MNIST测试,结果各种爆炸,一开始上不了官网,科学上网以后也过不去,后来找了墙内的下载,结果跑起来还是有错误,大概是数据集不完整之类差错。当时用VS调试,调试也不友好,一出错就中断弹中断。
今天用PyCharm建立好,建好项目重新跑了一次,中间还出现一次关于CUDA设备路径错误(采用了*nux路径),升级到最新修复的1.0.1版本后正常。
MNIST测试在TensorFlow包下自带了,大概在这样一个路径:
C:\Python35\Lib\site-packages\tensorflow\examples\tutorials\mnist里面有input_data.py 是用于获取数据的。
测试代码如下:
# load MNIST data
import tensorflow.examples.tutorials.mnist.input_data as input_data
mnist = input_data.read_data_sets("MNIST_data/", one_hot=True)
# start tensorflow interactiveSession
import tensorflow as tf
sess = tf.InteractiveSession()
# weight initialization
def weight_variable(shape):
initial = tf.truncated_normal(shape, stddev=0.1)
return tf.Variable(initial)
def bias_variable(shape):
initial = tf.constant(0.1, shape=shape)
return tf.Variable(initial)
# convolution
def conv2d(x, W):
return tf.nn.conv2d(x, W, strides=[1, 1, 1, 1], padding='SAME')
# pooling
def max_pool_2x2(x):
return tf.nn.max_pool(x, ksize=[1, 2, 2, 1], strides=[1, 2, 2, 1], padding='SAME')
# Create the model
# placeholder
x = tf.placeholder("float", [None, 784])
y_ = tf.placeholder("float", [None, 10])
# variables
W = tf.Variable(tf.zeros([784, 10]))
b = tf.Variable(tf.zeros([10]))
y = tf.nn.softmax(tf.matmul(x, W) + b)
# first convolutinal layer
w_conv1 = weight_variable([5, 5, 1, 32])
b_conv1 = bias_variable([32])
x_image = tf.reshape(x, [-1, 28, 28, 1])
h_conv1 = tf.nn.relu(conv2d(x_image, w_conv1) + b_conv1)
h_pool1 = max_pool_2x2(h_conv1)
# second convolutional layer
w_conv2 = weight_variable([5, 5, 32, 64])
b_conv2 = bias_variable([64])
h_conv2 = tf.nn.relu(conv2d(h_pool1, w_conv2) + b_conv2)
h_pool2 = max_pool_2x2(h_conv2)
# densely connected layer
w_fc1 = weight_variable([7 * 7 * 64, 1024])
b_fc1 = bias_variable([1024])
h_pool2_flat = tf.reshape(h_pool2, [-1, 7 * 7 * 64])
h_fc1 = tf.nn.relu(tf.matmul(h_pool2_flat, w_fc1) + b_fc1)
# dropout
keep_prob = tf.placeholder("float")
h_fc1_drop = tf.nn.dropout(h_fc1, keep_prob)
# readout layer
w_fc2 = weight_variable([1024, 10])
b_fc2 = bias_variable([10])
y_conv = tf.nn.softmax(tf.matmul(h_fc1_drop, w_fc2) + b_fc2)
# train and evaluate the model
cross_entropy = -tf.reduce_sum(y_ * tf.log(y_conv))
# train_step = tf.train.AdagradOptimizer(1e-4).minimize(cross_entropy)
train_step = tf.train.GradientDescentOptimizer(1e-3).minimize(cross_entropy)
correct_prediction = tf.equal(tf.argmax(y_conv, 1), tf.argmax(y_, 1))
accuracy = tf.reduce_mean(tf.cast(correct_prediction, "float"))
sess.run(tf.global_variables_initializer())
for i in range(20000):
batch = mnist.train.next_batch(50)
if i % 100 == 0:
train_accuracy = accuracy.eval(feed_dict={x: batch[0], y_: batch[1], keep_prob: 1.0})
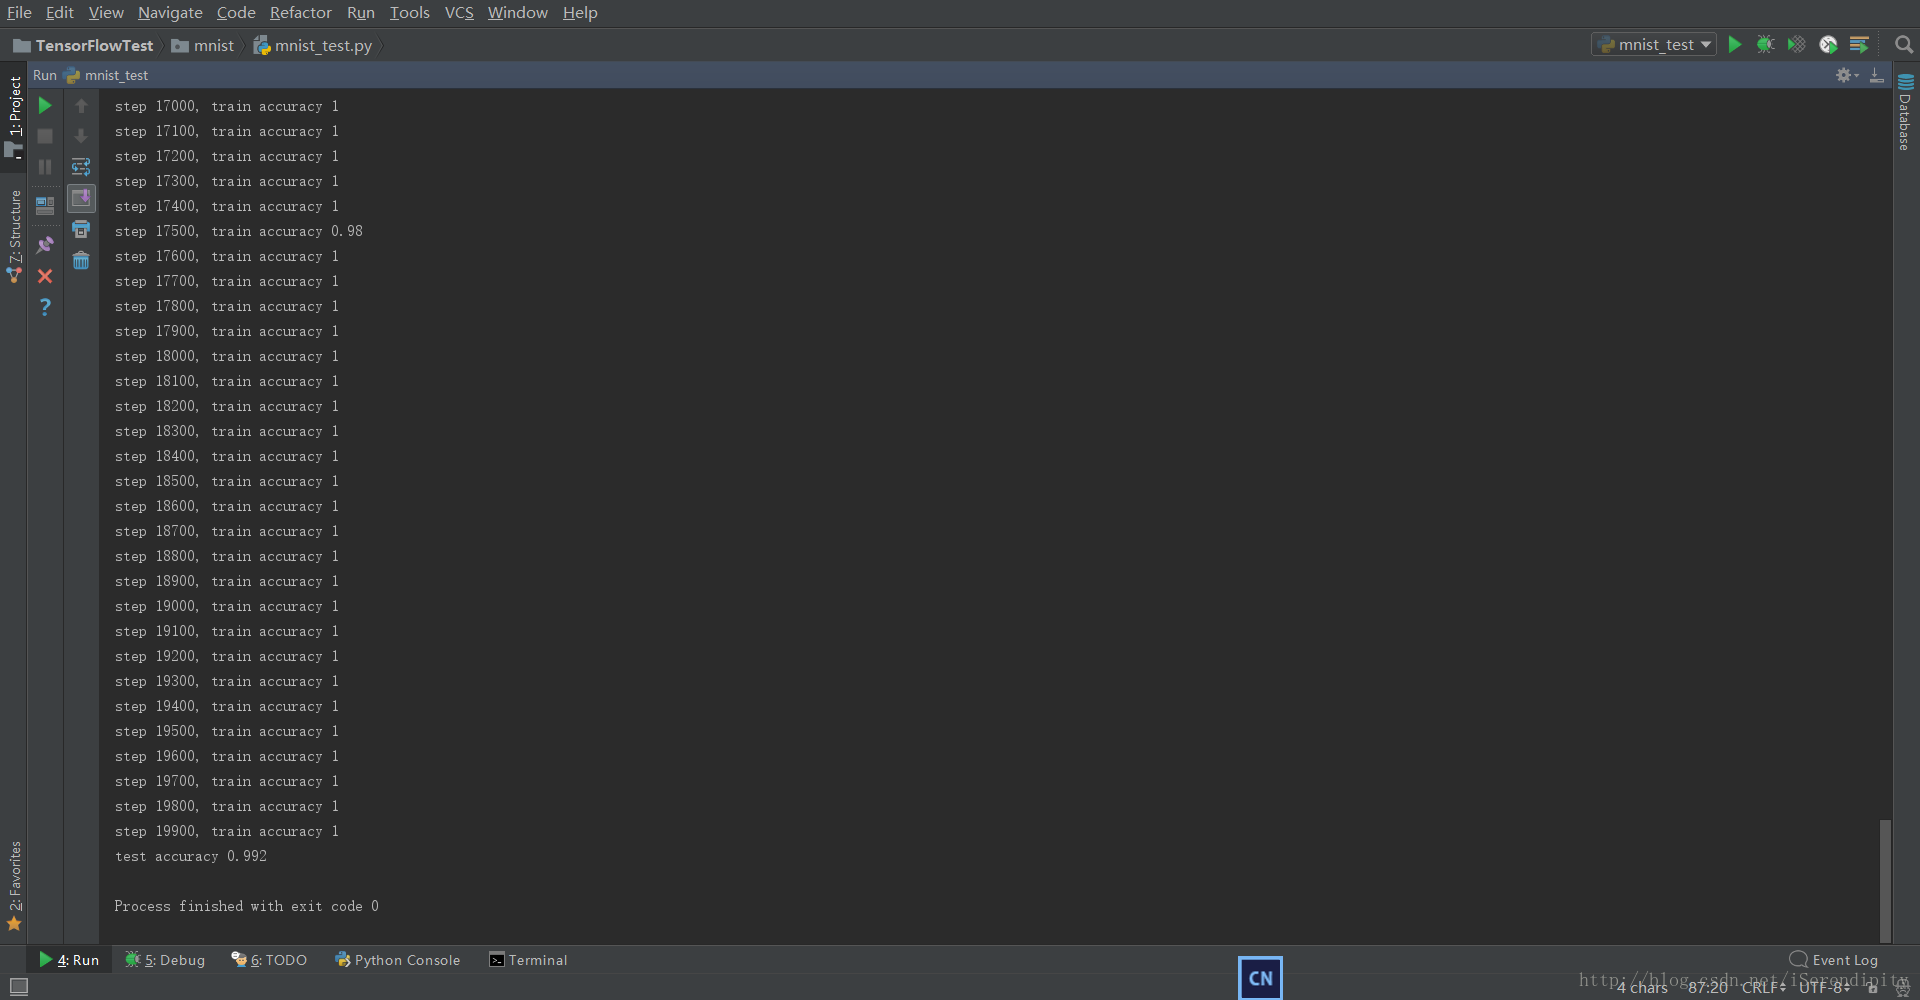
print("step %d, train accuracy %g" % (i, train_accuracy))
train_step.run(feed_dict={x: batch[0], y_: batch[1], keep_prob: 0.5})
# 显存不足错误
# print("test accuracy %g" % accuracy.eval(feed_dict={x: mnist.test.images, y_: mnist.test.labels, keep_prob: 1.0}))
a = 10
b = 50
sum = 0
for i in range(a):
testSet = mnist.test.next_batch(b)
c = accuracy.eval(feed_dict={x: testSet[0], y_: testSet[1], keep_prob: 1.0})
sum += c * b
#print("test accuracy %g" % c)
print("test accuracy %g" % (sum / (b * a)))
测试结果大约是99.2%。
倒数几行是为了解决下面一个显存不足的问题,测试集一次全部载入显存不足,用分多次载入统计解决。
参考了tensorflow-deep-mnist-resource-exhausted-oom-when-allocating-tensor-with-shape
I c:\tf_jenkins\home\workspace\release-win\device\gpu\os\windows\tensorflow\core\common_runtime\bfc_allocator.cc:700] Sum Total of in-use chunks: 1.45GiB
I c:\tf_jenkins\home\workspace\release-win\device\gpu\os\windows\tensorflow\core\common_runtime\bfc_allocator.cc:702] Stats:
Limit:                  1566221926
InUse:                  1553462016
MaxInUse:               1553862144
NumAllocs:                   21141
MaxAllocSize:           1508639488

W c:\tf_jenkins\home\workspace\release-win\device\gpu\os\windows\tensorflow\core\common_runtime\bfc_allocator.cc:274] ********************************************************************xxxxxxxxxxxxxxxxxxxxxxxxxxxxxxxx
W c:\tf_jenkins\home\workspace\release-win\device\gpu\os\windows\tensorflow\core\common_runtime\bfc_allocator.cc:275] Ran out of memory trying to allocate 957.03MiB.  See logs for memory state.
W c:\tf_jenkins\home\workspace\release-win\device\gpu\os\windows\tensorflow\core\framework\op_kernel.cc:993] Resource exhausted: OOM when allocating tensor with shape[10000,32,28,28]
参考:
http://wiki.jikexueyuan.com/project/tensorflow-zh/tutorials/mnist_pros.html


 4438
4438


 被折叠的 条评论
为什么被折叠?
被折叠的 条评论
为什么被折叠?
 到【灌水乐园】发言


