


最近看了看高德地图的开发平台以及它们的API,奇怪的是一直没找到语音API,这个问题放到以后再说吧。
对于高德地图的开发平台,它们提供的说明文档还算健全,而且由于API是国人开发的,所以所有接口都有中文的接口说明,很是容易理解。只不过,在加载它们的第三方库时,总是一个功能一个功能的加载,没有像百度那样,一下子都给了出来(开始我以为我的cocoapods坏了.......)。
高德开放平台:http://lbs.amap.com/
做了一个简单的demo,包括地图展示,定位和虚拟导航,具体代码如下:
首先在AppDelegate里配置了高德开发这的钥匙:
- (BOOL)application:(UIApplication *)application didFinishLaunchingWithOptions:(NSDictionary *)launchOptions {

    [AMapServices sharedServices].apiKey = @"93c5496bf2b16137226af9170498045b";//这个钥匙key需要去高德开放平台去申请

    return YES;
}
然后在rootviewcontroller的view里边,我添加了两个图层View,一个是地图展示View,另一个是虚拟导航View
//
//  ViewController.m
//  FairyFishMap
//
//  Created by jinhui005 on 16/9/19.
//  Copyright © 2016年 yhl. All rights reserved.
//

#import "ViewController.h"
#import <MAMapKit/MAMapKit.h>
#import <UIKit/UIKit.h>
#import <AMapFoundationKit/AMapFoundationKit.h>
#import <AMapLocationKit/AMapLocationKit.h>
#import <AMapNaviKit/AMapNaviKit.h>

@interface ViewController () <MAMapViewDelegate, AMapLocationManagerDelegate, AMapNaviDriveManagerDelegate, AMapNaviDriveViewDelegate>

@property (nonatomic, strong) MAMapView *mapView;
@property (nonatomic, strong) AMapLocationManager *locationManager;
@property (nonatomic, strong) UIButton *btn;
@property (nonatomic, strong) AMapNaviDriveManager *driveManager;
@property (nonatomic, strong) AMapNaviDriveView *driveView;
@property (nonatomic, strong) AMapNaviPoint *startPoint;
@property (nonatomic, strong) AMapNaviPoint *endPoint;

@end

@implementation ViewController

- (void)viewDidLoad {
    [super viewDidLoad];

    self.mapView = [[MAMapView alloc] initWithFrame:self.view.frame];
    self.mapView.delegate = self;
    self.mapView.showsUserLocation = YES;
    self.mapView.userTrackingMode = MAUserTrackingModeFollow;
    [self.view addSubview:self.mapView];

    self.locationManager = [[AMapLocationManager alloc] init];
    self.locationManager.delegate = self;
    [self.locationManager startUpdatingLocation];

    [self.locationManager setDesiredAccuracy:kCLLocationAccuracyHundredMeters];    // 带逆地理信息的一次定位(返回坐标和地址信息)
    self.locationManager.locationTimeout =2;    //   定位超时时间,最低2s,此处设置为2s
    self.locationManager.reGeocodeTimeout = 2;    //   逆地理请求超时时间,最低2s,此处设置为2s

    self.btn = [[UIButton alloc] init];
    self.btn.frame = CGRectMake(20, 50, 90, 40);
    [self.btn setTitle:@"导航" forState:UIControlStateNormal];
    [self.btn setTitleColor:[UIColor blueColor] forState:UIControlStateNormal];
    [self.btn addTarget:self action:@selector(beginRouting) forControlEvents:UIControlEventTouchUpInside];
    [self.view addSubview:self.btn];

//    [self showMap];
//    [self controlEx];
}

- (void)viewDidAppear:(BOOL)animated {
    [super viewDidAppear:animated];

//    [self clipOneAnnnotation];
}

- (void)didReceiveMemoryWarning {
    [super didReceiveMemoryWarning];
    // Dispose of any resources that can be recreated.
}

- (void)showMap {
    self.mapView.showTraffic = NO;
    self.mapView.mapType = MAMapTypeStandard;

}

- (void)controlEx {
    self.mapView.logoCenter = CGPointMake(50, 450);

    self.mapView.showsCompass = NO;
    self.mapView.compassOrigin = CGPointMake(self.mapView.compassOrigin.x, 22);

    self.mapView.showsScale = NO;
    self.mapView.scaleOrigin = CGPointMake(self.mapView.compassOrigin.x, 22);
}

- (void)clipOneAnnnotation {
    MAPointAnnotation *pointAnnotation = [[MAPointAnnotation alloc] init];
    pointAnnotation.coordinate = CLLocationCoordinate2DMake(39.989631, 116.481018);
    pointAnnotation.title = @"方恒国际";
    pointAnnotation.subtitle = @"阜通东大街6号";

    [self.mapView addAnnotation:pointAnnotation];
}

- (void)beginRouting {
    self.startPoint = [AMapNaviPoint locationWithLatitude:39.993135 longitude:116.474175];
    self.endPoint   = [AMapNaviPoint locationWithLatitude:39.908791 longitude:116.321257];

    self.driveManager = [[AMapNaviDriveManager alloc] init];
    self.driveManager.delegate = self;

    self.driveView = [[AMapNaviDriveView alloc] init];
    self.driveView.frame = self.view.frame;
    self.driveView.delegate = self;
    [self.view addSubview:self.driveView];

    [self.driveManager addDataRepresentative:self.driveView];

    [self.driveManager calculateDriveRouteWithStartPoints:@[self.startPoint] endPoints:@[self.endPoint] wayPoints:nil drivingStrategy:AMapNaviDrivingStrategyDefault];
}


#pragma mark - MAMapViewDelegate
- (MAAnnotationView *)mapView:(MAMapView *)mapView viewForAnnotation:(id <MAAnnotation>)annotation
{
    if ([annotation isKindOfClass:[MAPointAnnotation class]])
    {
        static NSString *pointReuseIndentifier = @"pointReuseIndentifier";
        MAPinAnnotationView*annotationView = (MAPinAnnotationView*)[mapView dequeueReusableAnnotationViewWithIdentifier:pointReuseIndentifier];
        if (annotationView == nil)
        {
            annotationView = [[MAPinAnnotationView alloc] initWithAnnotation:annotation reuseIdentifier:pointReuseIndentifier];
        }
        annotationView.canShowCallout= YES;       //设置气泡可以弹出,默认为NO
        annotationView.animatesDrop = YES;        //设置标注动画显示,默认为NO
        annotationView.draggable = YES;        //设置标注可以拖动,默认为NO
        annotationView.pinColor = MAPinAnnotationColorPurple;
        return annotationView;
    }
    return nil;
}

- (void)mapView:(MAMapView *)mapView didUpdateUserLocation:(MAUserLocation *)userLocation updatingLocation:(BOOL)updatingLocation {

}

#pragma mark - AMapLocationManagerDelegate
- (void)amapLocationManager:(AMapLocationManager *)manager didUpdateLocation:(CLLocation *)location {

}

#pragma mark - AMapNaviDriveManagerDelegate
- (void)driveManagerOnCalculateRouteSuccess:(AMapNaviDriveManager *)driveManager {
    [driveManager startEmulatorNavi];//开始模拟导航
}

#pragma mark - AMapNaviDriveViewDelegate

@end
我在最后没有做导航完毕的回调相应,只是想粗略的看一看高德的API。
其实高德的API都很好理解,就比如下边的行车导航管理器的代理方法:
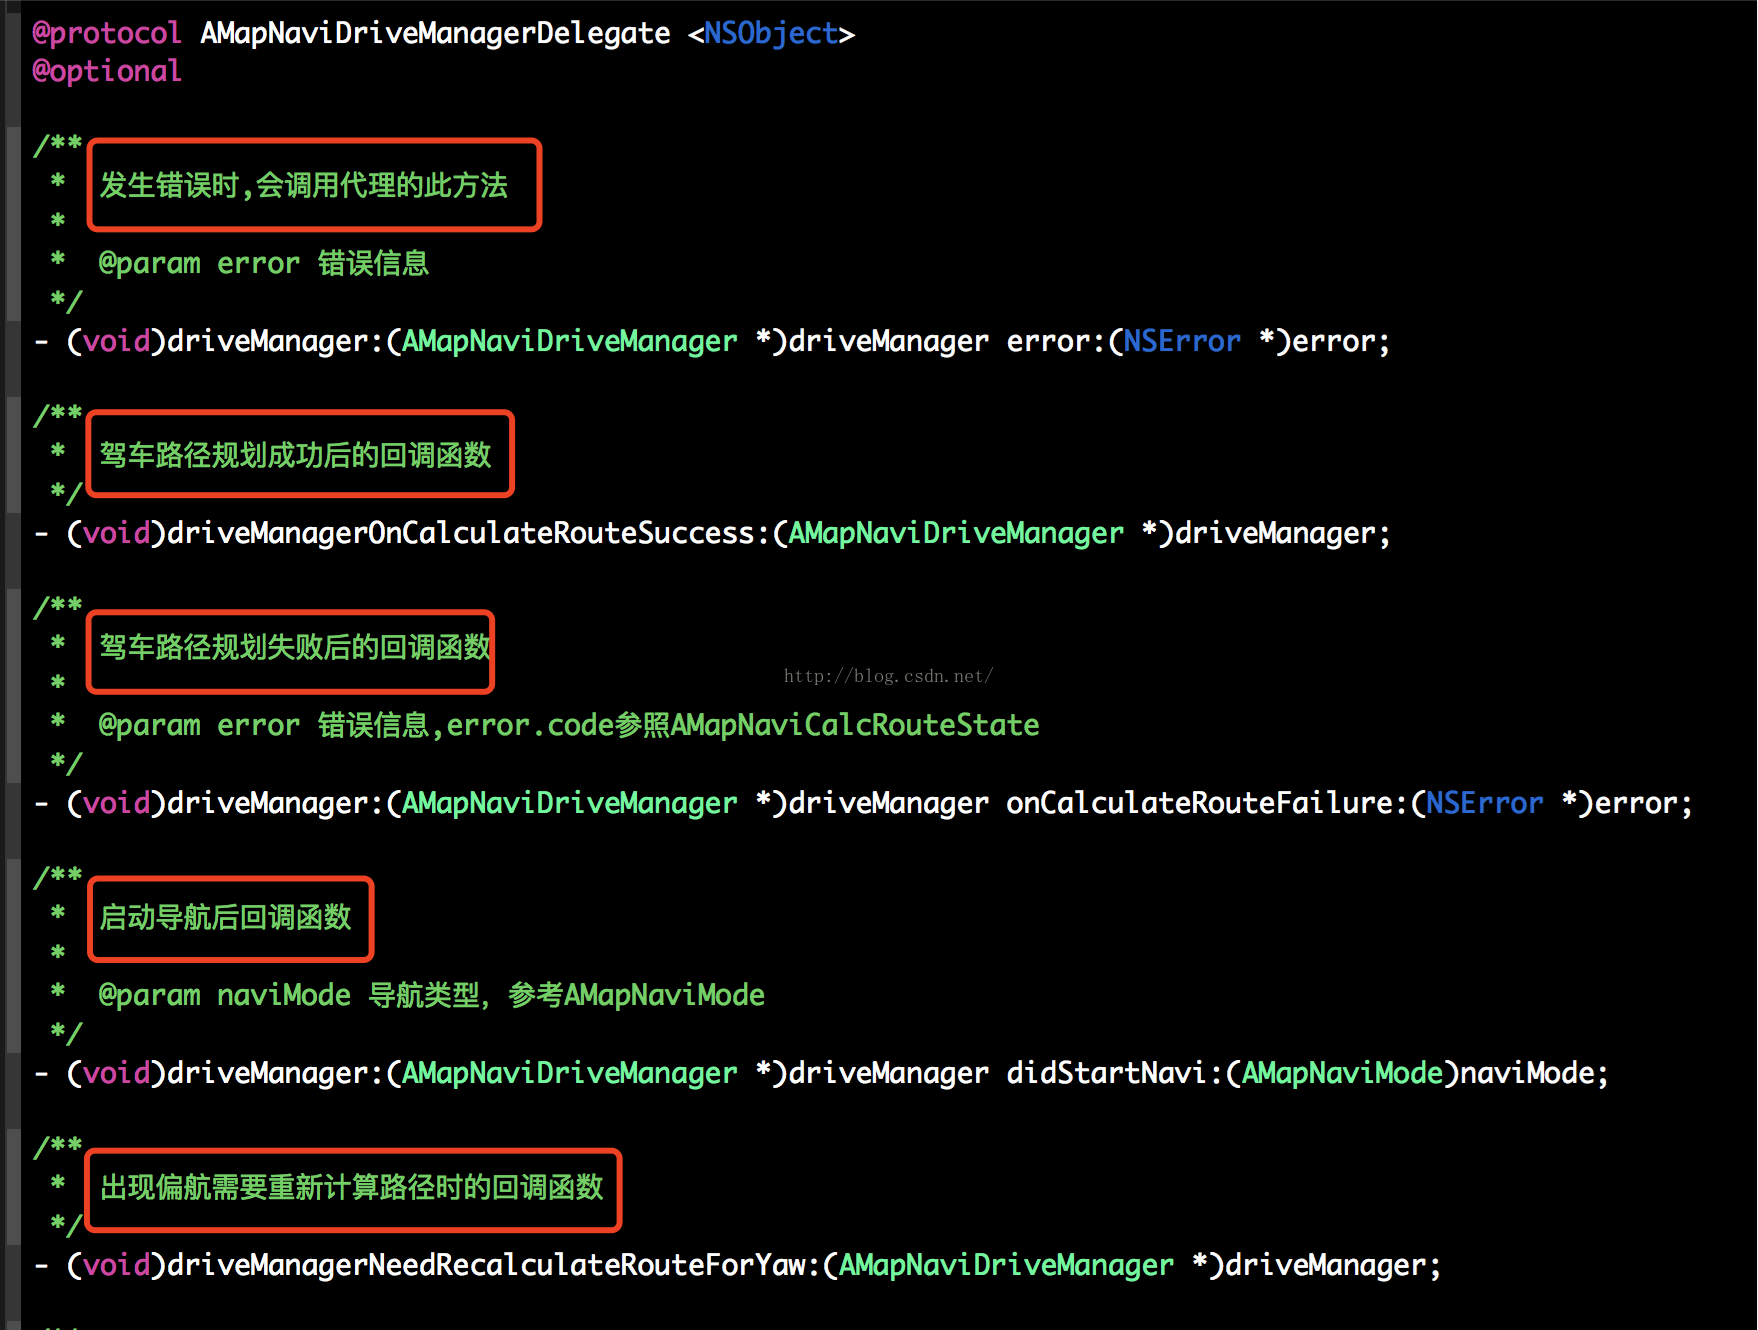
每一个回调方法都说明的特别清楚。
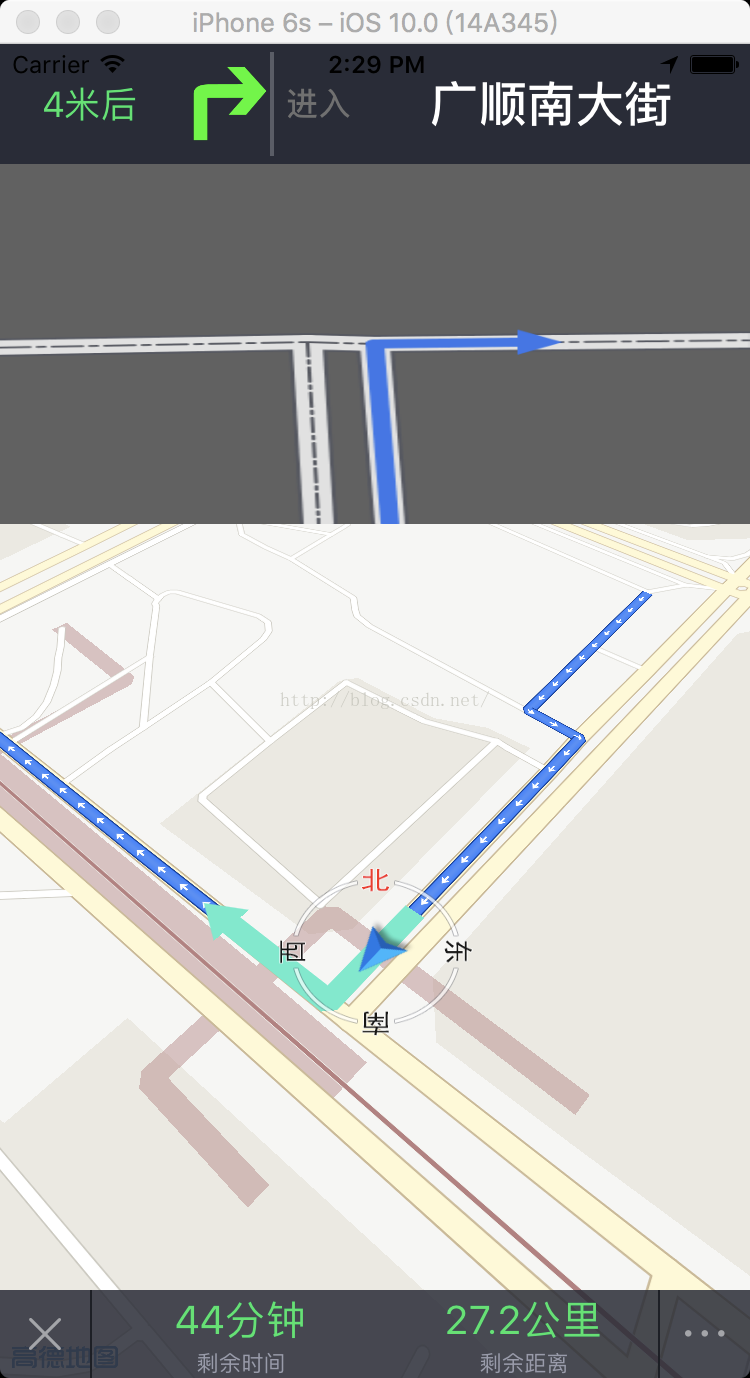
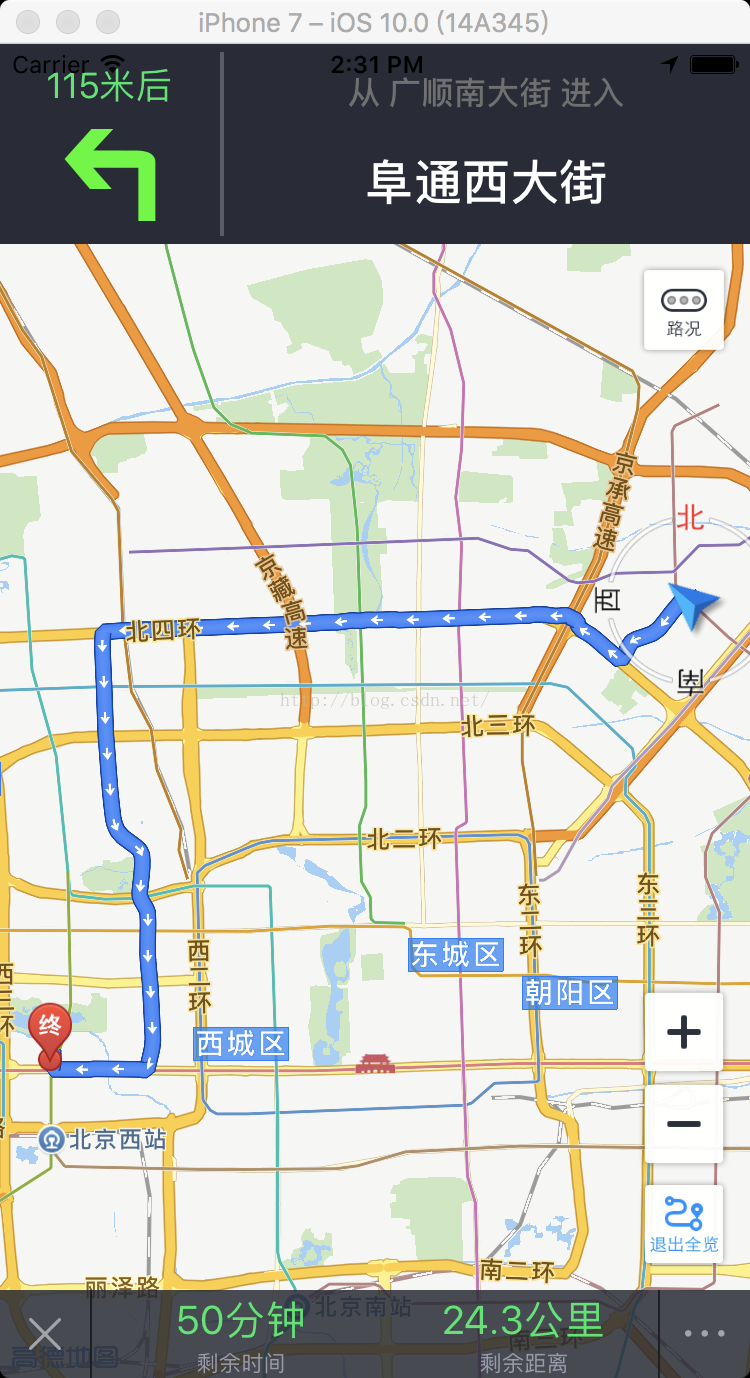
附上两张虚拟导航的截图:
最后附带一个Podfile文件(包括地图的展示/定位/导航 API):
target 'FairyFishMap' do

pod 'AMap3DMap'
pod 'AMapLocation'
pod 'AMapNavi'

end


 3446
3446

 被折叠的 条评论
为什么被折叠?
被折叠的 条评论
为什么被折叠?
 到【灌水乐园】发言


