


回顾
在《 Android界面生成流程:View的测量(Measure)》说到View的测量流程,每个ViewGroup遍历所有的子View,View自己去测量自己的实际大小,然后View自己保存自己的大小信息,当然在View测量之前ViewGroup会传递一些信息给它们:
父布局的尺寸
父布局对子View的限制类型:
UNSPECIFIED:不限定,想要多大就多大
EXACTLY:精确的,就用我给的尺寸
AT_MOST:最多的,刚好更包裹你自己的就好,但是不能超过我给的尺寸
布局流程一
ViewGroup的布局流程
三大流程始于ViewRootImpl#performTraversals方法,在该方法内通过调用performMeasure、performLayout、performDraw这三个方法来进行measure、layout、draw流程,那么我们就从performLayout方法开始说,我们先看它的源码:
private void performLayout(WindowManager.LayoutParams lp, int desiredWindowWidth,
        int desiredWindowHeight) {
    mLayoutRequested = false;
    mScrollMayChange = true;
    mInLayout = true;

    final View host = mView;
    if (DEBUG_ORIENTATION || DEBUG_LAYOUT) {
        Log.v(TAG, "Laying out " + host + " to (" +
                host.getMeasuredWidth() + ", " + host.getMeasuredHeight() + ")");
    }

    Trace.traceBegin(Trace.TRACE_TAG_VIEW, "layout");
    try {
        host.layout(0, 0, host.getMeasuredWidth(), host.getMeasuredHeight()); // 1

        //省略...
    } finally {
        Trace.traceEnd(Trace.TRACE_TAG_VIEW);
    }
    mInLayout = false;
}
由上面的代码可以看出,直接调用了①号的host.layout方法,host也就是DecorView,那么对于DecorView来说,调用layout方法,就是对它自身进行布局,注意到传递的参数分别是0,0,host.getMeasuredWidth,host.getMeasuredHeight,它们分别代表了一个View的上下左右四个位置,显然,DecorView的左上位置为0,然后宽高为它的测量宽高。由于View的layout方法是final类型,子类不能重写,因此我们直接看View#layout方法即可:
public void layout(int l, int t, int r, int b) {
    if ((mPrivateFlags3 & PFLAG3_MEASURE_NEEDED_BEFORE_LAYOUT) != 0) {
        onMeasure(mOldWidthMeasureSpec, mOldHeightMeasureSpec);
        mPrivateFlags3 &= ~PFLAG3_MEASURE_NEEDED_BEFORE_LAYOUT;
    }

    int oldL = mLeft;
    int oldT = mTop;
    int oldB = mBottom;
    int oldR = mRight;

    boolean changed = isLayoutModeOptical(mParent) ?
            setOpticalFrame(l, t, r, b) : setFrame(l, t, r, b); // 1

    if (changed || (mPrivateFlags & PFLAG_LAYOUT_REQUIRED) == PFLAG_LAYOUT_REQUIRED) {
        onLayout(changed, l, t, r, b);             // 2
        mPrivateFlags &= ~PFLAG_LAYOUT_REQUIRED;

        ListenerInfo li = mListenerInfo;
        if (li != null && li.mOnLayoutChangeListeners != null) {
            ArrayList<OnLayoutChangeListener> listenersCopy =
                    (ArrayList<OnLayoutChangeListener>)li.mOnLayoutChangeListeners.clone();
            int numListeners = listenersCopy.size();
            for (int i = 0; i < numListeners; ++i) {
                listenersCopy.get(i).onLayoutChange(this, l, t, r, b, oldL, oldT, oldR, oldB);
            }
        }
    }

    mPrivateFlags &= ~PFLAG_FORCE_LAYOUT;
    mPrivateFlags3 |= PFLAG3_IS_LAID_OUT;
}
首先看①号代码,调用了setFrame方法,并把四个位置信息传递进去,这个方法用于确定View的四个顶点的位置,即初始化mLeft,mRight,mTop,mBottom这四个值,当初始化完毕后,ViewGroup的布局流程也就完成了
那么,我们先看View#setFrame方法:
protected boolean setFrame(int left, int top, int right, int bottom) {
    //省略...

    mLeft = left;
    mTop = top;
    mRight = right;
    mBottom = bottom;
    mRenderNode.setLeftTopRightBottom(mLeft, mTop, mRight, mBottom);

    //省略...
    return changed;
}
可以看出,它对mLeft、mTop、mRight、mBottom这四个值进行了初始化,对于每一个View,包括ViewGroup来说,以上四个值保存了Viwe的位置信息,所以这四个值是最终宽高,也即是说,如果要得到View的位置信息,那么就应该在layout方法完成后调用getLeft()、getTop()等方法来取得最终宽高,如果是在此之前调用相应的方法,只能得到0的结果,所以一般我们是在onLayout方法中获取View的宽高信息。
在设置ViewGroup自身的位置完成后,我们看到会接着调用②号方法,即onLayout()方法,该方法在ViewGroup中调用,用于确定子View的位置,即在该方法内部,子View会调用自身的layout方法来进一步完成自身的布局流程。由于不同的布局容器的onMeasure方法均有不同的实现,因此不可能对所有布局方式都说一次,另外上一篇文章是用FrameLayout#onMeasure进行讲解的,那么现在也对FrameLayout#onLayout方法进行讲解:
@Override
protected void onLayout(boolean changed, int left, int top, int right, int bottom) {

    //把父容器的位置参数传递进去
    layoutChildren(left, top, right, bottom, false /* no force left gravity */);
}

void layoutChildren(int left, int top, int right, int bottom,
                                  boolean forceLeftGravity) {
    final int count = getChildCount();

    //以下四个值会影响到子View的布局参数
    //parentLeft由父容器的padding和Foreground决定
    final int parentLeft = getPaddingLeftWithForeground();
    //parentRight由父容器的width和padding和Foreground决定
    final int parentRight = right - left - getPaddingRightWithForeground();

    final int parentTop = getPaddingTopWithForeground();
    final int parentBottom = bottom - top - getPaddingBottomWithForeground();

    for (int i = 0; i < count; i++) {
        final View child = getChildAt(i);
        if (child.getVisibility() != GONE) {
            final LayoutParams lp = (LayoutParams) child.getLayoutParams();

            //获取子View的测量宽高
            final int width = child.getMeasuredWidth();
            final int height = child.getMeasuredHeight();

            int childLeft;
            int childTop;

            int gravity = lp.gravity;
            if (gravity == -1) {
                gravity = DEFAULT_CHILD_GRAVITY;
            }

            final int layoutDirection = getLayoutDirection();
            final int absoluteGravity = Gravity.getAbsoluteGravity(gravity, layoutDirection);
            final int verticalGravity = gravity & Gravity.VERTICAL_GRAVITY_MASK;

            //当子View设置了水平方向的layout_gravity属性时,根据不同的属性设置不同的childLeft
            //childLeft表示子View的 左上角坐标X值
            switch (absoluteGravity & Gravity.HORIZONTAL_GRAVITY_MASK) {

                /* 水平居中,由于子View要在水平中间的位置显示,因此,要先计算出以下:
                 * (parentRight - parentLeft -width)/2 此时得出的是父容器减去子View宽度后的
                 * 剩余空间的一半,那么再加上parentLeft后,就是子View初始左上角横坐标(此时正好位于中间位置),
                 * 假如子View还受到margin约束,由于leftMargin使子View右偏而rightMargin使子View左偏,所以最后
                 * 是 +leftMargin -rightMargin .
                 */
                case Gravity.CENTER_HORIZONTAL:
                    childLeft = parentLeft + (parentRight - parentLeft - width) / 2 +
                    lp.leftMargin - lp.rightMargin;
                    break;

                //水平居右,子View左上角横坐标等于 parentRight 减去子View的测量宽度 减去 margin
                case Gravity.RIGHT:
                    if (!forceLeftGravity) {
                        childLeft = parentRight - width - lp.rightMargin;
                        break;
                    }

                //如果没设置水平方向的layout_gravity,那么它默认是水平居左
                //水平居左,子View的左上角横坐标等于 parentLeft 加上子View的magin值
                case Gravity.LEFT:
                default:
                    childLeft = parentLeft + lp.leftMargin;
            }

            //当子View设置了竖直方向的layout_gravity时,根据不同的属性设置同的childTop
            //childTop表示子View的 左上角坐标的Y值
            //分析方法同上
            switch (verticalGravity) {
                case Gravity.TOP:
                    childTop = parentTop + lp.topMargin;
                    break;
                case Gravity.CENTER_VERTICAL:
                    childTop = parentTop + (parentBottom - parentTop - height) / 2 +
                    lp.topMargin - lp.bottomMargin;
                    break;
                case Gravity.BOTTOM:
                    childTop = parentBottom - height - lp.bottomMargin;
                    break;
                default:
                    childTop = parentTop + lp.topMargin;
            }

            //对子元素进行布局,左上角坐标为(childLeft,childTop),右下角坐标为(childLeft+width,childTop+height)
            child.layout(childLeft, childTop, childLeft + width, childTop + height);
        }
    }
}
由源码看出,onLayout方法内部直接调用了layoutChildren方法,而layoutChildren则是具体的实现。
先梳理一下以上逻辑:首先先获取父容器的padding值,然后遍历其每一个子View,根据子View的layout_gravity属性、子View的测量宽高、父容器的padding值、来确定子View的布局参数,然后调用child.layout方法,把布局流程从父容器传递到子元素。
那么,现在就分析完了ViewGroup的布局流程,那么我们接着分析子元素的布局流程。
子View的布局流程
子View的布局流程也很简单,如果子View是一个ViewGroup,那么就会重复以上步骤,如果是一个View,那么会直接调用View#layout方法,根据以上分析,在该方法内部会设置view的四个布局参数,接着调用onLayout方法,我们看看View#onLayout方法:
protected void onLayout(boolean changed, int left, int top, int right, int bottom) {
}
这是一个空实现,主要作用是在我们的自定义View中重写该方法,实现自定义的布局逻辑。
那么到目前为止,View的布局流程就已经全部分析完了。可以看出,布局流程的逻辑相比测量流程来说,简单许多,获取一个View的测量宽高是比较复杂的,而布局流程则是根据已经获得的测量宽高进而确定一个View的四个位置参数。在下一篇文章,将会讲述最后一个流程:绘制流程。希望这篇文章给大家对View的工作流程的理解带来帮助,谢谢阅读。
布局流程二
onLayout()
measure过程结束后,视图的大小就已经测量好了,接下来就是layout的过程了。正如其名字所描述的一样,这个方法是用于给视图进行布局的,也就是确定视图的位置。ViewRoot的performTraversals()方法会在measure结束后继续执行,并调用View的layout()方法来执行此过程,如下所示:
host.layout(0, 0, host.mMeasuredWidth, host.mMeasuredHeight); layout()方法接收四个参数,分别代表着左、上、右、下的坐标,当然这个坐标是相对于当前视图的父视图而言的。可以看到,这里还把刚才测量出的宽度和高度传到了layout()方法中。那么我们来看下layout()方法中的代码是什么样的吧,如下所示:
public void layout(int l, int t, int r, int b) {
    int oldL = mLeft;
    int oldT = mTop;
    int oldB = mBottom;
    int oldR = mRight;
    boolean changed = setFrame(l, t, r, b);
    if (changed || (mPrivateFlags & LAYOUT_REQUIRED) == LAYOUT_REQUIRED) {
        if (ViewDebug.TRACE_HIERARCHY) {
            ViewDebug.trace(this, ViewDebug.HierarchyTraceType.ON_LAYOUT);
        }
        onLayout(changed, l, t, r, b);
        mPrivateFlags &= ~LAYOUT_REQUIRED;
        if (mOnLayoutChangeListeners != null) {
            ArrayList<OnLayoutChangeListener> listenersCopy =
                    (ArrayList<OnLayoutChangeListener>) mOnLayoutChangeListeners.clone();
            int numListeners = listenersCopy.size();
            for (int i = 0; i < numListeners; ++i) {
                listenersCopy.get(i).onLayoutChange(this, l, t, r, b, oldL, oldT, oldR, oldB);
            }
        }
    }
    mPrivateFlags &= ~FORCE_LAYOUT;
}
在layout()方法中,首先会调用setFrame()方法来判断视图的大小是否发生过变化,以确定有没有必要对当前的视图进行重绘,同时还会在这里把传递过来的四个参数分别赋值给mLeft、mTop、mRight和mBottom这几个变量。接下来会在第11行调用onLayout()方法,正如onMeasure()方法中的默认行为一样,也许你已经迫不及待地想知道onLayout()方法中的默认行为是什么样的了。进入onLayout()方法,咦?怎么这是个空方法,一行代码都没有?!
没错,View中的onLayout()方法就是一个空方法,因为onLayout()过程是为了确定视图在布局中所在的位置,而这个操作应该是由布局来完成的,即父视图决定子视图的显示位置。既然如此,我们来看下ViewGroup中的onLayout()方法是怎么写的吧,代码如下:
@Override
protected abstract void onLayout(boolean changed, int l, int t, int r, int b);
可以看到,ViewGroup中的onLayout()方法竟然是一个抽象方法,这就意味着所有ViewGroup的子类都必须重写这个方法。没错,像LinearLayout、RelativeLayout等布局,都是重写了这个方法,然后在内部按照各自的规则对子视图进行布局的。由于LinearLayout和RelativeLayout的布局规则都比较复杂,就不单独拿出来进行分析了,这里我们尝试自定义一个布局,借此来更深刻地理解onLayout()的过程。
自定义的这个布局目标很简单,只要能够包含一个子视图,并且让子视图正常显示出来就可以了。那么就给这个布局起名叫做SimpleLayout吧,代码如下所示:
public class SimpleLayout extends ViewGroup {

    public SimpleLayout(Context context, AttributeSet attrs) {
        super(context, attrs);
    }

    @Override
    protected void onMeasure(int widthMeasureSpec, int heightMeasureSpec) {
        super.onMeasure(widthMeasureSpec, heightMeasureSpec);
        if (getChildCount() > 0) {
            View childView = getChildAt(0);
            measureChild(childView, widthMeasureSpec, heightMeasureSpec);
        }
    }

    @Override
    protected void onLayout(boolean changed, int l, int t, int r, int b) {
        if (getChildCount() > 0) {
            View childView = getChildAt(0);
            childView.layout(0, 0, childView.getMeasuredWidth(), childView.getMeasuredHeight());
        }
    }

}
代码非常的简单,我们来看下具体的逻辑吧。你已经知道,onMeasure()方法会在onLayout()方法之前调用,因此这里在onMeasure()方法中判断SimpleLayout中是否有包含一个子视图,如果有的话就调用measureChild()方法来测量出子视图的大小。
接着在onLayout()方法中同样判断SimpleLayout是否有包含一个子视图,然后调用这个子视图的layout()方法来确定它在SimpleLayout布局中的位置,这里传入的四个参数依次是0、0、childView.getMeasuredWidth()和childView.getMeasuredHeight(),分别代表着子视图在SimpleLayout中左上右下四个点的坐标。其中,调用childView.getMeasuredWidth()和childView.getMeasuredHeight()方法得到的值就是在onMeasure()方法中测量出的宽和高。
这样就已经把SimpleLayout这个布局定义好了,下面就是在XML文件中使用它了,如下所示:
<com.example.viewtest.SimpleLayout xmlns:android="http://schemas.android.com/apk/res/android"
    android:layout_width="match_parent"
    android:layout_height="match_parent" >

    <ImageView
        android:layout_width="wrap_content"
        android:layout_height="wrap_content"
        android:src="@drawable/ic_launcher"
        />

</com.example.viewtest.SimpleLayout>
可以看到,我们能够像使用普通的布局文件一样使用SimpleLayout,只是注意它只能包含一个子视图,多余的子视图会被舍弃掉。这里SimpleLayout中包含了一个ImageView,并且ImageView的宽高都是wrap_content。现在运行一下程序,结果如下图
所示:
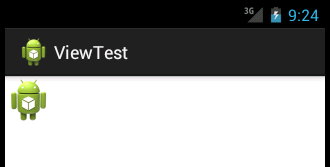
OK!ImageView成功已经显示出来了,并且显示的位置也正是我们所期望的。如果你想改变ImageView显示的位置,只需要改变childView.layout()方法的四个参数就行了。
在onLayout()过程结束后,我们就可以调用getWidth()方法和getHeight()方法来获取视图的宽高了。说到这里,我相信很多朋友长久以来都会有一个疑问,getWidth()方法和getMeasureWidth()方法到底有什么区别呢?它们的值好像永远都是相同的。其实它们的值之所以会相同基本都是因为布局设计者的编码习惯非常好,实际上它们之间的差别还是挺大的。
首先getMeasureWidth()方法在measure()过程结束后就可以获取到了,而getWidth()方法要在layout()过程结束后才能获取到。另外,getMeasureWidth()方法中的值是通过setMeasuredDimension()方法来进行设置的,而getWidth()方法中的值则是通过视图右边的坐标减去左边的坐标计算出来的。
观察SimpleLayout中onLayout()方法的代码,这里给子视图的layout()方法传入的四个参数分别是0、0、childView.getMeasuredWidth()和childView.getMeasuredHeight(),因此getWidth()方法得到的值就是childView.getMeasuredWidth() - 0 = childView.getMeasuredWidth() ,所以此时getWidth()方法和getMeasuredWidth() 得到的值就是相同的,但如果你将onLayout()方法中的代码进行如下修改:
@Override
protected void onLayout(boolean changed, int l, int t, int r, int b) {
    if (getChildCount() > 0) {
        View childView = getChildAt(0);
        childView.layout(0, 0, 200, 200);
    }
}
这样getWidth()方法得到的值就是200 - 0 = 200,不会再和getMeasuredWidth()的值相同了。当然这种做法充分不尊重measure()过程计算出的结果,通常情况下是不推荐这么写的。getHeight()与getMeasureHeight()方法之间的关系同上,就不再重复分析了。
到此为止,我们把视图绘制流程的第二阶段也分析完了。
布局流程三
mView.measure(childWidthMeasureSpec, childHeightMeasureSpec);
......
mView.layout(0, 0, mView.getMeasuredWidth(), mView.getMeasuredHeight());
performTraversals 方法执行完mView.measure 计算出mMeasuredXXX后就开始执行layout 函数来确定View具体放在哪个位置,我们计算出来的View目前只知道view矩阵的大小,具体这个矩阵放在哪里,这就是layout 的工作了。layout的主要作用 :根据子视图的大小以及布局参数将View树放到合适的位置上。
既然是通过mView.layout(0, 0, mView.getMeasuredWidth(), mView.getMeasuredHeight()); 那我们来看下layout 函数做了什么,mView肯定是个ViewGroup,不会是View,我们直接看下ViewGroup 的layout函数
public final void layout(int l, int t, int r, int b) {
   if (!mSuppressLayout && (mTransition == null || !mTransition.isChangingLayout())) {
    if (mTransition != null) {
       mTransition.layoutChange(this);
    }
    super.layout(l, t, r, b);
    } else {
    // record the fact that we noop'd it; request layout when transition finishes
      mLayoutCalledWhileSuppressed = true;
   }
}
代码可以看个大概,LayoutTransition是用于处理ViewGroup增加和删除子视图的动画效果,也就是说如果当前ViewGroup未添加LayoutTransition动画,或者LayoutTransition动画此刻并未运行,那么调用super.layout(l, t, r, b),继而调用到ViewGroup中的onLayout,否则将mLayoutSuppressed设置为true,等待动画完成时再调用requestLayout()。
这个函数是final 不能重写,所以ViewGroup的子类都会调用这个函数,layout 的具体实现是在super.layout(l, t, r, b)里面做的,那么我接下来看一下View类的layout函数
 public final void layout(int l, int t, int r, int b) {
       .....
      //设置View位于父视图的坐标轴
       boolean changed = setFrame(l, t, r, b);
       //判断View的位置是否发生过变化,看有必要进行重新layout吗
       if (changed || (mPrivateFlags & LAYOUT_REQUIRED) == LAYOUT_REQUIRED) {
           if (ViewDebug.TRACE_HIERARCHY) {
               ViewDebug.trace(this, ViewDebug.HierarchyTraceType.ON_LAYOUT);
           }
           //调用onLayout(changed, l, t, r, b); 函数
           onLayout(changed, l, t, r, b);
           mPrivateFlags &= ~LAYOUT_REQUIRED;
       }
       mPrivateFlags &= ~FORCE_LAYOUT;
       .....
   }
1、setFrame(l, t, r, b) 可以理解为给mLeft 、mTop、mRight、mBottom赋值,然后基本就能确定View自己在父视图的位置了,这几个值构成的矩形区域就是该View显示的位置,这里的具体位置都是相对与父视图的位置。
2、回调onLayout,对于View来说,onLayout只是一个空实现,一般情况下我们也不需要重载该函数,:
protected void onLayout(boolean changed, int left, int top, int right, int bottom) {

    }
对于ViewGroup 来说,唯一的差别就是ViewGroup中多了关键字abstract的修饰,要求其子类必须重载onLayout函数。
@Override
protected abstract void onLayout(boolean changed,
        int l, int t, int r, int b);
而重载onLayout的目的就是安排其children在父视图的具体位置,那么如何安排子View的具体位置呢?
 int childCount = getChildCount() ;
  for(int i=0 ;i<childCount ;i++){
       View child = getChildAt(i) ;
       //整个layout()过程就是个递归过程
       child.layout(l, t, r, b) ;
    }
代码很简单,就是遍历自己的孩子,然后调用 child.layout(l, t, r, b) ,给子view 通过setFrame(l, t, r, b) 确定位置,而重点是(l, t, r, b) 怎么计算出来的呢。还记得我们之前测量过程,测量出来的MeasuredWidth和MeasuredHeight吗?还记得你在xml 设置的Gravity吗?还有RelativeLayout 的其他参数吗,没错,就是这些参数和MeasuredHeight、MeasuredWidth 一起来确定子View在父视图的具体位置的。具体的计算过程大家可以看下最简单FrameLayout 的onLayout 函数的源码,每个不同的ViewGroup 的实现都不一样,这边不做具体分析了吧。
3、MeasuredWidth和MeasuredHeight这两个参数为layout过程提供了一个很重要的依据(如果不知道View的大小,你怎么固定四个点的位置呢),但是这两个参数也不是必须的,layout过程中的4个参数l, t, r, b完全可以由我们任意指定,而View的最终的布局位置和大小(mRight - mLeft=实际宽或者mBottom-mTop=实际高)完全由这4个参数决定,measure过程得到的mMeasuredWidth和mMeasuredHeight提供了视图大小测量的值,但我们完全可以不使用这两个值,所以measure过程并不是必须的。如果我们不使用这两个值,那么getMeasuredWidth() 和getWidth() 就很有可能不是同一个值,它们的计算是不一样的:
public final int getMeasuredWidth() {
        return mMeasuredWidth & MEASURED_SIZE_MASK;
    }
public final int getWidth() {
        return mRight - mLeft;
    }
layout 过程相对简单些,分析就到此为止。


 663
663


 被折叠的 条评论
为什么被折叠?
被折叠的 条评论
为什么被折叠?
 到【灌水乐园】发言


