


在安卓开发的时候,我们经常要导入第三方的包或第三方的SDK,而且极其方便,比如说,导入友盟的SDK只需一行代码:
compile 'com.umeng.analytics:analytics:latest.integration'那么,这是怎么做到的呢?下面,我就一步一步教大家发布自己的SDK。请大家务必按照我的顺序来操作,相信我,你就可以少走很多弯路。Just trust me.
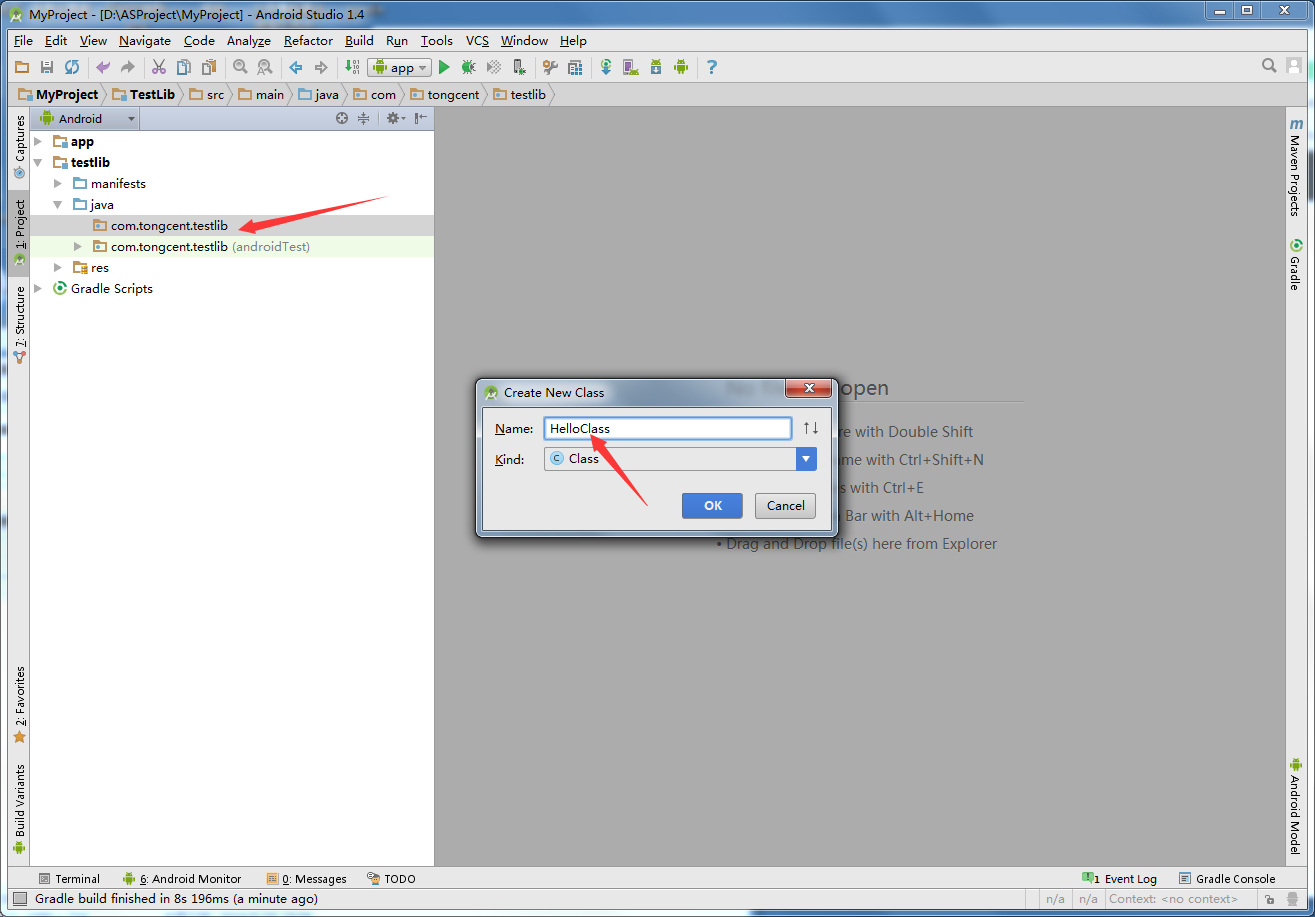
第一步:写好你自己要发布的SDK源码
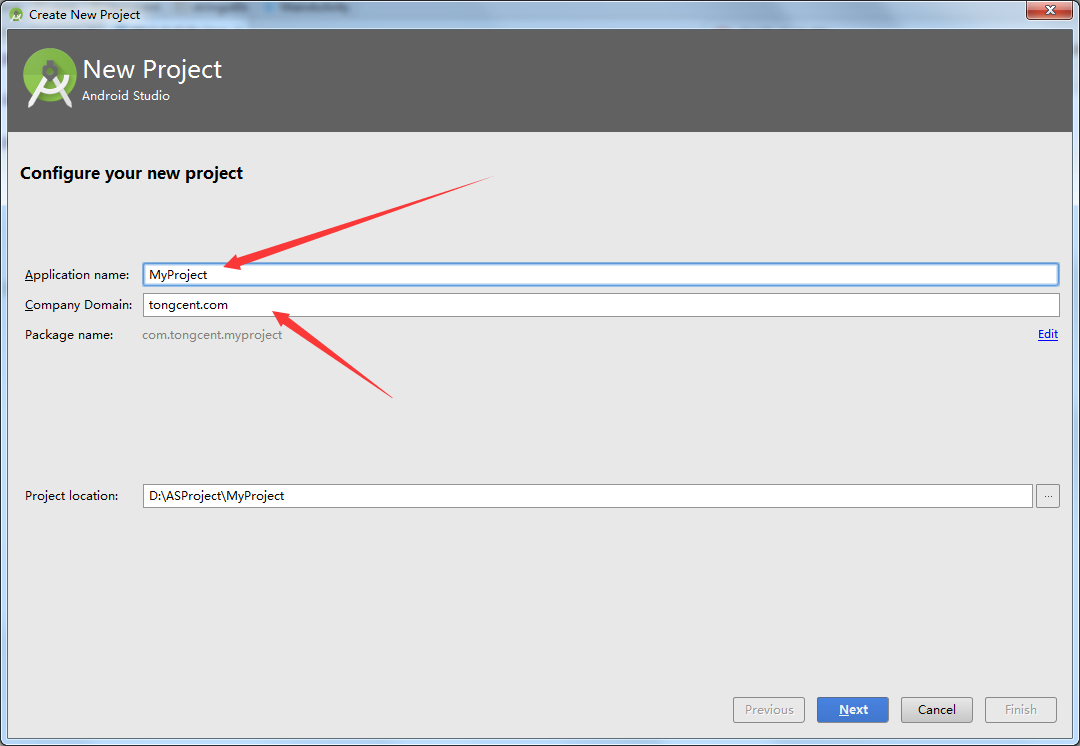
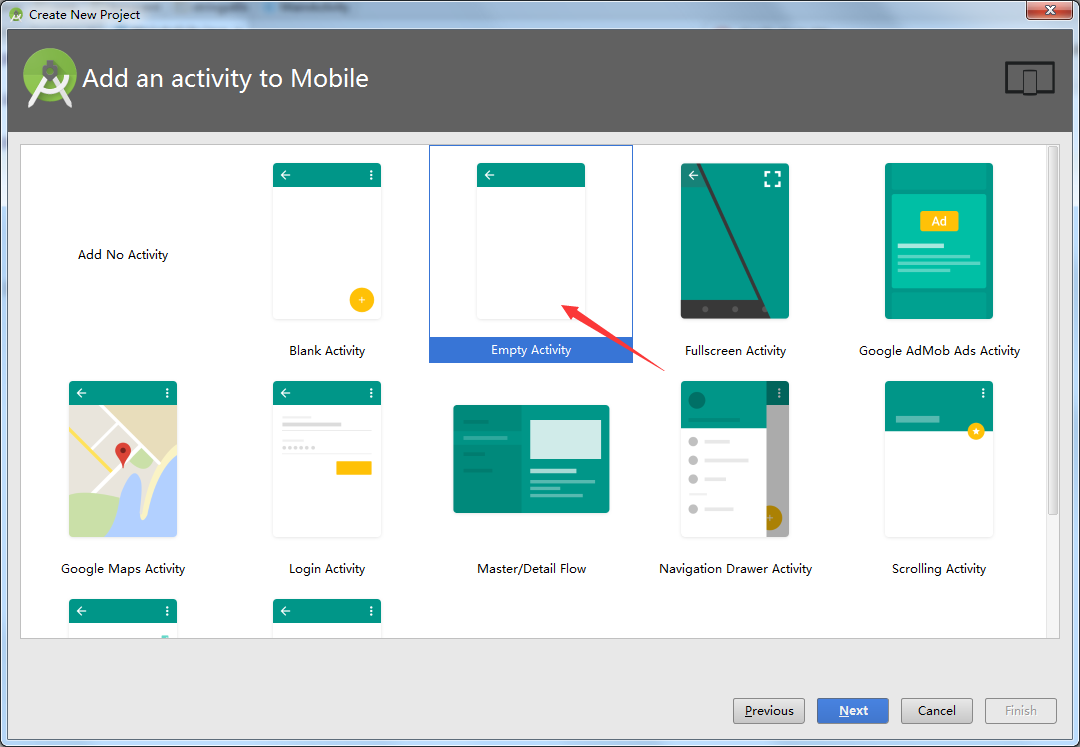
打开AndroidStudio,新建一个Empty的Project,Application名随便起,这里叫做MyProject。
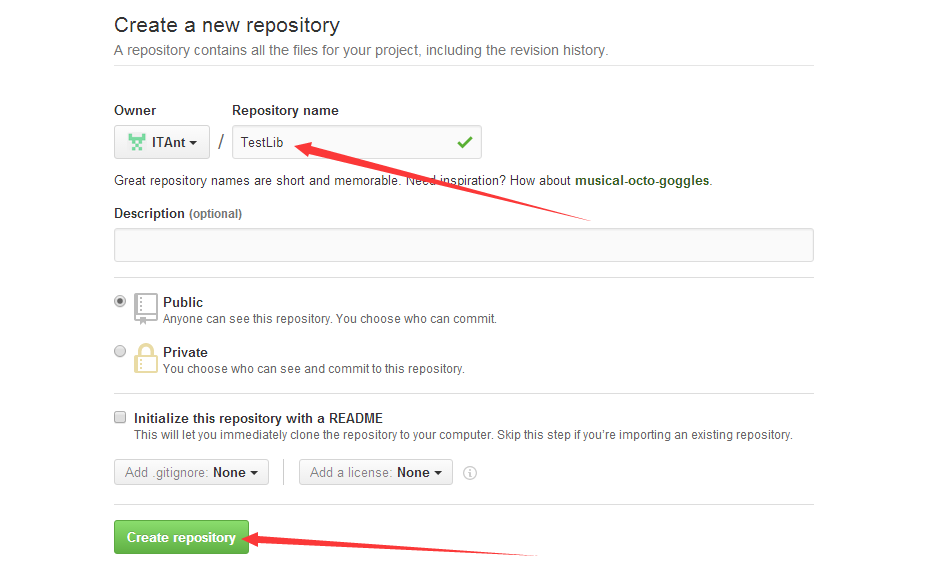
在github上新建自己的SDK项目TestLib。
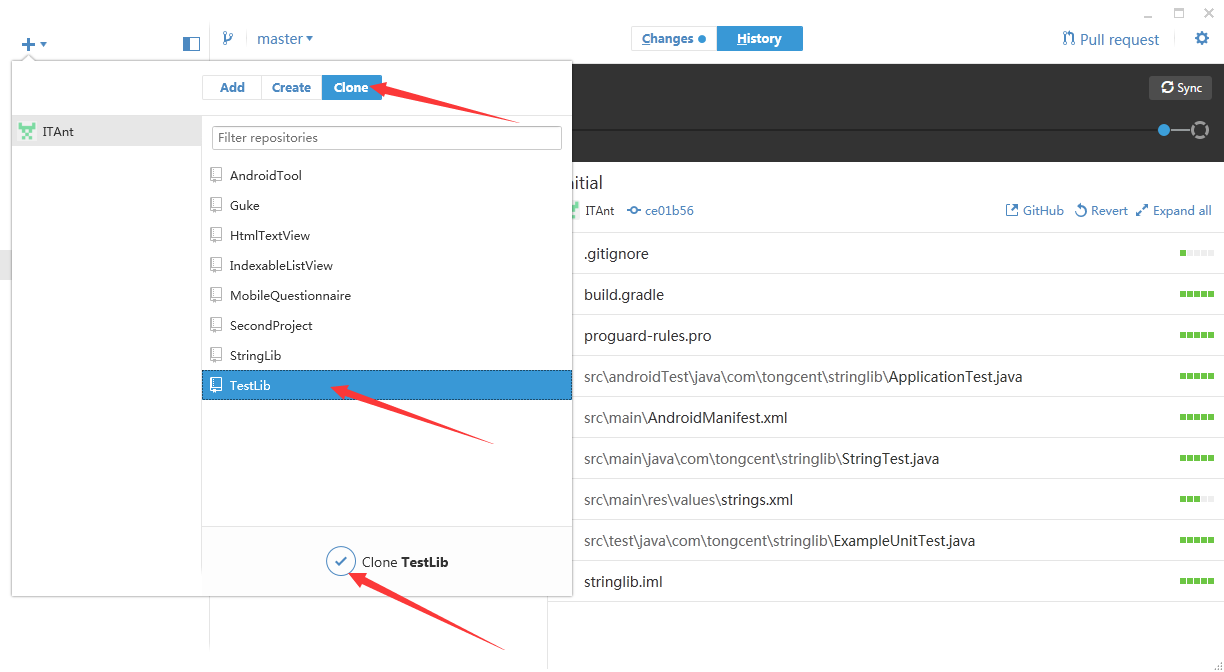
在github的Windows客户端上将TestLib拉下来,放到MyProject的根目录下。接下来是重头戏了,New一个Module,也就是你要发布的SDK。
这里的Application neme要和github上创建的Project name一致,这里都是TestLib。注意到Package name是com.tongcent.testlib,后面会用到Package name,所以这里要稍微记住一下。
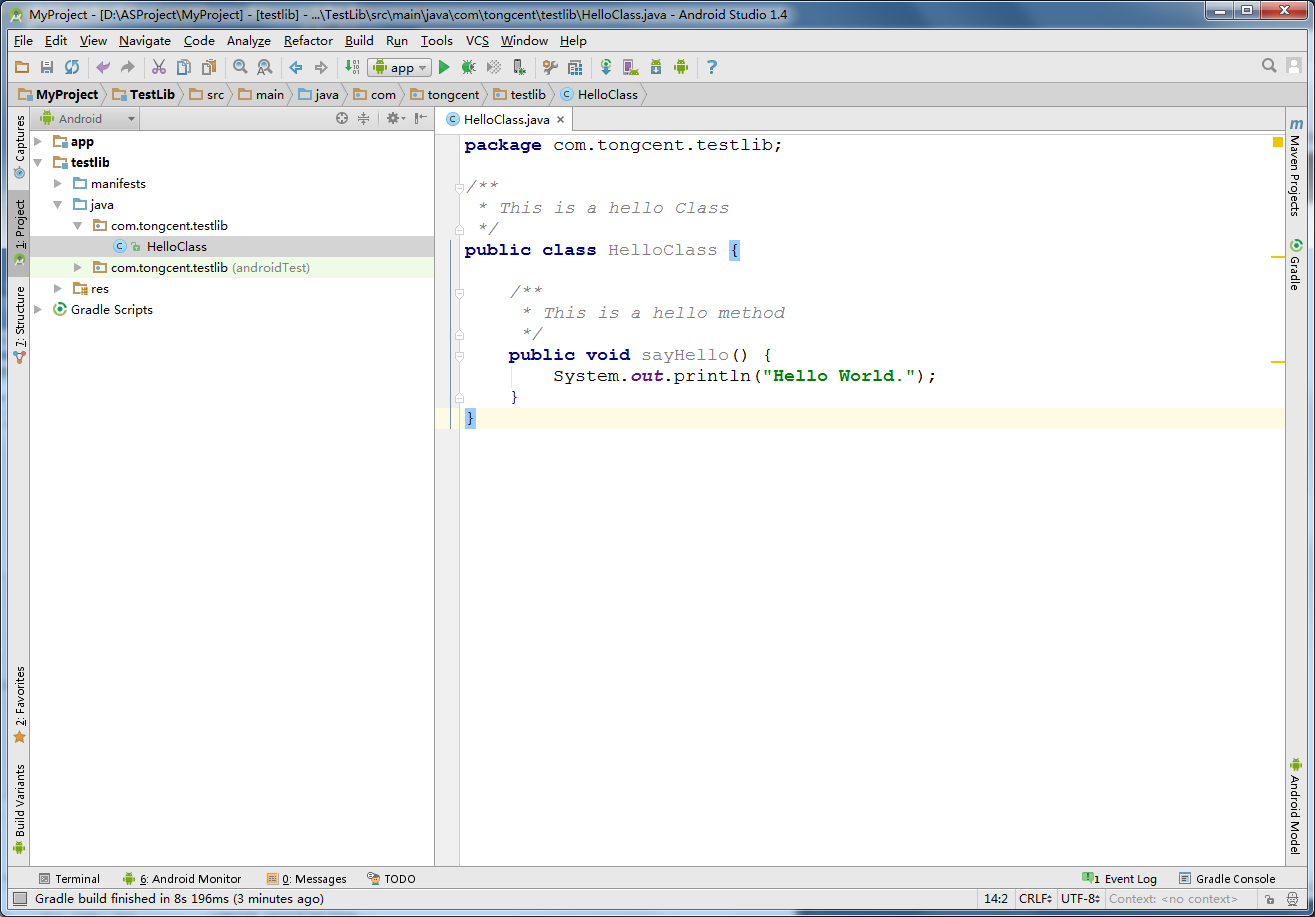
写好你要发布的类和相关方法,如果使用中文注释出现乱码情况,解决办法有两个:1.去掉生成javadoc。2.设置javadoc的编码为utf-8
task javadoc(type: Javadoc) {
    source = android.sourceSets.main.java.srcDirs
    classpath += project.files(android.getBootClasspath().join(File.pathSeparator))
    options.encoding = "UTF-8"
}
到现在,一个简单的SDK就写好了,将代码同步到github。
第二步:注册Bintray账号
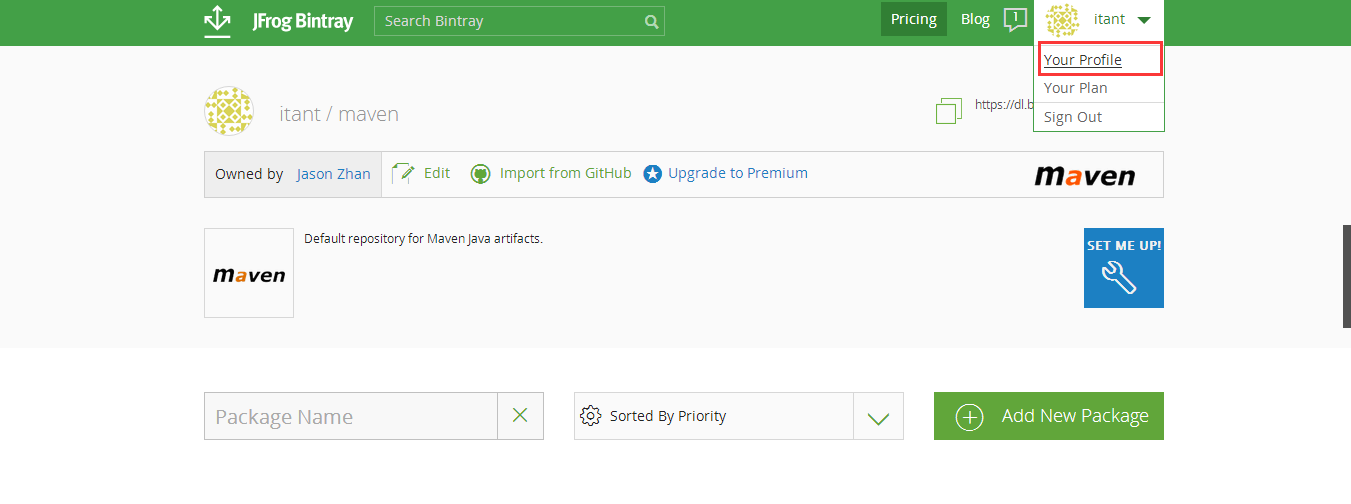
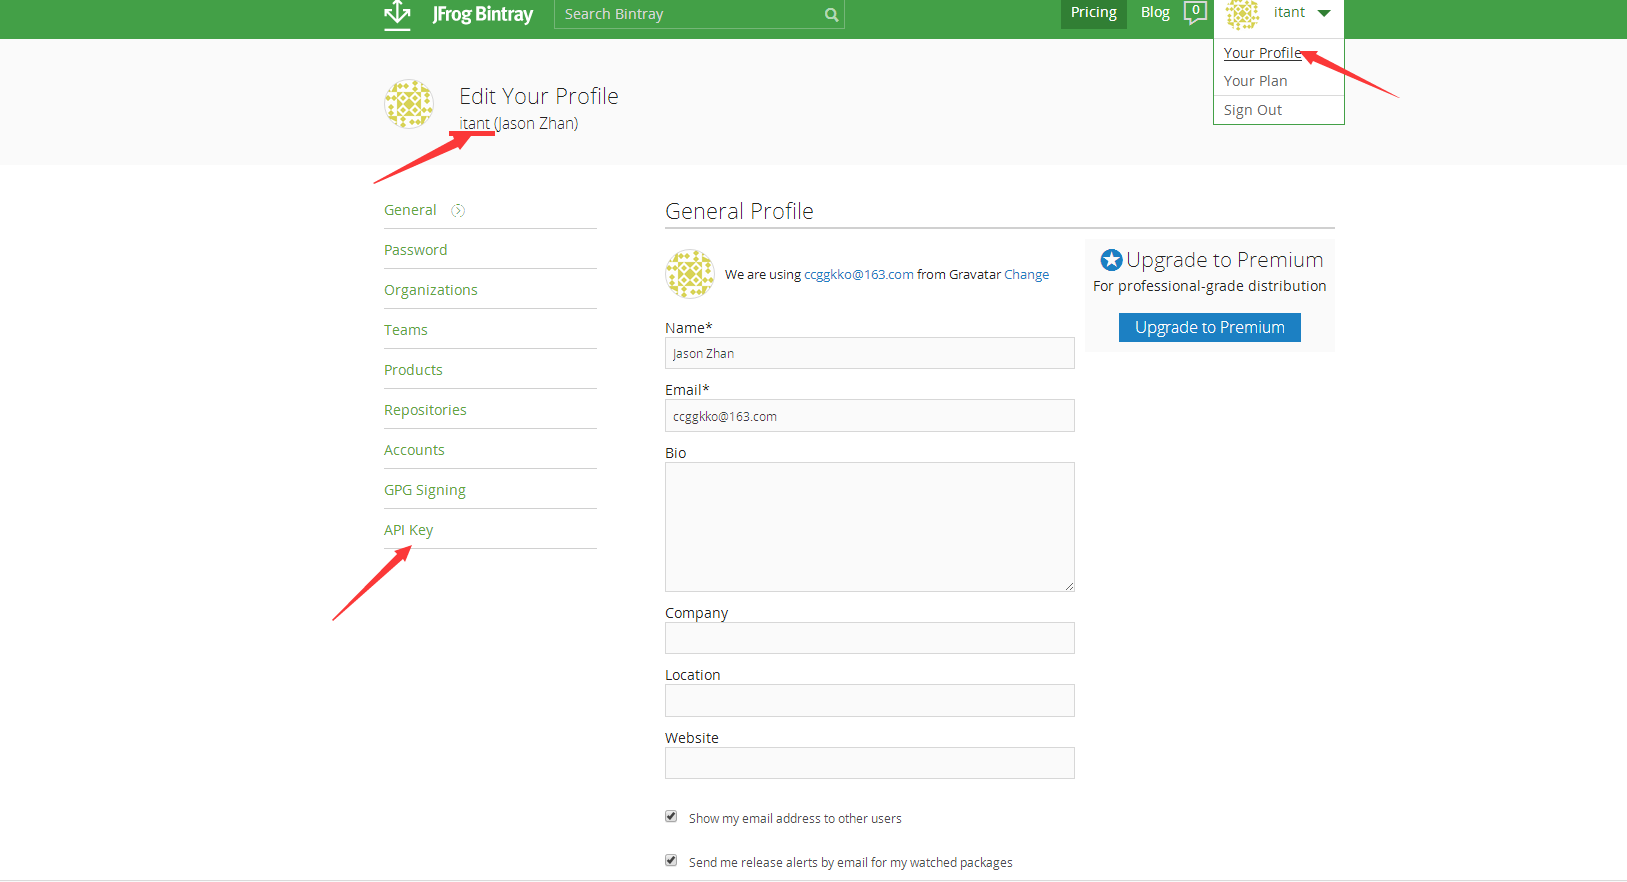
点击这里注册你的Bintray账号,点击邮件激活账号,然后登录,成功之后,点击View All,找到maven,点击进去
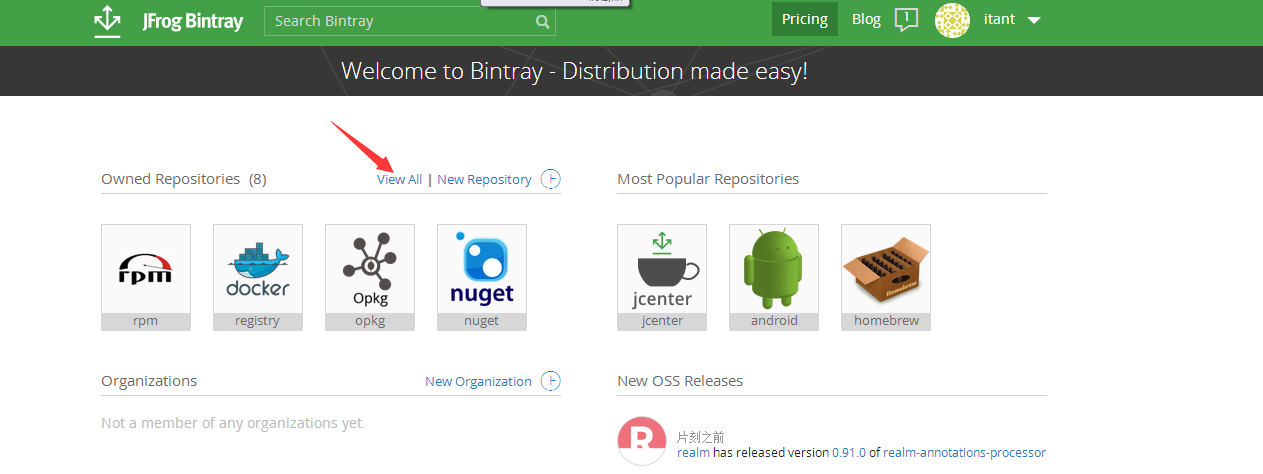
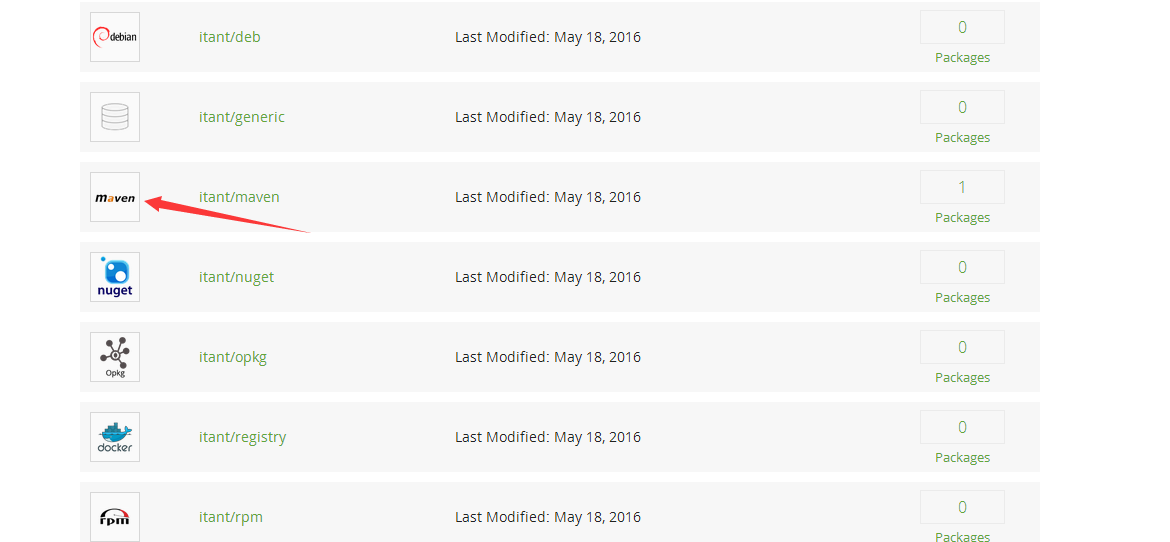
后面要查看自己上传的SDK,就按照上面两张图片的操作来查看。
第三步:上传SDK
在local.properties里添加如下信息:
bintray.user=你的Bintray账号
bintray.apikey=你的Bintray账号的apikey
在浏览器的新标签打开Bintray官网,按如下操作可以查看你的账号和apikey:
在Project的build.gradle里添加如下依赖:
classpath 'com.jfrog.bintray.gradle:gradle-bintray-plugin:1.6'
classpath 'com.github.dcendents:android-maven-gradle-plugin:1.3'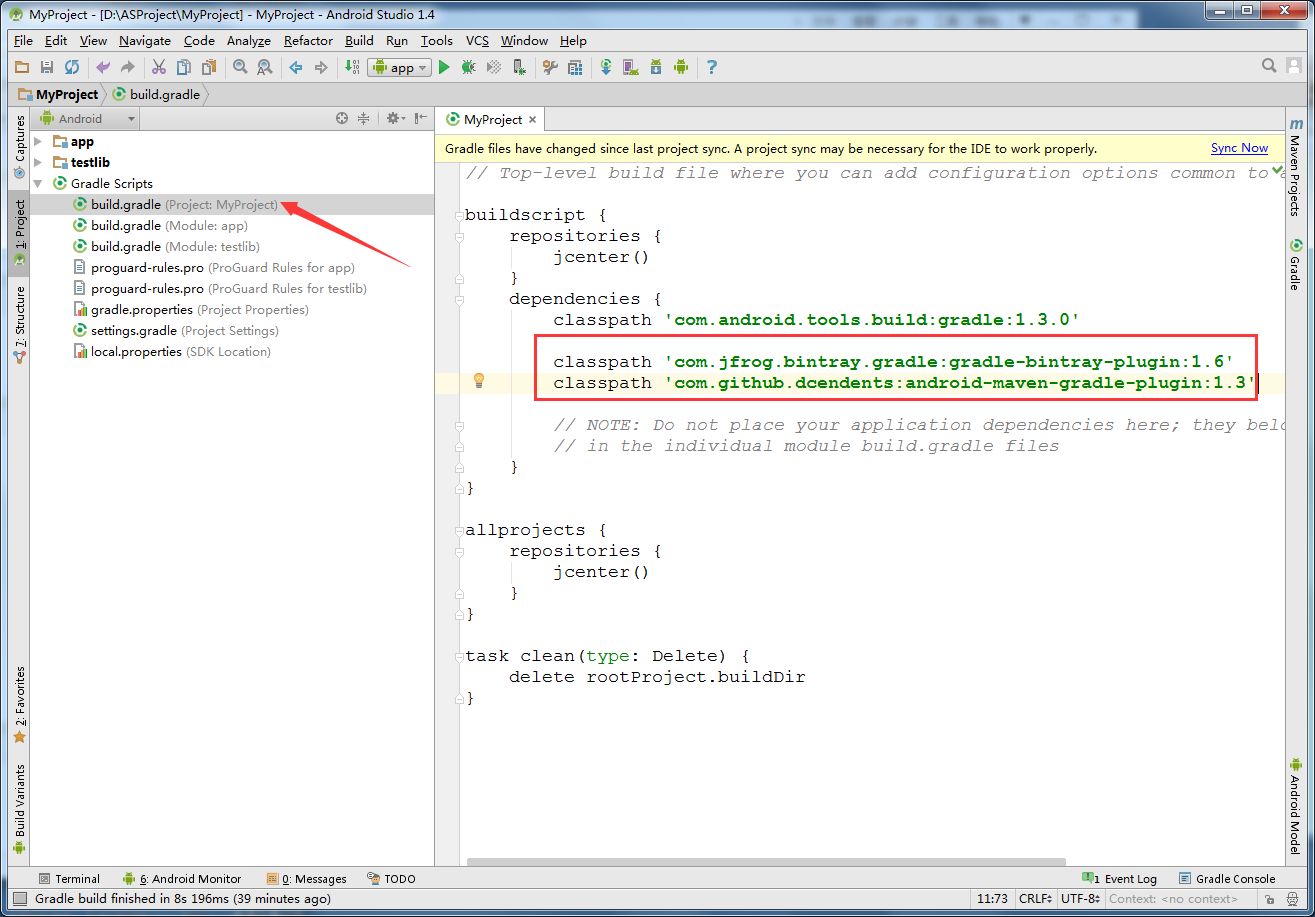
在Module的build.gradle的顶部添加:
apply plugin: 'com.github.dcendents.android-maven'
apply plugin: 'com.jfrog.bintray'
// 这个version是library的版本,更新后也需要更改这个值
version = "0.0.1"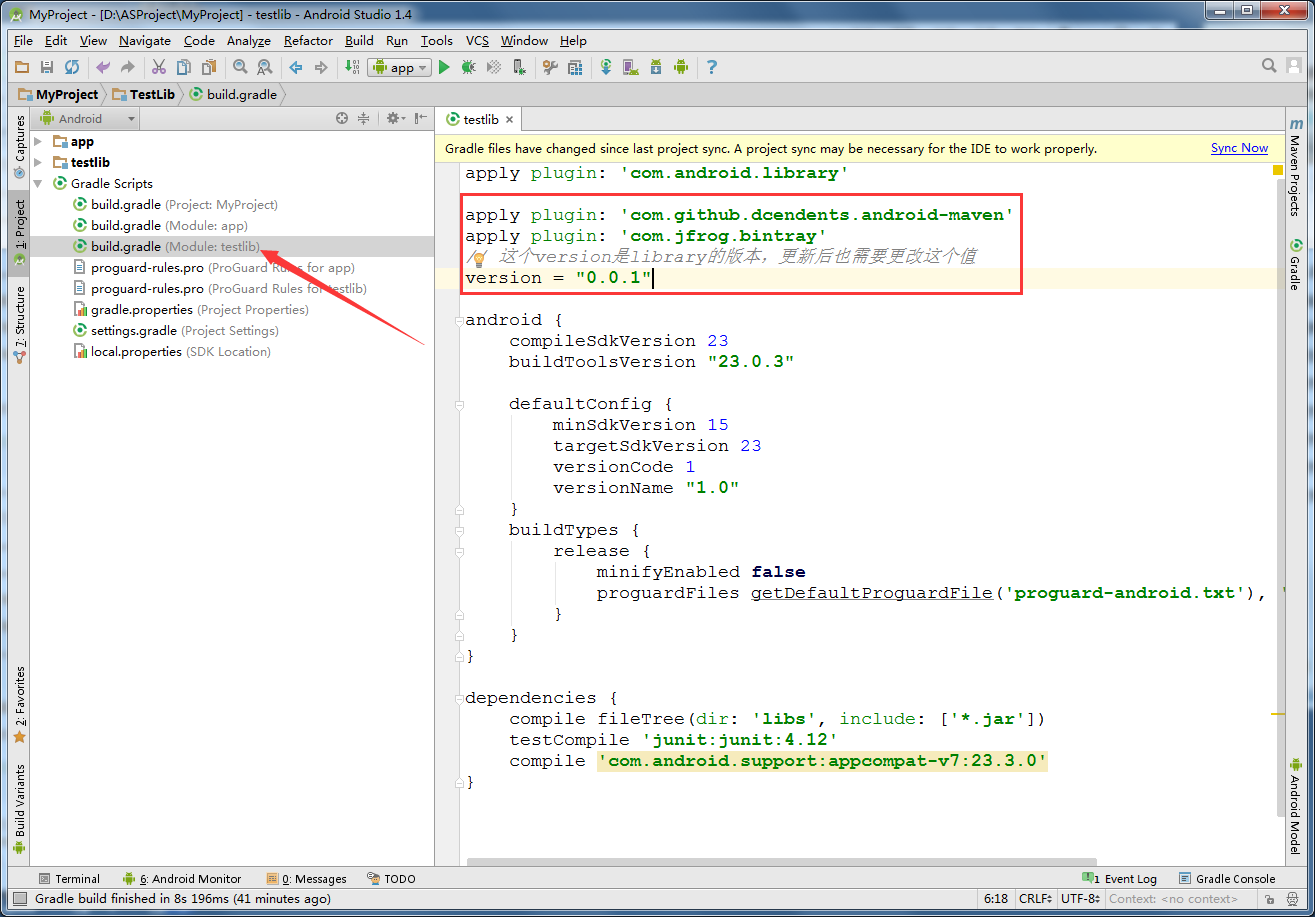
接着在Module的build.gradle最底部,添加:
def siteUrl = 'https://github.com/ITAnt/TestLib'// 项目的主页
def gitUrl = 'https://github.com/ITAnt/TestLib.git'// Git仓库的url
group = "com.tongcent.testlib" // Maven Group ID for the artifact,
install {
    repositories.mavenInstaller {
        pom {
            project {
                packaging 'aar'
                name 'test lib'//项目的描述 你可以多写一点
                url 'https://github.com/ITAnt/StringLib'//
                licenses {
                    license {
                        name 'The Apache Software License, Version 2.0'
                        url 'http://www.apache.org/licenses/LICENSE-2.0.txt'
                    }
                }
                developers {
                    developer {
                        id 'itant' //
                        name 'Jason Zhan'//
                        email 'ccggkko@163.com'//
                    }
                }
                scm {
                    connection 'https://github.com/ITAnt/TestLib'//
                    developerConnection 'https://github.com/ITAnt/TestLib.git'//
                    url 'https://github.com/ITAnt/TestLib'//
                }
            }
        }
    }
}
task sourcesJar(type: Jar) {
    from android.sourceSets.main.java.srcDirs
    classifier = 'sources'
}
task javadoc(type: Javadoc) {
    source = android.sourceSets.main.java.srcDirs
    classpath += project.files(android.getBootClasspath().join(File.pathSeparator))
}
task javadocJar(type: Jar, dependsOn: javadoc) {
    classifier = 'javadoc'
    from javadoc.destinationDir
}
artifacts {
    archives javadocJar
    archives sourcesJar
}
Properties properties = new Properties()
//读取properties的配置信息,当然直接把信息写到代码里也是可以的
properties.load(project.rootProject.file('local.properties').newDataInputStream())
bintray {
    user = properties.getProperty("bintray.user")
    key = properties.getProperty("bintray.apikey")
    configurations = ['archives']
    pkg {
        //这个应该是传到maven的仓库的
        repo = "maven"
        name = "testlib"//发布的项目名字小写
        websiteUrl = 'https://github.com/ITAnt/TestLib'//
        vcsUrl = 'https://github.com/ITAnt/TestLib.git'//
        licenses = ["Apache-2.0"]
        publish = true
    }
}
语句后面有//的地方需要根据自己的项目改写。
在AndroidStudio的Terminal运行
gradlew install
(注意:如果遇到网络问题,导致:gradlew rec failed,那么在AndroidStudio中clean project之后,直接下载对应的版本,放到指定文件夹目录下,例如:先下载gradle-2.4-all.zip,然后放到
C:\Users\Jason.gradle\wrapper\dists\gradle-2.4-all\3i2gobhdl0fm2tosnn15g540i0文件夹下就可以了。)
然后运行
gradlew bintrayUpload
成功之后就传到maven仓库了。但是现在还不能直接使用该SDK,需要点击Add to jcenter。下面这张图片是添加到jcenter之后的,如果还没添加那么箭头所指向的文字就是“Add to jcenter”,点击它,然后填写一下描述,点击提交就可以了。
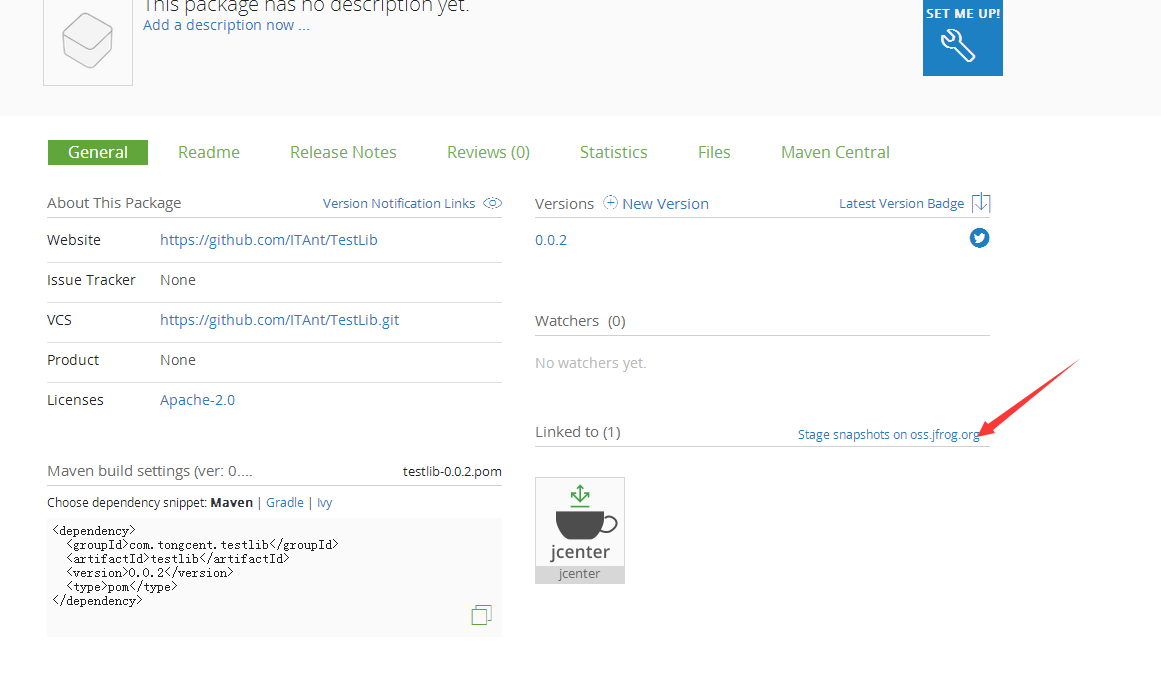
然后等两三分钟,直到我们的SDK被添加到了JCenter,就可以直接使用以下语句导入我们的SDK了:
//gradle
compile 'com.tongcent.testlib:testlib:0.0.1'
我截图的时候,已经更新到了0.0.2版本,所以截图是compile ‘com.tongcent.testlib:testlib:0.0.2’

以后,我们直接把更新版本的SDK提交到Github就可以了。
参考链接:
https://antoniocappiello.com/2015/11/11/publish-your-library-to-jcenter-in-3-steps/
http://blog.csdn.net/qq_23018915/article/details/51055470


 被折叠的 条评论
为什么被折叠?
被折叠的 条评论
为什么被折叠?
 到【灌水乐园】发言


