


一、环境准备
1.spring-framework jar包的下载
下载解压后文件夹目录如下图所示:

docs文件夹:spring-framework相关的帮助文档。
libs:spring-framework各个模块的jar包、源码和文档。
schema:spring-framework各个模块对应的命名空间的xml模板,schema限定了xml中的文档结构。
2.IDE中需要引入的jar包
spring-core-4.1.2.RELEASE.jar
spring-context-4.1.2.RELEASE.jar
spring-beans-4.1.2.RELEASE.jar
spring-expression-4.1.2.RELEASE.jar
还有一个需要另外下载。它是apache开源组织下的commons-logging,用来统一日志门面,可以根据需要方便的随时切换不同的日志组件,下载地址:
mirrors.cnnic.cn/apache//commons/logging/binaries/commons-logging-1.2-bin.zip
3.创建项目
选择普通的java project即可,完成之后项目的层级目录如下:

二、spring中bean的获取
1.创建Bean
<span style="font-family:Courier New;">package com.csdn.spring.wiring;


public class Engine {

	private String name = "engine...";

	// 省略对应的get和set方法...
}
2.创建bean的配置文件
<span style="font-family:Courier New;"><?xml version="1.0" encoding="UTF-8"?>
<beans xmlns="http://www.springframework.org/schema/beans"
    xmlns:xsi="http://www.w3.org/2001/XMLSchema-instance"
    xsi:schemaLocation="http://www.springframework.org/schema/beans
        http://www.springframework.org/schema/beans/spring-beans.xsd">

	<!-- 声明注册bean -->

	<bean id="engine" class="com.csdn.spring.wiring.Engine"></bean>

</beans>
3.获取我们需要的bean
读取解析配置文件,可以使用XmlBeanFactory也可以使用ClassPathXmlApplicationContext。
IOC容器会读取解析指定的配置文件,并将它们管理起来。
测试类代码如下:
测试结果:<span style="font-family:Courier New;">package com.csdn.spring.wiring; import org.springframework.context.ApplicationContext; import org.springframework.context.support.ClassPathXmlApplicationContext; public class TestEngine { @SuppressWarnings("resource") public static void main(String[] args) { // 1.指定配置文件的路径 ApplicationContext context = new ClassPathXmlApplicationContext( "classpath:com/csdn/spring/wiring/beans.xml"); // 2.通过IOC上下文获取bean Engine engine = (Engine) context.getBean("engine"); System.out.println(engine.getName().toString()); } }
可以看到我们Engine类已经成功的通过Spring Ioc容器实例化并且可以正常的使用。
三、spring注入的方式
1.开始之前的准备工作
类的结构图:
类的代码:
<span style="font-family:Courier New;"></span><pre name="code" class="java">package com.csdn.spring.wiring;

public class Car {

	private String name = "car...";

	private Engine engine;

	private Wheel wheel;

	// 省略对应的get和set方法...
}
<span style="font-family:Courier New;">package com.csdn.spring.wiring; public class Engine { private String name = "engine..."; // 省略对应的get和set方法...<span style="font-family:Courier New;"> }
<span style="font-family:Courier New;">package com.csdn.spring.wiring;


public class Wheel {

	private String name = "wheel...";

	// 省略对应的get和set方法...<span style="font-family:Courier New;">
}
简单说一下三个类:Car(汽车)、Engine(发动机)、Wheel(轮子),Car包含Engine和Wheel。为了测试方便三个类中都有一个name属性,调用getName()如果能够获得默认的字符串,则认为该对象被spring ioc容器正确的实例化。

2.最常用的setter注入方式
1)代码实例
这里将Engine和Wheel对象注入到Car中。
配置文件如下:
测试类:<?xml version="1.0" encoding="UTF-8"?> <beans xmlns="http://www.springframework.org/schema/beans" xmlns:xsi="http://www.w3.org/2001/XMLSchema-instance" xsi:schemaLocation="http://www.springframework.org/schema/beans http://www.springframework.org/schema/beans/spring-beans.xsd"> <!-- 声明注册bean <bean id="engine" class="com.csdn.spring.wiring.Engine"></bean> --> <!-- spring之setter注入 --> <bean id="car" class="com.csdn.spring.wiring.Car"> <property name="engine" ref="engine"/> <property name="wheel" ref="wheel"/> </bean> <bean id="engine" class="com.csdn.spring.wiring.Engine" /> <bean id="wheel" class="com.csdn.spring.wiring.Wheel" /> </beans>
测试结果:package com.csdn.spring.wiring; import org.springframework.context.ApplicationContext; import org.springframework.context.support.ClassPathXmlApplicationContext; /** * spring注入之setter注入 * @author jay. * */ public class TestSetter { public static void main(String[] args) { ApplicationContext context = new ClassPathXmlApplicationContext( "classpath:com/csdn/spring/wiring/beans.xml"); Car car = (Car) context.getBean("car"); System.out.println(car.getEngine().getName().toString()); System.out.println(car.getWheel().getName().toString()); } }
很显然我们已经通过setter注入的方式将engine和wheel成功的装配到了car的对象中。<img src="https://img-blog.csdn.net/20151123223639439?watermark/2/text/aHR0cDovL2Jsb2cuY3Nkbi5uZXQv/font/5a6L5L2T/fontsize/400/fill/I0JBQkFCMA==/dissolve/70/gravity/Center" alt="" />2)beans命名空间用法简介
这里顺便介绍下spring最核心也是最原始的命名空间beans的用法,主要用来声明和配置bean。
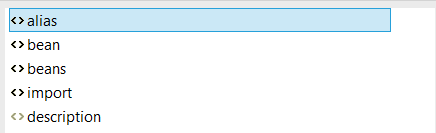
<beans>是spring配置文件的根节点,根节点下可以使用的标签包含:
<alias>见名之意,用来给bean定义个其他的名字
这样我们不仅可以使用getBean("car")获取对象,也可以使用它的别名getBean("car1")达到相同的效果。<alias name="car" alias="car1" />
<bean>标签这里只介绍id、name、class属性:
id是在同一个上线文中是不可重复的,可以理解成是这个bean的唯一标示符。
name则可以有多个,这里的多个不是说可以有多个name属性,而且name中可以使用逗号、分号或者空格隔开用来使用多个不同的名字,和<alias>作用有点类似,但是<alias>中的name只可以有一个。
class是指要装配类的包路径+类名。
用法如下:
<bean id="car" name="car1,car2" class="com.csdn.spring.wiring.Car"/>
<import>标签可以引入其他的spring配置文件,主要用来减少单个配置文件的代码量,用法如下:<import resource="the classPath of resoures..."/>
3.构造方法注入
1).扩展我们的Car类,增加一个有参构造方法。
package com.csdn.spring.wiring;

public class Car {

    private String name = "car...";

    private Engine engine;

    private Wheel wheel;

    public Car(){
    }

    public Car(String name, Engine engine, Wheel wheel) {
        super();
        this.name = name;
        this.engine = engine;
        this.wheel = wheel;
    }
// 省略get和set方法
}
2).根据参数名注入
配置文件如下:
测试类如下:<!-- 根据参数名注入 --> <bean id="car" class="com.csdn.spring.wiring.Car"> <constructor-arg name="name" value="i'm a car..." /> <constructor-arg name="engine" ref="engine" /> <constructor-arg name="wheel" ref="wheel"> </bean> <bean id="engine" class="com.csdn.spring.wiring.Engine" /> <bean id="wheel" class="com.csdn.spring.wiring.Wheel" />package com.csdn.spring.wiring; import org.springframework.context.ApplicationContext; import org.springframework.context.support.ClassPathXmlApplicationContext; /** * spring构造方法注入测试. * @author jay. * */ public class TestConstructor { public static void main(String[] args) { ApplicationContext context = new ClassPathXmlApplicationContext( "classpath:com/csdn/spring/wiring/beans.xml"); Car car = (Car) context.getBean("car"); System.out.println(car.getName().toString()); System.out.println(car.getEngine().getName().toString()); System.out.println(car.getWheel().getName().toString()); } }
测试结果:
很显然我们使用构造方法也成功的装配了我们的bean。
3).根据参数类型装配
配置文件如下:
<!-- 根据参数类型注入 -->
<bean id="car" class="com.csdn.spring.wiring.Car">
	<constructor-arg type="java.lang.String" value="i'm a car..." />
	<constructor-arg type="com.csdn.spring.wiring.Engine" ref="a"/>
	<constructor-arg type="com.csdn.spring.wiring.Wheel" ref="b"/>
</bean>
<bean id="a" class="com.csdn.spring.wiring.Engine" />
<bean id="b" class="com.csdn.spring.wiring.Wheel" />
测试结果、测试方法和上例相同4).根据参数的顺序注入
配置文件如下:
<!-- 根据参数顺序注入 -->
	<bean id="car" class="com.csdn.spring.wiring.Car">
		<constructor-arg index="0" value="i'm a car..." />
		<constructor-arg index="1" ref="a"/>
		<constructor-arg index="2" ref="b"/>
	</bean>
	<bean id="a" class="com.csdn.spring.wiring.Engine" />
	<bean id="b" class="com.csdn.spring.wiring.Wheel" />
这里的参数的顺序和类型不能出错,坐标值从0开始计算。测试结果、测试方法和上例相同。
5).总结
根据构造方法的参数类型和顺序注入的局限性不言而喻,最常用的还是根据构造方法的参数名来注入。
本文仅仅做spring简单的上手入门的介绍,以及spring注入的两种方式:setter和constructor,同时也是本人在学习《Spring In Action》之后的总结。
网上也有听闻注入的另外一种方式(接口注入),这里本人理解应该是注入的是接口具体的实现类,应该不算作是第三种注入方式。
博客写难免有疏忽,如有错误欢迎留言指出。


 1万+
1万+

 被折叠的 条评论
为什么被折叠?
被折叠的 条评论
为什么被折叠?
 到【灌水乐园】发言


