


这个功能先做的ios,很好实现。找了个RSKImage框架,而且效果很好。android端有点难办,从流程开始记录:
1、先将从相册或者拍照返回的Uri转换成BitMap,再将BitMap转换成二级制传递到剪裁页面,可是intent.putExtra(...)只能传递40KB以内的图片,大了就卡死了,所以只能将从相册或照片返回的Uri先转换成String,存放到Sharedpreference中,到裁剪页面再去取出,然后再转化为Bitmap,显示在屏幕上。
返回的Uri并存储代码:

剪切页面将Uri取出,并转换为Bigmap代码:
<span style="white-space:pre">	</span>protected void onCreate(Bundle savedInstanceState) {
		super.onCreate(savedInstanceState);
		setContentView(R.layout.activity_crop);

		imageView = (ClipImageView) findViewById(R.id.src_pic);
		try{
			ContentResolver resolver = getContentResolver();
			uriString = SharedPreferenceUtil.getStringValue(getApplicationContext(), "portraitUri");
			//将图片内容解析成字节数组
			if(uriString != null){
				mContent=readStream(resolver.openInputStream(Uri.parse(uriString)));
			}
	        //将字节数组转换为ImageView可调用的Bitmap对象
	        myBitmap = getPicFromBytes(mContent, null);
	        // 设置需要裁剪的图片
			if(myBitmap != null){
				imageView.setImageBitmap(myBitmap);
			}
		}catch(Exception e){
			e.printStackTrace();
		}

	}

	/*
	 * 将图片内容解析成字节数组
	 */
<span style="white-space:pre">	</span>public static Bitmap getPicFromBytes(byte[] bytes, BitmapFactory.Options opts) {
        if (bytes != null)
            if (opts != null)
                return BitmapFactory.decodeByteArray(bytes, 0, bytes.length,opts);
            else
                return BitmapFactory.decodeByteArray(bytes, 0, bytes.length);
        return null;
    }
   /*
    * 将字节数组转换为ImageView可调用的Bitmap对象
    */
    public static byte[] readStream(InputStream inStream) throws Exception {
        byte[] buffer = new byte[1024];
        int len = -1;
        ByteArrayOutputStream outStream = new ByteArrayOutputStream();
        while ((len = inStream.read(buffer)) != -1) {
                 outStream.write(buffer, 0, len);
        }
        byte[] data = outStream.toByteArray();
        outStream.close();
        inStream.close();
        return data;
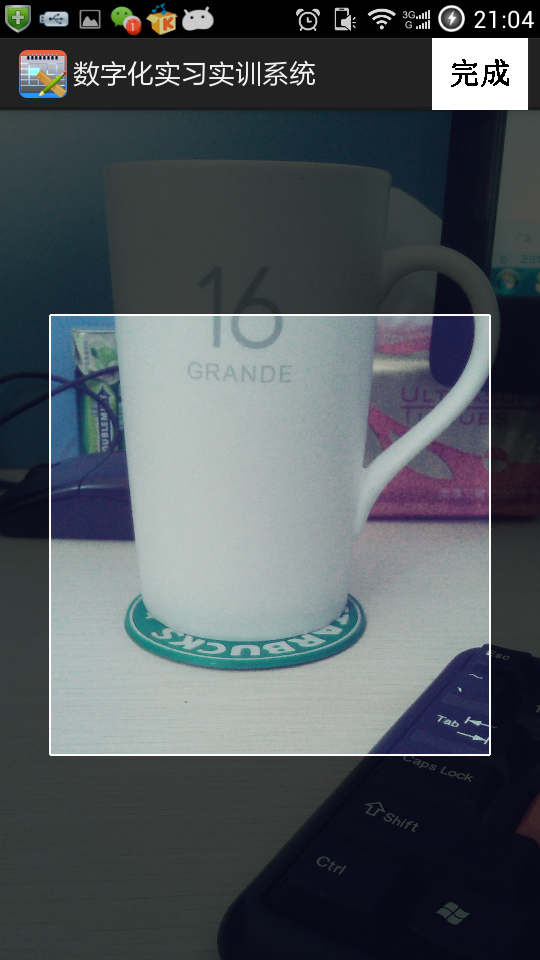
} 为什么这么说呢,是因为我刚用照相机照完相,将相片传到剪裁页面,显示的图片是非常小的一块,一查,图片尺寸2460*1440,手机屏幕分辨率850*450(我很纳闷一个像素这么低的手机怎么能照出那么大分辨率的图片),而且显示的部分图片还不是很清晰[可能和我的手机分辨率有关],手机照的照片原图为:

剪裁页面显示的初始图像为::
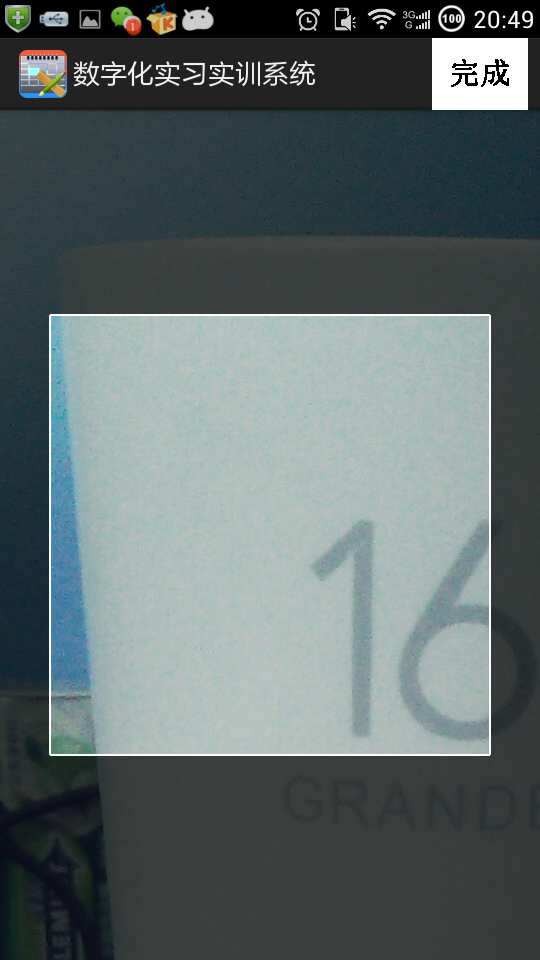
3、我想让它初始化时就缩放为完整图像,而且显示局部的图片,像素也不好。
所以开始查看ClipImageView的代码,看哪些地方是缩放代码:
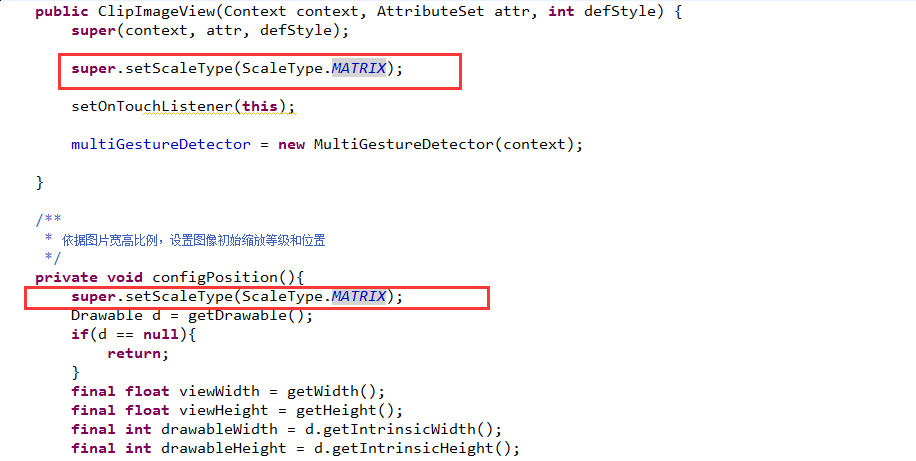
4、上图中的两处scaleType都设置的MATRIX,我就把他改为center fit_xy fit_start等等8种情况做测试,发现改完后图像是缩放到全屏了,但是却不能移动和双击放大缩小了。
5、所以这个方法不合适,只能更改图片初始化的宽高比例,如图:
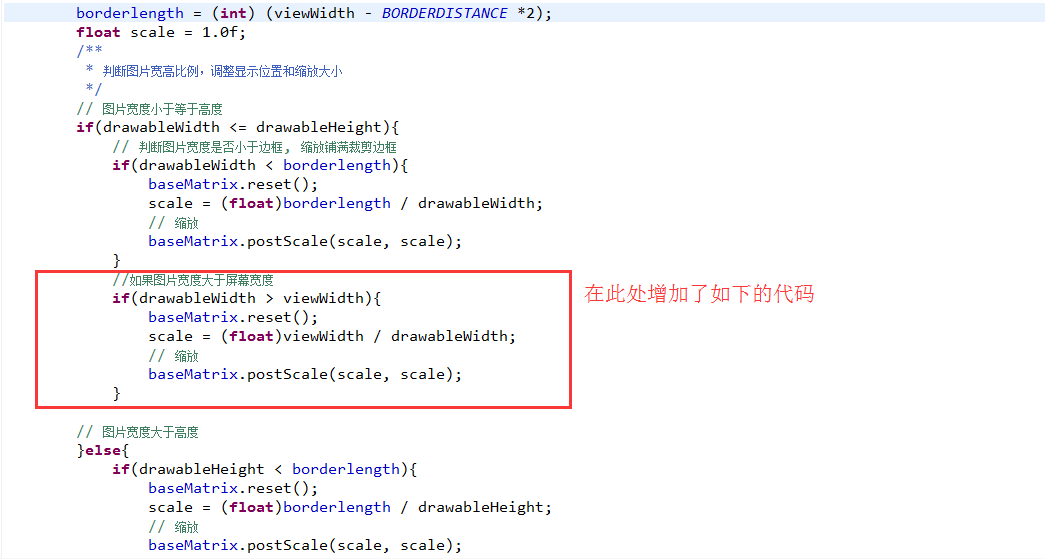
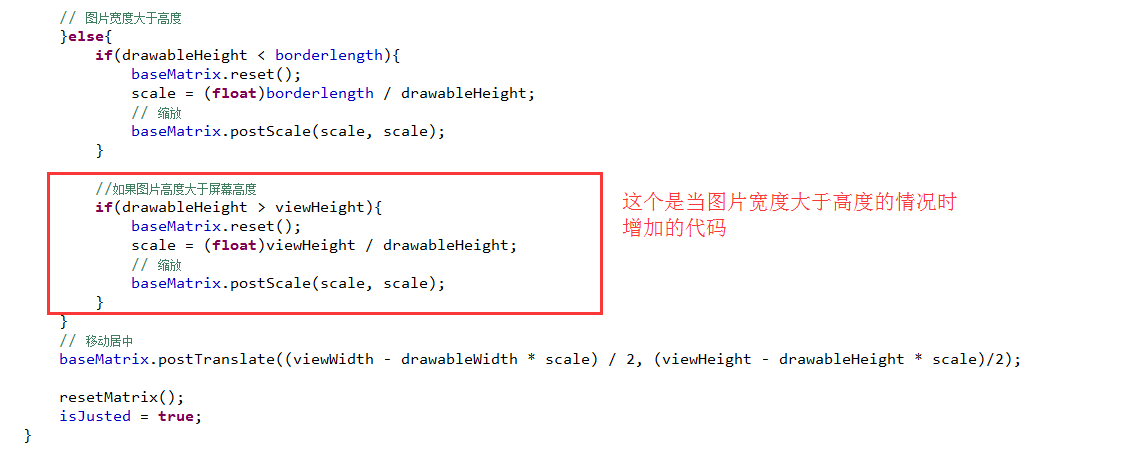
6、在控制缩放比例处添加了当“图片的宽度大于屏幕的宽度”和“图片的高度大于屏幕的高度”的判断
这样当进入剪裁图片的页面时,显示的图像就缩放到全屏,而且图片可以拖动和缩放,效果如图:
7、点击完成后,要将bitmap直接生成png图片,存入本地,下次登陆后显示头像可以直接从本地读取,如果没有再去网络获取。将bitmap生成png图片代码:
<span style="white-space:pre">	</span>/*
	 * 将bitmap生成为图片存到本地
	 */
	public void saveMyBitmap(Bitmap bitMap) throws IOException {
		String portraitPath = FileUtils.shareInstance().getAbsolutePath() + "/" + "portraitPic/portrait.png";
		File file = new File(portraitPath);
		file.createNewFile();
	    FileOutputStream fOut = null;
	    try {
	            fOut = new FileOutputStream(file);
	    } catch (FileNotFoundException e) {
	            e.printStackTrace();
	    }
	    bitMap.compress(Bitmap.CompressFormat.PNG, 100, fOut);
	    try {
	            fOut.flush();
	    } catch (IOException e) {
	            e.printStackTrace();
	    }
	    try {
	            fOut.close();
	    } catch (IOException e) {
	            e.printStackTrace();
	    }
	}
但是,运行程序后报错,报错如图:
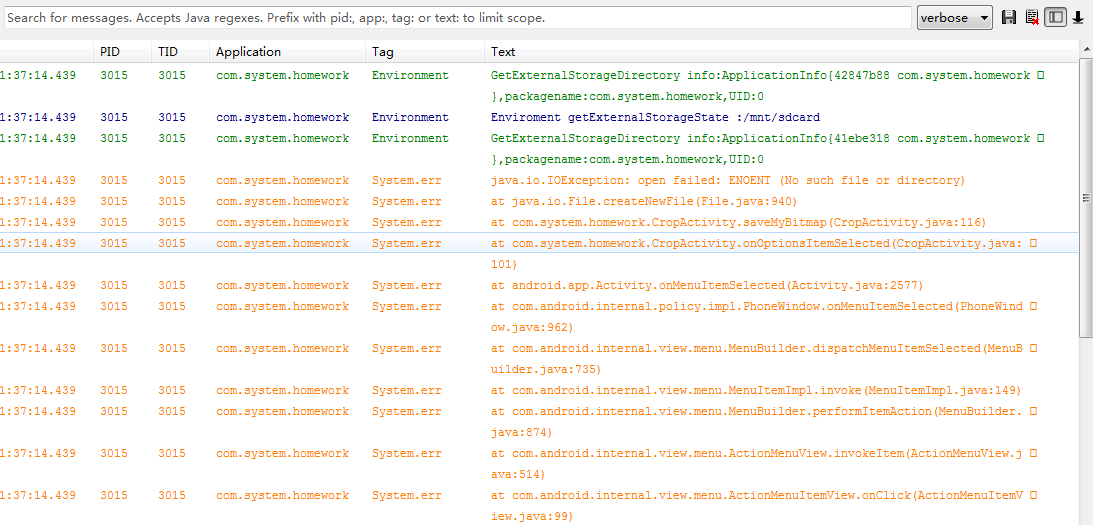
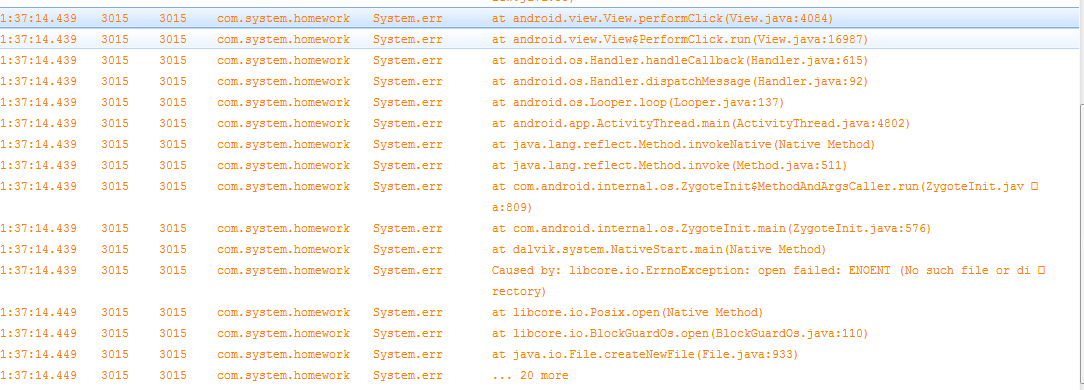
8、查找错误:caused by:libcore.io.ErrnoException: open failed ENOENT (no such file or directory)错误原因,是因为没先生成目录,要先生成个目录,生成目录的方法:
<span style="white-space:pre">	</span>/*
	 * 先生成个目录,要不然报错
	 */
	public static void makeRootDirectory() {
        File file = null;
        String dirPath = FileUtils.shareInstance().getAbsolutePath() + "/" + "portraitPic/";
        try {
            file = new File(dirPath);
            if (!file.exists()) {
                file.mkdir();
            }
        } catch (Exception e) {

        }
    }  </span>
然后在显示头像页面,读取本地的PNG图片,显示到imageView中,代码为:
<span style="font-size:14px;"><span style="white-space:pre">	</span>//读取本地生成的头像文件
	private Bitmap getDiskBitmap() {
	    Bitmap bitmap = null;
	    try{
	    	String portraitPath = FileUtils.shareInstance().getAbsolutePath() + "/" + "portraitPic/portrait.png";
	        File file = new File(portraitPath);
	        if(file.exists())
	        {
	            bitmap = BitmapFactory.decodeFile(portraitPath);
	        }
	    } catch (Exception e) {
	    	e.printStackTrace();
	    }

	    return bitmap;
	} <span style="white-space:pre">	</span>
大功告成!
引用和查阅的资料,谢谢以下各位:
http://loovle.iteye.com/blog/906217
http://blog.csdn.net/lmj623565791/article/details/39761281
http://blog.csdn.net/xilibi2003/article/details/6628668/
http://blog.csdn.net/walker02/article/details/7826533
http://ithinkfeed.iteye.com/blog/1253776
http://blog.csdn.net/fengyee_zju/article/details/18101545
http://blog.csdn.net/lvxiangan/article/details/10165361


 3750
3750


 被折叠的 条评论
为什么被折叠?
被折叠的 条评论
为什么被折叠?
 到【灌水乐园】发言


