


SimpleAdapter介绍
SimpleAdapter是一个简单的适配器,可以将静态数据映射到XML文件中定义好的视图。
构造函数
public SimpleAdapter (Context context, List<? extends Map<String, ?>> data, int resource, String[] from, int[] to)参数
context SimpleAdapter关联的View的运行环境
data 一个Map组成的List。在列表中的每个条目对应列表中的一行,每一个map中应该包含所有在from参数中指定的键
resource 一个定义列表项的布局文件的资源ID。布局文件将至少应包含那些在to中定义了的ID
from 一个将被添加到Map映射上的键名
to 将绑定数据的视图的ID,跟from参数对应,这些应该全是TextView
ListView
Java类
package com.app.test01;
import java.util.ArrayList;
import java.util.HashMap;
import java.util.List;
import android.app.Activity;
import android.os.Bundle;
import android.widget.ListView;
import android.widget.SimpleAdapter;
public class ListViewSimple extends Activity{
ListView listView1;
@Override
protected void onCreate(Bundle savedInstanceState) {
// TODO Auto-generated method stub
super.onCreate(savedInstanceState);
setContentView(R.layout.activity_weixin);
listView1 = (ListView) findViewById(R.id.listView1);
String[] strings = {"img","title","info","time"};//Map的key集合数组
int[] ids = {R.id.img,R.id.title,R.id.info,R.id.time};//对应布局文件的id
SimpleAdapter simpleAdapter = new SimpleAdapter(this,
getData(), R.layout.activity_weixin_item, strings, ids);
listView1.setAdapter(simpleAdapter);//绑定适配器
}
// 初始化一个List
private List<HashMap<String, Object>> getData() {
// 新建一个集合类,用于存放多条数据
ArrayList<HashMap<String, Object>> list = new ArrayList<HashMap<String, Object>>();
HashMap<String, Object> map = null;
for (int i = 1; i <= 40; i++) {
map = new HashMap<String, Object>();
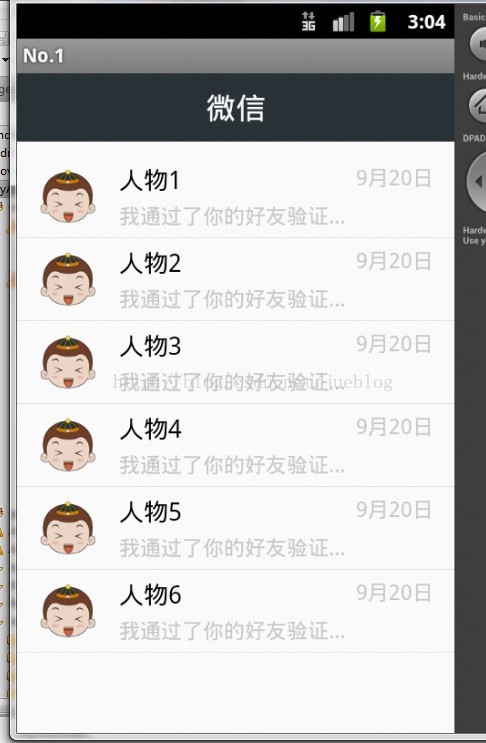
map.put("title", "人物" + i);
map.put("time", "9月20日");
map.put("info", "我通过了你的好友验证请求,现在我们可以开始对话啦");
map.put("img", R.drawable.special_spring_head2);
list.add(map);
}
return list;
}
}
主视图布局
<?xml version="1.0" encoding="utf-8"?>
<!-- 这是范例ListView的布局文件,出了ListView,还可以放置其他控件 -->
<RelativeLayout xmlns:android="http://schemas.android.com/apk/res/android"
    android:layout_width="match_parent"
    android:layout_height="fill_parent"
    android:background="#fff"
    android:orientation="vertical" >
    <RelativeLayout
        android:id="@+id/relativeLayout1"
        android:layout_width="match_parent"
        android:layout_height="50dp"
        android:layout_alignParentLeft="true"
        android:layout_alignParentTop="true"
        android:background="#2B3439" >

        <TextView
            android:id="@+id/textView1"
            android:layout_width="wrap_content"
            android:layout_height="wrap_content"
            android:layout_centerHorizontal="true"
            android:layout_centerVertical="true"
            android:text="微信"
            android:textColor="#fff"
            android:textSize="22sp" />
    </RelativeLayout>

    <ListView
        android:id="@+id/listView1"
        android:layout_width="match_parent"
        android:paddingTop="60dp"
        android:paddingBottom="50dp"
        android:cacheColorHint="#00000000"
        android:layout_height="match_parent"
        android:stackFromBottom="true"
		android:transcriptMode="alwaysScroll"  >
    </ListView>

</RelativeLayout>
子视图布局
<?xml version="1.0" encoding="utf-8"?>
<!-- 这是列表项的布局文件,每一行长什么样子,修改这里 -->
<RelativeLayout xmlns:android="http://schemas.android.com/apk/res/android"
    android:layout_width="fill_parent"
    android:layout_height="60dp"
    android:layout_gravity="center_vertical"
    android:orientation="horizontal"
    android:padding="5dp" >

    <ImageView
        android:id="@+id/img"
        android:layout_width="wrap_content"
        android:layout_height="wrap_content"
        android:layout_alignParentLeft="true"
        android:layout_alignParentTop="true"
        android:layout_centerVertical="true"
        android:padding="5dp"
        android:src="@drawable/gong1" />

    <RelativeLayout
        android:id="@+id/relativeLayout1"
        android:layout_width="match_parent"
        android:layout_height="match_parent"
        android:layout_centerVertical="true"
        android:layout_marginLeft="5dp"
        android:layout_marginRight="70dp"
        android:layout_toRightOf="@+id/img" >

        <TextView
            android:id="@+id/title"
            android:layout_width="wrap_content"
            android:layout_height="wrap_content"
            android:layout_alignParentLeft="true"
            android:layout_alignParentTop="true"
            android:text="TextView"
            android:textColor="#000"
            android:textSize="18sp"/>

        <TextView
            android:id="@+id/info"
            android:layout_width="match_parent"
            android:layout_height="wrap_content"
            android:layout_alignParentBottom="true"
            android:layout_alignParentLeft="true"
            android:text="TextView"
            android:singleLine="true"
            android:ellipsize="end"
            android:textColor="#ccc"
            android:textSize="15sp"  />
    </RelativeLayout>

    <TextView
        android:id="@+id/time"
        android:layout_width="wrap_content"
        android:layout_height="wrap_content"
        android:layout_alignTop="@+id/relativeLayout1"
        android:layout_alignParentRight="true"
        android:layout_marginRight="10dp"
        android:text="TextView"
        android:textColor="#ccc"
        android:textSize="15sp"/>

</RelativeLayout>
效果图
GridView
Java类
package com.app.test01;

import java.util.ArrayList;
import java.util.HashMap;
import java.util.Map;

import android.app.Activity;
import android.os.Bundle;
import android.widget.GridView;
import android.widget.SimpleAdapter;

public class GridViewSimple extends Activity {
	private GridView gridView1;
	private int[] ids = { R.drawable.gong1, R.drawable.gong2, R.drawable.gong3,
			R.drawable.gong4, R.drawable.gong5, R.drawable.gong6,
			R.drawable.gong7, R.drawable.gong8, R.drawable.gong9,
			R.drawable.gong1, R.drawable.gong2, R.drawable.gong3,
			R.drawable.gong4, R.drawable.gong5, R.drawable.gong6,
			R.drawable.gong7, R.drawable.gong8, R.drawable.gong9 };

	@Override
	protected void onCreate(Bundle savedInstanceState) {
		// TODO Auto-generated method stub
		super.onCreate(savedInstanceState);
		setContentView(R.layout.gridview);
		gridView1 = (GridView) findViewById(R.id.gridView1);

		ArrayList<Map<String, Object>> arrayList = new ArrayList<Map<String, Object>>();
		for (int i = 0; i < ids.length; i++) {
			Map<String, Object> map = new HashMap<String, Object>();
			map.put("image", ids[i]);
			arrayList.add(map);
		}

		SimpleAdapter simpleAdapter = new SimpleAdapter(this, arrayList,
				R.layout.gridview_item, new java.lang.String[] { "image" },
				new int[] { R.id.imageView1 });
		gridView1.setAdapter(simpleAdapter);
	}
}
主视图布局
<?xml version="1.0" encoding="utf-8"?>
<LinearLayout xmlns:android="http://schemas.android.com/apk/res/android"
    android:layout_width="match_parent"
    android:layout_height="match_parent"
    android:orientation="vertical" >

    <GridView
        android:id="@+id/gridView1"
        android:layout_width="match_parent"
        android:layout_height="wrap_content"
        android:numColumns="3" >
    </GridView>

</LinearLayout>
子视图布局
<?xml version="1.0" encoding="utf-8"?>
<LinearLayout xmlns:android="http://schemas.android.com/apk/res/android"
android:layout_width="match_parent"
android:layout_height="match_parent"
android:orientation="vertical"
android:gravity="center"
android:paddingTop="10dp"
android:paddingBottom="10dp">
<ImageView
android:id="@+id/imageView1"
android:layout_width="wrap_content"
android:layout_height="wrap_content"
android:src="@drawable/gong1" />
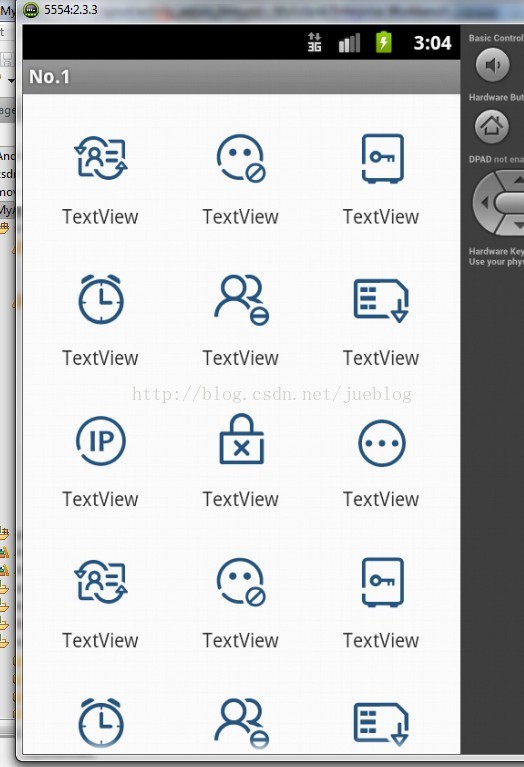
<TextView
android:id="@+id/textView1"
android:layout_width="wrap_content"
android:layout_height="wrap_content"
android:text="TextView" />
</LinearLayout>
效果图


 被折叠的 条评论
为什么被折叠?
被折叠的 条评论
为什么被折叠?
 到【灌水乐园】发言


