


-
纯粹做个记录,以免日后忘记该怎么设定。
这一篇将会说明两种使用 jQuery EasyUI DataGrid 的 Checkbox 设定方式,以及在既有数据下将 checked 为 true 的该笔数据列的 Checkbox 设定为 Checked,另外就是两种 Checkbox 设定方式下如何取得有勾选的数据。
有关 jQuery EasyUI DataGrid 的相关资料,可以前往官网查看,
jQuery EasyUI 官网
jQuery EasyUI Documentation
DataGrid Demo
CheckBox select on DataGrid
使用的范例 JSON 数据:
01.{02."total": 4,03."rows": [04.{05."productid":"FI-SW-01",06."productname":"Koi",07."unitcost": 10.00,08."status":"P",09."listprice": 36.50,10."attr1":"Large",11."itemid":"EST-1",12."checked":true13.},14.{15."productid":"K9-DL-01",16."productname":"Dalmation",17."unitcost": 12.00,18."status":"P",19."listprice": 18.50,20."attr1":"Spotted Adult Female",21."itemid":"EST-10",22."checked":true23.},24.{25."productid":"RP-SN-01",26."productname":"Rattlesnake",27."unitcost": 12.00,28."status":"P",29."listprice": 38.50,30."attr1":"Venomless",31."itemid":"EST-11",32."checked":true33.},34.{35."productid":"RP-SN-01",36."productname":"Rattlesnake",37."unitcost": 12.00,38."status":"P",39."listprice": 26.50,40."attr1":"Rattleless",41."itemid":"EST-12",42."checked":false43.}44.]45.}设定方式一:使用预设的设定方式
网页的 HTML 原始码内容
01.<body>02.<h2>Custom CheckBox on DataGrid</h2>03.04.<inputtype="button"id="ButonGetCheck"value="Get Checked"/>05.<br/><br/>06.07.<tableid="dg"></table>08.09.</body>我是习惯把 DataGrid 的相关设定放在 Javascript 程序中,因为这会比直接在 HTML 的 Table Tag 使用属性设定的方式还具有弹性,
Javascript 程序中的 DataGrid 设定
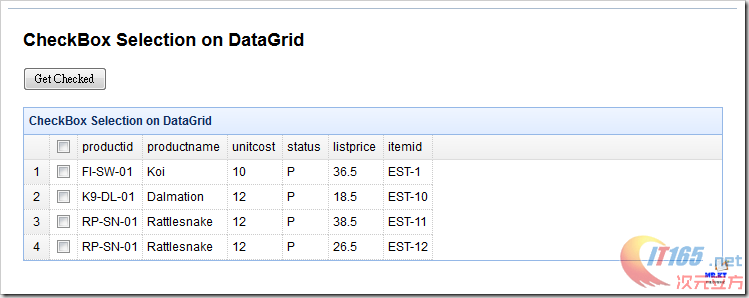
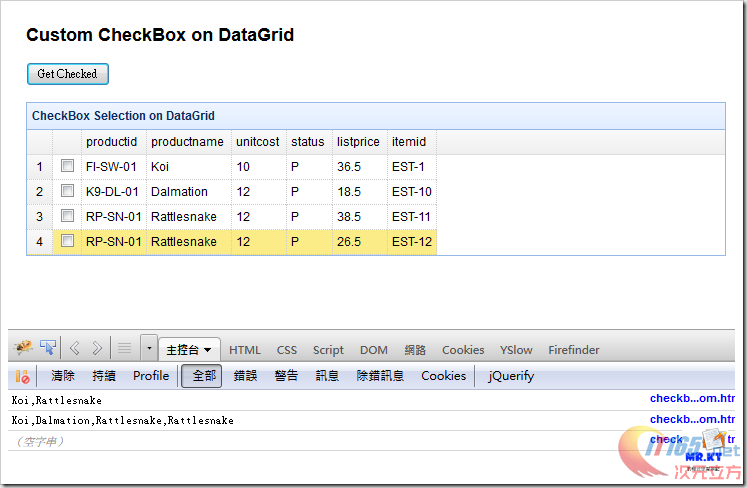
01.$('#dg').datagrid({02.title:'CheckBox Selection on DataGrid',03.url:'datagrid_data3.json',04.width:'700',05.rownumbers:true,06.columns:[[07.{ field:'ck',checkbox:true},08.{ field:'productid', title:'productid'},09.{ field:'productname', title:'productname'},10.{ field:'unitcost', title:'unitcost'},11.{ field:'status', title:'status'},12.{ field:'listprice', title:'listprice'},13.{ field:'itemid', title:'itemid'}14.]],15.singleSelect:false,16.selectOnCheck:true,17.checkOnSelect:true18.});设定完成后的页面如下:
但是我们的 JSON 数据里有个字段是「checked」,这个字段的数据 true / false 就是用来设定 Checkbox 是否勾选,而设定的动作必须要在 DataGrid 加载数据完成后再去执行,这边会使用到 jQuery 的 each 去逐一检查每个数据列的的数据内容,假如 checked 为 true,那就使用「checkRow」这个 Method 将该数据列的 Checkbox 设为勾选的状态,
修改后的 DataGrid 设定程序如下:
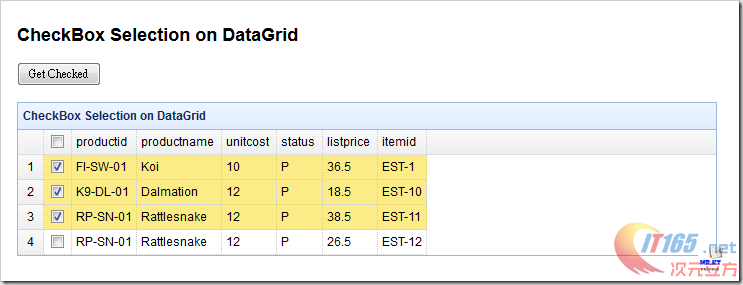
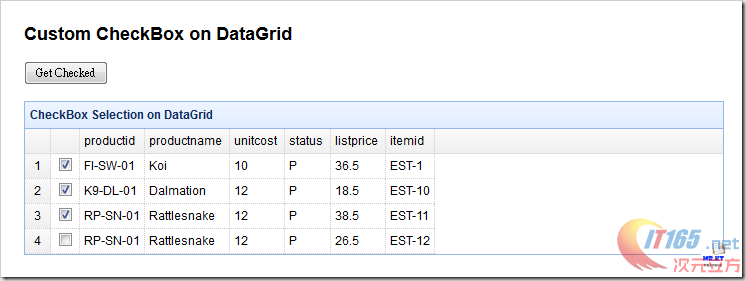
01.$('#dg').datagrid({02.title:'CheckBox Selection on DataGrid',03.url:'datagrid_data3.json',04.width:'700',05.rownumbers:true,06.columns:[[07.{ field:'ck',checkbox:true},08.{ field:'productid', title:'productid'},09.{ field:'productname', title:'productname'},10.{ field:'unitcost', title:'unitcost'},11.{ field:'status', title:'status'},12.{ field:'listprice', title:'listprice'},13.{ field:'itemid', title:'itemid'}14.]],15.singleSelect:false,16.selectOnCheck:true,17.checkOnSelect:true,18.onLoadSuccess:function(data){19.if(data){20.$.each(data.rows,function(index, item){21.if(item.checked){22.$('#dg').datagrid('checkRow', index);23.}24.});25.}26.}27.});重新执行页面后就可以看到 checked 为 true 的数据列 Checkbox 都为勾选,
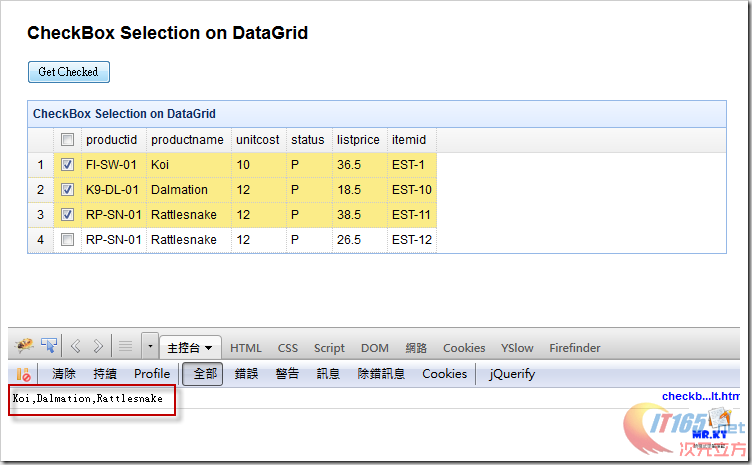
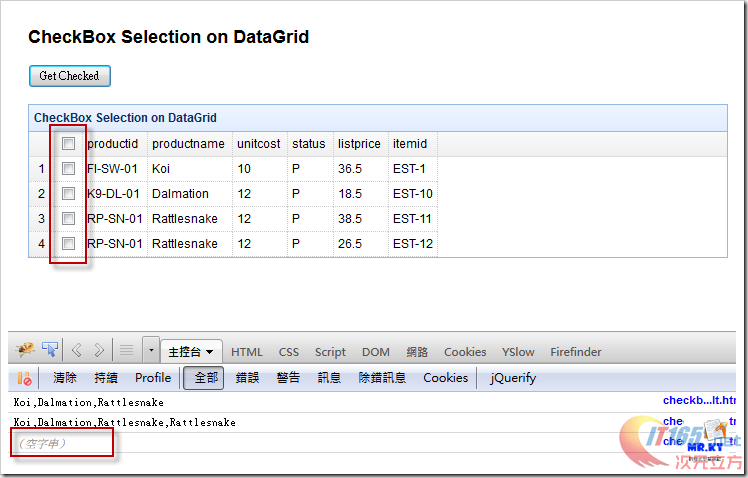
再来就是要取得勾选的数据值,这边也是使用 DataGrid 所提供的 Method「getChecked」 www.it165.net
程序如下:
1.$('#ButonGetCheck').click(function(){2.varcheckedItems = $('#dg').datagrid('getChecked');3.varnames = [];4.$.each(checkedItems,function(index, item){5.names.push(item.productname);6.});7.console.log(names.join(","));8.});最后的执行结果:
方式一的完整 Javascript 程序:
01.$('#dg').datagrid({02.title:'CheckBox Selection on DataGrid',03.url:'datagrid_data3.json',04.width:'700',05.rownumbers:true,06.columns:[[07.{ field:'ck',checkbox:true},08.{ field:'productid', title:'productid'},09.{ field:'productname', title:'productname'},10.{ field:'unitcost', title:'unitcost'},11.{ field:'status', title:'status'},12.{ field:'listprice', title:'listprice'},13.{ field:'itemid', title:'itemid'}14.]],15.singleSelect:false,16.selectOnCheck:true,17.checkOnSelect:true,18.onLoadSuccess:function(data){19.if(data){20.$.each(data.rows,function(index, item){21.if(item.checked){22.$('#dg').datagrid('checkRow', index);23.}24.});25.}26.}27.});28.29.$('#ButonGetCheck').click(function(){30.varcheckedItems = $('#dg').datagrid('getChecked');31.varnames = [];32.$.each(checkedItems,function(index, item){33.names.push(item.productname);34.});35.console.log(names.join(","));36.});设定方式二:不使用预设的设定方式与 Method
这个设定的方式应该是在 jQuery EasyUI 1.3 之前所使用的,因为早期的版本并没有足够的设定方式与 Method 让使用者可以去增加 Checkbox 的项目,这边所使用的 JSON 数据以及 HTML 原始码都跟设定方式一的内容是一样的,不一样的地方在于 Javascript 程序的部份,
先看 DataGrid 的设定
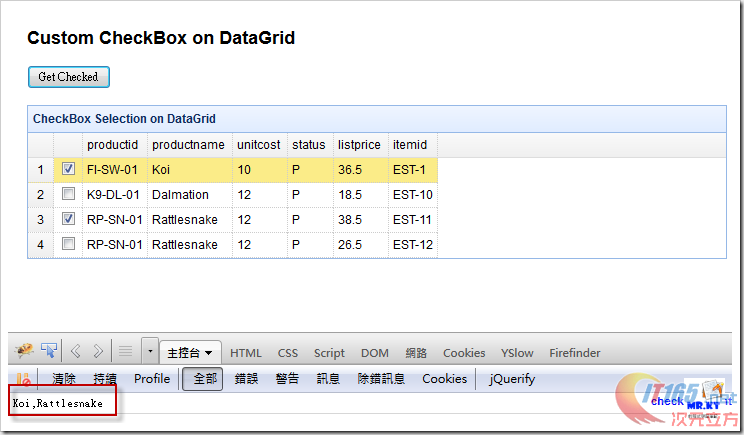
01.$('#dg').datagrid({02.title:'CheckBox Selection on DataGrid',03.url:'datagrid_data3.json',04.width:'700',05.rownumbers:true,06.columns:[[07.{field:'checked',formatter:function(value,row,index){08.if(row.checked){09.return'<input type="checkbox" name="DataGridCheckbox" checked="checked">';10.}11.else{12.return'<input type="checkbox" name="DataGridCheckbox">';13.}14.}},15.{ field:'productid', title:'productid'},16.{ field:'productname', title:'productname'},17.{ field:'unitcost', title:'unitcost'},18.{ field:'status', title:'status'},19.{ field:'listprice', title:'listprice'},20.{ field:'itemid', title:'itemid'}21.]],22.singleSelect:true23.});这边的 Checkbox 设定则是使用 formatter 的方式,类似 ASP.NET GridView 的 ItemTemplate 设定方式,判断每个数据列的 checked 字段数据是否为 true,如 checked 为 true 则回传一个有勾选的 Checkbox,不过这样的设定方式就不会在 DataGrid 的字段名称列出现可让使用者全选的 Checkbox,如需要的话就必须再用其它的方式来做设定,不过这边就不介绍,
接着就是取得有勾选的数据值,因为这里是使用自己加入 checkbox tag 的方式,所以就无法使用 DataGrid 所提供的 getChecked 方法,而是必须要另外写程序来处理,可以使用 extend 的方式去扩充 DataGrid 的方法,
程序如下:
01.$.extend($.fn.datagrid.methods, {02.getChecked:function(jq) {03.varrr = [];04.varrows = jq.datagrid('getRows');05.jq.datagrid('getPanel').find('div.datagrid-cell input:checked').each(function() {06.varindex = $(this).parents('tr:first').attr('datagrid-row-index');07.rr.push(rows[index]);08.});09.returnrr;10.}11.});
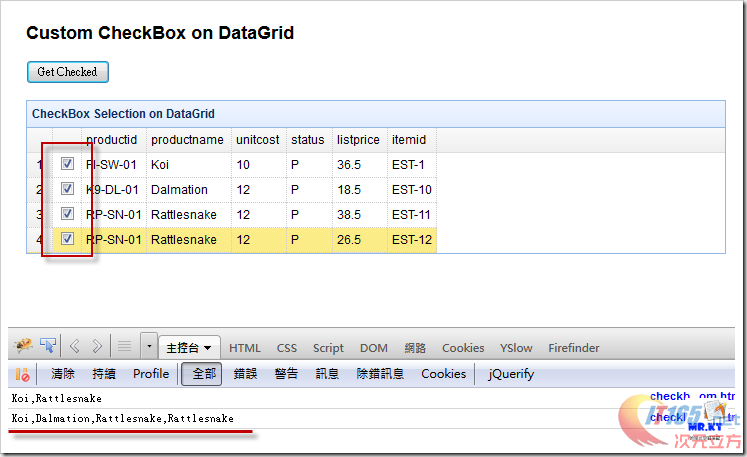
这么一来在取得 DataGrid 的 Checkbox 有勾选的数据值就可以沿用方式一的程序,
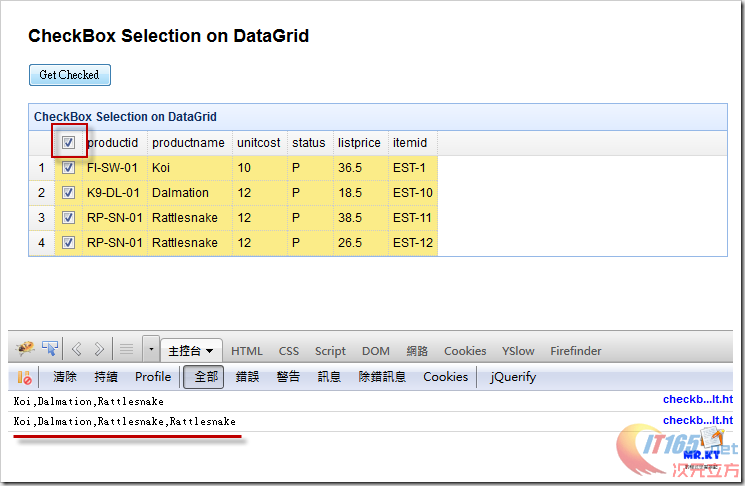
1.$('#ButonGetCheck').click(function(){2.varcheckedItems = $('#dg').datagrid('getChecked');3.varnames = [];4.$.each(checkedItems,function(index, item){5.names.push(item.productname);6.});7.console.log(names.join(","));8.});执行结果:
完整 Javascript 程序如下:
01.$(function(){02.$('#dg').datagrid({03.title:'CheckBox Selection on DataGrid',04.url:'datagrid_data3.json',05.width:'700',06.rownumbers:true,07.columns:[[08.{field:'checked',formatter:function(value,row,index){09.if(row.checked){10.return'<input type="checkbox" name="DataGridCheckbox" checked="checked">';11.}12.else{13.return'<input type="checkbox" name="DataGridCheckbox">';14.}15.}},16.{ field:'productid', title:'productid'},17.{ field:'productname', title:'productname'},18.{ field:'unitcost', title:'unitcost'},19.{ field:'status', title:'status'},20.{ field:'listprice', title:'listprice'},21.{ field:'itemid', title:'itemid'}22.]],23.singleSelect:true24.});25.26.$('#ButonGetCheck').click(function(){27.varcheckedItems = $('#dg').datagrid('getChecked');28.varnames = [];29.$.each(checkedItems,function(index, item){30.names.push(item.productname);31.});32.console.log(names.join(","));33.});34.});35.36.$.extend($.fn.datagrid.methods, {37.getChecked:function(jq) {38.varrr = [];39.varrows = jq.datagrid('getRows');40.jq.datagrid('getPanel').find('div.datagrid-cell input:checked').each(function() {41.varindex = $(this).parents('tr:first').attr('datagrid-row-index');42.rr.push(rows[index]);43.});44.returnrr;45.}46.});以上


转载自:http://www.it165.net/pro/html/201305/6000.html


 1835
1835


 被折叠的 条评论
为什么被折叠?
被折叠的 条评论
为什么被折叠?
 到【灌水乐园】发言


