


在完成Flask相关环境安装后,我们就可以尝试先写一个简单的hello world程序。
0x01 基础配置
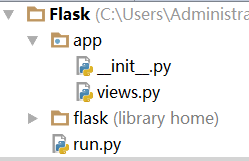
在挂载的虚拟目录flask同一级目录下创建文件run.py:
#!flask/bin/env python
#coding:utf-8

from app import app

app.run(debug=True)在Flask架构中,run.py就是我们应用程序的启动程序。新建app包,然后在app包,其中包的__init__.py文件如下:
from flask import Flask

app = Flask(__name__)
from app import views此时,__name__为__main__,Flask用这个参数确定程序的根目录,以便于查找资源文件的位置。在app包中新建views.py:
#!flask/bin/env python
#coding:utf-8

__author__ = 'kikay'

from app import app
整个组织结构如下:
0x02 路由规则
views.py中定义index函数,并设置以下装饰器:
@app.route('/')
@app.route('/index')
def index():
return 'hello,world!'上面的代码添加了2个装饰器,指定了路由规则。执行run.py后,默认Flask会启动5000端口进行监听,用浏览器访问http://127.0.0.1:5000或者http://127.0.0.1:5000/index就都会看到“hello,world!”了。
@app.route('/')
@app.route('/index/<id>/<name>')
def index(id,name):
    return '<p>提交的ID为{id},name为{name}'.format(id=id,name=name)
上面采用的是动态路由的形式,尖括号内部是动态部分,任何匹配静态部分的URL均会映射到这个路由。

路由规则可以标记为<converter:variable_name>,其中转换器converter可以缺省,如上面的例子,修改如下:
@app.route('/')
@app.route('/index1/<int:id>/<name>')
def index1(id,name):
    return '<p>提交的ID为{id},name为{name}'.format(id=id,name=name)
这样,可以限定id的数据类型为整型,否则会“路由”不到对应的处理函数:

转换器converter有以下几种:int(整型)、float(浮点型)、path(包括“/”的字符串)、string(匹配不包含“/”的字符串),后面2种方式如下:
@app.route('/url/<path:file>/<string:file2>')
def url1(file,file2):
return '<h1>file:{0}</h1><br><h1>{1}</h1>'.format(file,file2)
0x03 构造Url
可以利用url_for来构造Url地址,首先导入url_for:
from flask import url_forurl_for函数接受函数名作为第一个参数,也接受对应 URL 规则的变量部分的命名参数。未知变量部分会添加到 Url 末尾作为查询参数。这里有一些例子:
@app.route('/url/<path:file>/<string:file2>')
def url1(file,file2):
    return '<h1>file:{0}</h1><br><h1>{1}</h1>'.format(file,file2)

@app.route('/url2')
def url2():
    pass

@app.route('/url3')
def url3():
    u1=url_for('url2')
    u2=url_for('url2',test='/1')
    u3=url_for('url1',file='f1',file2='f2')
    u4=url_for('url1',file='f1',file2='f2',_external=True)#输出绝对路径
    html='''
    <p>u1:{u1}</p>
    <p>u2:{u2}</p>
    <p>u3:{u3}</p>
    <p>u4:{u4}</p>
    '''.format(u1=u1,u2=u2,u3=u3,u4=u4)
    return html
效果如下:

另外,利用url_for函数还可以映射路径,看下面的例子:
@app.route('/static')
def staticurl():
    p=url_for('static',filename='test/static.css')
    html=('<h1>{p}</h1>').format(p=p)
    return html
效果如下:

0x04 请求与响应
在服务端接收客户端请求时,需要获取一些访问的对象(资源),比如上下文环境等等。首先在views.py中导入request库:
from flask import request例如:
@app.route('/req')
def req():
    user_agent=request.headers['User_Agent']
    return '您的浏览器为:{0}'.format(user_agent)
上面获取了客户端的User_Agent上下文信息。

再来看下响应:
(1)自定义状态码:
@app.route('/req2')
def req2():
    return '<h1>Bad Request<h1>',400
定义返回的状态码为400:

(2)通过make_response()自定义response对象:
导入make_response:
from flask import make_response例如:
@app.route('/req3')
def req3():
    response=make_response('<h1>OK<h1>',200)
    #添加cookie
    response.set_cookie('test','123456',httponly=True)
    return response
利用set_cookie函数添加了cookie信息:

(3)重定向:
导入redirect:
from flask import redirect例如:
@app.route('/req4')
def req4():
    return redirect('http://www.baidu.com')
(4)Abort中断请求:
导入abort:
from flask import abort例如:
@app.route('/req5')
def req5():
    abort(404)
return '<h1>Test</h1>'遇到abort(404)后,将中断处理过程,即不会返回<h1>Test</h1>的内容。
(5)自定义错误页面
可以自定义错误页面,使用errorhandler装饰器即可:
#定义统一的错误页面
@app.errorhandler(404)
def pageError(error):
return render_template('notFound.html'),404
notFound.html:
<!DOCTYPE html>
<html lang="en">
<head>
    <meta charset="UTF-8">
    <title>not found</title>
</head>
<body>
<h1>没有找到</h1>
</body>
</html>


 421
421

 被折叠的 条评论
为什么被折叠?
被折叠的 条评论
为什么被折叠?
 到【灌水乐园】发言


