


接上篇http://blog.csdn.net/javastudyr/article/details/52526220我们继续来写我们自定义配置文件处理
(1)第三种配置文件处理,利用@bean 来读取配置文件
1. 新增config2
    package com.springboot.study.config;

/**
 * 自定义配置
 * @author like
 *
 */
public class Config2 {
    private String name;
    private String gender;
    public String getName() {
        return name;
    }
    public void setName(String name) {
        this.name = name;
    }
    public String getGender() {
        return gender;
    }
    public void setGender(String gender) {
        this.gender = gender;
    }
    @Override
    public String toString() {
        return "Config [name=" + name + ", gender=" + gender + "]";
    }


}- 在启动类中加载bean,这个也可以在其他类中,一般来说在启动类中加载比较好管理,或者在配置类中加载也是不错的,这里我们在启动类中添加配置。
package com.springboot.study;

import org.springframework.boot.SpringApplication;
import org.springframework.boot.autoconfigure.SpringBootApplication;
import org.springframework.boot.context.properties.ConfigurationProperties;
import org.springframework.context.annotation.Bean;

import com.springboot.study.config.Config2;

/**
 * 启动主类
 * @author like
 *
 */
@SpringBootApplication
public class ConfigApp {
    @Bean
    @ConfigurationProperties(prefix="test")
    public Config2 getConfig(){
        return new Config2();
    }

    public static void main(String[] args) {
        SpringApplication.run(ConfigApp.class, args);
    }
}- 在controller中新增方法来测试这个配置是否生效
package com.springboot.study.controller;
import org.springframework.beans.factory.annotation.Autowired;
import org.springframework.beans.factory.annotation.Value;
import org.springframework.web.bind.annotation.RequestMapping;
import org.springframework.web.bind.annotation.RestController;
import com.springboot.study.config.Config;
import com.springboot.study.config.Config2;
/**
* 自定义配置文件读取控制类
* @author like
*
*/
@RestController
public class ConfigController {
@Value(value="${test.name}")
private String test_Name;
@Value(value="${test.gender}")
private String test_gender;
@Value(value="${test.default:defaultValue}")
private String test_dafault;
@Autowired
private Config config;
@Autowired
private Config2 config2;
@RequestMapping(value="/readApplicationConfigByValue")
public String readApplicationConfigByValue(){
return test_Name + " : " + test_gender;
}
@RequestMapping(value= "readDefaultValue")
public String readDefaultValue(){
return test_dafault;
}
@RequestMapping("/readConfigByBean")
public String readConfigByBean(){
return config.toString();
}
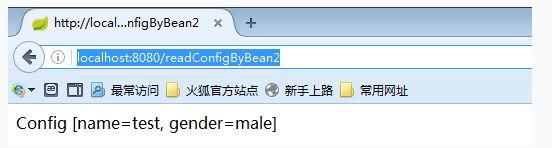
@RequestMapping("/readConfigByBean2")
public String readConfigByBean2(){
return config2.toString();
}
}
(2)第四种,读取不在application.properties中的自定义配置文件
1.在src/main/resources中创建config文件夹,再创建config.properties文件
2.增加以下内容
test.name=test3
test.gender=male3
3.新增config3
package com.springboot.study.config;

import org.springframework.boot.context.properties.ConfigurationProperties;
import org.springframework.stereotype.Component;

/**
 * 自定义配置
 * @author like
 *
 */
@Component
@ConfigurationProperties(prefix="test",locations="classpath:config/config.properties")
public class Config3 {
    private String name;
    private String gender;
    public String getName() {
        return name;
    }
    public void setName(String name) {
        this.name = name;
    }
    public String getGender() {
        return gender;
    }
    public void setGender(String gender) {
        this.gender = gender;
    }
    @Override
    public String toString() {
        return "Config [name=" + name + ", gender=" + gender + "]";
    }


}
(3)在controller中新增方法来测试自定义读取配置文件是否正确
package com.springboot.study.controller;
import org.springframework.beans.factory.annotation.Autowired;
import org.springframework.beans.factory.annotation.Value;
import org.springframework.web.bind.annotation.RequestMapping;
import org.springframework.web.bind.annotation.RestController;
import com.springboot.study.config.Config;
import com.springboot.study.config.Config2;
import com.springboot.study.config.Config3;
/**
* 自定义配置文件读取控制类
* @author like
*
*/
@RestController
public class ConfigController {
@Value(value="${test.name}")
private String test_Name;
@Value(value="${test.gender}")
private String test_gender;
@Value(value="${test.default:defaultValue}")
private String test_dafault;
@Autowired
private Config config;
@Autowired
private Config2 config2;
@Autowired
private Config3 config3;
@RequestMapping(value="/readApplicationConfigByValue")
public String readApplicationConfigByValue(){
return test_Name + " : " + test_gender;
}
@RequestMapping(value= "readDefaultValue")
public String readDefaultValue(){
return test_dafault;
}
@RequestMapping("/readConfigByBean")
public String readConfigByBean(){
return config.toString();
}
@RequestMapping("/readConfigByBean2")
public String readConfigByBean2(){
return config2.toString();
}
/**
* 读取自定义在config文件里config.properties的配置
* @return
*/
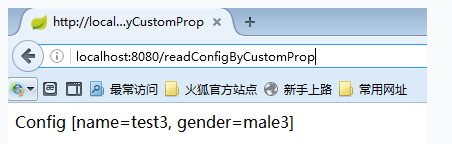
@RequestMapping(value="/readConfigByCustomProp")
public String readConfigByCustomProp(){
return config3.toString();
}
}(4)访问:http://localhost:8080/readConfigByCustomProp
(5)结果:
到这里自定义配置文件就结束了,下面在补充一点对自定义文件校验的注解
1.新增config4
package com.springboot.study.config;

import javax.validation.constraints.Max;
import javax.validation.constraints.NotNull;

import org.hibernate.validator.constraints.NotBlank;
import org.hibernate.validator.constraints.URL;
import org.springframework.boot.context.properties.ConfigurationProperties;
import org.springframework.stereotype.Component;

/**
 * 自定义配置
 * @author like
 *
 */
@Component
@ConfigurationProperties(prefix="test")
public class Config4 {
    @NotNull
    private String name;
    @NotBlank
    private String gender;
    @URL
    private String url;
    @Max(value=100 ,message="最大不能超过100")
    private int num;
    public String getName() {
        return name;
    }
    public void setName(String name) {
        this.name = name;
    }
    public String getGender() {
        return gender;
    }
    public void setGender(String gender) {
        this.gender = gender;
    }
    public String getUrl() {
        return url;
    }
    public void setUrl(String url) {
        this.url = url;
    }
    public int getNum() {
        return num;
    }
    public void setNum(int num) {
        this.num = num;
    }


}
2.在application中配置如下数据
test.name=test
test.gender=male
test.url=123
test.num=123
3.启动
4.结果:
Description:

Binding to target com.springboot.study.config.Config4@70aa2 failed:

    Property: test.url
    Value: 123
    Reason: 需要是一个合法的URL

    Property: test.num
    Value: 123
    Reason: 最大不能超过100


Action:

Update your application's configuration
到此springboot自定义配置文件全篇结束.


 被折叠的 条评论
为什么被折叠?
被折叠的 条评论
为什么被折叠?
 到【灌水乐园】发言


