


 本文总结了在小程序开发过程中遇到的问题,包括如何对特定位置进行0或置1操作、加载dll或lib库的方法,以及如何在Qt中调用dll中的功能函数。此外,文章还讨论了在Qt中处理字符串转换、文本显示、checkBox使能等问题,提供了实用的代码示例。
今天写小程序遇到的问题,做个小总结:
1.如何对某一位置0或者置1?
写成宏,方便移植
#define setbit(x,y) x|=(1<<y) //将X的第Y位置1
#define clrbit(x,y) x&=~(1<<y) //将X的第Y位清02.是关于如何加载dll或lib库的。可以看这篇bog Qt调用dll中的功能函数 点击打开链接
****************************************************************************************************************************************************
声明: 事先我已经自己动手写了一个简单的dll文件(myDLL.dll),C版接口的。并且用我前两篇有关DLL文章里面的方法,从dll中导出了导入库(.lib)文件,dll中有两个函数,原型如下:
下面分别通过显示调用和隐式调用两种方法,来模拟Qt如何调用外部dll文件中的功能函数,follow me....
预备知识:
1、如果在没有导入库文件(.lib),而只有头文件(.h)与动态链接库(.dll)时,我们才需要显示调用,如果这三个文件都全的话,我们就可以使用简单方便的隐式调用。
2、通常Windows下程序显示调用dll的步骤分为三步(三个函数):LoadLibrary()、GetProcAdress()、FreeLibrary()
其中,LoadLibrary() 函数用来载入指定的dll文件,加载到调用程序的内存中(DLL没有自己的内存!)
GetProcAddress() 函数检索指定的动态链接库(DLL)中的输出库函数地址,以备调用
FreeLibrary() 释放dll所占空间
1、显示调用
Qt提供了一个 QLibrary 类供显示调用。下面给出一个完整的例子:
#include <QApplication>
#include <QLibrary>
#include <QDebug>
#include <QMessageBox>
#include "dll.h"             //引入头文件
typedef int (*Fun)(int,int); //定义函数指针,以备调用
int main(int argc,char **argv)
{
    QApplication app(argc,argv);
    QLibrary mylib("myDLL.dll");   //声明所用到的dll文件
    int result;
    if (mylib.load())              //判断是否正确加载
    {
        QMessageBox::information(NULL,"OK","DLL load is OK!");
        Fun open=(Fun)mylib.resolve("add");    //援引 add() 函数
        if (open)                  //是否成功连接上 add() 函数
        {
            QMessageBox::information(NULL,"OK","Link to Function is OK!");
            result=open(5,6);      //这里函数指针调用dll中的 add() 函数
            qDebug()<<result;
        }
        else
            QMessageBox::information(NULL,"NO","Linke to Function is not OK!!!!");
    }
    else
        QMessageBox::information(NULL,"NO","DLL is not loaded!");
        return 0;  //加载失败则退出28}
myDLL.dll为自定义的dll文件,将其复制到程序的输出目录下就可以调用。显然,显示调用代码书写量巨大,实在不方便。
2、隐式调用
这个时候我们需要三个文件,头文件(.h)、导入库文件(.lib)、动态链接库(.dll),具体步骤如下:
1、首先我们把 .h 与 .lib/.a 文件复制到程序当前目录下,然后再把dll文件复制到程序的输出目录,
2、下面我们在pro文件中,添加 .lib 文件的位置: LIBS+= -L D:/hitempt/api/ -l myDLL
-L 参数指定 .lib/.a 文件的位置
-l 参数指定导入库文件名(不要加扩展名)
另外,导入库文件的路径中,反斜杠用的是向右倾斜的
3、在程序中include头文件(我试验用的dll是用C写的,因此要用 extern "C" { #include "dll.h" } )
下面是隐式调用的实例代码:
#include <QApplication>
#include <QDebug>
extern "C"    //由于是C版的dll文件,在C++中引入其头文件要加extern "C" {},注意
{
        #include "dll.h"
}
int main(int argv ,char **argv)
{
       QApplication app(argv,argv);
       HelloWordl();          //调用Win32 API 弹出helloworld对话框
       qDebug()<<add(5,6);    // dll 中我自己写的一个加法函数
       return 0;  //完成使命后,直接退出,不让它进入事件循环
}
************************************************************************************************************************************
本来是打算用隐身调用的,但是可能是库的原因,造成无法使用。库是别的公司提供的。so,用的第一种。在后面会贴一些我的code。
jida.h 部分 函数形成如下
BOOL WINAPI JidaDllInstall(BOOL install);
BOOL WINAPI JidaDllInitialize(void);
BOOL WINAPI JidaDllUninitialize(void);

DWORD WINAPI JidaBoardCountW(LPCWSTR pszClass, DWORD dwFlags);
BOOL WINAPI JidaBoardOpenW(LPCWSTR pszClass, DWORD dwNum, DWORD dwFlags,/*@out@*/PHJIDA phJida);
BOOL WINAPI JidaBoardClose(HJIDA hJida);

DWORD WINAPI JidaI2CCount(HJIDA hJida);
DWORD WINAPI JidaI2CType(HJIDA hJida, DWORD dwType);
BOOL WINAPI JidaI2CRead(HJIDA hJida, DWORD dwType, BYTE bAddr, LPBYTE pBytes,DWORD dwLen);
BOOL WINAPI JidaI2CWrite(HJIDA hJida, DWORD dwType, BYTE bAddr, LPBYTE pBytes,DWORD dwLen);
在要加载的cpp文件上写上QT,因为dll是window的,里面含有定义的宏DWORD这类,so加上windows.h
#include <windows.h>
#include <QLibrary>
#include "jida.h"
定义指针函数以备调用如:一个add函数。下面第一行为函数,第二行为函数指针。
    //int add(int a,int b);
    //typedef int (*Fun)(int,int); //定义函数指针,以备调用
下面是我的main.cpp里面的。第一行pHandle是给dll的函数里面的api接口,不同dll接口不同,请忽略,不用在意。
主要是dll的加载。QLibrary jida_lib("jida.dll");
然后引用dll里面的函数。resolve是加载dll里面的函数。括号里面的(JidaDallInstall)是Dell里面的函数名。然后直接调用jida_install即可使用dll里面的JidaDallInstall函数。jida_install是自己自定义的。
//加载dll 函数
    FunJidaInstal jida_install=(FunJidaInstal)jida_lib.resolve("JidaDllInstall");    //引用dll里面的JidaDllInstall() 函数
DWORD pHandle = 0; //句柄返回值
    //int add(int a,int b);
    //typedef int (*Fun)(int,int); //定义函数指针,以备调用

    //dll init uninit
    typedef BOOL WINAPI (*FunJidaInstal)(BOOL install);     //BOOL WINAPI JidaDllInstall(BOOL install);
    typedef BOOL WINAPI (*FunJidaDllInit)(BOOL install);    //BOOL WINAPI JidaDllInitialize(void);
    typedef BOOL WINAPI (*FunJidaDllUninit)(BOOL install);  //BOOL WINAPI JidaDllUninitialize(void);
    //板子
    typedef DWORD WINAPI (*FunJidaBoardCountW)(LPCWSTR,DWORD);             //DWORD WINAPI JidaBoardCountW(LPCWSTR pszClass, DWORD dwFlags); 板子数
    typedef BOOL WINAPI (*FunJidaBoardOpenW)(LPCWSTR,DWORD,DWORD,PHJIDA);//打开板子 BOOL WINAPI JidaBoardOpenW(LPCWSTR pszClass, DWORD dwNum, DWORD dwFlags,/*@out@*/PHJIDA phJida);
    typedef BOOL WINAPI (*FunJidaBoardClose)(HJIDA hJida);//BOOL WINAPI JidaBoardClose(HJIDA hJida); 板子关闭
    //I2C
    typedef DWORD WINAPI (*FunJidaI2CCount)(HJIDA);              //DWORD WINAPI JidaI2CCount(HJIDA hJida);
    typedef DWORD WINAPI (*FunJidaI2CType)(HJIDA, DWORD ); //DWORD WINAPI JidaI2CType(HJIDA hJida, DWORD dwType);
    typedef BOOL WINAPI (*FunJidaI2CRead)(HJIDA, DWORD , BYTE , LPBYTE ,DWORD );//BOOL WINAPI JidaI2CRead(HJIDA hJida, DWORD dwType, BYTE bAddr, LPBYTE pBytes,DWORD dwLen);
    typedef BOOL WINAPI (*FunJidaI2CWrite)(HJIDA, DWORD , BYTE , LPBYTE ,DWORD );//BOOL WINAPI JidaI2CWrite(HJIDA hJida, DWORD dwType, BYTE bAddr, LPBYTE pBytes,DWORD dwLen);

    //声明所用到的dll文件
    QLibrary jida_lib("jida.dll");
    //加载dll 函数
    FunJidaInstal jida_install=(FunJidaInstal)jida_lib.resolve("JidaDllInstall");    //引用dll里面的JidaDllInstall() 函数
    FunJidaDllInit jida_dll_init = (FunJidaDllInit)jida_lib.resolve("JidaDllInitialize");
    FunJidaDllUninit jida_dll_uninit = (FunJidaDllUninit)jida_lib.resolve("JidaDllUninitialize");
    FunJidaBoardCountW jida_board_countw = (FunJidaBoardCountW)jida_lib.resolve("JidaBoardCountW");
    FunJidaBoardOpenW jida_board_openw = (FunJidaBoardOpenW)jida_lib.resolve("JidaBoardOpenW");
    FunJidaBoardClose jida_board_close = (FunJidaBoardClose)jida_lib.resolve("JidaBoardClose");
    FunJidaI2CCount jida_i2c_count = (FunJidaI2CCount)jida_lib.resolve("JidaI2CCount");
    FunJidaI2CType jida_i2c_type = (FunJidaI2CType)jida_lib.resolve("JidaI2CType");
    FunJidaI2CRead jida_i2c_read = (FunJidaI2CRead)jida_lib.resolve("JidaI2CRead");
    FunJidaI2CWrite jida_i2c_write = (FunJidaI2CWrite)jida_lib.resolve("JidaI2CWrite");
进行下简单的判断,dll是否加载成功。.load是加载dll。jida_install是我调用dll里面的dll初始化程序。
等于是调用dll里面的函数,再次看是否加载ok。
    if (jida_lib.load()) //判断是否正确加载
    {
            cout << "qt lib load ok" << endl;
    }
    else
    {
        cout << "qt lib load error" << endl;
    }

    if(jida_install)
    {
        cout << "dell load ok" <<endl;
    }
    else
    {
        cout << "dell load error" <<endl;
    }
3.QT中char * 转换为 wchar_t * (LPTSTR)类型
醉了,windows下宏定义了很多char类型 LPTSTR 。今天,直接使用,qt报错,真TM费事。
将“CPU”转化为wcha_t *
    QString str = "CPU";
    const wchar_t * str_cpu = reinterpret_cast<const wchar_t *>(str.utf16());//char * 转换为 wchar_t * 类型
下面这篇blog很好
QT QString, wchar_t *, TCHAR, CString和其他字符或字符串类型的转化
//QString to wchar_t *:
const wchar_t * encodedName = reinterpret_cast<const wchar_t *>(fileName.utf16());

//QString to char * given a file name:
QByteArray fileName = QFile::encodeName(aFileName);
const char * encodedName = fileName.constData(); //Valid as long as fileName exists

//QString to char * (general case):
const char * tmp = str.toUtf8().constData();
[/code]
Windows 数据类型: http://msdn.microsoft.com/en-us/library/aa383751.aspx
[code lang="cpp"]
//TCHAR:
#ifdef UNICODE
typedef wchar_t TCHAR;
#else
typedef char TCHAR;
#endif

//LPCTSTR:
#ifdef UNICODE
typedef LPCWSTR LPCTSTR;
#else
typedef LPCSTR LPCTSTR;
#endif

//LPCSTR:
typedef const char * LPCSTR;

//LPCWSTR:
typedef const wchar_t * LPCWSTR;

//LPCWSTR to QString:
QString text(QString::fromUtf16(reinterpret_cast<const unsigned short *>(tmp)));
另一种解决办法是使用QString::fromWCharArray(),但这个函数可能导致一些尚未解决的wchar_t符号问题。

最佳的编程风格: 使用L来定义wchar_t宽字符串,比如 L"text" 字义了一个UNICODE字符串"text"。

今天又看到一个文章,关于字符串之间的转换,比较全面,在此将英文翻译并整理一下。
原文地址:http://hi.baidu.com/koko200147/blog/item/7e3cad828c9b9bb66d8119cb.html

QString与其他字符类型之间的转换,QString在Qt4中是UNICODE编码的,使用utf16规范。

QString::fromAscii ( const char * str, int size = -1 );
QString::fromLatin1 ( const char * str, int size = -1 );
QString::fromLocal8Bit ( const char * str, int size = -1 );
QString::fromRawData ( const QChar * unicode, int size );
QString::fromStdString ( const std::string & str );
QString::fromStdWString ( const std::wstring & str );
QString::fromUcs4 ( const uint * unicode, int size = -1 );
QString::fromUtf8 ( const char * str, int size = -1 );
QString::fromUtf16 ( const ushort * unicode, int size = -1 );
QString::fromWCharArray ( const wchar_t * string, int size = -1 );

//qstring ->std::string
QString::toStdString () ;
QString::toStdWString ();

//BSTR<->QString,不太了解BSTR是什么,还没用到过,所以不知道对不对
BSTR bstr_str;
QString q_str((QChar*)bstr_str, wcslen(bstr_str));
bstr_str = SysAllocString(q_str.utf16());//remember use SysFreeString on BSTR

//QString<->LPCSTR
QString::toLocal8Bit().constData();
QString::fromLocal8Bit ( const char * str, int size = -1 );

//QString<->LPCWSTR
QString::utf16();
QString::fromUtf16 ( const ushort * unicode, int size = -1 );

//QString<->CString
CString c_str(qstring::utf16());
QString fromUtf16 (LPCTSTR(c_str) );
CString转换为char*

//1.传给未分配内存的const char* (LPCTSTR)指针.
CString cstr(asdd);
const char* ch = (LPCTSTR)cstr;//ch指向的地址和cstr相同。但由于使用const保证ch不会修改,所以安全.

//2.传给未分配内存的指针.
CString cstr = "ASDDSD";
char *ch = cstr.GetBuffer(cstr1.GetLength() + 1);
cstr.ReleaseBuffer();
//修改ch指向的值等于修改cstr里面的值.
//PS:用完ch后,不用delete ch,因为这样会破坏cstr内部空间,容易造成程序崩溃.

//3.第二种用法。把CString 值赋给已分配内存的char *。
CString cstr1 = "ASDDSD";
int strLength = cstr1.GetLength() + 1;
char *pValue = new char[strLength];
strncpy(pValue, cstr1, strLength);

//4.第三种用法.把CString 值赋给已分配内存char[]数组.
CString cstr2 = "ASDDSD";
int strLength1 = cstr1.GetLength() + 1;
char chArray[100];
memset(chArray,0, sizeof(bool) * 100); //将数组的垃圾内容清空.
strncpy(chArray, cstr1, strLength1);

//5.如果上述都不行,使用以下方法
CString origCString("Hello, World!");
wchar_t* wCharString = origCString.GetBuffer(origCString.GetLength()+1);
size_t origsize = wcslen(wCharString) + 1;
size_t convertedChars = 0;
char *CharString;
CharString=new char(origsize);
wcstombs_s(&convertedChars, CharString, origsize, wCharString , _TRUNCATE);
cout << CharString << endl; //成功输出字符串"Hello,World"
从UTF8编码到GB编码的字符串转换方法:

QString Utf8_To_GB(QString strText)
{
return QString::fromUtf8(strText.toLocal8Bit().data());
}
从GB编码到UTF8编码的字符串转换方法:

QString GB_To_Utf8(char *strText)
{
return QString::fromLocal8Bit(strText);
}
这篇点击打开链接
char * 与 const char *的转换
char *ch1="hello11";
const char *ch2="hello22";
ch2 = ch1;//不报错,但有警告
ch1 = (char *)ch2;


char 转换为 QString
其实方法有很多中,我用的是:
char a='b';
QString str;
str=QString(a);


QString 转换为 char
方法也用很多中
QString str="abc";
char *ch;
ch = str.toLatin1.data();


QByteArray 转换为 char *
char *ch;//不要定义成ch[n];
QByteArray byte;
ch = byte.data();


char * 转换为 QByteArray
char *ch;
QByteArray byte;
byte = QByteArray(ch);


QString 转换为 QByteArray
QByteArray byte;
QString string;
byte = string.toAscii();


QByteArray 转换为 QString
QByteArray byte;
QString string;
string = QString(byte);
这里再对这俩中类型的输出总结一下:
qDebug()<<"print";
qDebug()<<tr("print");
qDebug()<<ch;(ch 为char类型)
qDebug()<<tr(ch);
qDebug()<<byteArray;(byteArray是QByteArray类型)
qDebug()<<tr(byteArray);
qDebug()<<str;(str 为Qstring类型)
但是qDebug()<<tr(str);是不可以的,要想用tr()函数输出QString类型的字符则要如下:
qDebug()<<tr(str.toLatin1);


int 转 QString
int a=10;
QString b;
b=QString::number(a)


QString 转int
QString a="120"
int b;
b=a.toInt()
另一个


1 QString --> string
QString.toStdString();
2 string --> QString
QString::fromStdString(string)
3 QString --->int,double,char *
QString::toInt()
QString::toDouble()
QString.toStdString().c_str();
4 int double char* --->string
可以采用<sstream>里的stringstream
以int 为例,int a = 3;
stringstream ss;
string strInt;
ss<<a;
ss>>strInt;还有一篇,也不错。Qt中 QString 和int, char等的“相互”转换 点击打开链接
4.显示在textBrowser->setText 中文乱码
转成QObject::trUtf8即可。
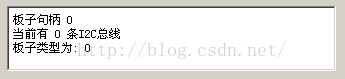
ui->textBrowser->setText((QObject::trUtf8("板子句柄 ")) ;5.QT的textBrowser显示框,要显示追加。使用append即可。append()里面为显示的字符串。
ui->textBrowser->append((QObject::trUtf8("当前有 ")) + QString::number(i2c) + (QObject::trUtf8(" 条I2C总线")));
6.QT的checkBox类型的 使能
ui->checkBox_1->setEnabled(true);
ui->wifi->setEnabled(false);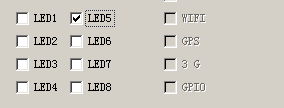


 1359
1359

 被折叠的 条评论
为什么被折叠?
被折叠的 条评论
为什么被折叠?
 到【灌水乐园】发言


