


最近项目中用到消息功能,在网上查找了很多资料,Apache的ActiveMQ为开源JMS消息服务中间件。将其整合到spring中很很容易。下面贴出整合事例。
1。从官网下载最新的ActiveMQ,目前我用的是5.9.0版本。下载spring,版本3.2.1。
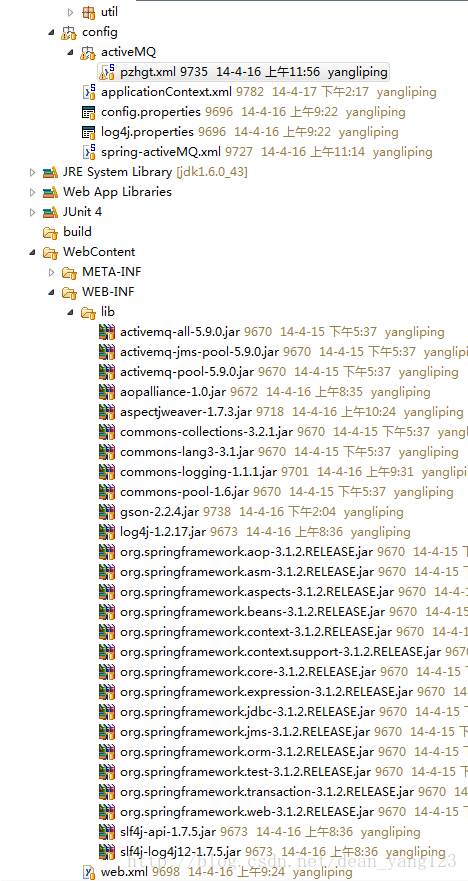
2。构建web工程加入相应的整合JAR包。其中activemq-jms-pool-5.9.0.jar,activema-pool-5.9.0是管理JMS连接工厂的包,不需要连接池功能可以不用加入,只引入activemq-all-5.9.0即可。
3。web.xml配置文件
<?xml version="1.0" encoding="UTF-8"?> <web-app xmlns:xsi="http://www.w3.org/2001/XMLSchema-instance" xmlns="http://java.sun.com/xml/ns/javaee" xsi:schemaLocation="http://java.sun.com/xml/ns/javaee http://java.sun.com/xml/ns/javaee/web-app_2_5.xsd" id="WebApp_ID" version="2.5"> <display-name>fs_jms</display-name> <context-param> <param-name>log4jConfigLocation</param-name> <param-value>classpath:config/log4j.properties</param-value> </context-param> <context-param> <param-name>contextConfigLocation</param-name> <param-value>classpath:config/applicationContext.xml</param-value> </context-param> <!-- log4j监听 --> <listener> <listener-class>org.springframework.web.util.Log4jConfigListener</listener-class> </listener> <!-- spring监听,启动spring容器初始化Bean --> <listener> <listener-class>org.springframework.web.context.ContextLoaderListener</listener-class> </listener> </web-app> 4。spring配置applicationContext.xml<?xml version="1.0" encoding="UTF-8"?> <beans xmlns="http://www.springframework.org/schema/beans" xmlns:xsi="http://www.w3.org/2001/XMLSchema-instance" xmlns:aop="http://www.springframework.org/schema/aop" xmlns:context="http://www.springframework.org/schema/context" xmlns:core="http://activemq.apache.org/schema/core" xmlns:jdbc="http://www.springframework.org/schema/jdbc" xmlns:jms="http://www.springframework.org/schema/jms" xmlns:lang="http://www.springframework.org/schema/lang" xmlns:p="http://www.springframework.org/schema/p" xmlns:task="http://www.springframework.org/schema/task" xmlns:tx="http://www.springframework.org/schema/tx" xmlns:util="http://www.springframework.org/schema/util" xsi:schemaLocation="http://www.springframework.org/schema/beans http://www.springframework.org/schema/beans/spring-beans-3.1.xsd http://www.springframework.org/schema/aop http://www.springframework.org/schema/aop/spring-aop-3.1.xsd http://www.springframework.org/schema/context http://www.springframework.org/schema/context/spring-context-3.1.xsd http://activemq.apache.org/schema/core http://activemq.apache.org/schema/core/activemq-core-5.9.0.xsd http://www.springframework.org/schema/jdbc http://www.springframework.org/schema/jdbc/spring-jdbc-3.1.xsd http://www.springframework.org/schema/jms http://www.springframework.org/schema/jms/spring-jms-3.1.xsd http://www.springframework.org/schema/lang http://www.springframework.org/schema/lang/spring-lang-3.1.xsd http://www.springframework.org/schema/task http://www.springframework.org/schema/task/spring-task-3.1.xsd http://www.springframework.org/schema/tx http://www.springframework.org/schema/tx/spring-tx-3.1.xsd http://www.springframework.org/schema/util http://www.springframework.org/schema/util/spring-util-3.1.xsd"> <!-- 指定系统配置文件,主要是数据库配置 --> <context:property-placeholder location="classpath:config/config.properties" /> <!-- 启用spring注解方式 --> <context:annotation-config /> <!-- 包扫描加入相应的注解自动注入或者初始化 --> <context:component-scan base-package="com.bobei.jms" /> <import resource="classpath:config/spring-activeMQ.xml"/> </beans>
5.spring整合activeMQ配置文件,spring-activeMQ.xml。
<?xml version="1.0" encoding="UTF-8"?>
<beans xmlns="http://www.springframework.org/schema/beans"
xmlns:xsi="http://www.w3.org/2001/XMLSchema-instance" xmlns:aop="http://www.springframework.org/schema/aop"
xmlns:context="http://www.springframework.org/schema/context"
xmlns:core="http://activemq.apache.org/schema/core" xmlns:jms="http://www.springframework.org/schema/jms"
xsi:schemaLocation="http://www.springframework.org/schema/beans http://www.springframework.org/schema/beans/spring-beans-3.1.xsd
http://www.springframework.org/schema/aop http://www.springframework.org/schema/aop/spring-aop-3.1.xsd
http://www.springframework.org/schema/context http://www.springframework.org/schema/context/spring-context-3.1.xsd
http://activemq.apache.org/schema/core http://activemq.apache.org/schema/core/activemq-core-5.9.0.xsd
http://www.springframework.org/schema/jms http://www.springframework.org/schema/jms/spring-jms-3.1.xsd">
<!-- 真正可以产生Connection的ConnectionFactory,由对应的 JMS服务厂商提供 -->
<bean id="targetConnectionFactory" class="org.apache.activemq.ActiveMQConnectionFactory">
<property name="brokerURL" value="tcp://localhost:61616" />
</bean>
<!-- 带连接池的JMS链接工厂 -->
<bean id="pooledConnectionFactory" class="org.apache.activemq.pool.PooledConnectionFactory">
<property name="connectionFactory" ref="targetConnectionFactory" />
<property name="maxConnections" value="10" />
</bean>
<!-- Spring用于管理真正的ConnectionFactory的ConnectionFactory -->
<bean id="connectionFactory"
class="org.springframework.jms.connection.SingleConnectionFactory">
<!-- 目标ConnectionFactory对应真实的可以产生JMS Connection的ConnectionFactory -->
<property name="targetConnectionFactory" ref="pooledConnectionFactory" />
</bean>
<!-- Spring提供的JMS工具类,它可以进行消息发送、接收等 -->
<bean id="jmsTemplate" class="org.springframework.jms.core.JmsTemplate">
<!-- 这个connectionFactory对应的是我们定义的Spring提供的那个ConnectionFactory对象 -->
<property name="connectionFactory" ref="connectionFactory" />
</bean>
<!-- 消息队列目的地 -->
<bean id="pzhgtQueue" class="org.apache.activemq.command.ActiveMQQueue">
<constructor-arg value="pzhgtQueue"/>
</bean>
<!-- 消息监听容器 -->
<bean id="pzhgt_jmsContainer"
class="org.springframework.jms.listener.DefaultMessageListenerContainer"
lazy-init="false">
<property name="connectionFactory" ref="connectionFactory" />
<property name="destination" ref="pzhgtQueue" />
<property name="messageListener" ref="pzhgtMessageListenerAdapter" />
<property name="sessionTransacted" value="true"/>
<!-- 应该只是在Destination为Queue的时候才使用多个MessageConsumer -->
<property name="concurrentConsumers" value="1" />
<property name="maxConcurrentConsumers" value="50" />
<property name="idleTaskExecutionLimit" value="2" />
<property name="receiveTimeout" value="10000" />
<!-- 0:CACHE_NONE,1:CACHE_CONNECTION,2:CACHE_SESSION,3:CACHE_CONSUMER,4:CACHE_AUTO -->
<property name="cacheLevel" value="0" />
</bean>
<!-- 监听适配器。 监听发送过来的队列消息 -->
<bean id="pzhgtMessageListenerAdapter" class="org.springframework.jms.listener.adapter.MessageListenerAdapter">
<property name="delegate">
<bean class="com.bobei.jms.messageListenner.PZHGTMessageListennerAdapter"/>
</property>
<property name="defaultListenerMethod" value="receiveMsg"/>
</bean>
</beans>
消息接收端代码,其中的pzhgtMessageListenerAdapter是一个消息监听适配器,用来监听发送过来的消息。适配器的主要功能是在接收到消息后根据方法的返回值,自动将返回值封装成消息发送给消息生产者。监听适配器代码
public class PZHGTMessageListennerAdapter { @Resource private IMessageHandlerService messageHandlerService; /** * * @param receivedMsg接收到的消息信息,消息采用JSON格式的字符串 * @return String 返回的字符串会自动包装成消息,反馈给消息发送端,如果消息返回为空则没有反馈消息 */ public String receiveMsg(String receivedMsg){ System.err.println("消费者接收到消息..."); System.out.println(receivedMsg); Gson gson = new Gson(); if (receivedMsg==null || ("").equals(receivedMsg) || receivedMsg.trim().length()==0) { return null; } List<MessageJson> msgJsons = gson.fromJson(receivedMsg, new TypeToken<List<MessageJson>>(){}.getType()); List<ResponseJson> repJsons = new ArrayList<ResponseJson>(); for (MessageJson msg : msgJsons) {//遍历消息对象 String rst = messageHandlerService.handleMessage(msg); ResponseJson responseJson = new ResponseJson(); responseJson.setDataId(msg.getDataId()); responseJson.setId(msg.getId()); if (rst!=null) { responseJson.setState(1); responseJson.setErrorMsg(rst); } repJsons.add(responseJson); } return gson.toJson(repJsons); } }


 813
813


 被折叠的 条评论
为什么被折叠?
被折叠的 条评论
为什么被折叠?
 到【灌水乐园】发言


