


上一章我们测试我们的接口的时候使用的是(Advanced REST client)进行接口的测试,大家可以很明显的感觉到该工具对接口的测试是一个很麻烦的过程,需要我们自己去拼接接口以及设计参数,但是我们的前辈已经给我们提供了更加强大的工具,那就是swagger2,通过使用该工具我们可以轻松的实现接口的测试以及开发人员之间接口文档的阅读和使用,接下来我们将讲解如何集成swagger2到我们的工程种中。
首先打开我们的rbac-produce工程的pom.xml引入以下的maven依赖:
                <!-- 引入swagger2依赖 -->
		<dependency>
			<groupId>io.springfox</groupId>
			<artifactId>springfox-swagger2</artifactId>
			<version>2.6.1</version>
		</dependency>

		<dependency>
			<groupId>io.springfox</groupId>
			<artifactId>springfox-swagger-ui</artifactId>
			<version>2.6.1</version>
		</dependency>
然后在我们的com/produce/common/config/ 底下新建一个swagger包目录,同时在该包底下新建SwaggerConfig.java配置类,配置内容如下:
package com.produce.common.config.swagger;

import com.google.common.base.Predicate;
import org.springframework.beans.factory.annotation.Autowired;
import org.springframework.boot.autoconfigure.web.BasicErrorController;
import org.springframework.context.annotation.Bean;
import org.springframework.context.annotation.Configuration;
import org.springframework.core.env.Environment;
import org.springframework.web.bind.annotation.ResponseBody;
import org.springframework.web.bind.annotation.RestController;
import springfox.documentation.RequestHandler;
import springfox.documentation.builders.ApiInfoBuilder;
import springfox.documentation.service.ApiInfo;
import springfox.documentation.spi.DocumentationType;
import springfox.documentation.spring.web.plugins.Docket;
import springfox.documentation.swagger2.annotations.EnableSwagger2;


/*
* 类描述:集成swagger框架
* @auther linzf
* @create 2017/8/9 0009
*/
@Configuration
@EnableSwagger2
public class SwaggerConfig {

    @Autowired
    private Environment env;


    @Bean
    public Docket createRestApi() {
        Predicate<RequestHandler> predicate = new Predicate<RequestHandler>() {
            @Override
            public boolean apply(RequestHandler input) {
                // 除非是在开发环境中否则不开启swagger2
                String active = env.getProperty("spring.profiles.active");
                if(!active.equalsIgnoreCase("prod-8100")){
                    return false;
                }
                Class<?> declaringClass = input.declaringClass();
                if (declaringClass == BasicErrorController.class)// 排除
                    return false;
                if(declaringClass.isAnnotationPresent(RestController.class)) // 被注解的类
                    return true;
                if(input.isAnnotatedWith(ResponseBody.class)) // 被注解的方法
                    return true;
                return false;
            }
        };
        return new Docket(DocumentationType.SWAGGER_2)
                .apiInfo(apiInfo())
                .useDefaultResponseMessages(false)
                .select()
                .apis(predicate)
                .build();
    }

    private ApiInfo apiInfo() {
        return new ApiInfoBuilder()
                .title("swagger2 接口测试专用页面!")//大标题
                .version("1.0")//版本
                .build();
    }

}
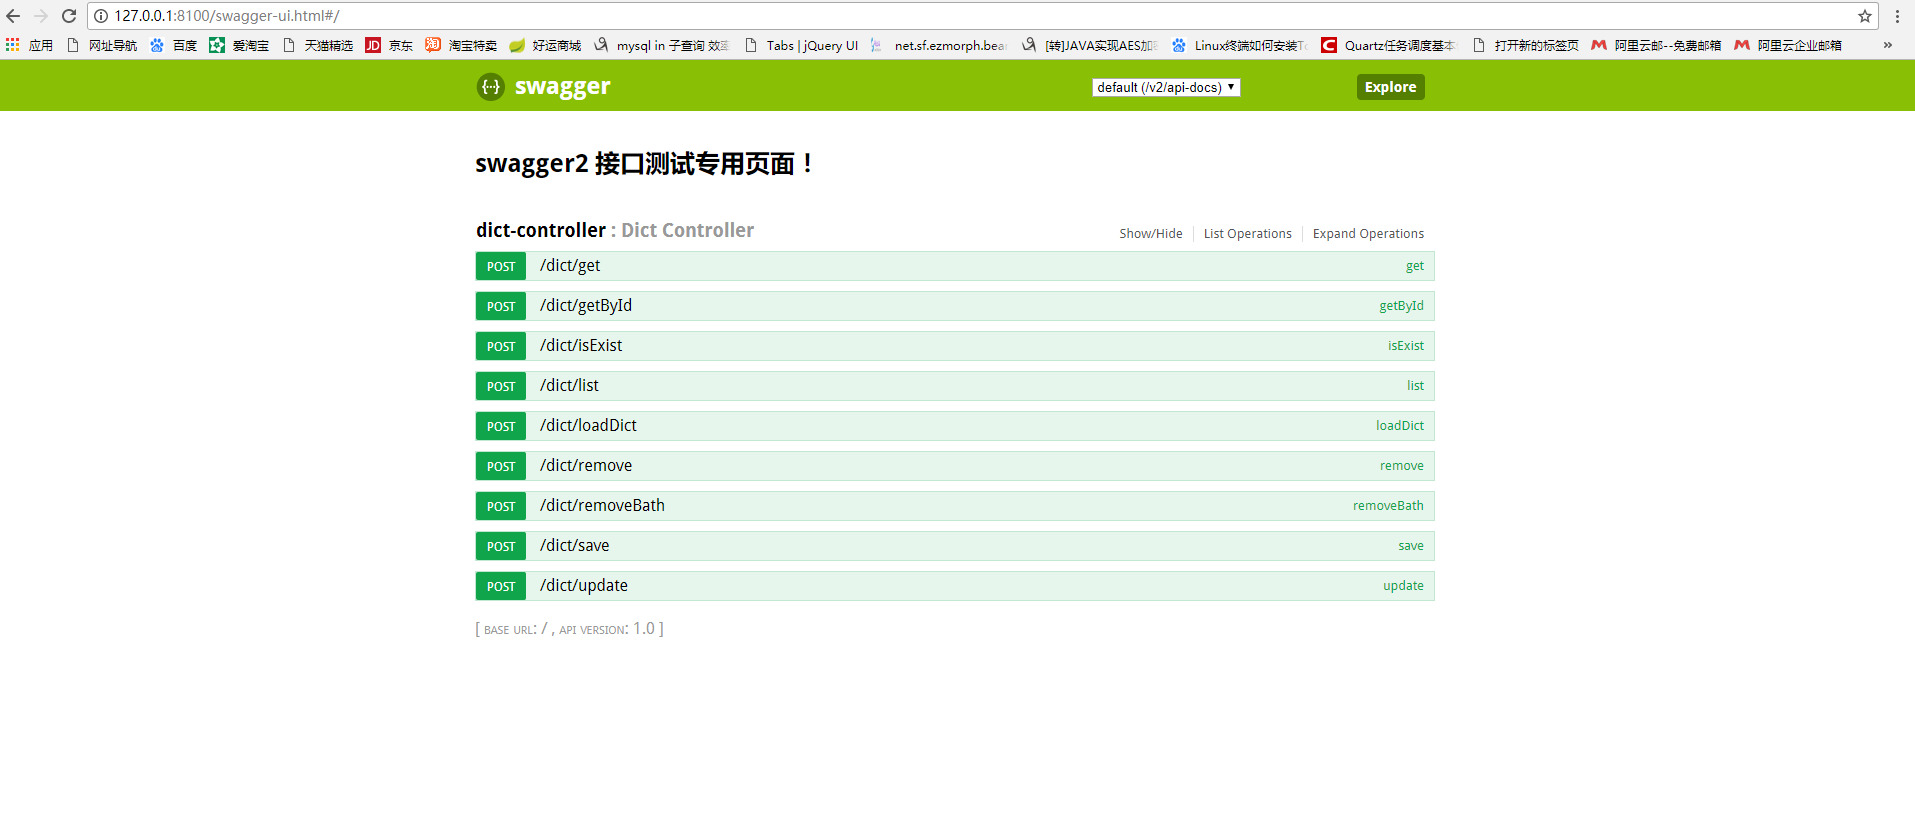
启动我们的注册中心,链路中心同时启动我们的rbac-produce,接着直接访问我们的swagger工程地址:http://127.0.0.1:8100/swagger-ui.html#/,那么我们会看到如下的页面则表示我们的swagger已经集成成功了。
到此我们就完成了我们的swagger2的集成,大家可以使用swagger2来进行相应的接口的测试以及开发工作。
到此为止的GitHub项目地址:https://github.com/185594-5-27/spring-cloud-rbac/tree/master-base-produce-swagger2
上一篇文章地址:基于springboot+redis+bootstrap+mysql开发一套属于自己的分布式springcloud云权限架构(七)【权限架构生产者(数据字典)】
下一篇文章地址:基于springboot+redis+bootstrap+mysql开发一套属于自己的分布式springcloud云权限架构(九)【权限架构生产者(角色管理)】
QQ交流群:578746866


 8232
8232

 被折叠的 条评论
为什么被折叠?
被折叠的 条评论
为什么被折叠?
 到【灌水乐园】发言


