


上一篇文章中,已经对freemarker做了简单的了解;动态表单的概念大家也应该不陌生了,在《浅析动态表单》文章中已经做了一定的分析;jstl自定义标签也比较熟悉了,在此之前已经使用多次了。今天我们就使用freemarker+jstl自定义标签实现动态表单的显示。
下面是我总结的使用动态表单的主要步骤,大家做个参考:
1、定义Map对象
本例在SSH项目里面实现,所以需要配置ActionForm,Document为本例的应用,其对应的ActionForm中另外添加类型为Map的props属性,用来获得与设置模板的变量:
public class DocumentActionForm extends ActionForm {
	private int id;
	/**
	 * 页面上通过:
	 * <input type="text" name="props(KEY)" >
	 * 			------->getProps().put(KEY,value)
	 */
	private Map props = new HashMap();
	public int getId() {
		return id;
	}
	public void setId(int id) {
		this.id = id;
	}
	public Map getProps() {
		return props;
	}
	public void setProps(Map props) {
		this.props = props;
	}
}
2、定义模板
我们将模板都定义成.ftl文件,便于嵌套使用。下面列出了本例子当中的一些模板:
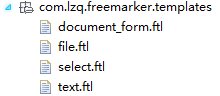
document_form.ftl:该模板定义表单域内容,也就是说,本例子主要通过该模板进行动态显示。根据用户相应的操作,该模板会根据fieldInput中的template属性,调用不同的子模板。
<table class="tableEdit" style="width:580px;" cellspacing="0" border="0" cellpadding="0">
<#assign i = 0>
<#list form.fields as field>
	<#assign i = i + 1>
	<#if field_index % 2 = 0>
	<tr>
	</#if>
                <!--fieldLabel为actionForm里面定义的标签字段,此处意思为从表单域中取出标签-->
		<td class="tdEditLabel" >${field.fieldLabel}</td>
                <!--fieldInput里面的template字段表示模板的名称,针对这个页面表单元素,如何呈现为HTML代码-->
		<td class="tdEditContent"><#include "${field.fieldInput.template}"></td>
	<#if i = 2 || !field_has_next>
	<#assign i = 0>
	</tr>
	</#if>
</#list>
</table>
下面分别是file.ftl、select.ftl和text.ftl对应的子模板:
<input type="file" name="props(${field.fieldName})"><select name="props(${field.fieldName})">
<#list field.items as item>
<option value="${item.value}">${item.label}</option>
</#list>
</select><input type="text" name="props(${field.fieldName})">3、读取模板的方法:
FreeMarkerManager类里面定义了加载模板、设置对象包装器、设置异常处理器等一系列模板处理的步骤,也就是包含了对对模板的处理。
public class FreeMarkerManager {
	private static Configuration cfg =new Configuration();
	static{
		//定义模板的位置:从类路径中,相对于FreeMarkerManager所在的路径加载模板
		cfg.setTemplateLoader(new ClassTemplateLoader(FreeMarkerManager.class, "templates"));
		//设置对象包装器
		cfg.setObjectWrapper(new DefaultObjectWrapper());
		//设置异常处理器
		cfg.setTemplateExceptionHandler(TemplateExceptionHandler.IGNORE_HANDLER);
	}
	public static Configuration getConfiguration(){
		return cfg;
	}
}
4、JSTL自定义函数的实现
本方法里面得到模板配置对象,对模板进行解释,进行输出。
/**
 * 用于freemarker的jstl界面显示函数
 * @author lzq
 *
 */
public class DynaFormFunction {
	private static FormManager formManager;
	private static String defaultTemplate="document_form.ftl";
	public static String form(int workflowId){
		try {
			//查找表单定义
			FlowForm form = formManager.findForm(workflowId);
			if (form == null) {
				return null;
			}
			//得到模板配置
			Configuration cfg =FreeMarkerManager.getConfiguration();
			Template template = null;
			if (form.getTemplate() == null || form.getTemplate().trim().equals("")) {
				template = cfg.getTemplate(defaultTemplate);
			}else {
				template = cfg.getTemplate(form.getTemplate());
			}
			//最终输出的位置
			Writer out = new StringWriter();
			//数据模型
			Map rootMap = new HashMap();
			rootMap.put("form", form);
			//模板引擎,解释模板
			template.process(rootMap, out);
			return out.toString();
		} catch (Exception e) {
			e.printStackTrace();
			return null;
		}
	}
	public void setFormManager(FormManager formManager) {
		DynaFormFunction.formManager = formManager;
	}
	public void setDefaultTemplate(String defaultTemplate) {
		DynaFormFunction.defaultTemplate = defaultTemplate;
	}
}
JSTL自定义标签的对应的配置my.tld文件:
<?xml version="1.0" encoding="UTF-8" ?>
<taglib>
  <tlib-version>1.1</tlib-version>
  <short-name>my</short-name>
  <uri>http://www.lzq.com/functions</uri>
  <function>
    <name>form</name>
    <function-class>com.lzq.web.DynaFormFunction</function-class>
    <function-signature>java.lang.String form(int)</function-signature>
  </function>
</taglib>
页面调用JSTL:
${my:form(documentForm.workflowId) }如此,便能在页面上显示动态的表单了。


 1万+
1万+


 被折叠的 条评论
为什么被折叠?
被折叠的 条评论
为什么被折叠?
 到【灌水乐园】发言


