


1.首先安装依赖包
yum install -y gcc-c++ wget unzip perl pcre-devel zlib-devel

yum -y install libevent
2.下载所需要的代码包和工具包
2.1下载FastDFS-v5.05.tar.gz
wget http://sourceforge.net/projects/fastdfs/files/FastDFS%20Server%20Source%20Code/FastDFS%20Server%20with%20PHP%20Extension%20Source%20Code%20V5.05/FastDFS_v5.05.tar.gz2.2下载libfastcommonV1.0.7
wget https://codeload.github.com/happyfish100/libfastcommon/tar.gz/V1.0.7 -O libfastcommon-1.0.7.tar.gz2.3下载fastdfs-nginx-module-v1.16.tar.gz
wget http://nchc.dl.sourceforge.net/project/fastdfs/FastDFS%20Nginx%20Module%20Source%20Code/fastdfs-nginx-module_v1.16.tar.gz2.4下载nginx
wget http://nginx.org/download/nginx-1.8.1.tar.gz3.查看官方安装步骤
3.1 解压FastDFS_v5.05.tar.gz
tar -zxvf FastDFS_v5.05.tar.gz 3.2 查看 解压后 文件夹FastDFS中的 ==INSTALL== 安装步骤
cat INSTALL
#第一步:安装 libfastcommon
#step 1. download libfastcommon source package from github and install it,
   the github address:
   https://github.com/happyfish100/libfastcommon.git

#第二步:
#step 2. download FastDFS source package and unpack it,
tar xzf FastDFS_v5.x.tar.gz
#for example:
tar xzf FastDFS_v5.08.tar.gz

#step 3. enter the FastDFS dir
cd FastDFS

#step 4. execute:
./make.sh

#step 5. make install
./make.sh install

#step 6. edit/modify the config file of tracker and storage

#step 7. run server programs
#start the tracker server:
/usr/bin/fdfs_trackerd /etc/fdfs/tracker.conf restart
#in Linux, you can start fdfs_trackerd as a service:
/sbin/service fdfs_trackerd start

#start the storage server:
/usr/bin/fdfs_storaged /etc/fdfs/storage.conf restart
#in Linux, you can start fdfs_storaged as a service:
/sbin/service fdfs_storaged start

#step 8. run test program
#run the client test program:
/usr/bin/fdfs_test <client_conf_filename> <operation>
/usr/bin/fdfs_test1 <client_conf_filename> <operation>
#for example, upload a file:
/usr/bin/fdfs_test conf/client.conf upload /usr/include/stdlib.h

#step 9. run monitor program
#run the monitor program:
/usr/bin/fdfs_monitor <client_conf_filename>


tracker server config file sample please see conf/tracker.conf

storage server config file sample please see conf/storage.conf

client config file sample please see conf/client.conf


Item detail
1. server common items
---------------------------------------------------
|  item name            |  type  | default | Must |
---------------------------------------------------
| base_path             | string |         |  Y   |
---------------------------------------------------
| disabled              | boolean| false   |  N   |
---------------------------------------------------
| bind_addr             | string |         |  N   |
---------------------------------------------------
| network_timeout       | int    | 30(s)   |  N   |
---------------------------------------------------
| max_connections       | int    | 256     |  N   |
---------------------------------------------------
| log_level             | string | info    |  N   |
---------------------------------------------------
| run_by_group          | string |         |  N   |
---------------------------------------------------
| run_by_user           | string |         |  N   |
---------------------------------------------------
| allow_hosts           | string |   *     |  N   |
---------------------------------------------------
| sync_log_buff_interval| int    |  10(s)  |  N   |
---------------------------------------------------
| thread_stack_size     | string |  1M     |  N   |
---------------------------------------------------
memo:
   * base_path is the base path of sub dirs:
     data and logs. base_path must exist and it's sub dirs will
     be automatically created if not exist.
       $base_path/data: store data files
       $base_path/logs: store log files
   * log_level is the standard log level as syslog, case insensitive
     # emerg: for emergency
     # alert
     # crit: for critical
     # error
     # warn: for warning
     # notice
     # info
     # debug
   * allow_hosts can ocur more than once, host can be hostname or ip address,
     "*" means match all ip addresses, can use range like this: 10.0.1.[1-15,20]
      or host[01-08,20-25].domain.com, for example:
        allow_hosts=10.0.1.[1-15,20]
        allow_hosts=host[01-08,20-25].domain.com

2. tracker server items
---------------------------------------------------
|  item name            |  type  | default | Must |
---------------------------------------------------
| port                  | int    | 22000   |  N   |
---------------------------------------------------
| store_lookup          | int    |  0      |  N   |
---------------------------------------------------
| store_group           | string |         |  N   |
---------------------------------------------------
| store_server          | int    |  0      |  N   |
---------------------------------------------------
| store_path            | int    |  0      |  N   |
---------------------------------------------------
| download_server       | int    |  0      |  N   |
---------------------------------------------------
| reserved_storage_space| string |  1GB    |  N   |
---------------------------------------------------

memo:
  * the value of store_lookup is:
    0: round robin (default)
    1: specify group
    2: load balance (supported since V1.1)
  * store_group is the name of group to store files.
    when store_lookup set to 1(specify group),
    store_group must be set to a specified group name.
  * reserved_storage_space is the reserved storage space for system
    or other applications. if the free(available) space of any stoarge
    server in a group <= reserved_storage_space, no file can be uploaded
    to this group (since V1.1)
    bytes unit can be one of follows:
      # G or g for gigabyte(GB)
      # M or m for megabyte(MB)
      # K or k for kilobyte(KB)
      # no unit for byte(B)

3. storage server items
-------------------------------------------------
|  item name          |  type  | default | Must |
-------------------------------------------------
| group_name          | string |         |  Y   |
-------------------------------------------------
| tracker_server      | string |         |  Y   |
-------------------------------------------------
| port                | int    | 23000   |  N   |
-------------------------------------------------
| heart_beat_interval | int    |  30(s)  |  N   |
-------------------------------------------------
| stat_report_interval| int    | 300(s)  |  N   |
-------------------------------------------------
| sync_wait_msec      | int    | 100(ms) |  N   |
-------------------------------------------------
| sync_interval       | int    |   0(ms) |  N   |
-------------------------------------------------
| sync_start_time     | string |  00:00  |  N   |
-------------------------------------------------
| sync_end_time       | string |  23:59  |  N   |
-------------------------------------------------
| store_path_count    | int    |   1     |  N   |
-------------------------------------------------
| store_path0         | string |base_path|  N   |
-------------------------------------------------
| store_path#         | string |         |  N   |
-------------------------------------------------
|subdir_count_per_path| int    |   256   |  N   |
-------------------------------------------------
|check_file_duplicate | boolean|    0    |  N   |
-------------------------------------------------
| key_namespace       | string |         |  N   |
-------------------------------------------------
| keep_alive          | boolean|    0    |  N   |
-------------------------------------------------
| sync_binlog_buff_interval| int |   60s |  N   |
-------------------------------------------------

memo:
  * tracker_server can ocur more than once, and tracker_server format is
    "host:port", host can be hostname or ip address.
  * store_path#, # for digital, based 0
  * check_file_duplicate: when set to true, must work with FastDHT server,
    more detail please see INSTALL of FastDHT. FastDHT download page:
    http://code.google.com/p/fastdht/downloads/list
  * key_namespace: FastDHT key namespace, can't be empty when
    check_file_duplicate is true. the key namespace should short as possible
4.安装步骤
4.1 libfastcommon-1.0.7.tar.gz
1.  tar -zxvf libfastcommon-1.0.7.tar.gz
2.  ./make.sh
3.  ./make.sh install
#   把/usr/lib64/libfastcommon.so文件向/usr/lib/下复制一份
#   libfastcommon安装好后会自动将库文件拷贝至/usr/lib64下,由于FastDFS程序引用usr/lib目录所以需要将/usr/lib64下的库文件拷贝至/usr/lib下
4.  cp /usr/lib64/libfastcommon.so  /usr/lib/
4.2 安装FastDFS
1.  tar -zxvf FastDFS_v5.05.tar.gz
2.  cd FastDFS
3.  ./make.sh
4.  ./make.sh install
#  /usr/bin/目录下有以fdfs开头的文件都是编译出来的。
#  配置文件都放到/etc/fdfs文件夹
#  FastDFS/conf目录下的所有的配置文件都复制到/etc/fdfs下
5. cp -f conf/* /etc/fdfs/
4.3配置Tracker服务
1. cd /etc/fdfs/     #进入配置文件所在的目录
2. mkdir -p /usr/data/fastdfs #创建自定义存放路径
3. vim tracker.conf  #tracker.conf中的base_path 为自己路径
4. base_path=/usr/data/fastdfs #设置tracker日志存放路径
5. /usr/bin/fdfs_trackerd /etc/fdfs/tracker.conf #启动
6. /usr/bin/fdfs_trackerd /etc/fdfs/tracker.conf restart #重启
7. /usr/bin/fdfs_trackerd /etc/fdfs/tracker.conf stop #停止
4.4配置Storage服务 (如果是在不同的服务器安装,4.3步的1~4需要重新执行)
1. cd /etc/fdfs/    #进入配置文件所在的目
2. mkdir -p /usr/data/fastdfs #创建自定义存放路径(以创建不需要再创建)
3. vim storage.conf #storage.conf中的base_path 为自己路径
4. base_path=/usr/data/fastdfs  #设置storage日志存放路径
5. store_path0=/usr/data/fastdfs #设置图片存放路径
6. tracker_server=192.168.31.102:22122 #指定tracker服务器的地址和端口

7. /usr/bin/fdfs_storaged /etc/fdfs/storage.conf #启动storage
8. /usr/bin/fdfs_storaged /etc/fdfs/storage.conf stop #停止storage
9. /usr/bin/fdfs_storaged /etc/fdfs/storage.conf restart #重启storage
4.5配置client.conf
1. vim client.conf
2. base_path=/usr/data/fastdfs # 设置 客户端日志存放路径
3. tracker_server=192.168.31.102:22122 #设置 tracker 服务器的地址和端口
4.6测试(huluwa.jpg是我自己上传的图片,系统有默认图片也可以测试:/etc/fdfs 下的 anti-steal.jpg )
[root@localhost fdfs]# /usr/bin/fdfs_test /etc/fdfs/client.conf upload huluwa.jpg
测试成功返回的数据:
4.7搭建nginx提供http服务
4.7.1安装fastdfs-nginx-module_v1.16.tar.gz
1.  tar -zxvf fastdfs-nginx-module_v1.16.tar.gz #解压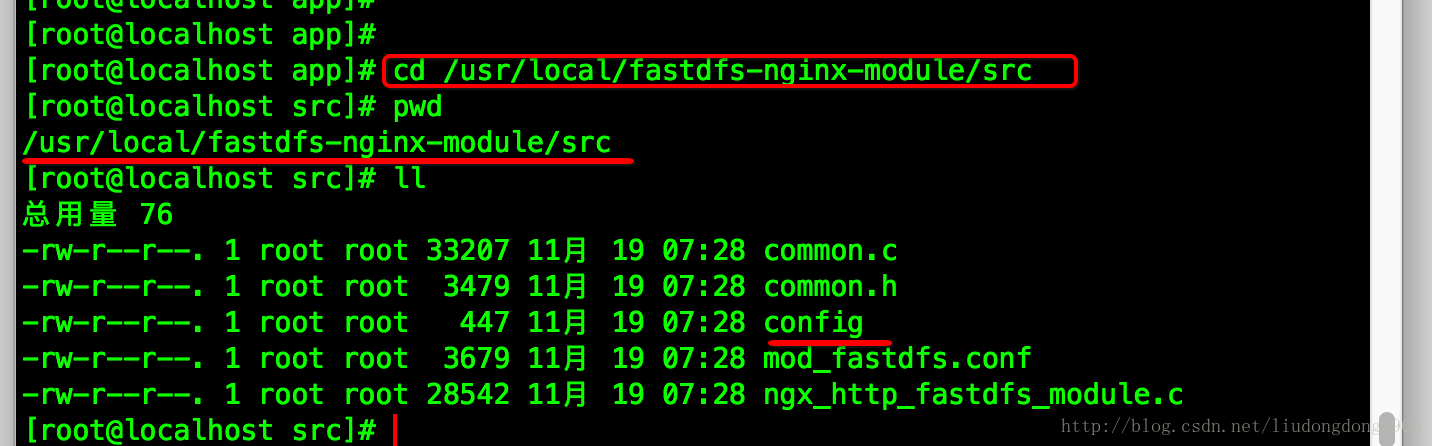
2. cp -r fastdfs-nginx-module /usr/local/ #将解压后的文件复制到 /usr/local/ 下3.vim config #去掉/local

修改之后
CORE_INCS="$CORE_INCS /usr/include/fastdfs /usr/include/fastcommon/" #默认安装fastdfs后,如果这里有local要去掉
CORE_LIBS="$CORE_LIBS -L/usr/lib -lfastcommon -lfdfsclient"
4.7.2 安装ngin
1. tar -zxvf nginx-1.8.0.tar.gz

2. [root@localhost local]# mkdir -p nginx # usr/local/下创建nginx文件目录
   [root@localhost local]# cd nginx/
   [root@localhost nginx]# pwd
      /usr/local/nginx

3. [root@localhost var]# pwd
/var
[root@localhost var]#  mkdir -p temp/nginx #var下创建nginx临时变量存储目录

4. 进入[root@localhost nginx-1.8.0] 修改参数:
./configure \
--prefix=/usr/local/nginx \
--pid-path=/var/run/nginx/nginx.pid \
--lock-path=/var/lock/nginx.lock \
--error-log-path=/var/log/nginx/error.log \
--http-log-path=/var/log/nginx/access.log \
--with-http_gzip_static_module \
--http-client-body-temp-path=/var/temp/nginx/client \
--http-proxy-temp-path=/var/temp/nginx/proxy \
--http-fastcgi-temp-path=/var/temp/nginx/fastcgi \
--http-uwsgi-temp-path=/var/temp/nginx/uwsgi \
--http-scgi-temp-path=/var/temp/nginx/scgi \
--add-module=/usr/local/fastdfs-nginx-module/src #fastdfs-nginx-module src 所在的目录

5. make
6. make install
4.7.3 编辑mod_fastdfs.conf
1. cp -p /usr/local/fastdfs-nginx-module/src/mod_fastdfs.conf  /etc/fdfs/ #复制mod-fastdfs.conf到/etc/fdfs/ 下
2. base_path=/tmp #日志存放路径
3. tracker_server=192.168.31.102:22122 #tracker服务器地址和端口号
3. store_path0=/usr/data/fastdfs #图片存放路径
4. url_have_group_name = true
4.7.4 编辑nginx.conf,添加一个server
 server {
        listen       80;
        server_name  192.168.31.102;
        location /group1/M00/ {
            root /usr/data/fastdfs/data;
            ngx_fastdfs_module;
        }
    }
将libfdfsclient.so拷贝至/usr/lib下
cp -r /usr/lib64/libfdfsclient.so /usr/lib/ 启动nginx
启动trancer 和 storage
[root@localhost /]# cd /usr/local/nginx/sbin/
[root@localhost sbin]# ./nginx

[root@localhost /]# /usr/bin/fdfs_trackerd /etc/fdfs/tracker.conf
[root@localhost /]# /usr/bin/fdfs_storaged /etc/fdfs/storage.conf
浏览器访问:http://192.168.31.102/group1/M00/00/00/wKgfZlivkpeAbomSAADgedhzSso810_big.jpg
拒绝访问,开放端口:
1.  vim /etc/sysconfig/iptables
2.  -A INPUT -m state --state NEW -m tcp -p tcp --dport 22122 -j ACCEPT #插入此行 开放22122端口
3.  service iptables restart
4.7.5设置自动启动
1. vim /etc/rc.d/rc.local
2.  加入:/usr/local/nginx/sbin/nginx
5.一些错误
- java 代码中 出错:java.net.SocketTimeoutException: connect timed out
插入此行 开放23000端口
-A INPUT -m state --state NEW -m tcp -p tcp --dport 23000 -j ACCEPT 


 3417
3417


 被折叠的 条评论
为什么被折叠?
被折叠的 条评论
为什么被折叠?
 到【灌水乐园】发言


