


对应AlarmManage有一个AlarmManagerServie服务程 序,该服务程序才是正真提供闹铃服务的,它主要维护应用程序注册下来的各类闹铃并适时的设置即将触发的闹铃给闹铃设备(在系统中,linux实现的设备名 为”/dev/alarm”),并且一直监听闹铃设备,一旦有闹铃触发或者是闹铃事件发生,AlarmManagerServie服务程序就会遍历闹铃列 表找到相应的注册闹铃并发出广播。该服务程序在系统启动时被系统服务程序system_service启动并初始化闹铃设备(/dev/alarm)。当 然,在JAVA层的AlarmManagerService与Linux Alarm驱动程序接口之间还有一层封装,那就是JNI。
AlarmManager将应用与服务分割开来后,使得应用程序开发者不用 关心具体的服务,而是直接通过AlarmManager来使用这种服务。这也许就是客户/服务模式的好处吧。AlarmManager与 AlarmManagerServie之间是通过Binder来通信的,他们之间是多对一的关系。
在android系统中,AlarmManage提供了3个接口5种类型的闹铃服务。
3个接口:
- // 取消已经注册的与参数匹配的闹铃
- void cancel(PendingIntent operation)
- //注册一个新的闹铃
- void set( int type, long triggerAtTime, PendingIntent operation)
- //注册一个重复类型的闹铃
- void setRepeating( int type, long triggerAtTime, long interval, PendingIntent operation)
- //设置时区
- void setTimeZone(String timeZone)
- // 取消已经注册的与参数匹配的闹铃
- void cancel(PendingIntent operation)
- //注册一个新的闹铃
- void set(int type, long triggerAtTime, PendingIntent operation)
- //注册一个重复类型的闹铃
- void setRepeating(int type, long triggerAtTime, long interval, PendingIntent operation)
- //设置时区
- void setTimeZone(String timeZone)
5个闹铃类型
- public static final int ELAPSED_REALTIME
- // 当系统进入睡眠状态时,这种类型的闹铃不会唤醒系统。直到系统下次被唤醒才传递它,该闹铃所用的时间是相对时间,是从系统启动后开始计时的,包括睡眠时 间,可以通过调用SystemClock.elapsedRealtime()获得。系统值是3 (0x00000003)。
- public static final int ELAPSED_REALTIME_WAKEUP
- //能唤醒系统,用法同ELAPSED_REALTIME,系统值是2 (0x00000002) 。
- public static final int RTC
- //当系统进入睡眠状态时,这种类型的闹铃不会唤醒系统。直到系统下次被唤醒才传递它,该闹铃所用的时间是绝对时间,所用时间是UTC时间,可以通过调用 System.currentTimeMillis()获得。系统值是1 (0x00000001) 。
- public static final int RTC_WAKEUP
- //能唤醒系统,用法同RTC类型,系统值为 0 (0x00000000) 。
- Public static final int POWER_OFF_WAKEUP
- //能唤醒系统,它是一种关机闹铃,就是说设备在关机状态下也可以唤醒系统,所以我们把它称之为关机闹铃。使用方法同RTC类型,系统值为4(0x00000004)。
- public
- static final int ELAPSED_REALTIME
- //当系统进入睡眠状态时,这种类型的闹铃不会唤醒系统。直到系统下次被唤醒才传递它,该闹铃所用的时间是相对时间,是从系统启动后开始计时的,包括睡眠
- 时间,可以通过调用SystemClock.elapsedRealtime()获得。系统值是3 (0x00000003)。
- public static final int ELAPSED_REALTIME_WAKEUP
- //能唤醒系统,用法同ELAPSED_REALTIME,系统值是2 (0x00000002) 。
- public static final int RTC
- //当系统进入睡眠状态时,这种类型的闹铃不会唤醒系统。直到系统下次被唤醒才传递它,该闹铃所用的时间是绝对时间,所用时间是UTC时间,可以通过调用
- System.currentTimeMillis()获得。系统值是1 (0x00000001) 。
- public static final int RTC_WAKEUP
- //能唤醒系统,用法同RTC类型,系统值为 0 (0x00000000) 。
- Public static final int POWER_OFF_WAKEUP
- //能唤醒系统,它是一种关机闹铃,就是说设备在关机状态下也可以唤醒系统,所以我们把它称之为关机闹铃。使用方法同RTC类型,系统值为
- 4(0x00000004)。
注意一个重要的参数PendingIntent。这个PendingIntent可以说是 Intent的进一步封装,他既包含了Intent的描述又是Intent行为的执行(这种定义也许不太严格),如果将Intent比作成一个订单的 话,PendingIntent更像是一个下订单的人,因为它既要负责将订单发出去,也要负责订单发送后的处理,比如发送成功后要准备验收订单货物,发送 失败后要重发还是取消订单等操作。开发者可以通过调用getActivity(Context, int, Intent, int)
getBroadcast(Context, int, Intent, int)
getService(Context, int, Intent, int)
三种不同方式来得到一个PendingIntent实例。
getBroadcast——通过该函数获得的PendingIntent将会 扮演一个广播的功能,就像调用 Context.sendBroadcast()函数一样。当系统通过它要发送一个intent时要采用广播的形式,并且在该intent中会包含相应的 intent接收对象,当然这个对象我们可以在创建PendingIntent的时候指定,也可以通过ACTION 和CATEGORY等描述让系统自动找到该行为处理对象。
- Intent intent = new Intent(AlarmController. this , OneShotAlarm. class );
- PendingIntent sender = PendingIntent.getBroadcast(AlarmController.this , 0 , intent, 0 );
- Intent intent = new Intent(AlarmController.this, OneShotAlarm.class);
- PendingIntent sender = PendingIntent.getBroadcast(AlarmController.this, 0, intent, 0);
getActivity——通过该函数获得的PendingIntent可以直 接启动新的activity, 就像调用 Context.startActivity(Intent)一样.不过值得注意的是要想这个新的Activity不再是当前进程存在的Activity 时。我们在intent中必须使用Intent.FLAG_ACTIVITY_NEW_TASK.
- // The PendingIntent to launch our activity if the user selects this notification
- PendingIntent contentIntent = PendingIntent.getActivity(this , 0 , new Intent( this , AlarmService. class ), 0 );
- // The PendingIntent to launch our activity if the user selects this notification
- PendingIntent contentIntent = PendingIntent.getActivity(this, 0, new Intent(this, AlarmService.class), 0);
getService——通过该函数获得的PengdingIntent可以直接启动新的Service,就像调用Context.startService()一样。
- // Create an IntentSender that will launch our service, to be scheduled
- // with the alarm manager.
- mAlarmSender = PendingIntent.getService(AlarmService.this ,
- 0 , new Intent(AlarmService. this , AlarmService_Service. class ), 0 );
通过代码来实现这个数据传输过程是冗长乏味的,Android提供了AIDL工具来处理这项工作。
AIDL IPC机制是面向接口的,像COM或Corba一样,但是更加轻量级。它是使用代理类在客户端和实现端传递数据。
- Calls made from the local process are executed in the same thread that is making the call. If this is your main UI thread, that thread continues to execute in the AIDL interface. If it is another thread, that is the one that executes your code in the service. Thus, if only local threads are accessing the service, you can completely control which threads are executing in it (but if that is the case, then you shouldn't be using AIDL at all, but should instead create the interface by implementing a Binder).
- Calls from a remote process are dispatched from a thread pool the platform maintains inside of your own process. You must be prepared for incoming calls from unknown threads, with multiple calls happening at the same time. In other words, an implementation of an AIDL interface must be completely thread-safe.
- The
onewaykeyword modifies the behavior of remote calls. When used, a remote call does not block; it simply sends the transaction data and immediately returns. The implementation of the interface eventually receives this as a regular call from theBinderthread pool as a normal remote call. Ifonewayis used with a local call, there is no impact and the call is still synchronous.
AIDL使用简单的语法来声明接口,描述其方法以及方法的参数和返回值。这些参数和返回值可以是任何类型,甚至是其他AIDL生成的接口。
需要特别注意的是, 对于非基本数据类型,也不是String和CharSequence类型的,需要有方向指示,包括in、out和inout,in表示由客户端设置,out表示由服务端设置,inout是两者均可设置。
import com.demo.Person;
interface IMyService {
void savePersonInfo(in Person person);
List<Person> getAllPerson();
}
private LinkedList<Person> personList = new LinkedList<Person>();
@Override
public IBinder onBind(Intent intent) {
return mBinder;
}
private final IMyService.Stub mBinder = new IMyService.Stub(){
@Override
public void savePersonInfo(Person person) throws RemoteException {
if (person != null){
personList.add(person);
}
}
@Override
public List<Person> getAllPerson() throws RemoteException {
return personList;
}
};
}
public static abstract class Stub extends android.os.Binder implements com.demo.IMyService
1) void writeToParcel(Parcel dest, int flags) 将需要序列化存储的数据写入外部提供的Parcel对象dest。而看了网上的代码例子,个人猜测,读取Parcel数据的次序要和这里的write次序一致,否则可能会读错数据。具体情况我没试验过!
2) describeContents() 没搞懂有什么用,反正直接返回0也可以
3) static final Parcelable.Creator对象CREATOR 这个CREATOR命名是固定的,而它对应的接口有两个方法:
createFromParcel(Parcel source) 实现从source创建出JavaBean实例的功能
newArray(int size) 创建一个类型为T,长度为size的数组,仅一句话(return new T[size])即可。估计本方法是供外部类反序列化本类数组使用。
private String name;
private String telNumber;
private int age;
public Person() {}
public Person(Parcel pl){
name = pl.readString();
telNumber = pl.readString();
age = pl.readInt();
}
public String getName() {
return name;
}
public void setName(String name) {
this.name = name;
}
public String getTelNumber() {
return telNumber;
}
public void setTelNumber(String telNumber) {
this.telNumber = telNumber;
}
public int getAge() {
return age;
}
public void setAge( int age) {
this.age = age;
}
@Override
public int describeContents() {
return 0;
}
@Override
public void writeToParcel(Parcel dest, int flags) {
dest.writeString(name);
dest.writeString(telNumber);
dest.writeInt(age);
}
public static final Parcelable.Creator<Person> CREATOR = new Parcelable.Creator<Person>() {
@Override
public Person createFromParcel(Parcel source) {
return new Person(source);
}
@Override
public Person[] newArray( int size) {
return new Person[size];
}
};
}
然后创建Person.aidl文件,注意这里的parcelable和原来实现的Parcelable 接口,开头的字母p一个小写一个大写:
parcelable Person;
3. 抛出的异常是不能返回给调用者(跨进程抛异常处理是不可取的)。
3. 客户端获取接口
private ServiceConnection mRemoteConnection = new ServiceConnection() {
public void onServiceConnected(ComponentName className, IBinder service) {
mRemoteService = IMyService.Stub.asInterface(service);
}
public void onServiceDisconnected(ComponentName className) {
mRemoteService = null;
}
};
* Cast an IBinder object into an com.demo.IMyService interface,
* generating a proxy if needed.
*/
public static com.demo.IMyService asInterface(android.os.IBinder obj) {...}
unbindService(mRemoteConnection);
} else{
bindService( new Intent( "com.demo.IMyService"),
mRemoteConnection, Context.BIND_AUTO_CREATE);
}
mIsRemoteBound = !mIsRemoteBound;
new View.OnClickListener(){
private int index = 0;
@Override
public void onClick(View view) {
Person person = new Person();
index = index + 1;
person.setName( "Person" + index);
person.setAge(20);
person.setTelNumber( "123456");
try {
mRemoteService.savePersonInfo(person);
} catch (RemoteException e) {
e.printStackTrace();
}
}
});
listPersonButton.setOnClickListener(
new View.OnClickListener(){
@Override
public void onClick(View view) {
List<Person> list = null;
try {
list = mRemoteService.getAllPerson();
} catch (RemoteException e) {
e.printStackTrace();
}
if (list != null){
StringBuilder text = new StringBuilder();
for(Person person : list){
text.append( "\nPerson name:");
text.append(person.getName());
text.append( "\n age :");
text.append(person.getAge());
text.append( "\n tel number:");
text.append(person.getTelNumber());
}
inputPersonEdit.setText(text);
} else {
Toast.makeText(ServiceActivity. this, "get data error",
Toast.LENGTH_SHORT).show();
}
}
});
Permission权限
如果Service在AndroidManifest.xml中声明了全局的强制的访问权限,其他引用必须声明权限才能来start,stop或bind这个service.
另外,service可以通过权限来保护她的IPC方法调用,通过调用checkCallingPermission(String)方法来确保可以执行这个操作。
AndroidManifest.xml的Service元素
< intent-filter >
< action android:name ="com.demo.IMyService" />
</ intent-filter >
</ service >
The name of the process where the service is to run. Normally, all components of an application run in the default process created for the application. It has the same name as the application package. The <application> element's process attribute can set a different default for all components. But component can override the default with its own process attribute, allowing you to spread your application across multiple processes.
摘要: Android 屏幕自适应方向尺寸与分辨率,android 自适应分辨率,android 屏幕自适应,android 图片自适应,android 横屏布局,包括屏幕界面布局、多分辨率支持、获取屏幕尺寸、屏幕横屏与竖屏等。 屏幕界面布局 Android 手机屏幕大小有 4
| Android 屏幕自适应方向尺寸与分辨率,android 自适应分辨率,android 屏幕自适应,android 图片自适应,android 横屏布局,包括屏幕界面布局、多分辨率支持、获取屏幕尺寸、屏幕横屏与竖屏等。 屏幕界面布局Android 手机屏幕大小有 480x320 、640x360, 、800x480 ,怎样让 App 自动适应不同的屏幕呢? 我们可以在 res 目录下创建不同的 layout 文件夹,比如 layout-640x360 、layout-800x480 ,所有的 layout 文件在编译之后都会写入 R.java 里,而系统将根据屏幕的大小自己选择合适的 layout 进行使用。 多分辨率支持支持多分辨率有 mdpi、ldpi、hdpi 3个文件。
系统将根据机器的分辨率来分别到这几个文件夹里面去找对应的图片,在程序开发中,为了兼容不同平台不同屏幕,建议将不同版本图片根据需求存放在各自对应的文件夹中。 获取屏幕尺寸code by 'http://www.desteps.com'
-->以下为引用内容:
Display display = getWindowManager().getDefaultDisplay();
int width = display.getWidth();
int height = display.getHeight();
DisplayMetrics dm = new DisplayMetrics();
dm = getResources().getDisplayMetrics();
int screenWidth = dm.widthPixels;
int screenHeight = dm.heightPixels;
float density = dm.density;
float xdpi = dm.xdpi;
float ydpi = dm.ydpi; 屏幕横屏与竖屏 |
屏幕横屏与竖屏
1、横屏竖屏自动切换
首先在 res 目录下建立 layout-port-800x600和layout-land 两个目录,里面分别放置竖屏和横屏两种布局文件,这样在手机屏幕方向变化的时候系统会自动调用相应的布局文件,避免一种布局文件无法满足两种屏幕显示的问题。
有的程序适合从竖屏切换到横屏,或者反过来,这个时候怎么办呢?可以在配置 Activity 的地方进行如下的配置:
code by 'http://www.desteps.com'
 -->以下为引用内容:
android:screenOrientation="portrait"
这样就可以保证是竖屏总是竖屏了,或者 landscape 横向。
而有的程序是适合横竖屏切换的。如何处理呢?首先要在配置 Activity 的时候进行如下的配置:
code by 'http://www.desteps.com'
 -->以下为引用内容:
android:configChanges="keyboardHidden|orientation"
另外需要重写 Activity 的 onConfigurationChanged 方法。实现方式如下:
code by 'http://www.desteps.com'
 -->以下为引用内容:
@Override
public void onConfigurationChanged(Configuration newConfig) {
super.onConfigurationChanged(newConfig);
if (this.getResources().getConfiguration().orientation == Configuration.ORIENTATION_LANDSCAPE) {
// land do nothing is ok
} else if (this.getResources().getConfiguration().orientation == Configuration.ORIENTATION_PORTRAIT) {
// port do nothing is ok
}
}
2、不同分辨率横屏竖屏自动切换
以800x600 为例,可以在res目录下建立 layout-port-800x600 和 layout-land-800x600 两个目录
说明:每个 activity 都有这个属性 screenOrientation ,每个 activity 都需要设置,可以设置为竖屏(portrait),也可以设置为无重力感应(nosensor)。
3、屏幕固定,不随手机方向转动而变化
可以在 AndroidManifest.xml 中配置,加入:
code by 'http://www.desteps.com'
 -->以下为引用内容:
android:screenOrientation="landscape"
例如(landscape 是横向,portrait 是纵向):
code by 'http://www.desteps.com'
 -->以下为引用内容:
<?xml version="1.0" encoding="utf-8"?>
<manifest xmlns:android="http://schemas.android.com/apk/res/android"
package="com.ray.linkit"
android:versionCode="1"
android:versionName="1.0">
<application android:icon="@drawable/icon" android:label="@string/app_name">
<activity android:name=".Main"
android:label="@string/app_name"
android:screenOrientation="portrait">
<intent-filter>
<action android:name="android.intent.action.MAIN" />
<category android:name="android.intent.category.LAUNCHER" />
</intent-filter>
</activity>
<activity android:name=".GamePlay"
android:screenOrientation="portrait"></activity>
<activity android:name=".OptionView"
android:screenOrientation="portrait"></activity>
</application>
<uses-sdk android:minSdkVersion="3" />
</manifest>
android 每次屏幕的切换动会重启 Activity ,所以应该在Activity销毁前保存当前活动的状态,在Activity再次Create的时候载入配置,那样进行中的游戏就不再自动重启。
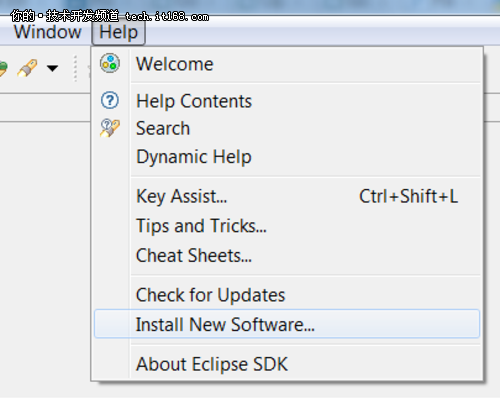
安装keytool插件
在eclipse的Help菜单中,如下图,选择安装新软件:
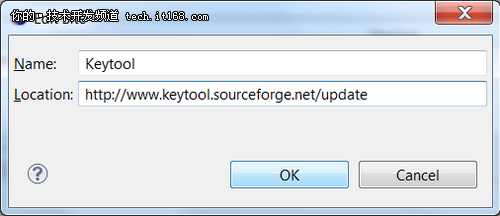
在安装地址中输入如下地址:http://www.keytool.sourceforge.net/update ,如下图
申请map api真是一波三折
首先先把keystore 弄坏了....!!!
惆怅的以为需要重装java
随后就重新安装了一下keystore
方法如下
注意(....是否正确?[否]: 后面是直接回车,然后接着输入要求的信息)
注意建议设置的用户名和密码统一为android ,因为eclipse中默认的证书用户名和密码也是android,如果设置其他的用户名和密码,则会带来不必要的麻烦。我就遇到过,如果设置成其他密码还要找办法去修改eclipse里面的默认密码。 (此处转载)
注意:此处的[否]:后面是大写的Y。密钥口令都是android。
下图:3、4是新证书的内容,属于自动生成.
然而好不容易弄好了,结果系统是win7的不能够正常输出md5值
所以keytool -list -v -keystore debug.keystore 这样就可以了
然而放入应用中却还是不行,地图成网状结构....靠一下
后来经过不懈的努力终于发现问题的所在
要cd一下将路径建在
也就是打开Eclipse选择 Windows→Preference→Android→Build,其中Default debug keystore的值便是debug.keystore的路径。
而且密码必须要得是android
var Interface = function(name,methods){
    if(arguments.length != 2){
        throw new Error("Interface constructor called with" + arguments.length+"arguments,but expected exactly 2.");
    }

    this.name;
    this.methods = [];
    for(var i = 0,len = methods.length; i < len; i++){
        if(typeof methods[i] !== 'string'){
            throw new Error("Interface constructor expects method names to be passed in a STRING");
        }
        this.methods.push(methods[i]);
    }
};
//define a interface: var NewInterface = interface('NewInterface',[funa,funb...]);
Interface.ensureImplements = function(object){
    if(arguments.length < 2){
        throw new Error("Function Interface.ensureImplements called with" + arguments.length + "arguments,but expected at least 2.");
    }

    for(i = 1,len = arguments.length; i < len; i++){
        var interface = arguments[i];
        if(interface.constructor !== Interface){
            throw new Error("Function Interface.ensureImplements expects arguments two and above to be instance of Interface.");
        }
        for(var j = 0,methodsLen = interface.methods.length;j < methodsLen;j++){
            var method = interface.methods[j];
            if(!object[method] || typeof object[method] !== 'function'){
                throw new Error("Function Interface.ensureImplements:does not implement the " + interface.name + "interface.Method" + method + "was not found.");
            }
        }
    }
}
//Interface.ensureImplements(object,interface_a,interface_b);
鸭辨式的写法是我觉得比较好的一种接口方式。
只要在成品之前检测完后删掉就可以。
首先定义一个接口
var NewInterface = interface('NewInterface',[funa,funb...]);

名字就是NewInterface
然后进行检测

Interface.ensureImplements(object,interface_a,interface_b);
注意object是需要检测是否实现接口的对象【注意必须是实例化以后的对象,因为javascript的原型链比较繁】。
4. this.css("top", ( $(window).height() - this.height() ) / 2+$(window).scrollTop() + "px");
5. this.css("left", ( $(window).width() - this.width() ) / 2+$(window).scrollLeft() + "px");
在js中这几天一直在考虑一个问题,如何将事件如click的功能代码和事件分开
比如先获取一个DOM的元素id为test并为之触发一个click事件,事件的功能函数为test将其分离
var test = document.getElementById('test');
test.adEventListener('click',test,false);
function test(){
...
}
如果触发一般的动作没什么问题,如果审查元素或需要运用本身的话就错了。
比如
function test(){
console.log(this);
console.log(e.target);
};
可见事件函数的对象和获取的元素本身纷纷消失。
虽然知道call可以绑定上下文不过对于事件的绑定貌似不行
比如我们改成test.adEventListener('click',test.call(this,e),false);
这样就会报错。
所以痛定思痛想了一个两全其美的办法那就是
var test = document.getElementById('test');
test.adEventListener('click',function(e){
test.call(this,e);
},false);
function test(){
...
}
先用一个匿名函数获取上下文和事件对象e,然后再用CALL绑定上下文就好了,用apply应该也可以。如果用jquery的话貌似还可以用$.proxy()
当一个函数以function进行作用域的回调的时候可以写成这样
(function(){
...
}).call(this)
如果在创建内部匿名函数,往往this就会丢掉。
这时候得打出函数全名并给定作用域
ExColor.prototype.test.call(ExColor,data);
如果说想写的率性一点可以用jquery的
$.proxy函数,感觉作用差不多。
这是一个小技巧,记录一下


 2899
2899


 被折叠的 条评论
为什么被折叠?
被折叠的 条评论
为什么被折叠?
 到【灌水乐园】发言


