


一、fragment的静态创建步骤:(前提:写好自己的Fragment类,见上篇文章)
代码如下:
二、Fragment的动态创建的步骤:(前提:写好自己的Fragment类,见上篇文章)
1.创建Fragment的管理对象fragmentManager。
FragmentManager fragmentManager = getFragmentManager();
2.创建事务对象(Fragment事务对象不能抽取,因为每提交一次,就需要一个新的Fragment事务对象.(所有的事务都有这个特性))
FragmentTransaction fragmentTransaction = fragmentManager.beginTransaction();
3.动态创建Fragment
注:但是,我们开发中使用动态创建一般不用上面的这种方法,因为这种方法每次切换fragment时都会重新初始化(使用replace方法的弊端),所以我们用隐藏和添加来实现代替replace。通过事物对象的add方法添加或show方法显示(如果已经被添加了),然后在跳转前将当前的fragment隐藏。这样我们就不用每次切换fragment都初始化了,节省流量和手机资源。
补充:碎片的回退实现方法,先通过事务对象的addToBackStack一个个放入栈中,再将通过popBackStack()从栈中拿出来,从而实现碎片回退功能。
主要逻辑代码如下:(注释很详细)
下面是代码:
MainActivity.java
activity_main2.xml
fragment_two.xml
在要用到fragment的Activity所对应的XML文件中添加fragment控件并为其添加name属性(android:name="包名.Fragment类名")和id属性(id不加的话会在程序运行时出现闪退)。
<!--name属性是静态引用Fragment类,
Layout属性是让布局立马显示在此布局上(layout属性可有可无)
id属性是必须要引用的,不加的话会报错-->
<fragment
    android:id="@+id/fragment_one"
    android:layout_width="100dp"
    android:layout_height="match_parent"
    android:name="com.zhiyuan3g.mybase3.FragmentOne"
    tools:layout="@layout/fragment_one"/>
代码如下:
MainActivity.class
public class MainActivity extends AppCompatActivity {

    @Override
    protected void onCreate(Bundle savedInstanceState) {
        super.onCreate(savedInstanceState);
        setContentView(R.layout.activity_main);
    }
}
activity_main.xml
<?xml version="1.0" encoding="utf-8"?>
<LinearLayout
xmlns:android="http://schemas.android.com/apk/res/android"
xmlns:tools="http://schemas.android.com/tools"
android:layout_width="match_parent"
android:layout_height="match_parent"
android:orientation="horizontal"
android:paddingBottom="@dimen/activity_vertical_margin"
android:paddingLeft="@dimen/activity_horizontal_margin"
android:paddingRight="@dimen/activity_horizontal_margin"
android:paddingTop="@dimen/activity_vertical_margin"
tools:context="com.zhiyuan3g.fragmenttest.MainActivity">
<fragment
android:name="com.zhiyuan3g.fragmenttest.Fragment1"
android:id="@+id/fragment1"
android:layout_width="0dp"
android:layout_height="match_parent"
android:layout_weight="1"/>
<fragment
android:name="com.zhiyuan3g.fragmenttest.Fragment2"
android:layout_width="0dp"
android:id="@+id/fragment2"
android:layout_height="match_parent"
android:layout_weight="1"/>
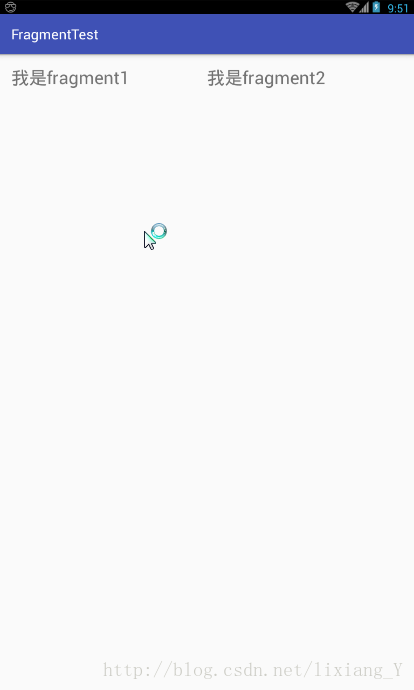
</LinearLayout>Fragment1.class(同Fragment2.class)
public class Fragment1 extends Fragment {
    @Nullable
    @Override
    public View onCreateView(LayoutInflater inflater, ViewGroup container, Bundle savedInstanceState) {
        View fragment1 = inflater.inflate(R.layout.fragment1, null);
        return fragment1;
    }
}
运行效果:
二、Fragment的动态创建的步骤:(前提:写好自己的Fragment类,见上篇文章)
1.创建Fragment的管理对象fragmentManager。
FragmentManager fragmentManager = getFragmentManager();
2.创建事务对象(Fragment事务对象不能抽取,因为每提交一次,就需要一个新的Fragment事务对象.(所有的事务都有这个特性))
FragmentTransaction fragmentTransaction = fragmentManager.beginTransaction();
3.动态创建Fragment
fragmentTransaction.replace(android.R.id.content, new Fragment1());
4.提交事务对象fragmentTransaction.commit();
//获取碎片管理者
mFragmentManager = getSupportFragmentManager();

//事务是不能共享的,每次用到都要重新开启一个事务,之后提交
FragmentTransaction fragmentTransactiontwo = mFragmentManager.beginTransaction();
//参数:1.父容器   2.要替换的fragment。
fragmentTransactiontwo.replace(R.id.framelayout, mFragmentTwo);
//提交事务
fragmentTransactiontwo.commit();
注:但是,我们开发中使用动态创建一般不用上面的这种方法,因为这种方法每次切换fragment时都会重新初始化(使用replace方法的弊端),所以我们用隐藏和添加来实现代替replace。通过事物对象的add方法添加或show方法显示(如果已经被添加了),然后在跳转前将当前的fragment隐藏。这样我们就不用每次切换fragment都初始化了,节省流量和手机资源。
补充:碎片的回退实现方法,先通过事务对象的addToBackStack一个个放入栈中,再将通过popBackStack()从栈中拿出来,从而实现碎片回退功能。
主要逻辑代码如下:(注释很详细)
//获取碎片管理者
mFragmentManager = getSupportFragmentManager();
FragmentTransaction fragmentTransaction1 = mFragmentManager.beginTransaction();
switch (v.getId()) {
    case R.id.frist:
        //判断fragmentOne是否已经存在
        if (mFragmentOne.isAdded()) {
            //如果fragmentOne已经存在,则隐藏当前的fragment,
            //然后显示fragmentOne(不会重新初始化,只是加载之前隐藏的fragment)
            fragmentTransaction1.hide(fragmentNow).show(mFragmentOne);
        } else {
            //如果fragmentOne不存在,则隐藏当前的fragment,
            //然后添加fragmentOne(此时是初始化)
            fragmentTransaction1.hide(fragmentNow).add(R.id.framelayout, mFragmentOne);
            fragmentTransaction1.addToBackStack(null);

        }
        //将加载的fragment赋给我们的中转量(用于记录屏幕当前显示的fragment)
        fragmentNow = mFragmentOne;
        fragmentTransaction1.commit();
        break;
下面是代码:
MainActivity.java
package com.zhiyuan3g.mybase3;

import android.os.Bundle;
import android.support.v4.app.Fragment;
import android.support.v4.app.FragmentManager;
import android.support.v4.app.FragmentTransaction;
import android.support.v7.app.AppCompatActivity;
import android.view.View;
import android.widget.Button;
import android.widget.FrameLayout;

public class Main2Activity extends AppCompatActivity implements View.OnClickListener {

    private Button frist;
    private Button two;
    private FragmentManager mFragmentManager;
    private FrameLayout framelayout;
    private Fragment mFragmentOne;
    private Fragment mFragmentTwo, fragmentNow;
    private Button back_btn;

    @Override
    protected void onCreate(Bundle savedInstanceState) {
        super.onCreate(savedInstanceState);
        setContentView(R.layout.activity_main2);
        initView();
        initDefaultFragment();

    }

    //初始化默认fragment的加载
    private void initDefaultFragment() {

        //开启一个事务
        FragmentTransaction fragmentTransaction = mFragmentManager.beginTransaction();
        //add:往碎片集合中添加一个碎片;
        //replace:移除之前所有的碎片,替换新的碎片(remove和add的集合体)(很少用,不推荐,因为是重新加载,所以消耗流量)
        //参数:1.公共父容器的的id  2.fragment的碎片
        fragmentTransaction.add(R.id.framelayout, mFragmentOne);
        fragmentTransaction.addToBackStack(null);

        //提交事务
        fragmentTransaction.commit();
        fragmentNow = mFragmentOne;

    }

    private void initView() {
        frist = (Button) findViewById(R.id.frist);
        two = (Button) findViewById(R.id.two);

        frist.setOnClickListener(this);
        two.setOnClickListener(this);
        framelayout = (FrameLayout) findViewById(R.id.framelayout);
        //实例化FragmentOne
        mFragmentTwo = new FragmentTwo();
        mFragmentOne = new FragmentOne();
        //获取碎片管理者
        mFragmentManager = getSupportFragmentManager();

        framelayout.setOnClickListener(this);
        back_btn = (Button) findViewById(R.id.back_btn);
        back_btn.setOnClickListener(this);
    }

    //通过点击事件跳转到对应的fragment上
    @Override
    public void onClick(View v) {
        FragmentTransaction fragmentTransaction1 = mFragmentManager.beginTransaction();
        switch (v.getId()) {
            case R.id.frist:
                //判断fragmentOne是否已经存在
                if (mFragmentOne.isAdded()) {
                    //如果fragmentOne已经存在,则隐藏当前的fragment,
                    //然后显示fragmentOne(不会重新初始化,只是加载之前隐藏的fragment)
                    fragmentTransaction1.hide(fragmentNow).show(mFragmentOne);
                } else {
                    //如果fragmentOne不存在,则隐藏当前的fragment,
                    //然后添加fragmentOne(此时是初始化)
                    fragmentTransaction1.hide(fragmentNow).add(R.id.framelayout, mFragmentOne);
                    fragmentTransaction1.addToBackStack(null);

                }
                fragmentNow = mFragmentOne;
                fragmentTransaction1.commit();
                break;
            case R.id.two:
                if (mFragmentTwo.isAdded()) {
                    fragmentTransaction1.hide(fragmentNow).show(mFragmentTwo);
                } else {
                    fragmentTransaction1.hide(fragmentNow).add(R.id.framelayout, mFragmentTwo);
                    fragmentTransaction1.addToBackStack(null);
                }
                fragmentNow = mFragmentTwo;
                fragmentTransaction1.commit();
                break;
            case R.id.back_btn:
                //在上面给事务对象添加addToBackStack(null),
                //下面就可以通过碎片管理对象(mFragmentManager)调用popBackStack()方法来返回上一个碎片(此时碎片管理器只有两个碎片)
                //因为我们是通过add的方法添加fragment的,而且只是添加的两次,其余都是显示和隐藏来实现
                //又因为我们当前占了一个fragment,所以我们只能回退一次,第二次回退就会是空的fragment(什么都没有)
                mFragmentManager.popBackStack();
                break;
        }
    }
}
FragmentOne.java
package com.zhiyuan3g.mybase3;

import android.os.Bundle;
import android.support.annotation.Nullable;
import android.support.v4.app.Fragment;
import android.view.LayoutInflater;
import android.view.View;
import android.view.ViewGroup;
import android.widget.Button;
import android.widget.Toast;


public class FragmentOne extends Fragment implements View.OnClickListener {

    //相当于Activity的onCreate方法,用来初始化数据和视图
    @Nullable
    @Override
    public View onCreateView(LayoutInflater inflater, @Nullable ViewGroup container, @Nullable Bundle savedInstanceState) {
        //让碎片加载一个布局
        View view = inflater.inflate(R.layout.fragment_one, container, false);
        Toast.makeText(getContext(), "fragment初始化提示消息", Toast.LENGTH_SHORT).show();
        initView(view);
        return view;
    }

    private void initView(View view) {
        Button button = (Button) view.findViewById(R.id.onclick_btn);
        button.setOnClickListener(this);
    }


    @Override
    public void onClick(View v) {
         Toast.makeText(getContext(), "fragment内部button按钮提示", Toast.LENGTH_SHORT).show();
    }
}
FragmentTwo.java
package com.zhiyuan3g.mybase3;

import android.os.Bundle;
import android.support.annotation.Nullable;
import android.support.v4.app.Fragment;
import android.view.LayoutInflater;
import android.view.View;
import android.view.ViewGroup;


public class FragmentTwo extends Fragment {
    @Nullable
    @Override
    public View onCreateView(LayoutInflater inflater, @Nullable ViewGroup container, @Nullable Bundle savedInstanceState) {
        View view = inflater.inflate(R.layout.fragment_two, container, false);
        Toast.makeText(getContext(), "fragment初始化提示消息", Toast.LENGTH_SHORT).show();
        return view;
    }
}
activity_main2.xml
<?xml version="1.0" encoding="utf-8"?>
<RelativeLayout
    xmlns:android="http://schemas.android.com/apk/res/android"
    xmlns:tools="http://schemas.android.com/tools"
    android:layout_width="match_parent"
    android:layout_height="match_parent"
    android:paddingBottom="@dimen/activity_vertical_margin"
    android:paddingLeft="@dimen/activity_horizontal_margin"
    android:paddingRight="@dimen/activity_horizontal_margin"
    android:paddingTop="@dimen/activity_vertical_margin"
    android:gravity="center_horizontal"
    tools:context="com.zhiyuan3g.mybase3.Main2Activity">

    <Button
        android:layout_width="wrap_content"
        android:layout_height="wrap_content"
        android:id="@+id/frist"
        android:text="第一个Fragment"/>
    <Button
        android:layout_below="@+id/frist"
        android:layout_width="wrap_content"
        android:id="@+id/two"
        android:text="第二个Fragment"
        android:layout_height="wrap_content"/>
    <Button
        android:layout_width="wrap_content"
        android:layout_height="wrap_content"
        android:id="@+id/back_btn"
        android:text="返回"
        android:layout_below="@+id/two"
        />
    <FrameLayout
        android:layout_width="match_parent"
        android:id="@+id/framelayout"
        android:layout_height="match_parent"
        android:layout_below="@+id/back_btn">

    </FrameLayout>

</RelativeLayout>
fragment_one.xml
<?xml version="1.0" encoding="utf-8"?>
<LinearLayout xmlns:android="http://schemas.android.com/apk/res/android"
              android:orientation="vertical"
              android:background="@android:color/holo_red_light"
              android:layout_width="match_parent"
              android:gravity="center_horizontal"
              android:layout_height="match_parent">

    <Button
        android:id="@+id/onclick_btn"
        android:text="点击事件"
        android:onClick="btn"
        android:layout_width="wrap_content"
        android:layout_height="wrap_content"/>
</LinearLayout>
fragment_two.xml
<?xml version="1.0" encoding="utf-8"?>
<LinearLayout xmlns:android="http://schemas.android.com/apk/res/android"
              android:orientation="vertical"
              android:layout_width="match_parent"
              android:background="#12ab34"
              android:layout_height="match_parent">

</LinearLayout>
效果图:
完整Demo代码下载:http://pan.baidu.com/s/1c2L3pwW


 1420
1420


 被折叠的 条评论
为什么被折叠?
被折叠的 条评论
为什么被折叠?
 到【灌水乐园】发言


