


Firekylin 是一款基于 ThinkJS 开发的开源 NodeJS 博客系统,本实验将带你从零开始快速搭建自己的 Firekylin 个人博客

1、安装 Node.js
使用 yum 命令安装 Node.js
curl --silent --location https://rpm.nodesource.com/setup_8.x | sudo bash -
yum -y install nodejs
2、使用 NPM 安装 PM2
通过 NPM 安装进程管理模块 PM2。它是 Node.js 的一个进程管理模块,之后我们会使用它来管理我们的个人网站进程。
npm install  //执行node依赖安装
npm install pm2 -g  //使用pm2管理nodejs服务
3、安装 MySQL
wget http://dev.mysql.com/get/mysql-community-release-el7-5.noarch.rpm
rpm -ivh mysql-community-release-el7-5.noarch.rpm
yum install mysql-community-server -y
启动 MySQL 服务:
service mysqld restart设置 MySQL 账户:
/usr/bin/mysqladmin -u root password 'Password4Firekylin'4、安装 Nginx
在 CentOS 上,可直接使用 [yum] 来安装 Nginx
yum install nginx -y5、安装并配置 Firekylin
安装 Firekylin
在服务器上下载安装包
wget https://firekylin.org/release/latest.tar.gz安装程序依赖
cd firekylin
npm install
复制项目下的 pm2_default.json 文件生成新文件 pm2.json
cp pm2_default.json pm2.json修改 pm2.json 文件中的 cwd 配置值为项目的当前路径 /root/firekylin:
{
  "apps": [{
    "name": "firekylin",
    "script": "www/production.js",
    "cwd": "/root/firekylin",
    "exec_mode": "fork",
    "max_memory_restart": "1G",
    "autorestart": true,
    "node_args": [],
    "args": [],
    "env": {

    }
  }]
}
然后通过以下命令启动项目
pm2 startOrReload pm2.jsonFirekylin 已经启动成功,使用浏览器直接访问 http://<您的 CVM IP 地址>:8360/ 即可看到 Firekylin 的配置界面。
配置信息
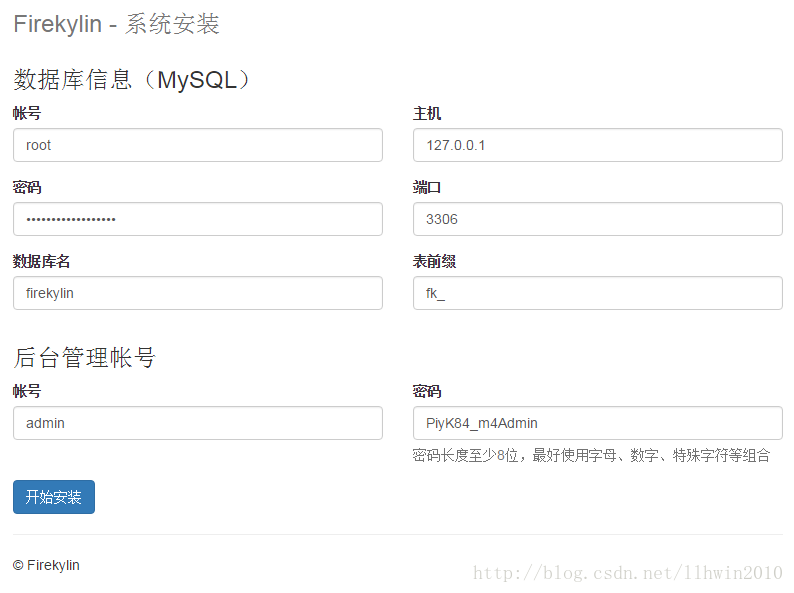
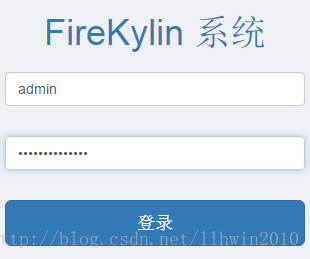
配置完成后可以通过后台管理帐号设置的帐号和密码登录博客管理后台,截图如下所示:
6、配置 Nginx
下面我们就配置 Nginx 使用域名访问我们的网站了。
复制项目下的 nginx_default.conf 为 nginx.conf
cp nginx_default.conf nginx.conf修改 nginx.conf 文件
server {
    listen 80;
    server_name www.yourdomain.com; #将 www.yourdomain.com 替换为之前注册并解析的域名
    root /root/firekylin;
    set $node_port 8360;

    index index.js index.html index.htm;

    location ^~ /.well-known/acme-challenge/ {
      alias /root/firekylin/ssl/challenges/;
      try_files $uri = 404;
    }

    location / {
        proxy_http_version 1.1;
        proxy_set_header X-Real-IP $remote_addr;
        proxy_set_header X-Forwarded-For $proxy_add_x_forwarded_for;
        proxy_set_header Host $http_host;
        proxy_set_header X-NginX-Proxy true;
        proxy_set_header Upgrade $http_upgrade;
        proxy_set_header Connection "upgrade";
        proxy_pass http://127.0.0.1:$node_port$request_uri;
        proxy_redirect off;
    }

    location = /development.js {
        deny all;
    }
    location = /testing.js {
        deny all;
    }

    location = /production.js {
        deny all;
    }
}
将 nginx.conf 文件软链到 nginx 配置目录下
ln -s /root/firekylin/nginx.conf /etc/nginx/conf.d/firekylin.conf重启 Nginx
service nginx restartserver_name 的值为你的域名,root 为你的项目所在路径,$node_port 的值为 Firekylin 启动端口,默认为 8360。
大功告成!
恭喜,您的 Firekylin 已经部署完成,尽情折腾吧:
博客访问地址:http://<您的域名>
博客后台地址:http://<您的域名>/admin


 182
182


 被折叠的 条评论
为什么被折叠?
被折叠的 条评论
为什么被折叠?
 到【灌水乐园】发言


