PS:截止到2015-05-12前是不支持Tomcat8的,详情见官网:https://github.com/jcoleman/tomcat-redis-session-manager
前提:你已经部署了Redis,尚未学会的,可以移步这里:http://blog.csdn.net/caiwenfeng_for_23/article/details/45511007
我的案例下载:http://download.csdn.net/detail/caiwenfeng_for_23/8689847
其实很简单,就几个步骤:
1.配置Tomcat的conf目录下的context.xml文件:
1> 单点Reids配置
<Valve className="com.orangefunction.tomcat.redissessions.RedisSessionHandlerValve" />
<Manager className="com.orangefunction.tomcat.redissessions.RedisSessionManager"
host="localhost"
port="6379"
database="0"
maxInactiveInterval="60"/>
2> Sentinel集群配置:
<Valve className="com.orangefunction.tomcat.redissessions.RedisSessionHandlerValve" />
<Manager className="com.orangefunction.tomcat.redissessions.RedisSessionManager"
maxInactiveInterval="60"
sentinelMaster="mymaster"
sentinels="127.0.0.1:26379,127.0.0.1:26380,127.0.0.1:26381,127.0.0.1:26382"
/>
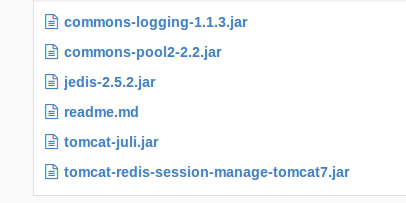
2.添加jar

3.测试
1>
存储Session:
protected void doPost(HttpServletRequest request, HttpServletResponse response) throws ServletException, IOException {
System.out.println("hello");
HttpSession session=request.getSession();
for(int i=0;i<100000;i++){
session.setAttribute("name"+i, "Magci_"+i);
}
}
2>重启Tomcat:假如Session保存在tomcat下,重启后Session不存在;如果保存在Redis下,Tomcat重启对Session无影响
3>取出Session:
protected void doPost(HttpServletRequest request, HttpServletResponse response) throws ServletException, IOException {
System.out.println("hello");
HttpSession session=request.getSession();
for(int i=0;i<100000;i++){
System.out.println(session.getAttribute("name"+i));
}
}
注意事项:从Tomcat6开始默认开启了Session持久化设置,测试时可以关闭本地Session持久化,其实也很简单,在Tomcat的conf目录下的context.xml文件中,取消注释下面那段配置即可:
详见这篇博客:Session持久化的实例分析
可以尝试运行上面的demo案例!


 273
273

 被折叠的 条评论
为什么被折叠?


