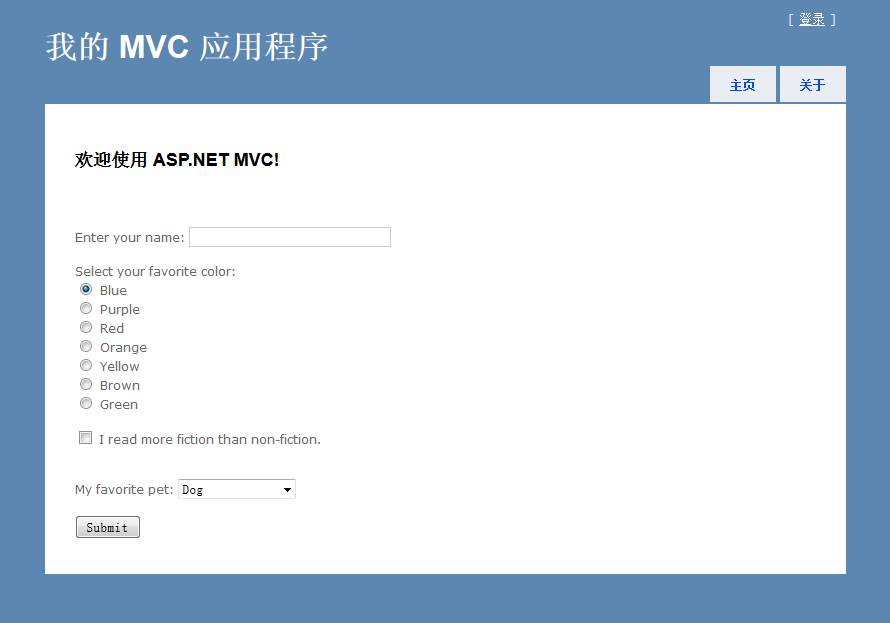
有Index视图如下:

视图代码如下:
<%@ Page Language="C#" MasterPageFile="~/Views/Shared/Site.Master" Inherits="System.Web.Mvc.ViewPage" %>

<asp:Content ID="Content1" ContentPlaceHolderID="TitleContent" runat="server">
    主页
</asp:Content>

<asp:Content ID="Content2" ContentPlaceHolderID="MainContent" runat="server">

    <h2><%= Html.Encode(ViewData["Message"]) %></h2>
    <br />
    <br />

    <% using(Html.BeginForm("HandleForm", "Home")) %>
    <% { %>
        Enter your name: <%= Html.TextBox("name") %>
        <br /><br />
        Select your favorite color:<br />
        <%= Html.RadioButton("favColor", "Blue", true) %> Blue <br />
        <%= Html.RadioButton("favColor", "Purple", false)%> Purple <br />
        <%= Html.RadioButton("favColor", "Red", false)%> Red <br />
        <%= Html.RadioButton("favColor", "Orange", false)%> Orange <br />
        <%= Html.RadioButton("favColor", "Yellow", false)%> Yellow <br />
        <%= Html.RadioButton("favColor", "Brown", false)%> Brown <br />
        <%= Html.RadioButton("favColor", "Green", false)%> Green
        <br /><br />
        <%= Html.CheckBox("bookType") %> I read more fiction than non-fiction.<br />
        <br /><br />
        My favorite pet: <%= Html.DropDownList("pets") %>
        <br /><br />
        <input type="submit" value="Submit" />
    <% } %>

</asp:Content>
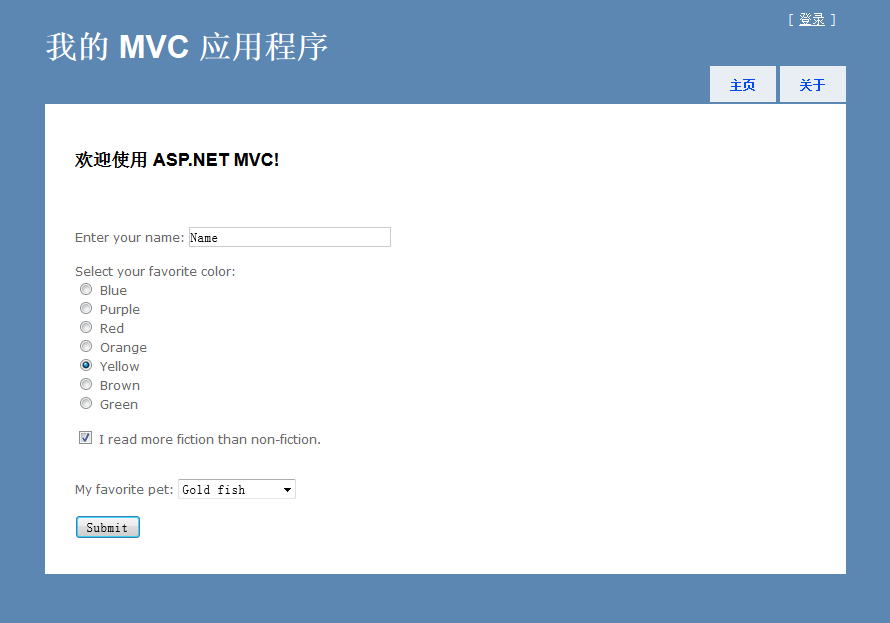
如图填写表单数据:

分别使用不同的表单处理方法,对提交的表单数据在视图FormResults呈现。
提交表单对应的HomeController,包含以不同方法获取表单数据的代码,如下:
using System;
using System.Collections.Generic;
using System.Linq;
using System.Web;
using System.Web.Mvc;

namespace HtmlHelper.Controllers
{
    [HandleError]
    public class HomeController : Controller
    {
        public ActionResult Index()
        {
            ViewData["Message"] = "欢迎使用 ASP.NET MVC!";

            //手动构造页面中下拉框的宠物数据
            List<string> petList = new List<string>();
            petList.Add("Dog");
            petList.Add("Cat");
            petList.Add("Hamster");
            petList.Add("Parrot");
            petList.Add("Gold fish");
            petList.Add("Mountain lion");
            petList.Add("Elephant");

            ViewData["Pets"] = new SelectList(petList);

            return View();
        }

        public ActionResult About()
        {
            return View();
        }

        /// <summary>
        /// 处理表单提交数据,方法1:使用传统的Request请求取值
        /// </summary>
        /// <returns></returns>
        public ActionResult HandleForm()
        {
            ViewData["name"] = Request["name"];
            ViewData["favColor"] = Request["favColor"];
            ViewData["bookType"] = Request["bookType"];
            ViewData["pet"] = Request["pets"];

            return View("FormResults");
        }

        /// <summary>
        /// 处理表单提交数据,方法2:Action参数名与表单元素name值一一对应
        /// </summary>
        /// <param name="name"></param>
        /// <param name="favColor"></param>
        /// <param name="bookType"></param>
        /// <param name="pets"></param>
        /// <returns></returns>
        //public ActionResult HandleForm(string name, string favColor, Boolean bookType, string pets)
        //{
        //    ViewData["name"] = name;
        //    ViewData["favColor"] = favColor;
        //    ViewData["bookType"] = bookType;
        //    ViewData["pet"] = pets;

        //    return View("FormResults");
        //}

        /// <summary>
        /// 处理表单提交数据,方法3:从MVC封装的FormCollection容器中读取
        /// </summary>
        /// <param name="form"></param>
        /// <returns></returns>
        //public ActionResult HandleForm(FormCollection form)
        //{
        //    ViewData["name"] = form["name"];
        //    ViewData["favColor"] = form["favColor"];
        //    ViewData["bookType"] = form["bookType"];
        //    ViewData["pet"] = form["pets"];

        //    return View("FormResults");
        //}

        /// <summary>
        /// 处理表单提交数据,方法4:使用实体作为Action参数传入,前提是提交的表单元素名称与实体属性名称一一对应
        /// </summary>
        /// <param name="request"></param>
        /// <returns></returns>
        //[HttpPost]
        //public ActionResult HandleForm(InforModel infor)
        //{
        //    ViewData["name"] = infor.name;
        //    ViewData["favColor"] = infor.favColor;
        //    ViewData["bookType"] = infor.bookType;
        //    ViewData["pet"] = infor.pets;

        //    return View("FormResults");
        //}

    }
}
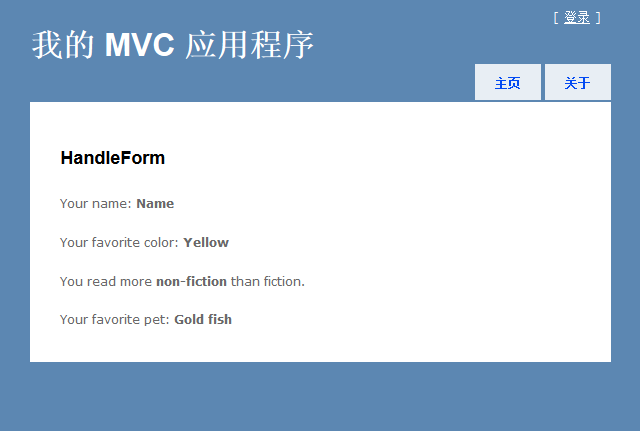
在FormResults视图显示ViewData的数据,如图所示:


 3614
3614


 被折叠的 条评论
为什么被折叠?


