


我是按照http://alibaba.github.io/weex/doc/demo/modal.html 这个网址的内容进行weex学习的,这只是笔记。
Weex由,
<template>: required. Just uses HTML syntax and describes the structure of a Weex page, which is build upon several tags. Each tag means a type of component.

<style>: optional. Describes the presetation details, and the content is based on CSS syntax.

<script>: optional. Describes the data and behaiver with JavaScript syntax. It defines data and how these data are processed etc.<template>
<!-- (required) the structure of page -->
</template>
<style>
/* (optional) stylesheet */
</style>
<script>
/* (optional) the definition of data, methods and life-circle */
</script>接下来我将记录一些比较常见的例子:
1.显示字符串
<template>
  <container>
    <text style="font-size: {{title.size}}">{{title.value}}</text>
  </container>
</template>

<script>
  module.exports = {
    data: {
      title: {
        size: 48,
        value: 'Alibaba Weex Team'
      }
    }
  }
</script>
*******或者*********
<template>
  <container style="flex-direction: row;">
    <text>{{firstName + ' ' + lastName}}</text>
  </container>
</template>

<script>
  module.exports = {
    data: {
      firstName: 'John',
      lastName: 'Smith'
    }
  }
</script>
NOTE: EACH BINDING CAN ONLY CONTAIN ONE SINGLE EXPRESSION
2.onclick事件
<template>
  <container style="flex-direction: row;">
    <text onclick="changeName">{{fullName}}</text>
  </container>
</template>

<script>
  module.exports = {
    data: {
      firstName: 'John',
      lastName: 'Smith'
    },
    computed: {
      fullName: {
        get: function() {
          return this.firstName + ' ' + this.lastName
        },

        set: function(v) {
          var s = v.split(' ')
          this.firstName = s[0]
          this.lastName = s[1]
        }
      }
    },
    methods: {
      changeName: function() {
        this.fullName = 'Terry King'
      }
    }
  }
</script>
点击以后才是Terry King字符
3.有参数onclick
<template>
  <image onclick="handler('arg1', $event)" ...></image>
</template>

<script>
  module.exports = {
    methods: {
      handler: function (arg1, e) {
        // TODO
      }
    }
  }
</script>
4.使用style
<template>
    <container>
        <text style="font-size: {{txtsize}}; color : #436EEE;">style</text>
    </container>
</template>

<script>
  module.exports = {
    data: {
      txtsize: 50
    }
  }
</script>
// 注意color不能用参数替代
5.使用class
<template>
  <container>
    <text class="{{size}}">hello</text>
    <text class="title {{status}}">hellohello</text>
  </container>
</template>
<style>
  .highlight {color: #ff0000;}
  .title {font-size: 50;}
  .highlight111 {color: #436EEE;}
</style>
<script>
  module.exports = {
    data: {
      size: 'highlight',
      status: 'highlight111'
    }
  }
</script>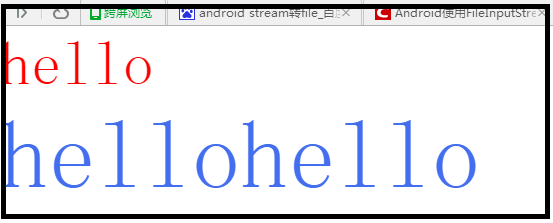
6.if……(图片默认高度为0,所以需要class=”display”)
<template>
  <container style="flex-direction: column;">
    <text onclick="toggle">Toggle</text>
    <image src="http://pic250.quanjing.com/imageclk007/ic01706307.jpg" if="{{shown}}" class="display"></image>
  </container>
</template>
<style>
  .display {width : 50; height : 50;}
</style>
<script>
  module.exports = {
    data: {
      shown: true
    },
    methods: {
      toggle: function () {
        this.shown = !this.shown
      }
    }
  }
</script>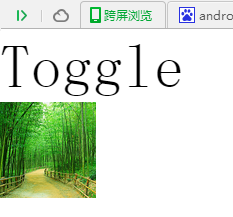
多次点击会交错显示
7.循环v1
<template>
  <container>
    <container repeat="{{list}}" class="{{gender}}">
      <image src="{{avatar}}"></image>
      <text>{{nickname}}</text>
    </container>
  </container>
</template>

<style>
  .male {color : #ff0000 ;}
  .female {color: #436EEE;}
</style>

<script>
  module.exports = {
    data: {
      list: [
        {gender: 'male', nickname: 'Li Lei', avatar: '...'},
        {gender: 'female', nickname: 'Han Meimei', avatar: '...'}
      ]
    }
  }
</script>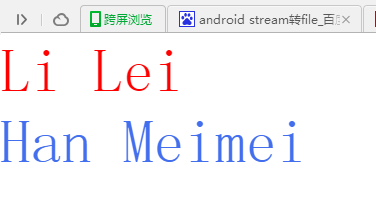
8.循环v2
<template>
  <container>
    <div repeat="{{v in list}}">
        <text>No. {{v.index + 1}}</text>
    <div>
  </container>
</template>

<style>
  .male {color : #ff0000 ;}
  .female {color: #436EEE;}
</style>

<script>
  module.exports = {
    data: {
      list: [
        {index: 1},
        {index: 2},
        {index: 3},
        {index: 4},
        {index: 5}
      ]
    }
  }
</script>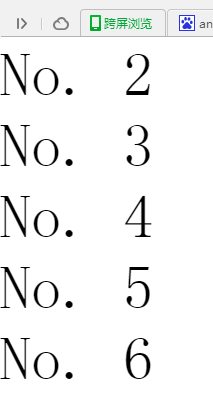
注意,显示的是index+1
9.append用法
<template>
  <container>
    <container id="world" append="tree">
      <text>Hello World!</text>
    </container>
    <container id="weex" append="node">
      <text>Hello Weex!</text>
    </container>
  </container>
</template>
官方给出的解释
the element with id ‘world’ will wait for all its children to be rendered then it will be rendered entiely,
while the element with id ‘weex’ will only render itself to the page
然而并不理解
10.两个.we文件联合编译
foo.we
<template>
  <container style="flex-direction: row;">
    <image src="{{image}}" class="display"></image>
    <text>{{title}}</text>
  </container>
</template>
<style>
  .display {width : 50; height : 50;}
</style>
<script>
  module.exports = {
    data: {
      title: null,
      image: null
    }
  }
</script>
调用:
<template>
  <foo title="图片" image="http://pic250.quanjing.com/imageclk007/ic01706307.jpg"></foo>
</template>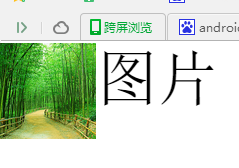
11.三个文件联合编译
foo.we内容不变
foo.list.we:
<template>
  <container>
    <text>{{description}}</text>
    <foo repeat="{{list}}" title="{{text}}" image="{{img}}"></foo>
  </container>
</template>
<script>
  module.exports = {
    data: {
      description: "",
      list: []
    }
  }
</script>
调用:
<template>
    <container>
        <foo.list description="图片集"; list="{{list}}"></foo-list>
    </container>
</template>
<script>
  module.exports = {
    data: {
      list: [
        {text: "图片1", img: "http://pic250.quanjing.com/imageclk007/ic01706307.jpg"},
        {text: "图片2", img: "http://img2.imgtn.bdimg.com/it/u=176005081,877018693&fm=11&gp=0.jpg"},
        {text: "图片3", img: "http://img4.imgtn.bdimg.com/it/u=3875871073,3449959891&fm=11&gp=0.jpg"}
      ]
    }
  }
</script>
The main.we uses
12.FIND AN ELEMENT
  <template>
    <container>
      <text id="top" onclick="toBottom">Top</text>
      <container style="height: 10000; background-color: #999999;">
      </container>
      <text id="bottom" onclick="toTop">Bottom</text>
    </container>
  </template>
  <script>
    module.exports = {
      methods: {
        toTop: function () {
          var top = this.$('top')
          this.$scrollTo(top)   // both work
          this.$scrollTo('top') // both work
        },
        toBottom: function () {
          var bottom = this.$('bottom')
          this.$scrollTo(bottom)   // both work
          this.$scrollTo('bottom') // both work
        }
      }
    }
    </script>
顶端和底部切换
13.FIND AN ELEMENT(根据事件返回相应的值)
  <template>
    <container>
      <image id="{{imgId}}" src="{{imgUrl}}" onclick="getImageId(imgId)" repeat="{{images}}" class="display"></image>    //注意参数的写法
      <text>id = {{ID}}</text>
    </container>
  </template>
  <style>
    .display {width : 50; height : 50;}
  </style>
  <script>
  module.exports = {
    data: {
      ID : 1 ,
      images: [
        {imgId: 1, imgUrl: "http://pic250.quanjing.com/imageclk007/ic01706307.jpg"},
        {imgId: 2, imgUrl: "http://img2.imgtn.bdimg.com/it/u=176005081,877018693&fm=11&gp=0.jpg"},
        {imgId: 3, imgUrl: "http://img4.imgtn.bdimg.com/it/u=3875871073,3449959891&fm=11&gp=0.jpg"}
      ]
    },
    methods: {
      getImageId: function(arg1) {
        this.ID = arg1                        //这里必须是this.ID
      }
    }
  }
  </script>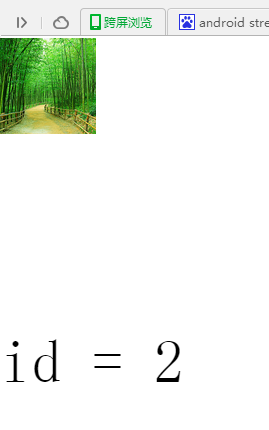
点击不同的图片切换不同的id
14.Child-Parent Communication
Children component can use this.
dispatch([Stringtype],[Objectdetail])methodpassinginformationtoparentcomponent.firstargumentmeaningtypeofmessage,secondargumentisthemessageobject.Ifanyparentofthechildcomponentregisterthesametypeoflistenerusing
on([String type], [Function callback]) method ,
the callback will be execute with one argument , the message object will be detail property of the the argument.
<we-element name="foo">
  <template>
    <div>
      <image src="{{imageUrl}}" onclick="test" class="display"></image>
      <text>{{title}}</text>
    </div>
  </template>
  <style>
    .display {width : 50; height : 50;}
  </style>
  <script>
    module.exports = {
      data: {
        title: "",
        imageUrl: ""
      },
      methods: {
        test: function () {
          this.$dispatch('notify', {'arg': "hello"})
        }
      }
    }
  </script>
</we-element>

<template>
  <foo title="图片" image-url="http://pic250.quanjing.com/imageclk007/ic01706307.jpg"></foo>  //注意这里的写法,当然如果全改成imageurl也可以运行
</template>

<script>
  module.exports = {
    created: function () {
      this.$on('notify', function(e) {
        alert(e.detail.arg)
      })
    }
  }
</script>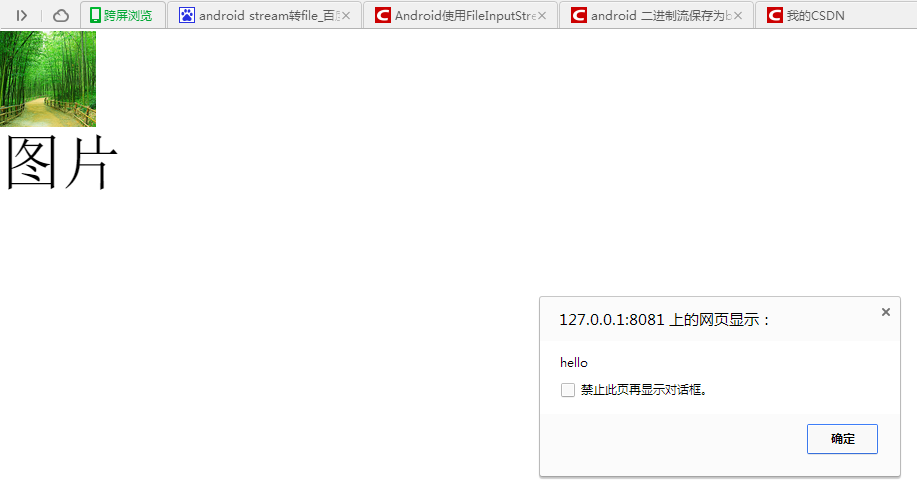
15.Parent-Child Communication
Parent component can using this.$([String id]) get context of child component. you can access child component information using the context object.
<we-element name="foo">
  <template>
    <div>
      <image src="{{imageurl}}" class="display"></image>
      <text>{{title}}</text>
    </div>
  </template>
  <style>
    .display {width : 50; height : 50;}
  </style>
  <script>
    module.exports = {
      data: {
        title: "",
        imageurl: ""
      },
      methods: {
        setTitle: function (t) {
          this.title = t
        }
      }
    }
  </script>
</we-element>

<template>
  <div>
    <text onclick="test">click to update foo</text>
    <foo id="fooEl" title="图片1" imageurl="http://pic250.quanjing.com/imageclk007/ic01706307.jpg"></foo>
  </div>
</template>

<script>
  module.exports = {
    methods: {
      test: function (e) {
        var foo = this.$('fooEl')
        foo.setTitle("图片2")
        foo.imageurl = "http://img2.imgtn.bdimg.com/it/u=176005081,877018693&fm=11&gp=0.jpg"
      }
    }
  }
</script>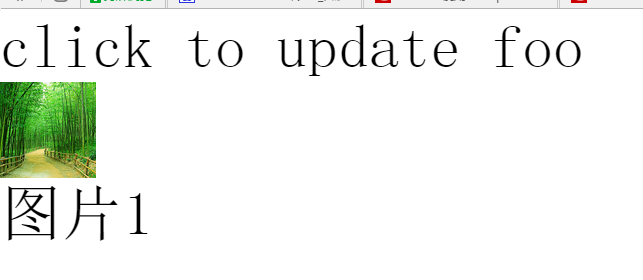
16.Parent to Children (multi-child) Communication
Parent can using this.$broadcast([String type], [Object detail]) broadcast message to all of children.
<we-element name="bar">
  <template>
    <div>
      <image src="{{imageUrl}}" class="display"></image>
    </div>
  </template>
  <style>
    .display {width : 50; height : 50;}
  </style>
  <script>
    module.exports = {
      data: {
        imageUrl: "http://pic250.quanjing.com/imageclk007/ic01706307.jpg"
      },
      created: function() {
        var self = this
        this.$on('changeImage', function(e) {
          self.imageUrl = e.detail.imageUrl
        })
      }
    }
  </script>
</we-element>

<we-element name="foo">
  <template>
    <div>
      <bar></bar>
      <text>{{title}}</text>
    </div>
  </template>
  <script>
    module.exports = {
      data: {
        title: "图片1"
      },
      created: function() {
        var self = this
        this.$on('changeTitle', function(e) {
          self.title = e.detail.title
        })
      }
    }
  </script>
</we-element>

<template>
  <div>
    <text onclick="test">click to update foo</text>
    <foo></foo>
  </div>
</template>

<script>
  module.exports = {
    methods: {
      test: function (e) {
        this.$broadcast('changeTitle', {
          title: "图片2"
        })
        this.$broadcast('changeImage', {
          imageUrl: "http://img2.imgtn.bdimg.com/it/u=176005081,877018693&fm=11&gp=0.jpg"
        })
      }
    }
  }
</script>
17.Siblings Communication
子传父dispatch。父传子broadcast
<we-element name="foo">
  <template>
    <container>
      <text onclick="callbar">foo</text>
    </container>
  </template>
  <script>
    module.exports = {
      methods: {
        callbar: function () {
          this.$dispatch('callbar', {'arg': "caller"})
        }
      }
    }
  </script>
</we-element>

<we-element name="bar">
  <template>
    <container>
      <text>bar</text>
    </container>
  </template>
  <script>
    module.exports = {
      created: function() {
        this.$on('callbar1', function(e) {
          alert(e.detail.arg1)
        })
      }
    }
  </script>
</we-element>

<template>
  <div>
    <foo></foo>
    <bar></bar>
  </div>
</template>

<script>
  module.exports = {
    created: function () {
      var self = this
      this.$on('callbar', function(e) {
        alert(e.detail.arg);
        self.$broadcast('callbar1', {'arg1': e.detail.arg})
      })
    }
  }
</script>
18.Slider
<template>
  <container>
    <slider>
        <image src="{{img}}" repeat="{{imageList}}" class="display" onchange="change"></image>
        <indicator class="indicator"></indicator>
    </slider>
  </container>
</template>
<style>
    .display {width : 250; height : 250;}
    .indicator {
        width:50;
        height:50;
        top:50;
        left:100;
        item-color: blue;
        item-selectedColor: red;
        item-size: 10;
    }
</style>
<script>
  module.exports = {
    data: {
      imageList: [
        {img: "http://pic250.quanjing.com/imageclk007/ic01706307.jpg"},
        {img: "http://img2.imgtn.bdimg.com/it/u=176005081,877018693&fm=11&gp=0.jpg"},
        {img: "http://img4.imgtn.bdimg.com/it/u=3875871073,3449959891&fm=11&gp=0.jpg"}
      ]
    },
    methods: {
      change: function (e) {
        // e.index
        alert(e.index)
      }
    }
  }
</script>
When you directly set an item with the index (vm.items[0] = {};), it won’t trigger view update. So we have a prototype methods: $set(index, item).
// same as example1.items[0] = ... but triggers view update
example1.items.$set(0, { childMsg: ‘Changed!’})
When you modify the length of the Array (vm.items.length = 0), it won’t trigger view update too. We recommend you just replace items with an empty array instead.
// same as example2.items.length = 0 but triggers view update
example2.items = []


 860
860

 被折叠的 条评论
为什么被折叠?
被折叠的 条评论
为什么被折叠?
 到【灌水乐园】发言


