


官网 http://greenrobot.org/greendao/documentation/how-to-get-started/
一,在build.gradle中进行配置:
2.添加依赖(greendao 3.0及以上)在app的build中
三,自定义路径
在gradle的根模块中加入上述代码,就完成了我们的基本配置了。
属性介绍:
schemaVersion--> 指定数据库schema版本号,迁移等操作会用到,数据库新增表,表结构改变,版本要加1;
daoPackage --> dao的包名,包名默认是entity所在的包;
targetGenDir --> 生成数据库文件的目录;
4 配置好项目的bulid和app的bulid后
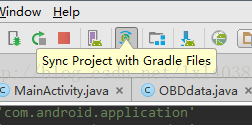 sync project就能根据build的设置,自动下载greendao的插件。
5 创建一个User的实体类
sync project就能根据build的设置,自动下载greendao的插件。
buildscript {
    repositories {
        jcenter()
        mavenCentral()
    }
    dependencies {
        classpath 'com.android.tools.build:gradle:2.2.2'
        classpath 'org.greenrobot:greendao-gradle-plugin:3.2.0'
        // NOTE: Do not place your application dependencies here; they belong
        // in the individual module build.gradle files
    }
}

allprojects {
    repositories {
        jcenter()
        maven { url "https://jitpack.io" }
    }
}

task clean(type: Delete) {
    delete rootProject.buildDir
}
apply plugin: 'com.android.application'
apply plugin: 'org.greenrobot.greendao'

android {
    compileSdkVersion 26
    buildToolsVersion "25.0.2"
    defaultConfig {
        applicationId "com.example.administrator.mytest"
        minSdkVersion 14
        targetSdkVersion 26
        versionCode 1
        versionName "1.0"
        testInstrumentationRunner "android.support.test.runner.AndroidJUnitRunner"
    }
    buildTypes {
        release {
            minifyEnabled false
            proguardFiles getDefaultProguardFile('proguard-android.txt'), 'proguard-rules.pro'
        }
    }
}
//schemaVersion---->指定数据库schema版本号,迁移等操作会用到
//daoPackage-------->通过gradle插件生成的数据库相关文件的包名,默认为你的entity所在的包名
//targetGenDir-------->这就是我们上面说到的自定义生成数据库文件的目录了,可以将生成的文件放到我们的java目录中,而不是build中,这样就不用额外的设置资源目录了
/*greendao {
    schemaVersion 1
    daoPackage 'com.obd.sql'
    targetGenDir 'src/main/java'
}*/
dependencies {
    compile fileTree(dir: 'libs', include: ['*.jar'])
    androidTestCompile('com.android.support.test.espresso:espresso-core:2.2.2', {
        exclude group: 'com.android.support', module: 'support-annotations'
    })
    compile 'com.android.support:appcompat-v7:26.0.0-alpha1'
    testCompile 'junit:junit:4.12'
    compile 'org.greenrobot:greendao:3.2.0'
    compile 'com.github.yuweiguocn:GreenDaoUpgradeHelper:v1.1.0'
}


 226
226


 被折叠的 条评论
为什么被折叠?
被折叠的 条评论
为什么被折叠?
 到【灌水乐园】发言


