


在这里我们全部使用android-support-v4.jar包里Fragment,不用系统自带的Fragment;这两个基本一样,但V4包中的相对功能更强大一些。
第一步:新建一个项目工程添加一个fragment1.xml
<?xml version="1.0" encoding="utf-8"?>
<LinearLayout xmlns:android="http://schemas.android.com/apk/res/android"
    android:layout_width="match_parent"
    android:layout_height="match_parent"
    android:background="#00ff00"
    android:orientation="vertical" >
    <TextView
        android:layout_width="wrap_content"
        android:layout_height="wrap_content"
        android:text="this is 1"
        android:textColor="#000000"
        android:textSize="25sp"/>

</LinearLayout>
第二步:新建一个fragment2.xml
<?xml version="1.0" encoding="utf-8"?>
<LinearLayout xmlns:android="http://schemas.android.com/apk/res/android"
    android:layout_width="match_parent"
    android:layout_height="match_parent"
    android:background="#00ff00"
    android:orientation="vertical" >
    <TextView
        android:layout_width="wrap_content"
        android:layout_height="wrap_content"
        android:text="this is 1"
        android:textColor="#000000"
        android:textSize="25sp"/>

</LinearLayout>
fragment2.xml和fragment1.xml很像
第三步:
新建一个Fragment1类,这个类继承Fragment,记得导入的包是
import android.support.v4.app.Fragment;package com.example.staticfragment;
import android.os.Bundle;
import android.support.v4.app.Fragment;
import android.view.LayoutInflater;
import android.view.View;
import android.view.ViewGroup;
public class Fragment1 extends Fragment{
@Override
public View onCreateView(LayoutInflater inflater, ViewGroup container,
Bundle savedInstanceState) {
// TODO Auto-generated method stub
return inflater.inflate(R.layout.fragment1, container, false);
//return super.onCreateView(inflater, container, savedInstanceState);
}
}
第四步骤,新建Fragment2,同样继承Fragment
package com.example.staticfragment;

import android.os.Bundle;
import android.support.v4.app.Fragment;
import android.view.LayoutInflater;
import android.view.View;
import android.view.ViewGroup;

public class Fragment2 extends Fragment{

    @Override
    public View onCreateView(LayoutInflater inflater, ViewGroup container,
            Bundle savedInstanceState) {
        // TODO Auto-generated method stub
        return inflater.inflate(R.layout.fragment2, container, false);
    }

}
第五步:修改main.xml
<LinearLayout xmlns:android="http://schemas.android.com/apk/res/android"
    xmlns:tools="http://schemas.android.com/tools"
    android:layout_width="match_parent"
    android:layout_height="match_parent"
    android:baselineAligned="false"
     >
    <fragment android:id="@+id/frame1"
        android:name="com.example.staticfragment.Fragment1"
        //包名加类名
        android:layout_width="0dip"
        android:layout_height="match_parent"
        android:layout_weight="1"/>

    <fragment android:id="@+id/frame2"
        android:name="com.example.staticfragment.Fragment2"
        android:layout_width="0dip"
        android:layout_height="match_parent"
        android:layout_weight="1"/>


</LinearLayout>
第六步:在MainActivity中调用
package com.example.staticfragment;

import android.os.Bundle;
import android.app.Activity;
import android.support.v4.app.FragmentActivity;
import android.view.Menu;

public class MainActivity extends FragmentActivity{

    @Override
    protected void onCreate(Bundle savedInstanceState) {
        super.onCreate(savedInstanceState);
        setContentView(R.layout.activity_main);
    }
}
由于上面用的的是V4包,必须将MainActivity派生自FragmentActivity,否则根本无法启动程序!因为系统的Activity只能用来盛装系统自带的Fragment,而无法盛装V4包中的Fragment,因为系统的Activity根本无法识别V4包中的Fragment,因为这根本就不是一块的代码!如果不使用V4包,使用系统自带的Fragment则不必将MainActivity派生自FragmentActivity。
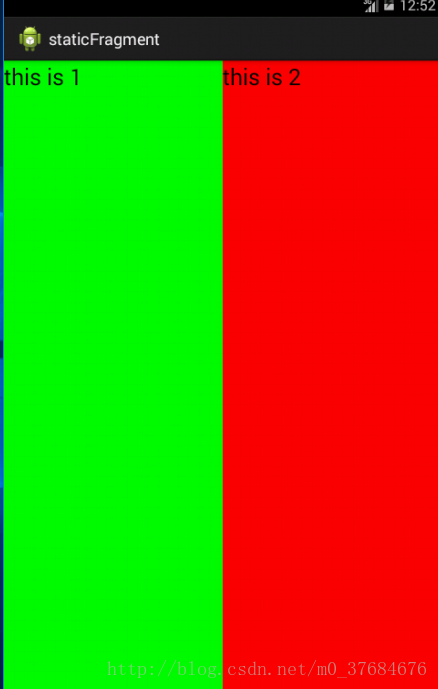
第⑦步,看下运行效果:
二、动态添加Fragment
你已经学会了如何在XML中使用Fragment,但是这仅仅是Fragment最简单的功能而已。Fragment真正的强大之处在于可以动态地添加到Activity当中,因此这也是你必须要掌握的东西。当你学会了在程序运行时向Activity添加Fragment,程序的界面就可以定制的更加多样化。下面我们立刻来看看,如何动态添加Fragment。
还是在上一节代码的基础上修改,打开activity_main.xml,将其中代码全部删除,改成下面的样子:
<LinearLayout xmlns:android="http://schemas.android.com/apk/res/android"
    xmlns:tools="http://schemas.android.com/tools"
    android:layout_width="match_parent"
    android:layout_height="match_parent"
    android:orientation="vertical"
    android:baselineAligned="false">
     <Button
         android:id="@+id/button1"
         android:layout_width="wrap_content"
         android:layout_height="wrap_content"
         android:text="显示Fragment1"/>

     <Button
         android:id="@+id/button2"
         android:layout_width="wrap_content"
         android:layout_height="wrap_content"
         android:text="显示Fragment2"/>

     <FrameLayout android:id="@+id/frame"
          android:layout_width="match_parent"
         android:layout_height="match_parent"/>


</LinearLayout>
其它代码都没有动,主要的是在MainActivity里,点击这两个按钮时做的处理:
package com.example.staticfragment;

import android.os.Bundle;
import android.support.v4.app.FragmentActivity;
import android.support.v4.app.FragmentManager;
import android.support.v4.app.FragmentTransaction;
import android.view.View;
import android.widget.Button;

public class MainActivity extends FragmentActivity{

    @Override
    protected void onCreate(Bundle savedInstanceState) {
        super.onCreate(savedInstanceState);
        setContentView(R.layout.activity_main);

        Button button1=(Button) findViewById(R.id.button1);
        button1.setOnClickListener(new View.OnClickListener() {

            @Override
            public void onClick(View arg0) {
                // TODO Auto-generated method stub
                /*1.获取到FragmentManager,在V4包中通过getSupportFragmentManager,在系统中原生的Fragment是通过getFragmentManager获得的。
                2.开启一个事务,通过调用beginTransaction方法开启。
                3.向容器内加入Fragment,一般使用add或者replace方法实现,需要传入容器的id和Fragment的实例。
                4.提交事务,调用commit方法提交。 */
                FragmentManager manager=getSupportFragmentManager();
                FragmentTransaction transaction=manager.beginTransaction();
                Fragment1 fragment1=new Fragment1();
                transaction.add(R.id.frame, fragment1);
                transaction.commit();
            }
        });
        Button button2=(Button) findViewById(R.id.button2);
        button2.setOnClickListener(new View.OnClickListener() {

            @Override
            public void onClick(View arg0) {
                // TODO Auto-generated method stub
                FragmentManager manager=getSupportFragmentManager();
                FragmentTransaction transaction=manager.beginTransaction();
                Fragment2 fragement2=new Fragment2();
                transaction.add(R.id.frame, fragement2);
                transaction.commit();

            }
        });
    }
}


 877
877


 被折叠的 条评论
为什么被折叠?
被折叠的 条评论
为什么被折叠?
 到【灌水乐园】发言


