


上篇文章介绍了什么是OSGI以及使用OSGI构建应用的优点,接着介绍了两款常用的OSGI实现,分别为Apache Felix和Equinox,接下来开始介绍如何在Eclipse中使用Apache Felix和Equinox搭建OSGI运行环境。
一、搭建Apache Felix运行环境
上篇文章中介绍了Felix的下载与使用,本节我们在Eclipse中搭建Felix运行环境,并开发一个自己的Bundle,然后发布到Felix容器中,下载解压后的Felix框架文件结构如下:
felix-framework-5.6.1
    │  DEPENDENCIES
    │  LICENSE
    │  LICENSE.kxml2
    │  NOTICE
    │
    ├─bin
    │      felix.jar
    │
    ├─bundle
    │      org.apache.felix.bundlerepository-2.0.8.jar
    │      org.apache.felix.gogo.command-0.16.0.jar
    │      org.apache.felix.gogo.runtime-0.16.2.jar
    │      org.apache.felix.gogo.shell-0.10.0.jar
    │
    ├─conf
    │      config.properties
    │
    └─doc
        │ ....
- 1
- 2
- 3
- 4
- 5
- 6
- 7
- 8
- 9
- 10
- 11
- 12
- 13
- 14
- 15
- 16
- 17
- 18
- 19
- 20
- 1
- 2
- 3
- 4
- 5
- 6
- 7
- 8
- 9
- 10
- 11
- 12
- 13
- 14
- 15
- 16
- 17
- 18
- 19
- 20
bin/felix.jar文件为Felix最核心的部分,包括Felix框架的启动类,bundle目录下为Felix的核心Bundle,包括控制台命令,运行环境,远程Bundle资源等,conf/config.properties文件为Felix的配置信息,用于配置日志级别,Http服务端口号。了解了这些之后,接下来我们就开始在Ecilpse中搭建Felix的运行环境。
1、打开Eclipse,新建一个Java工程,名称为org.apache.felix.main。
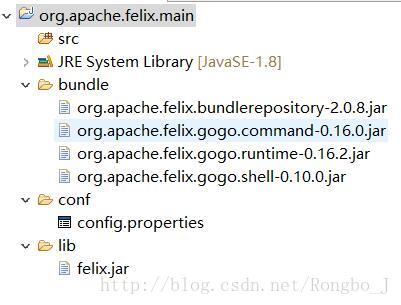
2、在新建的Java工程中新建一个lib目录,接着把felix.jar拷贝到该目录下,然后將Felix框架中的bundle和conf目录拷贝到工程中。完成后项目结构如下图所示:
3、接下来將felix.jar添加到classpath中,操作很简单,在felix.jar上单击鼠标右键=>Build Path=>Add to Build Path。
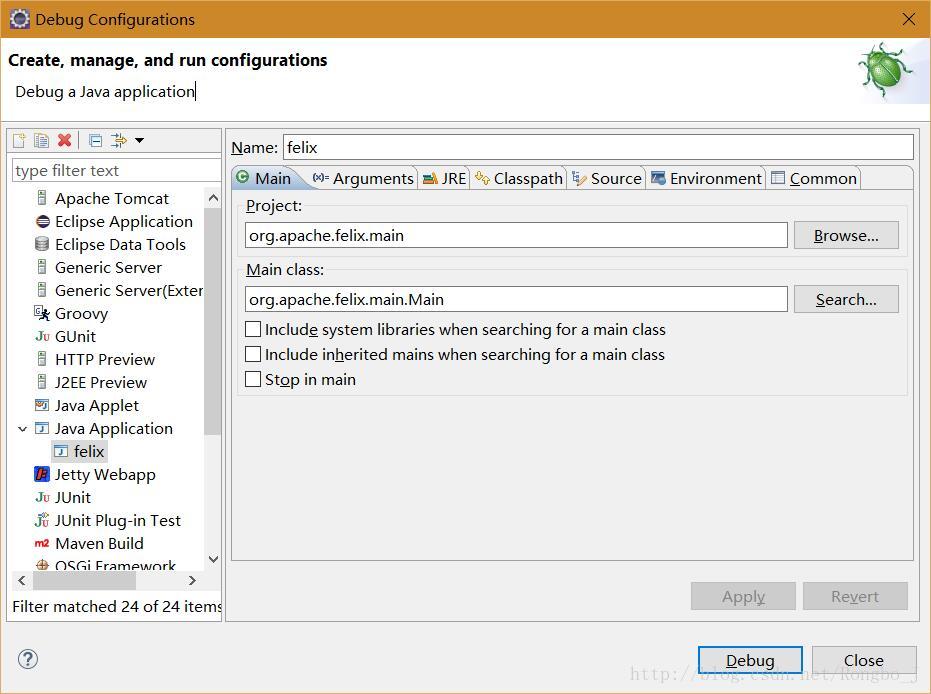
4、接着单击Run=>Debug Configrations…菜单,在JavaApplication条目上单击右键new,配置如下图所示:
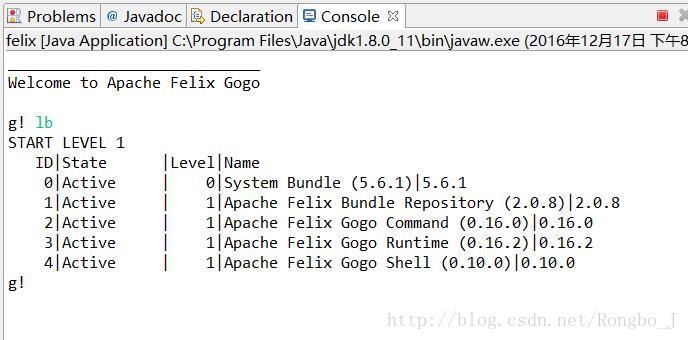
5、单击Debug按钮即可启动Felix框架,接着可以在控制台中输入lb命令查看所有运行的Bundle,如下图所示:
二、开发一个自己的Bundle
到此为止Felix运行环境已经搭建起来了,接下来我们可以开发一个自己的Bundle。
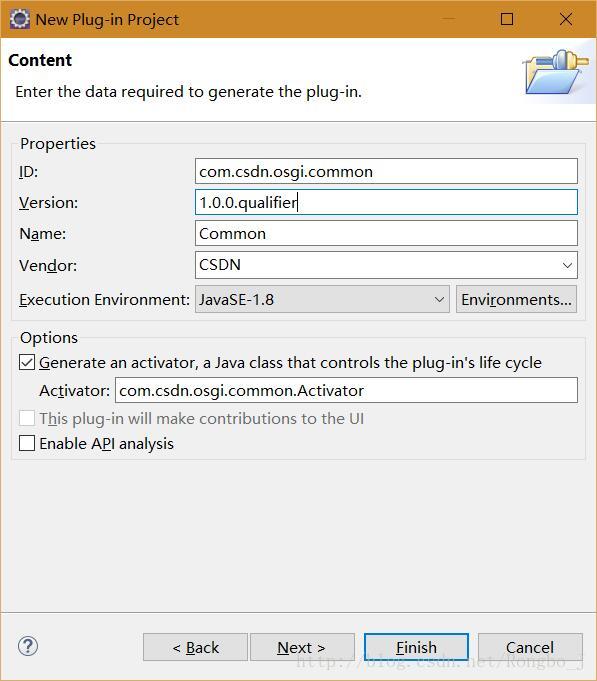
1、新建一个Plug-in Project,如下图所示:
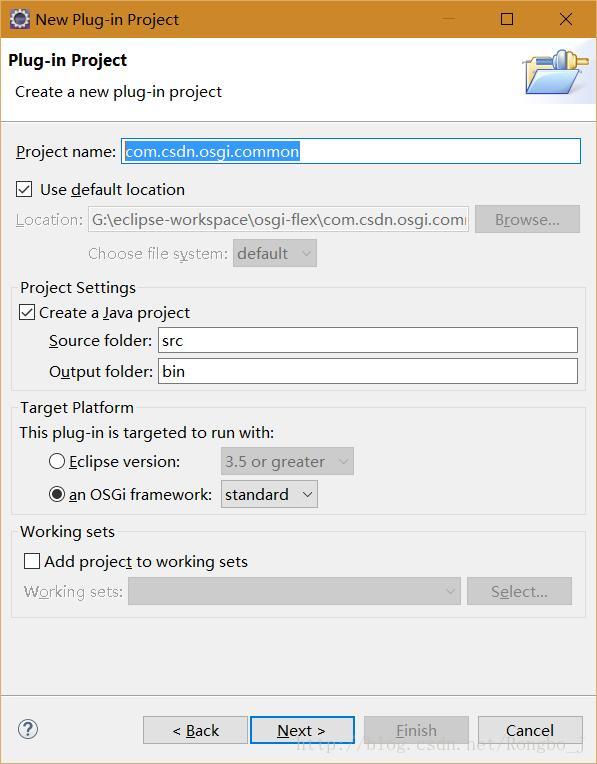
如上图所示,工程名称为com.csdn.osgi.common,在Target Platform的an OSGI framewor选项,选择standard,单击Next按钮,进入如下界面:
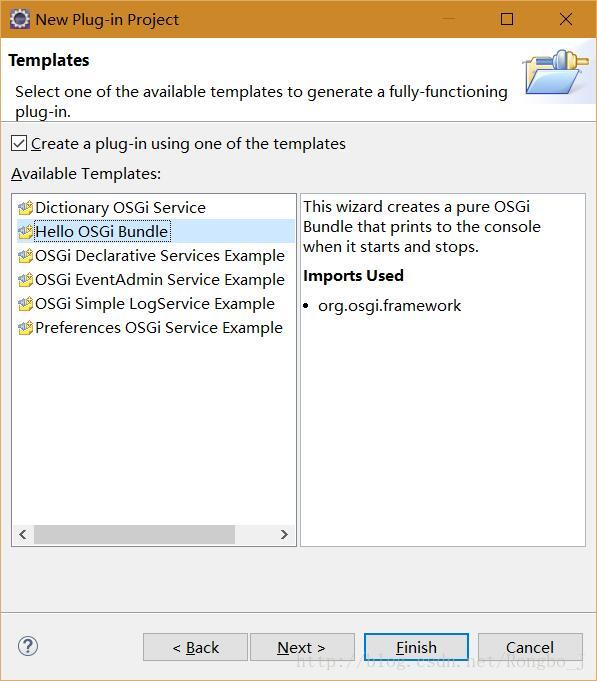
2、继续单击Next按钮,进入如下界面,选择Hello OGSI Bundle,单击Finish按钮。
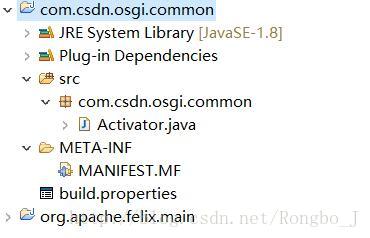
3、工程新建完毕后,项目结构如下图所示:
Eclipse向导为我们生成一个Activator,该类的内容如下:
package com.csdn.osgi.common;

import org.osgi.framework.BundleActivator;
import org.osgi.framework.BundleContext;

public class Activator implements BundleActivator {

    /*
     * (non-Javadoc)
     * @see org.osgi.framework.BundleActivator#start(org.osgi.framework.BundleContext)
     */
    public void start(BundleContext context) throws Exception {
        System.out.println("Hello World!!");
    }

    /*
     * (non-Javadoc)
     * @see org.osgi.framework.BundleActivator#stop(org.osgi.framework.BundleContext)
     */
    public void stop(BundleContext context) throws Exception {
        System.out.println("Goodbye World!!");
    }

}
- 1
- 2
- 3
- 4
- 5
- 6
- 7
- 8
- 9
- 10
- 11
- 12
- 13
- 14
- 15
- 16
- 17
- 18
- 19
- 20
- 21
- 22
- 23
- 24

- 1
- 2
- 3
- 4
- 5
- 6
- 7
- 8
- 9
- 10
- 11
- 12
- 13
- 14
- 15
- 16
- 17
- 18
- 19
- 20
- 21
- 22
- 23
- 24
该类用于控制Bundle的生命周期,start方法会在Bundle启动时调用,而stop方法则会在Bundle卸载是调用。
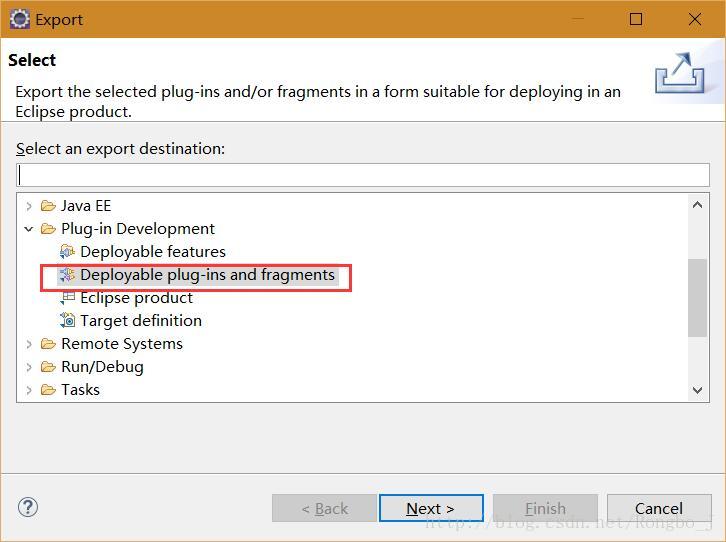
4、接下来就是发布该Bundle,在com.csdn.osgi.common工程上单击右键=>Export,如下图所示:
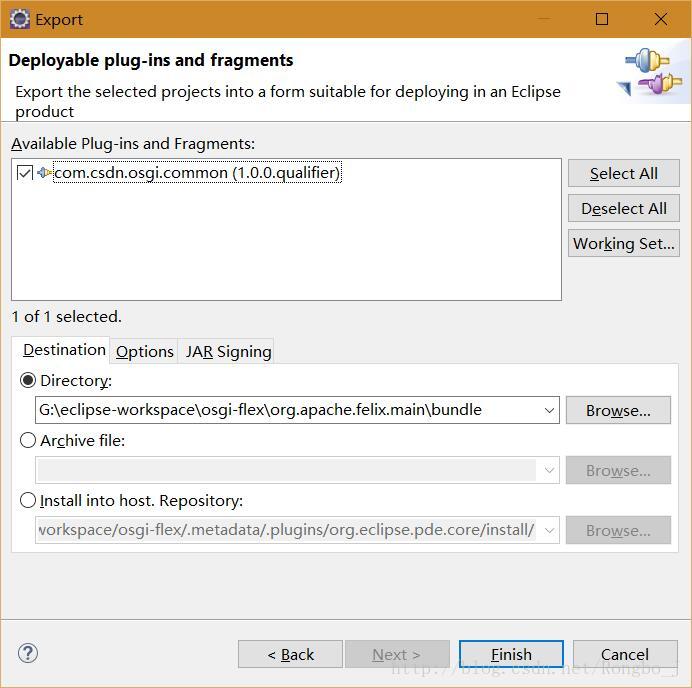
5、单击Next按钮,选择导出路径,如下图所示:
6、將导出的jar包放到org.apache.felix.main工程的bundle目录下,Felix启动时即可自动加载该目录下的bundle。
7、重新运行Felix框架,输入lb命令,控制台输出内容如下:

Hello World!!
____________________________
Welcome to Apache Felix Gogo

g! lb
START LEVEL 1
   ID|State      |Level|Name
    0|Active     |    0|System Bundle (5.6.1)|5.6.1
    1|Active     |    1|Apache Felix Bundle Repository (2.0.8)|2.0.8
    2|Active     |    1|Apache Felix Gogo Command (0.16.0)|0.16.0
    3|Active     |    1|Apache Felix Gogo Runtime (0.16.2)|0.16.2
    4|Active     |    1|Apache Felix Gogo Shell (0.10.0)|0.10.0
    5|Active     |    1|Common (1.0.0.201612172059)|1.0.0.201612172059
g!
- 1
- 2
- 3
- 4
- 5
- 6
- 7
- 8
- 9
- 10
- 11
- 12
- 13
- 14
- 1
- 2
- 3
- 4
- 5
- 6
- 7
- 8
- 9
- 10
- 11
- 12
- 13
- 14
控制台输出Hello World!!,说明我们的自己开发的Bundle已经成功运行!实际项目中我们可以使用构建工具Ant来帮助我们完成这一操作,本节内容就介绍这么多,下节介绍Eclipse中搭建Equinox运行环境。
本文源码下载地址:
http://download.csdn.net/detail/rongbo_j/9714354


 1万+
1万+


 被折叠的 条评论
为什么被折叠?
被折叠的 条评论
为什么被折叠?
 到【灌水乐园】发言


