


5分钟实现Android中更换头像功能
本文原创,转载请经过本人准许
写在前面:
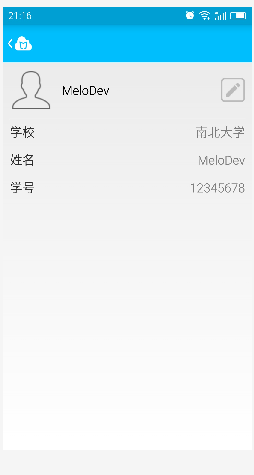
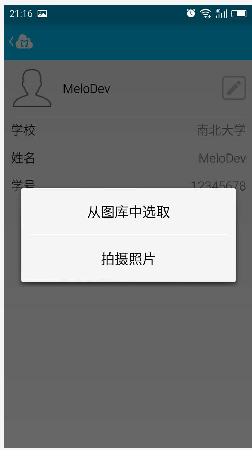
更换头像这个功能在用户界面几乎是100%出现的。通过拍摄照片或者调用图库中的图片,并且进行剪裁,来进行头像的设置。
功能相关截图如下:


下面我们直接看看完整吧:
public class UserActivity extends BaseActivity implements OnClickListener {

    private ImageView iv_photo;
    private Bitmap head;// 头像Bitmap
    private static String path = "/sdcard/myHead/";// sd路径

    @Override
    protected void onCreate(Bundle savedInstanceState) {
        super.onCreate(savedInstanceState);
        initView();
        initListener();
    }

    private void initView() {
        setContentView(R.layout.activity_user);
        iv_photo = (ImageView) findViewById(R.id.iv_photo);
        Bitmap bt = BitmapFactory.decodeFile(path + "head.jpg");// 从SD卡中找头像,转换成Bitmap
        if (bt != null) {
            @SuppressWarnings("deprecation")
            Drawable drawable = new BitmapDrawable(bt);// 转换成drawable
            iv_photo.setImageDrawable(drawable);
        } else {
            /**
             * 如果SD里面没有则需要从服务器取头像,取回来的头像再保存在SD中
             *
             */
        }
    }

    private void initListener() {
        iv_photo.setOnClickListener(this);
    }

    @Override
    public void onClick(View v) {
        switch (v.getId()) {
        case R.id.iv_photo:// 更换头像
            showTypeDialog();
            break;
        }
    }

    private void showTypeDialog() {
        AlertDialog.Builder builder = new AlertDialog.Builder(this);
        final AlertDialog dialog = builder.create();
        View view = View.inflate(this, R.layout.dialog_select_photo, null);
        TextView tv_select_gallery = (TextView) view.findViewById(R.id.tv_select_gallery);
        TextView tv_select_camera = (TextView) view.findViewById(R.id.tv_select_camera);
        tv_select_gallery.setOnClickListener(new OnClickListener() {// 在相册中选取
            @Override
            public void onClick(View v) {
                Intent intent1 = new Intent(Intent.ACTION_PICK, null);
                intent1.setDataAndType(MediaStore.Images.Media.EXTERNAL_CONTENT_URI, "image/*");
                startActivityForResult(intent1, 1);
                dialog.dismiss();
            }
        });
        tv_select_camera.setOnClickListener(new OnClickListener() {// 调用照相机
            @Override
            public void onClick(View v) {
                Intent intent2 = new Intent(MediaStore.ACTION_IMAGE_CAPTURE);
                intent2.putExtra(MediaStore.EXTRA_OUTPUT,
                        Uri.fromFile(new File(Environment.getExternalStorageDirectory(), "head.jpg")));
                startActivityForResult(intent2, 2);// 采用ForResult打开
                dialog.dismiss();
            }
        });
        dialog.setView(view);
        dialog.show();
    }

    @Override
    protected void onActivityResult(int requestCode, int resultCode, Intent data) {
        switch (requestCode) {
        case 1:
            if (resultCode == RESULT_OK) {
                cropPhoto(data.getData());// 裁剪图片
            }

            break;
        case 2:
            if (resultCode == RESULT_OK) {
                File temp = new File(Environment.getExternalStorageDirectory() + "/head.jpg");
                cropPhoto(Uri.fromFile(temp));// 裁剪图片
            }

            break;
        case 3:
            if (data != null) {
                Bundle extras = data.getExtras();
                head = extras.getParcelable("data");
                if (head != null) {
                    /**
                     * 上传服务器代码
                     */
                    setPicToView(head);// 保存在SD卡中
                    iv_photo.setImageBitmap(head);// 用ImageView显示出来
                }
            }
            break;
        default:
            break;

        }
        super.onActivityResult(requestCode, resultCode, data);
    }

    /**
     * 调用系统的裁剪功能
     *
     * @param uri
     */
    public void cropPhoto(Uri uri) {
        Intent intent = new Intent("com.android.camera.action.CROP");
        intent.setDataAndType(uri, "image/*");
        intent.putExtra("crop", "true");
        // aspectX aspectY 是宽高的比例
        intent.putExtra("aspectX", 1);
        intent.putExtra("aspectY", 1);
        // outputX outputY 是裁剪图片宽高
        intent.putExtra("outputX", 150);
        intent.putExtra("outputY", 150);
        intent.putExtra("return-data", true);
        startActivityForResult(intent, 3);
    }

    private void setPicToView(Bitmap mBitmap) {
        String sdStatus = Environment.getExternalStorageState();
        if (!sdStatus.equals(Environment.MEDIA_MOUNTED)) { // 检测sd是否可用
            return;
        }
        FileOutputStream b = null;
        File file = new File(path);
        file.mkdirs();// 创建文件夹
        String fileName = path + "head.jpg";// 图片名字
        try {
            b = new FileOutputStream(fileName);
            mBitmap.compress(Bitmap.CompressFormat.JPEG, 100, b);// 把数据写入文件
        } catch (FileNotFoundException e) {
            e.printStackTrace();
        } finally {
            try {
                // 关闭流
                b.flush();
                b.close();
            } catch (IOException e) {
                e.printStackTrace();
            }
        }
    }
}
代码的注释还算全面,大家可以一试~这样一个更换头像的功能就实现了。


 7660
7660


 被折叠的 条评论
为什么被折叠?
被折叠的 条评论
为什么被折叠?
 到【灌水乐园】发言


