


gRPC 是一个高性能、开源和通用的 RPC 框架,面向移动和 HTTP/2 设计。目前提供 C、Java 和 Go 语言版本,分别是:grpc, grpc-java, grpc-go. 其中 C 版本支持 C, C++, Node.js, Python, Ruby, Objective-C, PHP 和 C# 支持.
gRPC 基于 HTTP/2 标准设计,带来诸如双向流、流控、头部压缩、单 TCP 连接上的多复用请求等特。这些特性使得其在移动设备上表现更好,更省电和节省空间占用。
研究gRPC之前,需要先熟悉Protocol Buffers
Protocol Buffers (ProtocolBuffer/ protobuf )是Google公司开发的一种数据描述语言,类似于XML能够将结构化数据序列化,可用于数据存储、通信协议等方面。现阶段支持C++、JAVA、Python等三种编程语言。
一:编写IDL文件 send_mail.proto
syntax = "proto3";

option java_multiple_files = true;
option java_package = "com.rpc.mail";
option java_outer_classname = "SendMailServiceProto";

message SendMailRequest {
	string recipient = 1;
    string title = 2;
    string content = 3;
}

message SendMailResponse {
	int32 code = 1;
	string msg = 2;
}

service SendMailService {
    rpc sendMail (SendMailRequest) returns (SendMailResponse) {}
}新建一个maven项目,把上面的proto文件放到src/main/proto目录
pom.xml里面增加如下配置
<dependencies>
	<dependency>
		<groupId>io.grpc</groupId>
		<artifactId>grpc-all</artifactId>
		<version>0.14.1</version>
	</dependency>
</dependencies>

<build>
	<extensions>
		<extension>
			<groupId>kr.motd.maven</groupId>
			<artifactId>os-maven-plugin</artifactId>
			<version>1.4.1.Final</version>
		</extension>
	</extensions>
	<plugins>
		<plugin>
			<groupId>org.xolstice.maven.plugins</groupId>
			<artifactId>protobuf-maven-plugin</artifactId>
			<version>0.5.0</version>
			<configuration>
				<protocArtifact>com.google.protobuf:protoc:3.0.0-beta-2:exe:${os.detected.classifier}
				</protocArtifact>
				<pluginId>grpc-java</pluginId>
				<pluginArtifact>io.grpc:protoc-gen-grpc-java:0.14.1:exe:${os.detected.classifier}
				</pluginArtifact>
			</configuration>
			<executions>
				<execution>
					<goals>
						<goal>compile</goal>
						<goal>compile-custom</goal>
					</goals>
				</execution>
			</executions>
		</plugin>
	</plugins>
</build>
之后执行maven clean package即可生成java代码,生成的java代码在target\generated-sources\protobuf 目录
注意:插件里面的protobuf(protocArtifact、pluginArtifact)需要和grpc-core里面依赖的protobuf版本需要保持一致
二:编码
新建一个maven项目(也可以直接使用上一步创建的项目),在pom.xml里面加入如下配置
<dependencies>
	<dependency>
		<groupId>io.grpc</groupId>
		<artifactId>grpc-all</artifactId>
		<version>0.14.1</version>
	</dependency>
</dependencies>
然后把target\generated-sources\protobuf\java 和 target\generated-sources\protobuf\grpc-java 里面的代码放到src目录中去
目录结构如下:
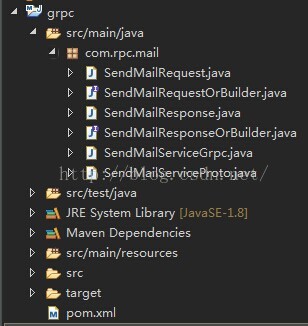
接下来,写接口的实现类
package com.rpc.mail;

import io.grpc.stub.StreamObserver;

public class SendMailServiceImpl implements SendMailServiceGrpc.SendMailService {
	public void sendMail(SendMailRequest request, StreamObserver<SendMailResponse> responseObserver) {
		System.out.println(request.getRecipient() + "\t" + request.getTitle() + "\t" + request.getContent());
		//这里是具体的业务逻辑
		SendMailResponse resp = SendMailResponse.newBuilder().setCode(0).setMsg("OK").build();
		//设置返回结果
		responseObserver.onNext(resp);
		responseObserver.onCompleted();
	}
}package com.rpc.mail;
import io.grpc.Server;
import io.grpc.netty.NettyServerBuilder;
public class GrpcServer {
public static void main(String[] args) throws Exception {
Server server = NettyServerBuilder.forPort(8080).addService(SendMailServiceGrpc.bindService(new SendMailServiceImpl())).build();
server.start();
System.out.println("server startup at 8080");
server.awaitTermination();
}
}package com.rpc.mail;
import java.util.concurrent.TimeUnit;
import com.rpc.mail.SendMailServiceGrpc.SendMailServiceBlockingStub;
import io.grpc.ManagedChannel;
import io.grpc.netty.NettyChannelBuilder;
public class GrpcClient {
public static void main(String[] args) throws Exception {
ManagedChannel channel = NettyChannelBuilder.forAddress("127.0.0.1", 8080).usePlaintext(true).build();
//同步调用(异步调用的话,就是:SendMailServiceGrpc.newFutureStub(channel))
SendMailServiceBlockingStub stub = SendMailServiceGrpc.newBlockingStub(channel);
//设置请求参数
SendMailRequest param = SendMailRequest.newBuilder().setRecipient("admin@google.com").setTitle("运维邮件").setContent("SOA服务挂了").build();
SendMailResponse resp = stub.sendMail(param);
System.out.println(resp.getMsg() + "\t" + resp.getCode());
//close
channel.shutdown().awaitTermination(1, TimeUnit.SECONDS);
}
}


 3617
3617


 被折叠的 条评论
为什么被折叠?
被折叠的 条评论
为什么被折叠?
 到【灌水乐园】发言


