


这段时间也看了很多关于tableview优化的文章,加上前段时间自己也做了一个同时仿微博和支付宝的项目,思考了一些关于UITableView的优化技巧。UITableView是iOS开发中最常用的控件之一。
UITableview的简单认识
1.重用机制
UITableView最核心的思想就是UITableViewCell的重用机制。UITableView只会创建一屏的UITableViewCell,其他都是从中取出来重用的。每当Cell滑出屏幕时,就会放入到一个集合中,当要显示某一位置的Cell时,会先去集合中取,如果有,就直接重用显示。如果没有,才会创建,这样能极大的减少内存开销。
2.代理方法
UITableView最主要的两个代理方法tableView:cellForRowAtIndexPath:和tableView:heightForRowAtIndexPath:。我最开始接触UITableView的时候,认为UITableView会先调用前者,再调用后者,因为这跟我们创建控件的思路是一样的,先创建它,然后设置它的布局。但实际上并非如此,UITableView是继承自UIScrollView的,需要先确定它的contentSize及每个Cell的位置,然后才会把重用的Cell放置到对应的位置。所以事实上,UITableView的回调顺序是先多次调用tableView:heightForRowAtIndexPath:以确定contentSize及Cell的位置,然后才会调用tableView:cellForRowAtIndexPath:,来显示在当前屏幕的cell。
举个例子来说:如果现在要显示100个Cell,当前屏幕显示5个。刷新(reload)UITableView时,UITableView会先调用100次tableView:heightForRowAtIndexPath:方法,然后调用5次tableView:cellForRowAtIndexPath:方法;滚动屏幕时,每当Cell滚入屏幕,都会调用一次tableView:heightForRowAtIndexPath:、tableView:cellForRowAtIndexPath:方法。通过上述的讲解后,首先想到的UITableView优化的方案是优化上面的UITableView两个代理方法。
优化技巧
1.将赋值和计算布局分离,并根据数据源计算出对应的布局,并缓存到数据源中。
这样能让tableView:cellForRowAtIndexPath:方法只负责赋值,tableView:heightForRowAtIndexPath:方法只负责计算高度。示例代码如下:
- (UITableViewCell *)tableView:(UITableView *)tableView cellForRowAtIndexPath:(NSIndexPath *)indexPath{
    VVeboTableViewCell *cell = [tableView dequeueReusableCellWithIdentifier:@"cell"];
    if (cell==nil) {
        cell = [[VVeboTableViewCell alloc] initWithStyle:UITableViewCellStyleDefault
                                         reuseIdentifier:@"cell"];
    }
    [self drawCell:cell withIndexPath:indexPath];
    return cell;
}

- (CGFloat)tableView:(UITableView *)tableView heightForRowAtIndexPath:(NSIndexPath *)indexPath{
    NSDictionary *dict = datas[indexPath.row];
    float height = [dict[@"frame"] CGRectValue].size.height;
    return height;
}
微博的头像在某次改版中换成了圆形,当头像下载下来后。利用后台线程将头像预先渲染为圆形并保存到一个ImageCache中去。示例代码如下
+ (YYWebImageManager *)avatarImageManager {
    static YYWebImageManager *manager;
    static dispatch_once_t onceToken;
    dispatch_once(&onceToken, ^{
        NSString *path = [[UIApplication sharedApplication].cachesPath stringByAppendingPathComponent:@"weibo.avatar"];
        YYImageCache *cache = [[YYImageCache alloc] initWithPath:path];
        manager = [[YYWebImageManager alloc] initWithCache:cache queue:[YYWebImageManager sharedManager].queue];
        manager.sharedTransformBlock = ^(UIImage *image, NSURL *url) {
            if (!image) return image;
            return [image imageByRoundCornerRadius:100]; // a large value
        };
    });
    return manager;
}
对于TableView来说,Cell内容的离屏渲染会带来较大的GPU消耗。为了避免离屏渲染,你应当尽量避免使用layer的border、corner、shadow、mask 等技术,而尽量在后台线程预先绘制好对应内容。
3.当滚动停止时才加载可见cell的图片
- (void)scrollViewDidEndDragging:(UIScrollView *)scrollView willDecelerate:(BOOL)decelerate
{
    if (!decelerate)
    {
        [self loadImagesForOnscreenRows];
    }
} 第三方库YYKit(GitHub地址:https://github.com/jingwanli6666/YYKit)在显示文本的控件上用到了异步绘制的功能。YYKit参考了FaceBook的AsyncDisplayKit库,它是用于保持iOS界面流畅的库。关于这块代码作者单独提取出来,放到了这里:YYAsyncLayer。YYAsyncLayer 是 CALayer 的子类,当它需要显示内容(比如调用了 [layer setNeedDisplay])时,它会向 delegate,也就是 UIView 请求一个异步绘制的任务。在异步绘制时,Layer 会传递一个BOOL(^isCancelled)() 这样的 block,绘制代码可以随时调用该 block 判断绘制任务是否已经被取消。
当 TableView 快速滑动时,会有大量异步绘制任务提交到后台线程去执行。但是有时滑动速度过快时,绘制任务还没有完成就可能已经被取消了。如果这时仍然继续绘制,就会造成大量的 CPU 资源浪费,甚至阻塞线程并造成后续的绘制任务迟迟无法完成。我的做法是尽量快速、提前判断当前绘制任务是否已经被取消;在绘制每一行文本前,我都会调用 isCancelled() 来进行判断,保证被取消的任务能及时退出,不至于影响后续操作。
当我们在Cell上添加系统控件时,实质上系统都需要调用底层的接口进行绘制。当需要大量添加控件时,对资源的开销也会很大,如果我们直接绘制,就能提高效率。第三方微博客户端(VVebo)通过给自定义的Cell添加draw方法,来异步绘制Cell的系统控件。相关实现见这个项目:VVeboTableViewDemo,部分代码如下所示:
//将主要内容绘制到图片上
- (void)draw{
    if (drawed) {
        return;
    }
    NSInteger flag = drawColorFlag;
    drawed = YES;
    //异步绘制
    dispatch_async(dispatch_get_global_queue(DISPATCH_QUEUE_PRIORITY_DEFAULT, 0), ^{
        CGRect rect = [_data[@"frame"] CGRectValue];
        UIGraphicsBeginImageContextWithOptions(rect.size, YES, 0);
        CGContextRef context = UIGraphicsGetCurrentContext();
        [[UIColor colorWithRed:250/255.0 green:250/255.0 blue:250/255.0 alpha:1] set];
        CGContextFillRect(context, rect);
        if ([_data valueForKey:@"subData"]) {
            [[UIColor colorWithRed:243/255.0 green:243/255.0 blue:243/255.0 alpha:1] set];
            CGRect subFrame = [_data[@"subData"][@"frame"] CGRectValue];
            CGContextFillRect(context, subFrame);
            [[UIColor colorWithRed:200/255.0 green:200/255.0 blue:200/255.0 alpha:1] set];
            CGContextFillRect(context, CGRectMake(0, subFrame.origin.y, rect.size.width, .5));
        }

        {
            float leftX = SIZE_GAP_LEFT+SIZE_AVATAR+SIZE_GAP_BIG;
            float x = leftX;
            float y = (SIZE_AVATAR-(SIZE_FONT_NAME+SIZE_FONT_SUBTITLE+6))/2-2+SIZE_GAP_TOP+SIZE_GAP_SMALL-5;
            [_data[@"name"] drawInContext:context withPosition:CGPointMake(x, y) andFont:FontWithSize(SIZE_FONT_NAME)
                             andTextColor:[UIColor colorWithRed:106/255.0 green:140/255.0 blue:181/255.0 alpha:1]
                                andHeight:rect.size.height];
            y += SIZE_FONT_NAME+5;
            float fromX = leftX;
            float size = [UIScreen screenWidth]-leftX;
            NSString *from = [NSString stringWithFormat:@"%@  %@", _data[@"time"], _data[@"from"]];
            [from drawInContext:context withPosition:CGPointMake(fromX, y) andFont:FontWithSize(SIZE_FONT_SUBTITLE)
                   andTextColor:[UIColor colorWithRed:178/255.0 green:178/255.0 blue:178/255.0 alpha:1]
                      andHeight:rect.size.height andWidth:size];
        }

            [@"•••" drawInContext:context
                     withPosition:CGPointMake(SIZE_GAP_LEFT, 8+countRect.origin.y)
                          andFont:FontWithSize(11)
                     andTextColor:[UIColor colorWithRed:178/255.0 green:178/255.0 blue:178/255.0 alpha:.5]
                        andHeight:rect.size.height];

            if ([_data valueForKey:@"subData"]) {
                [[UIColor colorWithRed:200/255.0 green:200/255.0 blue:200/255.0 alpha:1] set];
                CGContextFillRect(context, CGRectMake(0, rect.size.height-30.5, rect.size.width, .5));
            }
        }
        //将绘制的内容以图片的形式返回,并调用主线程显示
        UIImage *temp = UIGraphicsGetImageFromCurrentImageContext();
        UIGraphicsEndImageContext();
        dispatch_async(dispatch_get_main_queue(), ^{
            if (flag==drawColorFlag) {
                postBGView.frame = rect;
                postBGView.image = nil;
                postBGView.image = temp;
            }
        });
    });
    [self drawText];
    [self loadThumb];
}

//将文本内容绘制到图片上
- (void)drawText{
    if (label==nil||detailLabel==nil) {
        [self addLabel];
    }
    label.frame = [_data[@"textRect"] CGRectValue];
    [label setText:_data[@"text"]];
    if ([_data valueForKey:@"subData"]) {
        detailLabel.frame = [[_data valueForKey:@"subData"][@"textRect"] CGRectValue];
        [detailLabel setText:[_data valueForKey:@"subData"][@"text"]];
        detailLabel.hidden = NO;
    }
}
各个部分都是根据之前算好的布局进行绘制。这里需要异步绘制,但如果在重写drawRect方法就不需要用GCD异步线程了,因为drawRect本身就是异步绘制。
5.按需加载
当滑动时,松开手指后,立刻计算出滑动停止时Cell的位置,并预先绘制那个位置附近的几个Cell,而忽略当前滑动中从Cell。代码如下:
//按需加载 - 如果目标行与当前行相差超过指定行数,只在目标滚动范围的前后指定3行加载。
- (void)scrollViewWillEndDragging:(UIScrollView *)scrollView withVelocity:(CGPoint)velocity targetContentOffset:(inout CGPoint *)targetContentOffset{
    NSIndexPath *ip = [self indexPathForRowAtPoint:CGPointMake(0, targetContentOffset->y)];
    NSIndexPath *cip = [[self indexPathsForVisibleRows] firstObject];
    NSInteger skipCount = 8;
    if (labs(cip.row-ip.row)>skipCount) {
        NSArray *temp = [self indexPathsForRowsInRect:CGRectMake(0, targetContentOffset->y, self.width, self.height)];
        NSMutableArray *arr = [NSMutableArray arrayWithArray:temp];
        if (velocity.y<0) {
            NSIndexPath *indexPath = [temp lastObject];
            if (indexPath.row+3<datas.count) {
                [arr addObject:[NSIndexPath indexPathForRow:indexPath.row+1 inSection:0]];
                [arr addObject:[NSIndexPath indexPathForRow:indexPath.row+2 inSection:0]];
                [arr addObject:[NSIndexPath indexPathForRow:indexPath.row+3 inSection:0]];
            }
        } else {
            NSIndexPath *indexPath = [temp firstObject];
            if (indexPath.row>3) {
                [arr addObject:[NSIndexPath indexPathForRow:indexPath.row-3 inSection:0]];
                [arr addObject:[NSIndexPath indexPathForRow:indexPath.row-2 inSection:0]];
                [arr addObject:[NSIndexPath indexPathForRow:indexPath.row-1 inSection:0]];
            }
        }
        [needLoadArr addObjectsFromArray:arr];
    }
}
6.全局并发控制
用 concurrent queue 来执行大量绘制任务时,偶尔会遇到这种问题:
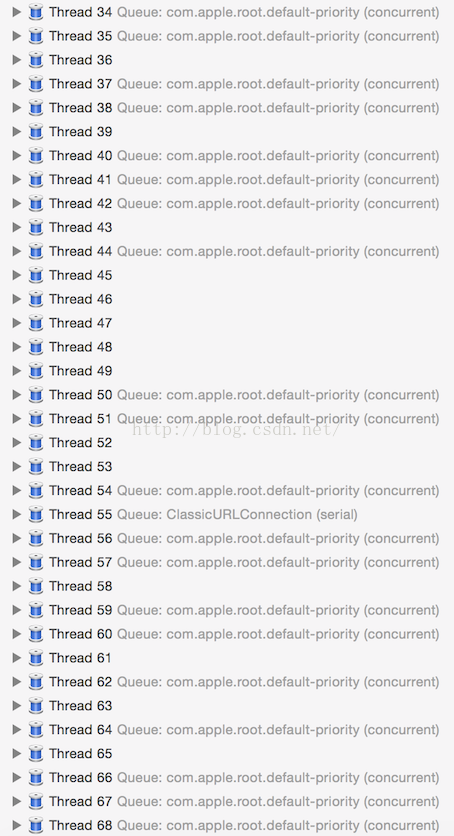
大量的任务提交到后台队列时,某些任务会因为某些原因(此处是 CGFont 锁)被锁住导致线程休眠,或者被阻塞,concurrent queue 随后会创建新的线程来执行其他任务。当这种情况变多时,或者 App 中使用了大量 concurrent queue 来执行较多任务时,App 在同一时刻就会存在几十个线程同时运行、创建、销毁。CPU 是用时间片轮转来实现线程并发的,尽管 concurrent queue 能控制线程的优先级,但当大量线程同时创建运行销毁时,这些操作仍然会挤占掉主线程的 CPU 资源。ASDK 有个 Feed 列表的 Demo:SocialAppLayout,当列表内 Cell 过多,并且非常快速的滑动时,界面仍然会出现少量卡顿,我谨慎的猜测可能与这个问题有关。
使用 concurrent queue 时不可避免会遇到这种问题,但使用 serial queue 又不能充分利用多核 CPU 的资源。我写了一个简单的工具 YYDispatchQueuePool,为不同优先级创建和 CPU 数量相同的 serial queue,每次从 pool 中获取 queue 时,会轮询返回其中一个 queue。我把 App 内所有异步操作,包括图像解码、对象释放、异步绘制等,都按优先级不同放入了全局的 serial queue 中执行,这样尽量避免了过多线程导致的性能问题。
除了上述提到的几个方面外,还有一些大家都比较熟悉的优化点:
- 正确使用重用机制
- 尽量少用或者不用透明图层
- 减少subviews的数量
- 如果Cell内部的内容来自web,使用异步加载,缓存请求结果
参考文献:


 1758
1758


 被折叠的 条评论
为什么被折叠?
被折叠的 条评论
为什么被折叠?
 到【灌水乐园】发言


