


Android网络之加载网络中图片
前几篇我们已经介绍了网络中数据传输的形式,同时也介绍了网络请求协议,下载我们写一个demo演示下。
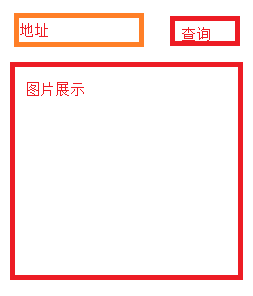
我们的原型图:
(1)、我们建立一个名为networkdemo的工程。新建一个NetWorkUtils类用于处理我们的网络请求。
    /**
     * Created by dsw on 2015/10/30.
     */
    public class NetWorkUtils {

        public static Bitmap downLoadImageFromNet(String urlString){
            Bitmap bitmap = null;
            InputStream inputStream;
            try {
                //建立一个URL对象
                URL url = new URL(urlString);
                //获取HttpURLConnection对象
                HttpURLConnection httpURLConnection = (HttpURLConnection) url.openConnection();
                httpURLConnection.setConnectTimeout(2000);
                //设置请求方式
                httpURLConnection.setRequestMethod("GET");
                //设置读取数据的事件
                httpURLConnection.setReadTimeout(2000);
                //设置是否使用缓存
                httpURLConnection.setUseCaches(false);
                //设置可以从服务器读取数据,默认为true
                httpURLConnection.setDoInput(true);
                //获取链接url获取的返回码
                int requestCode = httpURLConnection.getResponseCode();
                if(requestCode == 200){//表示我们请求成功
                    inputStream = httpURLConnection.getInputStream();
                    bitmap = BitmapFactory.decodeStream(inputStream);
                }
            } catch (MalformedURLException e) {
                e.printStackTrace();
            } catch (IOException e) {
                e.printStackTrace();
            }
            return bitmap;
        }
    }
这里就是我们上篇将的基本内容。通过httpURLConnection.getInputStream();获取流,然后将流形成一个bitmap对象即可。
(2)、布局文件:
    <?xml version="1.0" encoding="utf-8"?>
    <LinearLayout xmlns:android="http://schemas.android.com/apk/res/android"
        xmlns:tools="http://schemas.android.com/tools"
        android:layout_width="match_parent"
        android:layout_height="match_parent"
        android:paddingLeft="@dimen/activity_horizontal_margin"
        android:paddingRight="@dimen/activity_horizontal_margin"
        android:paddingTop="@dimen/activity_vertical_margin"
        android:paddingBottom="@dimen/activity_vertical_margin"
        android:orientation="vertical"
        tools:context=".MainActivity">
        <RelativeLayout
            android:layout_width="match_parent"
            android:layout_height="wrap_content"
            android:orientation="horizontal">
            <Button
                android:id="@+id/btn_find"
                android:layout_width="wrap_content"
                android:layout_height="wrap_content"
                android:textSize="17sp"
                android:layout_alignParentRight="true"
                android:layout_centerVertical="true"
                android:text="查询"/>
            <EditText
                android:id="@+id/et_url"
                android:layout_width="match_parent"
                android:layout_height="wrap_content"
                android:layout_centerVertical="true"
                android:layout_toLeftOf="@id/btn_find"/>
        </RelativeLayout>
        <ImageView
            android:id="@+id/iv_imageView"
            android:layout_width="match_parent"
            android:layout_height="match_parent"
            android:scaleType="fitXY"/>
    </LinearLayout>
(3)、MainActivity中的处理,我们要记住,请求网络不能再主线程中进行,所以我们需要开启一个子线程进行网络的访问。
public class MainActivity extends AppCompatActivity {
private Button btn_find;
private EditText et_url;
private ImageView iv_imageView;
@Override
protected void onCreate(Bundle savedInstanceState) {
super.onCreate(savedInstanceState);
setContentView(R.layout.activity_main);
btn_find = (Button) findViewById(R.id.btn_find);
et_url = (EditText) findViewById(R.id.et_url);
iv_imageView = (ImageView) findViewById(R.id.iv_imageView);
btn_find.setOnClickListener(new View.OnClickListener() {
@Override
public void onClick(View v) {
new Thread(new Runnable() {
@Override
public void run() {
Message msg = mHandler.obtainMessage();
msg.obj = NetWorkUtils.downLoadImageFromNet(et_url.getText().toString().trim());
msg.what =0;
mHandler.sendMessage(msg);
}
}).start();
}
});
}
private Handler mHandler = new Handler() {
@Override
public void handleMessage(Message msg) {
Bitmap bitmap = (Bitmap) msg.obj;
if(bitmap == null){
iv_imageView.setBackgroundResource(R.mipmap.ic_launcher);
}else{
iv_imageView.setImageBitmap(bitmap);
}
}
};
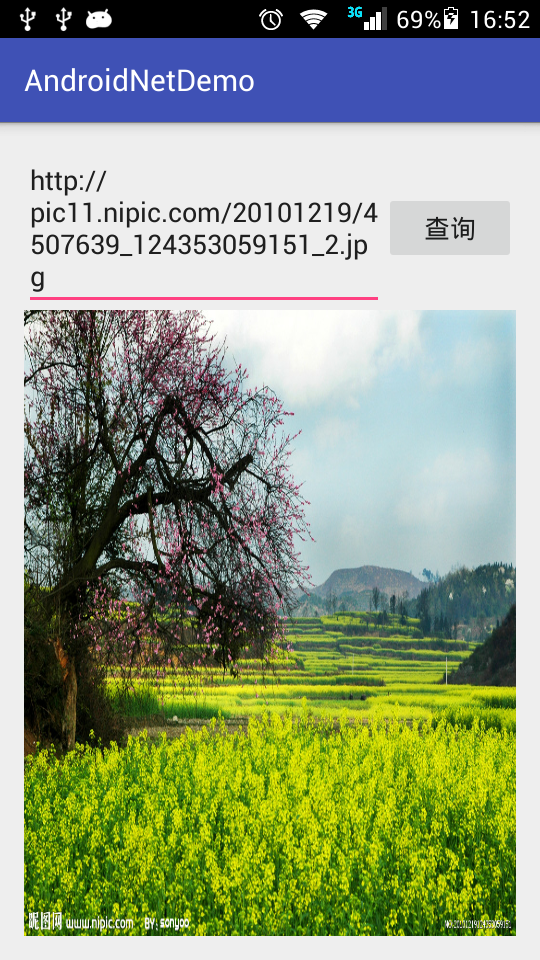
}至此,基本的就完成了。看下效果图:
是不是很简单,请求其它数据都是一个道理,读取流中的字节,转换成对象即可。
作者:mr_dsw 欢迎转载,与人分享是进步的源泉!
转载请保留地址:http://blog.csdn.net/mr_dsw


 1051
1051

 被折叠的 条评论
为什么被折叠?
被折叠的 条评论
为什么被折叠?
 到【灌水乐园】发言


