


词Ci的介绍页是这样的,可以上下滑动翻页。
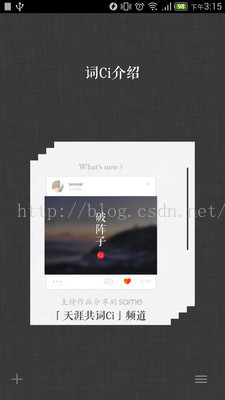
这样效果自己要实现还是很麻烦的,后来发现已经有了Stack'View就是这样效果了,要做的就是使用啦。
public class IntroductionView extends RelativeLayout
{
    private Context mContext;
    final int[] mColors = {R.drawable.intro00, R.drawable.intro01, R.drawable.intro02, R.drawable.intro03,
            R.drawable.intro04, R.drawable.intro05};
    public IntroductionView(Context context, AttributeSet attrs, int defStyle)
    {
        super(context, attrs, defStyle);
    }
    public IntroductionView(Context context, AttributeSet attrs)
    {
        super(context, attrs);
    }
    public IntroductionView(Context context)
    {
        super(context);
        mContext = context;
        initView();
    }
    private void layoutItemContainer(View itemContainer)
    {
        RelativeLayout.LayoutParams params = (RelativeLayout.LayoutParams) itemContainer.getLayoutParams();
        params.width = LayoutParams.MATCH_PARENT;
        params.height = ResizeUtil.resize(mContext, 864);
        itemContainer.setLayoutParams(params);
    }

    private void initView()
    {
        LayoutInflater inflater = (LayoutInflater) mContext.getSystemService(Context.LAYOUT_INFLATER_SERVICE);
        View root = inflater.inflate(R.layout.layout_intro, null);
        TextView title = (TextView) root.findViewById(R.id.title);
        title.setTypeface(MyApplication.getTypeface());
        final StackView stackView = (StackView) root.findViewById(R.id.stack_view);
        layoutItemContainer(stackView);
        IntroAdapter colorAdapter = new IntroAdapter(mContext, mColors);
        stackView.setAdapter(colorAdapter);
        stackView.getLayoutParams().height = ResizeUtil.resize(mContext, 600);
        // stackView.setLayoutParams(new LayoutParams(-1, ));
        addView(root, new LayoutParams(-1, -1));
    }

}
<RelativeLayout xmlns:android="http://schemas.android.com/apk/res/android"
android:layout_width="match_parent"
android:layout_height="match_parent" >
<TextView
android:id="@+id/title"
android:layout_width="wrap_content"
android:layout_height="wrap_content"
android:text="词Ci介绍"
android:textColor="@color/white"
android:layout_marginTop="100dp"
android:layout_centerHorizontal="true"
android:textSize="28sp" />
<StackView
android:id="@+id/stack_view"
android:layout_width="match_parent"
android:layout_height="wrap_content"
android:layout_alignParentBottom="true"
android:layout_marginBottom="60dp"
android:loopViews="true" />
</RelativeLayout>StackView 也是继承了AdapterView<Adapter>的,adpater的写法也没什么区别。
这里有个要注意的地方是自定义View的LayoutParams设置问题,
<pre name="code" class="java">// stackView.setLayoutParams(new LayoutParams(-1, ));
        addView(root, new LayoutParams(-1, -1));
上面一句是没必要的,addView时注意要加上LayoutParams,-1就是MatchParent,这样写着快点,但应该还是要写名称好。
 public View getView(int position, View convertView, ViewGroup parent)
    {
        ViewHolder holder;
        if (convertView == null)
        {
            holder = new ViewHolder();
            LinearLayout.LayoutParams colorLayoutParams = new LinearLayout.LayoutParams(
                    ResizeUtil.resize(mContext, 450), ResizeUtil.resize(mContext, 540));

            convertView = new LinearLayout(mContext);
            holder.imageview = new ImageView(mContext);

            holder.imageview.setScaleType(ScaleType.FIT_XY);
            holder.imageview.setLayoutParams(colorLayoutParams);
            ((LinearLayout) convertView).addView(holder.imageview);
            convertView.setTag(holder);
        }
        else
        {
            holder = (ViewHolder) convertView.getTag();
        }

        holder.imageview.setImageResource(mColors[position]);

        return convertView;
    }


 1848
1848


 被折叠的 条评论
为什么被折叠?
被折叠的 条评论
为什么被折叠?
 到【灌水乐园】发言


