


前沿
上一篇进行Espresso 安装方面介绍,也就是测试环境的设置。下面几篇会对照官方文档进行一个分析。避免与主题脱节。关于Espresso文章不分先后。
1.翻译官网文档
Espresso的核心是它能够无缝地同步所有测试操作与正在测试的应用程序。默认情况下,Espresso会等待当前消息队列中的UI事件被处理,并在默认的AsyncTasks完成之后再进入下一个测试操作。
然而,存在应用程序通过非标准手段执行后台操作(例如与web服务通信)的情况; 例如:直接创建和管理线程。在这种情况下,你必须使用Idling Resource来通知应用程序的长时间运行操作。
我认为,实现Idling Resource结构重写判断条件isIdleNow()可以实现模拟的异步操作
1.1创建和注册Idling资源
您可以实现IdlingResource接口自己或使用一个已经存在的实现,如CountingIdlingResource,包含在espresso-idling-resource包中。
此接口需要暴露于测试或在其中创建并注入应用程序。然后,通过调用注册您的Idling资源(S)与espresso中的一个或多个Espresso.registerIdlingResource()在测试设置。
Sample: https://github.com/googlesamples/android-testing/tree/master/ui/espresso/IdlingResourceSample
1.2 Idling Resource approaches
Counting running jobs:当一个作业启动,自动增加的计数器。当它完成时,递减它。如果计数器为零,应用程序将处于空闲状态。这种方法非常简单,解释了大多数情况。CountingIdlingResource原理正是这一点。
Querying state:这可能是更可靠的问一个工作队列或HTTP客户端(或任何正在做工作背景),如果它是忙。如果状态是暴露的,实现Idling Resource 是很容易的。
请注意,Idling Resource implementations for okhttp怠速资源。
Blog: https://github.com/JakeWharton/okhttp-idling-resource
1.3 IdlingResource 接口
package android.support.test.espresso;


public interface IdlingResource {


  public String getName();


  public boolean isIdleNow();

  public void registerIdleTransitionCallback(ResourceCallback callback);


    public void onTransitionToIdle();
  }

}
IdlingResource 两种用法
1.停止指定的时间 不需要注入
2.根据真实耗时时间回调 需要注入测试代码到源码中
方法一 实现IdlingResource ,重写 isIdleNow()
 class ElapsedTimeIdlingResource implements IdlingResource {
    private final long startTime;
    private final long waitingTime;
    private ResourceCallback resourceCallback;

    public ElapsedTimeIdlingResource(long waitingTime) {
        this.startTime = System.currentTimeMillis();
        this.waitingTime = waitingTime;
    }

    @Override
    public String getName() {
        return ElapsedTimeIdlingResource.class.getName() + ":" + waitingTime;
    }

    @Override
    public boolean isIdleNow() {
        long elapsed = System.currentTimeMillis() - startTime;
        boolean idle = (elapsed >= waitingTime);
        if (idle) {
            resourceCallback.onTransitionToIdle();
        }
        return idle;
    }

    @Override
    public void registerIdleTransitionCallback(ResourceCallback resourceCallback) {
        this.resourceCallback = resourceCallback;
    }
}
在需要后台耗时工作测试代码前面添加如下代码
idlingResource = new ElapsedTimeIdlingResource(1000 * 3);

Espresso.registerIdlingResources(idlingResource);
这样就可以限制3秒之后进行后面的验证
方法二用法:注入待测类
在工程包名下新建espresso 包,粘贴如下代码
public class SimpleIdlingResource implements IdlingResource {

    @Nullable
    private volatile ResourceCallback mCallback;

    // Idleness is controlled with this boolean.
    private AtomicBoolean mIsIdleNow = new AtomicBoolean(true);

    @Override
    public String getName() {
        return this.getClass().getName();
    }

    @Override
    public boolean isIdleNow() {
        return mIsIdleNow.get();
    }

    @Override
    public void registerIdleTransitionCallback(ResourceCallback callback) {
        mCallback = callback;
    }

    /**
     * Sets the new idle state, if isIdleNow is true, it pings the {@link ResourceCallback}.
     *
     * @param isIdleNow false if there are pending operations, true if idle.
     */
    public void setIdleState(boolean isIdleNow) {
        mIsIdleNow.set(isIdleNow);
        if (isIdleNow && mCallback != null) {
            mCallback.onTransitionToIdle();
        }
    }
在待测类中需要
定义该方法
/**
 * Only called from test, creates and returns a new {@link SimpleIdlingResource}.
 */
@VisibleForTesting
@NonNull
public IdlingResource getIdlingResource() {
    if (mIdlingResource == null) {
        mIdlingResource = new SimpleIdlingResource();
    }
    return mIdlingResource;
}
在耗时任务前加上
mIdlingResource.setIdleState(false);
在耗时任务后加上
mIdlingResource.setIdleState(true);
两种方式最后都会通过调用onTransitionToIdle()方法通知Esspresso框架被测应用进行耗时任务,两种方式各有利弊。根据需求各自衡量
2.Hamcrest框架的引入
使用Esprosso框架进行自动化脚本编写的同事引入Hamcrest框架可以做到事半功倍。
hamcrest 详细介绍
Hamcrest是一个书写匹配器对象时允许直接定义匹配规则的框架.有大量的匹配器是侵入式的,例如UI验证或者数据过滤,但是匹配对象在书写灵活的测试是最常用
Hamcrest从一开始就设计结合不同的单元测试框架.例如,Hamcrest可以使用JUnit3和4和TestNG.(详细查看完整Hamcrest发布中的例子).在一个现有的测试套件中迁移到使用Hamcrest风格的断言是很容易的,因为其他断言风格可以和Hamcrest的共存.
通过使用从mock Objects框架概念匹配器到Hamcrest匹配器桥接适配器Hamcrest也可以在mock objects框架中.例如,JMock 1系统规定是Hamcrest风格.Hamcrest提供了一个JMock 1适配器来允许你在JMock 1测试中使用Hamcrest匹配器.JMock 2不需要这样一个适配器层,因为它被设计使用Hamcrest作为一个匹配库.Hamcrest还提供了EasyMock 2适配器.同样,详细查看Hamcrest例子.
Hamcrest带有一个有用的匹配器库.以下是一些最重要的.
核心
    anything - 总是匹配,如果你不关心测试下的对象是什么是有用的
    describedAs - 添加一个定制的失败表述装饰器
    is - 改进可读性装饰器 - 见下 “Sugar”
    逻辑
    allOf - 如果所有匹配器都匹配才匹配, short circuits (很难懂的一个词,意译是短路,感觉不对,就没有翻译)(像 Java &&)
    anyOf - 如果任何匹配器匹配就匹配, short circuits (像 Java ||)
    not - 如果包装的匹配器不匹配器时匹配,反之亦然
对象
    equalTo - 测试对象相等使用Object.equals方法
    hasToString - 测试Object.toString方法
    instanceOf, isCompatibleType - 测试类型
    notNullValue, nullValue - 测试null
    sameInstance - 测试对象实例
    Beans
    hasProperty - 测试JavaBeans属性
集合
    array - 测试一个数组元素test an array’s elements against an array of matchers
    hasEntry, hasKey, hasValue - 测试一个Map包含一个实体,键或者值
    hasItem, hasItems - 测试一个集合包含一个元素
    hasItemInArray - 测试一个数组包含一个元素
数字
closeTo - 测试浮点值接近给定的值
greaterThan, greaterThanOrEqualTo, lessThan, lessThanOrEqualTo - 测试次序
文本
equalToIgnoringCase - 测试字符串相等忽略大小写
equalToIgnoringWhiteSpace - 测试字符串忽略空白
containsString, endsWith, startsWith - 测试字符串匹配
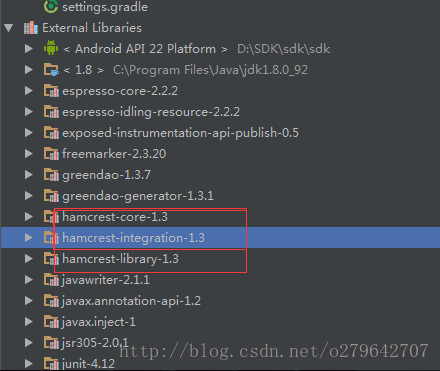
更多详细信息可以查看 工程目录下的 External LIbraries( 前提是你已经引入了Hamcrest库的依赖)
3.Record Esprosso Test
在进行自动化测试的开始,首先学习一下Record Esprosso Test,它是官方提供的一个可以方便进行路径录制的工具,当然现在还是有些bug的。可以作为一种快速学习的样板。
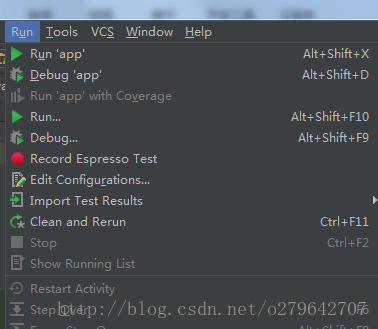
1.进入工程
Run—->Record Esprosso Test
–> Select Deplyment Target
2.进入需要录制脚本app
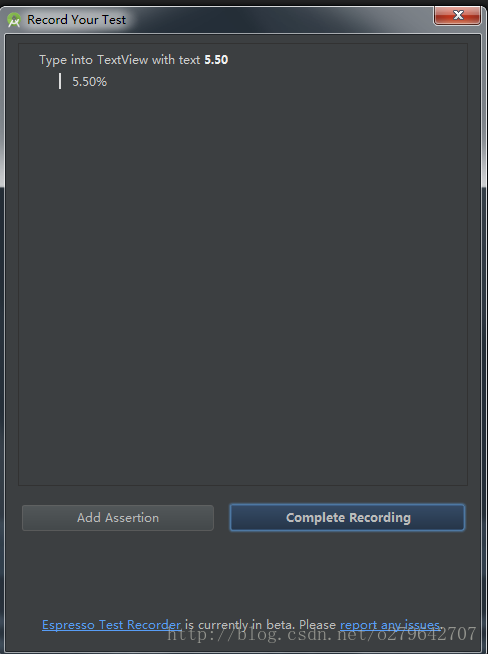
然后可以操作具体的路径。
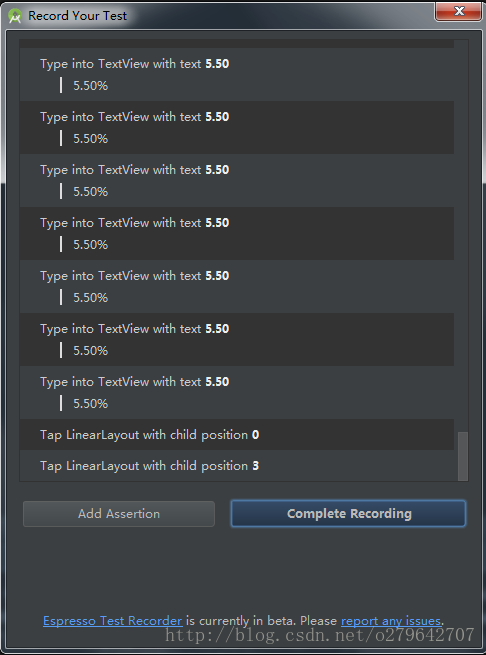
点击Complete Recording ,并指定生成的路径就给你生成具体的测试脚本。
But,直接运行生成的脚本
具体问题,只能呵呵了!!!!,但是我们可以模仿着生成的脚本。进行修改,学习。还是很方便的。
4.单元测试效果
下面是一组简单的测试 有下拉测试,点击测试。断言判断。自定义 Idling Resource
录制视频存放路径 2M
http://pan.baidu.com/s/1nuJ5DUx
5.贴代码进行分析
import org.hamcrest.Matchers;
import org.hamcrest.TypeSafeMatcher;
import org.junit.After;
import org.junit.Before;
import org.junit.Rule;
import org.junit.Test;

import static android.support.test.espresso.Espresso.onView;
import static android.support.test.espresso.action.ViewActions.click;
import static android.support.test.espresso.action.ViewActions.swipeDown;
import static android.support.test.espresso.matcher.ViewMatchers.isDisplayed;
import static android.support.test.espresso.matcher.ViewMatchers.withId;
import static android.support.test.espresso.matcher.ViewMatchers.withParent;
import static org.hamcrest.Matchers.allOf;

/**
 * 1.只是模拟交互,有一个新的需求模拟数据的改变,对Ui的改变
 * 2.测试报告生成
 * 3.做黑盒测试足够了,如果进行白盒测试需要与数据进行交互
 */

/**
 * Created by weichyang on 2017/1/20.
 */
public class MainActivityTest {

    @Rule
    public ActivityTestRule<MainActivity> mActivityTestRule = new ActivityTestRule<MainActivity>(MainActivity.class);

    //跳转到
    HomeFragment homeFragment;
    InvestmentFragment moneyFgFragment;
    DiscoverFragment discoverFragment;
    BMineFragment mineFragment;
    private static IdlingResource idlingResource;

    // 初始化数据
    @Before
    public void initTesttingData() {


    }

    @After
    public void destroyData() {


    }

    //进入首页,点击闪赚,进入产品页面,下拉刷新,返回首页

    @Test
    public void AenterProductionSz() {

        idlingResource = new ElapsedTimeIdlingResource(DateUtils.SECOND_IN_MILLIS * 4);
        Espresso.registerIdlingResources(idlingResource);

        //检查按钮是否显示
        ViewInteraction radioButton3 = onView(
                Matchers.allOf(ViewMatchers.withId(R.id.main_rb),
                        withParent(withId(R.id.main_tab)),
                        isDisplayed()));
        radioButton3.perform(click());

        Log.d("xxxxx", "-----------------------------start");
        idlingResource = new ElapsedTimeIdlingResource(DateUtils.SECOND_IN_MILLIS * 5);
        Espresso.registerIdlingResources(idlingResource);


        /**
         * 点击第一个入口
         */
        ViewInteraction linearLayout = onView(
                allOf(childAtPosition(
                        withId(R.id.gridview),
                        1),
                        isDisplayed()));
        linearLayout.perform(click());
        Log.d("xxxxx", "-----------------------------end");

        //刷新
        ViewInteraction pullToRefreshListView = onView(allOf(withId(R.id.lstview_production_detail), withParent(withId(R.id.line_production))));
        pullToRefreshListView.perform(swipeDown());
        // 返回首页 关闭
        //测试完毕关闭列表
        ViewInteraction linearLayout2 = onView(
                allOf(withId(R.id.topbarLeftLinearLayout),
                        withParent(allOf(withId(R.id.topbar_layout), withParent(withId(R.id.top_bar)))),
                        isDisplayed()));
        linearLayout2.perform(click());

        // Clean up
        Espresso.unregisterIdlingResources(idlingResource);


    }


    /**
     * 自定义过滤器 position
     *
     * @param parentMatcher
     * @param position
     * @return
     */
    private static Matcher<View> childAtPosition(
            final Matcher<View> parentMatcher, final int position) {

        return new TypeSafeMatcher<View>() {
            @Override
            public void describeTo(Description description) {
                description.appendText("Child at position " + position + " in parent ");
                parentMatcher.describeTo(description);
            }

            @Override
            public boolean matchesSafely(View view) {
                ViewParent parent = view.getParent();
                return parent instanceof ViewGroup && parentMatcher.matches(parent)
                        && view.equals(((ViewGroup) parent).getChildAt(position));
            }
        };
    }

    private static void waitFor(long waitingTime, boolean success) {


    }

}
自定义 ElapsedTimeIdlingResource 根据传入的异步时间。进行资源Idling
import android.support.test.espresso.IdlingResource;

public class ElapsedTimeIdlingResource implements IdlingResource {
    private final long startTime;
    private final long waitingTime;
    private ResourceCallback resourceCallback;

    public ElapsedTimeIdlingResource(long waitingTime) {
        this.startTime = System.currentTimeMillis();
        this.waitingTime = waitingTime;
    }

    @Override
    public String getName() {
        return ElapsedTimeIdlingResource.class.getName() + ":" + waitingTime;
    }

    @Override
    public boolean isIdleNow() {
        long elapsed = System.currentTimeMillis() - startTime;
        boolean idle = (elapsed >= waitingTime);
        if (idle) {
            resourceCallback.onTransitionToIdle();
        }
        return idle;
    }

    @Override
    public void registerIdleTransitionCallback(ResourceCallback resourceCallback) {
        this.resourceCallback = resourceCallback;
    }
}
分析:
1.关于屏幕上过滤具体元素,进行操作的方法,这里使用Espresso Recorder 自动生成的脚本方式,这种方式可以找到显示在屏幕上的大部分元素。
     ViewInteraction linearLayout2 = onView(
                allOf(withId(R.id.topbarLeftLinearLayout),
                        withParent(allOf(withId(R.id.topbar_layout), withParent(withId(R.id.top_bar)))),
                        isDisplayed()));
onView()过滤可以看到的Ui组件。匹配器
Allof()是Harmcret 框架提供的脚本,表示在allof()中的条件必须全部符合
withParent(),匹配元素的父元素
ViewInteraction 得到匹配结果是ViewInteraction 对象。通过它可以执行具体ViewAction
2.
ElapsedTimeIdlingResource 类属于自定义 IdlingResource ,根据传入waitingTime。主线程可以停留具体的时间,执行异步操作,
//通用格式
idlingResource = new ElapsedTimeIdlingResource(DateUtils.SECOND_IN_MILLIS * 5);
Espresso.registerIdlingResources(idlingResource);
取消注册
// Clean up
Espresso.unregisterIdlingResources(idlingResource);
对于 isIdleNow()这个函数,需要我们指定具体的判断逻辑,条件符合就会通知主线程,继续下一个步骤
有的blog设置了
//设置异步操作测试超时时间
IdlingPolicies.setMasterPolicyTimeout( waitingTime * 10 TimeUnit.MILLISECONDS);
IdlingPolicies.setIdlingResourceTimeout(waitingTime * 10, TimeUnit.MILLISECONDS);
上面这设置与否没有任何影响。(想具体了解的可以看 页脚的引用 2 Espresso测试)
3.自定义元素过滤器,过滤具体位置的元素(下面这个是Espresso Recorder 生成的)
   private static Matcher<View> childAtPosition(
            final Matcher<View> parentMatcher, final int position) {

        return new TypeSafeMatcher<View>() {
            @Override
            public void describeTo(Description description) {
                description.appendText("Child at position " + position + " in parent ");
                parentMatcher.describeTo(description);
            }

            @Override
            public boolean matchesSafely(View view) {
                ViewParent parent = view.getParent();
                return parent instanceof ViewGroup && parentMatcher.matches(parent)
                        && view.equals(((ViewGroup) parent).getChildAt(position));
            }
        };
    }
matchesSafely()方法中的条件,需要我们去指定。当符合匹配条件,就会过滤掉ui组件。
6.总结
1.关于Espresso 框架的学习,需要实践才能理解一些api用法
2.具体的写法与具体的业务配和,没有万能的写法。都需要进行简单的调试才可以运行
3. 上面的代码只是提供一个范例。配套demo需要下载官方的进行学习,这里不进行提供
引用
Harmcret 介绍 http://blog.csdn.net/shuangde800/article/details/9109131
Espresso测试 http://www.aichengxu.com/android/2486620.htm


 356
356


 被折叠的 条评论
为什么被折叠?
被折叠的 条评论
为什么被折叠?
 到【灌水乐园】发言


