


匹配另一个视图旁边的视图
布局可以包含其自身不是唯一的某些视图(例如,联系人表格中的重复调用按钮可以具有相同的R.id,包含相同的文本并且具有与视图层次结构内的其他调用按钮相同的属性)。
例如,在此活动中,文本为“7”的视图在多行中重复:
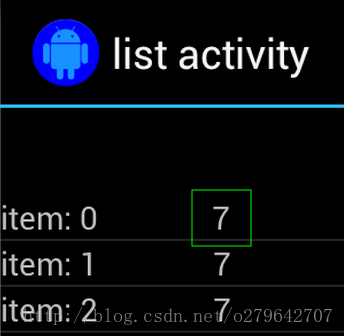
通常,非唯一视图将与其旁边的一些唯一标签(例如,在呼叫按钮旁边的联系人的名称)配对。在这种情况下,您可以使用hasSibling匹配器缩小您的选择:
onView(allOf(withText("7"), hasSibling(withText("item: 0"))))
  .perform(click());
匹配ActionBar中的视图
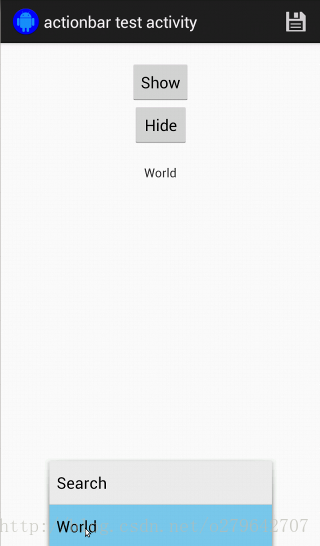
该ActionBarTestActivity有两个不同的action Bar:一个正常的actionBar ,一个使用options menu创建的actionBar 。两个操作栏都有一个总是可见的项目和两个仅在溢出菜单中可见的项目。单击项目时,会将TextView更改为所单击项目的内容。
在两个操作栏上匹配可见图标很容易:
public void testClickActionBarItem() {
  // We make sure the contextual action bar is hidden.
  onView(withId(R.id.hide_contextual_action_bar))
    .perform(click());

  // Click on the icon - we can find it by the r.Id.
  onView(withId(R.id.action_save))
    .perform(click());

  // Verify that we have really clicked on the icon by checking the TextView content.
  onView(withId(R.id.text_action_bar_result))
    .check(matches(withText("Save")));}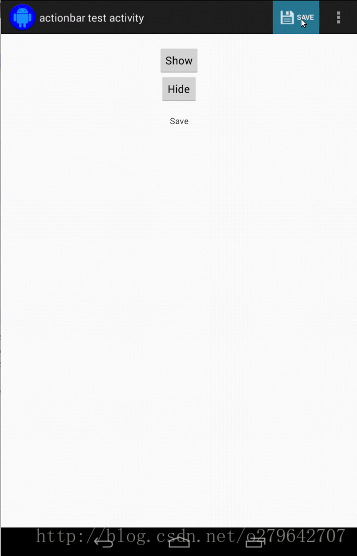
两种看起来没有什么特别
public void testClickActionModeItem() {
  // Make sure we show the contextual action bar.
  onView(withId(R.id.show_contextual_action_bar))
    .perform(click());

  // Click on the icon.
  onView((withId(R.id.action_lock)))
    .perform(click());

  // Verify that we have really clicked on the icon by checking the TextView content.
  onView(withId(R.id.text_action_bar_result))
    .check(matches(withText("Lock")));}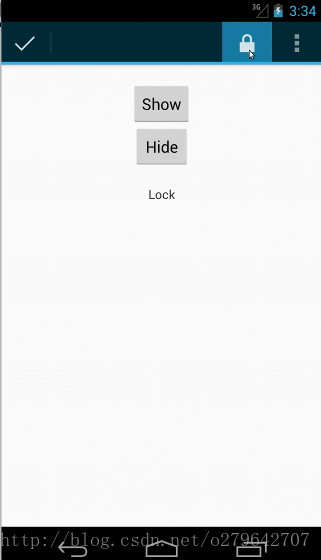
单击溢出菜单中的项目对于正常的操作栏有点棘手,因为一些设备具有硬件溢出菜单按钮(它们将打开选项菜单中的溢出项),并且一些设备具有软件溢出菜单按钮(它们将打开正常溢出菜单)。幸运的是,Espresso为我们处理。
对于正常操作栏:
public void testActionBarOverflow() {
  // Make sure we hide the contextual action bar.
  onView(withId(R.id.hide_contextual_action_bar))
    .perform(click());

  // Open the overflow menu OR open the options menu,
  // depending on if the device has a hardware or software overflow menu button.
  openActionBarOverflowOrOptionsMenu(getInstrumentation().getTargetContext());

  // Click the item.
  onView(withText("World"))
    .perform(click());

  // Verify that we have really clicked on the icon by checking the TextView content.
  onView(withId(R.id.text_action_bar_result))
    .check(matches(withText("World")));}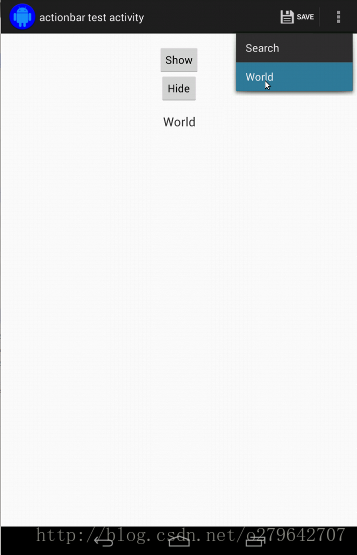
这是在具有硬件溢出菜单按钮的设备上的外观:
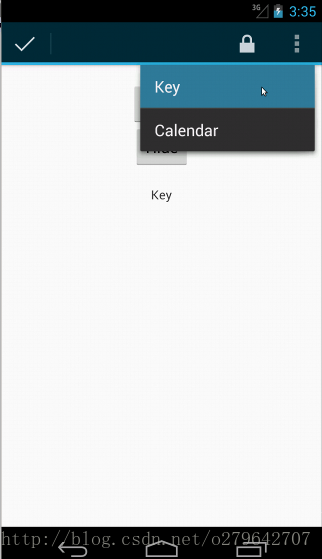
对于上下文操作栏,它很容易再次:
public void testActionModeOverflow() {
  // Show the contextual action bar.
  onView(withId(R.id.show_contextual_action_bar))
    .perform(click());

  // Open the overflow menu from contextual action mode.
  openContextualActionModeOverflowMenu();

  // Click on the item.
  onView(withText("Key"))
    .perform(click());

  // Verify that we have really clicked on the icon by checking the TextView content.
  onView(withId(R.id.text_action_bar_result))
    .check(matches(withText("Key")));
  }
断言不显示视图
执行一系列操作后,您肯定希望断言测试中的UI的状态。有时,这可能是一个不存在view在视图层级中。请记住,您可以使用ViewAssertions.matches将任何hamcrest视图匹配器转换为ViewAssertion。
onView(withId(R.id.bottom_left))
  .check(matches(not(isDisplayed())));
如果视图仍然是层次结构的一部分,上述方法适用。如果不是,你会得到一个NoMatchingViewException和你需要使用ViewAssertions.doesNotExist(见下文)。
断言视图不存在
如果视图从视图层次结构消失(例如,如果一个动作引起了过渡到另一个活动可能发生这种情况),你应该使用ViewAssertions.doesNotExist:
import static com.google.android.apps.common.testing.ui.espresso.Espresso.onView;
import static com.google.android.apps.common.testing.ui.espresso.assertion.ViewAssertions.doesNotExist;import static com.google.android.apps.common.testing.ui.espresso.matcher.ViewMatchers.withId;
onView(withId(R.id.bottom_left)).check(doesNotExist());
断言数据项不在适配器中
为了证明一个特定的数据项不在AdapterView中,你必须做一些不同的事情。我们必须找到我们感兴趣的AdapterView,并询问其持有的数据。我们不需要使用onData()。相反,我们使用onView来找到AdapterView,然后使用另一个匹配器来处理视图中的数据。
首先是匹配器:
private static Matcher<View> withAdaptedData(final Matcher<Object> dataMatcher) {
  return new TypeSafeMatcher<View>() {

    @Override
    public void describeTo(Description description) {
      description.appendText("with class name: ");
      dataMatcher.describeTo(description);
    }

    @Override
    public boolean matchesSafely(View view) {
      if (!(view instanceof AdapterView)) {
        return false;
      }
      @SuppressWarnings("rawtypes")
      Adapter adapter = ((AdapterView) view).getAdapter();
      for (int i = 0; i < adapter.getCount(); i++) {
        if (dataMatcher.matches(adapter.getItem(i))) {
          return true;
        }
      }
      return false;
    }
  };}
然后我们需要的是一个onView找到AdapterView:
@SuppressWarnings("unchecked")
public void testDataItemNotInAdapter(){
  onView(withId(R.id.list))
      .check(matches(not(withAdaptedData(withItemContent("item: 168")))));
  }
如果在具有id列表的适配器视图中存在等于“item:168”的项目,我们有一个断言将失败。
对于全样本来看AdapterViewTest#testDataItemNotInAdapter。
使用自定义失败处理程序
用自定义的替换Espresso的默认FailureHandler允许额外的(或不同的)错误处理 - 例如截取屏幕截图或转储额外的调试信息。
该CustomFailureHandlerTest示例演示如何实现自定义的故障处理程序:
private static class CustomFailureHandler implements FailureHandler {
  private final FailureHandler delegate;

  public CustomFailureHandler(Context targetContext) {
    delegate = new DefaultFailureHandler(targetContext);
  }

  @Override
  public void handle(Throwable error, Matcher<View> viewMatcher) {
    try {
      delegate.handle(error, viewMatcher);
    } catch (NoMatchingViewException e) {
      throw new MySpecialException(e);
    }
  }}
此失败处理程序抛出一个MySpecialException,而不是一个NoMatchingViewException,并将所有其他失败委托给DefaultFailureHandler。CustomFailureHandler可以在测试的setUp()中注册到Espresso:
@Override
public void setUp() throws Exception {
  super.setUp();
  getActivity();
setFailureHandler(new CustomFailureHandler(getInstrumentation().getTargetContext()));}欲了解更多信息,请参阅FailureHandler接口和Espresso.setFailureHandler。
使用inRoot来定位非默认窗口
Android支持多窗口。通常,这对于用户和应用开发者来说是透明的(但是在某些情况下,多个窗口是可见的(例如,自动完成窗口被绘制在搜索窗口中的主应用窗口上)。为了简化,默认情况下,Espresso使用启发式来猜测你打算与哪个Window交互。这个启发式几乎总是“足够好”; 但是,在极少数情况下,您需要指定互动应定位哪个窗口。您可以通过提供自己的根窗口()匹配:
onView(withText("South China Sea"))
  .inRoot(withDecorView(not(is(getActivity().getWindow().getDecorView()))))
  .perform(click());
Take a look at the sample or the sample on GitHub.
匹配作为ListView中的页脚/标头的视图
页眉和页脚添加到通过列表视图addHeaderView()/ addFooterView()的API。为了确保Espresso.onData()知道哪些数据对象来搭配,确保通过预设的数据对象值作为第二个参数
addHeaderView()/addFooterView()。例如:
public static final String FOOTER = "FOOTER";...View footerView = layoutInflater.inflate(R.layout.list_item, listView, false);
((TextView) footerView.findViewById(R.id.item_content)).setText("count:");
((TextView) footerView.findViewById(R.id.item_size)).setText(String.valueOf(data.size()));
listView.addFooterView(footerView, FOOTER, true);
然后,你可以为页脚写一个匹配器:
import static org.hamcrest.Matchers.allOf;
import static org.hamcrest.Matchers.instanceOf;
import static org.hamcrest.Matchers.is;
@SuppressWarnings("unchecked")
public static Matcher<Object> isFooter() {
  return allOf(is(instanceOf(String.class)),
}
并且在测试中加载视图是容易的:
import static com.google.android.apps.common.testing.ui.espresso.Espresso.onData;import static com.google.android.apps.common.testing.ui.espresso.action.ViewActions.click;import static com.google.android.apps.common.testing.ui.espresso.sample.LongListMatchers.isFooter;
public void testClickFooter() {
  onData(isFooter())
    .perform(click());
...}相应配套地址,请自行前往官方文档中查看


 3万+
3万+


 被折叠的 条评论
为什么被折叠?
被折叠的 条评论
为什么被折叠?
 到【灌水乐园】发言


