


关键时刻,第一时间送达!


一、前言
Swift版本 4.0
Xcode版本 9.2
以前接触到的项目需求中,几乎都是全竖屏展现界面,所以我也来得省事,直接在TARGETS中的界面方向选项中只勾选竖屏,这样就满足了需求。
但最近的项目中,产品突然增加了一个需求,需要部分界面支持旋转,这才来研究了一下屏幕旋转的问题!
需要紧急解决问题的道友直接看3.3
二、屏幕旋转相关知识
2.1 三个方向的理解和联系
UIDeviceOrientation: 设备方向
public enum UIDeviceOrientation : Int {
case unknown
case portrait // 设备vertically方向, home键在下方
case portraitUpsideDown // 设备vertically方向, home键在上方
case landscapeLeft // 设备horizontally方向, home键在右方
case landscapeRight // 设备horizontally方向, home键在左方
case faceUp // 设备flat方向, 屏幕朝上
case faceDown // 设备flat方向, 屏幕朝下
}
从设备方向的命名就能看出来这个枚举的含义,这里指的是物理设备(即iPhone)的方向。
UIInterfaceOrientation: 界面方向
public enum UIInterfaceOrientation : Int {
case unknown
case portrait
case portraitUpsideDown
case landscapeLeft
case landscapeRight
}
而界面方向指屏幕中显示内容的方向,它的方向和Home键的方向是一致的。仔细观察一下屏幕旋转就能理解UIDeviceOrientation和UIInterfaceOrientation了,我们把手机转向左边,可以看到界面随之才转向右边。
UIInterfaceOrientationMask: 是用来控制允许转向的方向,对应UIInterfaceOrientation
public struct UIInterfaceOrientationMask : OptionSet {
public init(rawValue: UInt)
public static var portrait: UIInterfaceOrientationMask { get }
public static var landscapeLeft: UIInterfaceOrientationMask { get }
public static var landscapeRight: UIInterfaceOrientationMask { get }
public static var portraitUpsideDown: UIInterfaceOrientationMask { get }
public static var landscape: UIInterfaceOrientationMask { get }
public static var all: UIInterfaceOrientationMask { get }
public static var allButUpsideDown: UIInterfaceOrientationMask { get }
}
2.2 观察屏幕旋转并作出响应
2.2.1 观察设备方向并响应
// 没有生成通知
if !UIDevice.current.isGeneratingDeviceOrientationNotifications {
// 生成通知
UIDevice.current.beginGeneratingDeviceOrientationNotifications()
}
// 锁定竖屏,依然有效,例如faceUp.
NotificationCenter.default.addObserver(self,
selector: #selector(handleDeviceOrientationChange(notification:)),
name:NSNotification.Name.UIDeviceOrientationDidChange,
object: nil)
@objc private func handleDeviceOrientationChange(notification: Notification) {
// 获取设备方向
let orientation = UIDevice.current.orientation
switch orientation {
case .landscapeRight:
// iOS8之后,横屏UIScreen.main.bounds.width等于竖屏时的UIScreen.main.bounds.height
print(UIScreen.main.bounds.width)
print("landscapeRight")
default: break
}
}
注销
deinit {
NotificationCenter.default.removeObserver(self)
UIDevice.current.endGeneratingDeviceOrientationNotifications()
}
2.2.2 观察界面方向并响应
和上面类似不过观察的name为
// 锁定竖屏,无效,通知方法不会触发
NSNotification.Name.UIApplicationWillChangeStatusBarOrientation
NSNotification.Name.UIApplicationDidChangeStatusBarOrientation
获取界面方向
let statusBarOrientation = UIApplication.shared.statusBarOrientation
2.2.3 建议
这里建议监听界面方向,原因有二:
监听设备方向,会返回多个方向,例如portrait和faceUp不冲突。
监听设备方向,上面提到,先是设备旋转,随之界面旋转,这里就有一个问题,我们操作界面时,可能界面还没有旋转。
三、问题解决实战
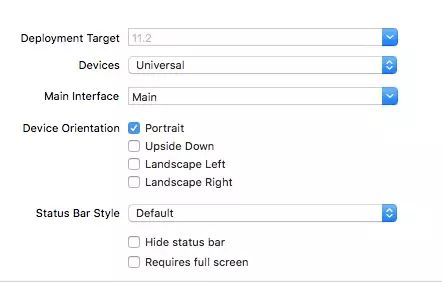
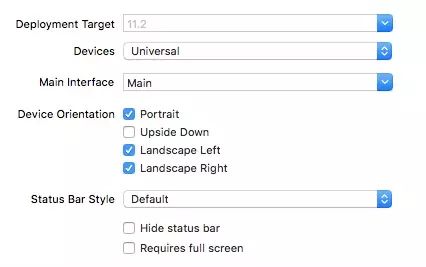
需要实现部分界面可旋转,部分界面锁定竖屏,首先我们需要配置TARGETS中的Device Orientation,这里是总开关,默认勾选了如图方向:
如果你确定整个项目只有竖屏,直接只勾选Protrait完事,不过像我现在这样,可能突然一个需求改变就不得不继续适配,哈哈。
这里的配置不要和代码控制的方向相冲突,不然会引发奔溃。
3.1 控制屏幕旋转的函数
// 默认为true
override var shouldAutorotate: Bool {
return true
}
// 支持的旋转方向
override var supportedInterfaceOrientations: UIInterfaceOrientationMask {
return .landscapeLeft
}
// 模态切换的默认方向
override var preferredInterfaceOrientationForPresentation: UIInterfaceOrientation {
return .landscapeRight
}
这三个属性都重写的UIViewController的属性。哎,看到模态切换,这里再给自己挖坑一个,以前研究了一会模态切换,只不过没写成总结,后面会写出来(:。
并且这三个方法会受到控制器层级的影响,也就是如果当前控制器配置支持旋转,如果他的导航控制器,乃至Tabbar控制器不支持旋转,当前控制器的配置也不会生效。
3.2 不同根控制器情况下的解决
核心问题: 需要旋转的界面是少数,大多界面需要锁定竖屏。
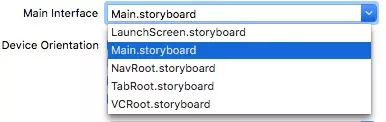
3.2.1 根控制器为UIViewController
对应Demo配置:
这种情况的APP可以说是非常少了,不过还是对后面的情况有所帮助。
设置BaseVC,在其中的配置锁定竖屏:
class BaseVC: UIViewController {
override var shouldAutorotate: Bool {
return false
}
override var supportedInterfaceOrientations: UIInterfaceOrientationMask {
return .portrait
}
override var preferredInterfaceOrientationForPresentation: UIInterfaceOrientation {
return .portrait
}
override func viewDidLoad() {
super.viewDidLoad()
}
}
然后其余控制器继承BaseVC,需要旋转的控制器单独再次重写方法。
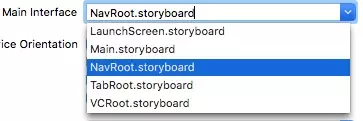
3.2.2 根控制器为UINavigationController
对应Demo配置:
我们可以获取到当前显示层级的控制器,并拿出它的属性赋给UINavigationController
class BaseNavC: UINavigationController {
override var shouldAutorotate: Bool {
return self.viewControllers.last?.shouldAutorotate ?? false
}
override var supportedInterfaceOrientations: UIInterfaceOrientationMask {
return self.viewControllers.last?.supportedInterfaceOrientations ?? .portrait
}
override var preferredInterfaceOrientationForPresentation: UIInterfaceOrientation {
return self.viewControllers.last?.preferredInterfaceOrientationForPresentation ?? .portrait
}
override func viewDidLoad() {
super.viewDidLoad()
}
}
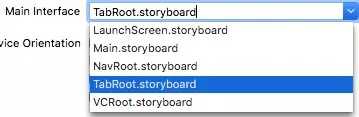
3.2.3 根控制器为UITabBarController
对应Demo配置:
class BaseTabBarC: UITabBarController {
override var shouldAutorotate: Bool {
return self.selectedViewController?.shouldAutorotate ?? false
}
override var supportedInterfaceOrientations: UIInterfaceOrientationMask {
return self.selectedViewController?.supportedInterfaceOrientations ?? .portrait
}
override var preferredInterfaceOrientationForPresentation: UIInterfaceOrientation {
return self.selectedViewController?.preferredInterfaceOrientationForPresentation ?? .portrait
}
override func viewDidLoad() {
super.viewDidLoad()
}
}
同理,我们只需要获取当前选中的控制器的配置赋给UITabBarController,这样一层一层就配置好了!
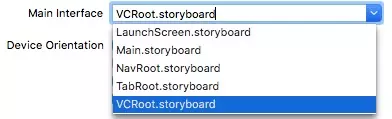
3.3 最简单的实现方式
对应Demo配置:
在查询屏幕旋转相关资料的时候我发现屏幕旋转时会最后调用Appdelegate中的:
func application(_ application: UIApplication, supportedInterfaceOrientationsFor window: UIWindow?)
-> UIInterfaceOrientationMask {
}
然后我立马想到一个超级简单的方法,那就是定义一个全局变量或者缓存一个bool值来进行判断,如下:
func application(_ application: UIApplication, supportedInterfaceOrientationsFor window: UIWindow?)
-> UIInterfaceOrientationMask {
if isAllowAutorotate {
return [.portrait, .landscapeLeft, .landscapeRight]
}
else {
return .portrait
}
}
然后默认isAllowAutorotate这个全局变量为false,在需要旋转的控制器中:
override func viewWillAppear(_ animated: Bool) {
super.viewWillAppear(animated)
isAllowAutorotate = false
}
override func viewWillDisappear(_ animated: Bool) {
super.viewWillDisappear(animated)
isAllowAutorotate = true
}
}
这样就不用麻烦的去搞那些继承什么的了!
四、后记和Demo
Github ScreenRotationDemo(https://github.com/swordjoy/ScreenRotationDemo)
参考:
iOS实录11:代码处理iOS的横竖屏旋转(https://www.jianshu.com/p/780738918a6c)
How to force view controller orientation in iOS 8?(https://stackoverflow.com/questions/26357162/how-to-force-view-controller-orientation-in-ios-8)

作者:swordjoy
https://juejin.im/post/5a584e30518825732f7eaa25
iOS开发整理发布,转载请联系作者授权


 328
328


 被折叠的 条评论
为什么被折叠?
被折叠的 条评论
为什么被折叠?
 到【灌水乐园】发言


