


app开发中下拉刷新是最常接触到的一个功能,也有很多开源的框架,封装的非常棒。前段时间了解了一下ViewDragHelper,遂用它实现了下拉刷新的功能。
大概和我之前的ViewDragHelper之拖动加载(类似淘宝)这篇代码类似。只是做了相关改动。具体的可以看一下那篇博文了解一下用到的ViewDragHelper的一些知识点。该界面主要是一个LinearLayout,上面的下拉刷新是一个textview(用TV代替),当然这个可以定制,在此只是用一个textview代替,实现简单的功能,下面是一个listview(用LV代替),当然listview也是可以定制的,可以使gridview或者其他你想要的都可以,在此也是只用Listview代替。大概的讲讲吧:
首先,在onLayout中将TV置于屏幕上方,将LV充满屏幕;
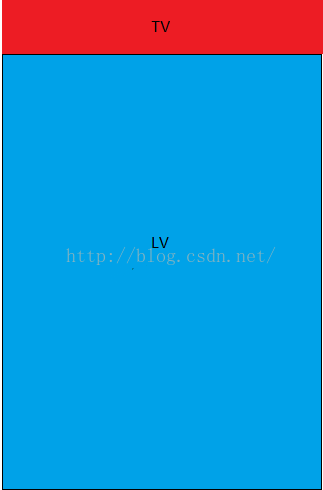
上图中蓝色部分是整个手机的屏幕,红色部分是下拉提示TV。TV是置于屏幕之外的是不显示的。
@Override
	protected void onLayout(boolean changed, int l, int t, int r, int b) {
		if (pullText.getTop() == 0) {
			viewHeight = pullText.getMeasuredHeight();
			pullText.layout(l, 0, r, b);
			myList.layout(l, 0, r, b);
			pullText.offsetTopAndBottom(-viewHeight);
		} else {
			pullText.layout(l, pullText.getTop(), r, pullText.getBottom());
			myList.layout(l, myList.getTop(), r, myList.getBottom());
		}
}<pre name="code" class="java"> /**
* 这是拖拽效果的主要逻辑
*/
private class DragHelperCallback extends ViewDragHelper.Callback {
@Override
public void onViewPositionChanged(View changedView, int left, int top,
int dx, int dy) {
int childIndex = 1;
if (changedView == myList) {
childIndex = 2;
}
onViewPosChanged(childIndex, top);
}
@Override
public boolean tryCaptureView(View child, int pointerId) {
return true;
}
@Override
public int getViewVerticalDragRange(View child) {
return 1;
}
@Override
public void onViewReleased(View releasedChild, float xvel, float yvel) {
refreshOrNot(releasedChild, yvel);
}
@Override
public int clampViewPositionVertical(View child, int top, int dy) {
int finalTop = top;
if (child == pullText) {
if (top > 0) {
finalTop = 0;
}
} else if (child == myList) {
if (top < 0) {
finalTop = 0;
}
if(top >= viewHeight){
pullText.setText("松开刷新");
}else{
pullText.setText("下拉刷新");
}
}
return child.getTop() + (finalTop - child.getTop()) / 2;
}
}上面的代码段中,主要是在clampViewPositionVertical中判断滑动的位置,作用的子view。其他就不多说了,大致和之前的博客相同。主要说说onViewReleased吧。在此函数中是在用户手势抬起时响应的,所以我们在此实现下拉后的刷新。我们先定义一个接口,以便在刷新的时候调用。
public interface pulltorefreshNotifier {
		public void onPull();
	}
public void setpulltorefreshNotifier(pulltorefreshNotifier pullNotifier) {
this.pullNotifier = pullNotifier;
}private void refreshOrNot(View releasedChild, float yvel) {
int finalTop = 0;
if (releasedChild == pullText) {
// 拖动第一个view松手
if (yvel < -50) {
finalTop = 0;
} else {
finalTop = viewHeight;
}
} else {
// 拖动第二个view松手
if (yvel > viewHeight - 5 || releasedChild.getTop() >= viewHeight) {
finalTop = viewHeight;
if (null != pullNotifier) {
pullNotifier.onPull();
}
pullText.setText("正在刷新");
}
}
if (VDH.smoothSlideViewTo(myList, 0, finalTop)) {
ViewCompat.postInvalidateOnAnimation(this);
}
}然后我们来看一下主要的Activity:
package com.maxi.pulltorefreshtest;

import android.annotation.SuppressLint;
import android.app.Activity;
import android.os.Bundle;
import android.os.Handler;
import android.os.Message;

import com.maxi.pulltorefreshtest.adapter.ProjectAdapter;
import com.maxi.pulltorefreshtest.widget.MyListView;
import com.maxi.pulltorefreshtest.widget.PullToRefreshGroup;
import com.maxi.pulltorefreshtest.widget.PullToRefreshGroup.pulltorefreshNotifier;

public class MainActivity extends Activity {
	private PullToRefreshGroup pullListgroup;
	private boolean isDown = false;
	private MyListView myList;
	private ProjectAdapter pa;
	@Override
	protected void onCreate(Bundle savedInstanceState) {
		super.onCreate(savedInstanceState);
		setContentView(R.layout.activity_main);
		findView();
		init();
	}

	private void findView() {
		pullListgroup = (PullToRefreshGroup) findViewById(R.id.pulltorefresh);
		myList = pullListgroup.returnMylist();
	}

	private void init() {
		pulltorefreshNotifier pullNotifier = new pulltorefreshNotifier() {
			@Override
			public void onPull() {
				// TODO Auto-generated method stub
				downLoad();
			}
		};
		pullListgroup.setpulltorefreshNotifier(pullNotifier);
		pa = new ProjectAdapter(this);
		myList.setAdapter(pa);
		pa.notifyDataSetChanged();
	}

	private void downLoad() {
		if (!isDown) {
			isDown = true;
			new Thread(new Runnable() {

				@Override
				public void run() {
					// TODO Auto-generated method stub
					try {
						Thread.sleep(2000);
						handler.sendEmptyMessage(1);
					} catch (InterruptedException e) {
//						 TODO Auto-generated catch block
						e.printStackTrace();
					}
				}
			}).start();
		}
	}

	@SuppressLint("HandlerLeak")
	private Handler handler = new Handler() {

		@Override
		public void handleMessage(Message msg) {
			// TODO Auto-generated method stub
			super.handleMessage(msg);
			switch (msg.what) {
			case 1:
				pullListgroup.refreshComplete();
				isDown = false;
				break;
			default:
				break;
			}
		}

	};
}
	public void refreshComplete() {
		if (VDH.smoothSlideViewTo(myList, 0, 0)) {
			ViewCompat.postInvalidateOnAnimation(this);
		}
}上段代码中我们发现MyListView是重写的ListView,主要是处理手势事件的。
package com.maxi.pulltorefreshtest.widget;

import android.content.Context;
import android.util.AttributeSet;
import android.view.MotionEvent;
import android.view.View;
import android.widget.ListView;

public class MyListView extends ListView {
	boolean allowDragBottom = true;
	float downY = 0;
	boolean needConsumeTouch = true;
	public MyListView(Context context){
		super(context);
	}
	public MyListView(Context context, AttributeSet attrs) {
		super(context, attrs);
		// TODO Auto-generated constructor stub
	}

	@Override
	public boolean dispatchTouchEvent(MotionEvent ev) {
		if (ev.getAction() == MotionEvent.ACTION_DOWN) {
			downY = ev.getRawY();
			needConsumeTouch = true;
			if (getMyScrollY() == 0) {
				allowDragBottom = true;
			} else {
				allowDragBottom = false;
			}
		} else if (ev.getAction() == MotionEvent.ACTION_MOVE) {
			if (!needConsumeTouch) {
				getParent().requestDisallowInterceptTouchEvent(false);
				return false;
			} else if (allowDragBottom) {
				if (downY - ev.getRawY() < -2) {
					needConsumeTouch = false;
					getParent().requestDisallowInterceptTouchEvent(false);
					return false;
				}
			}
		}
		getParent().requestDisallowInterceptTouchEvent(needConsumeTouch);
		return super.dispatchTouchEvent(ev);
	}

	public int getMyScrollY() {
		View c = getChildAt(0);
		if (c == null) {
			return 0;
		}
		int firstVisiblePosition = getFirstVisiblePosition();
		int top = c.getTop();
		return -top + firstVisiblePosition * c.getHeight();
	}
}好吧。大致就这些,有疑问或建议请留言,共同进步,谢谢!
项目中使用参考:Android聊天界面搭建


 4147
4147


 被折叠的 条评论
为什么被折叠?
被折叠的 条评论
为什么被折叠?
 到【灌水乐园】发言


