SpringMVC显示上传文件

显示我们上传的图片将会是一件nice的事情,不是吗?让我们一起来现在这个功能。我们将要添加模型的参数在PictureUploadController类中。

@ModelAttribute("picturePath")
public Resource picturePath() {
return anonymousPicture;
}

现在我们修改getUploadedPicture的函数。

@RequestMapping(value = "/uploadedPicture")
public void getUploadedPicture(HttpServletResponse response, @
ModelAttribute("picturePath") Path picturePath) throws IOException {
response.setHeader("Content-Type", URLConnection.guessContentTypeF
romName(picturePath.toString()));
Files.copy(picturePath, response.getOutputStream());
}
上面的代码中,我们用@ModelAttribute注解,这个是很容易去创建一个模型参数。这个使用与直接在方法体上注解,其实功能是一样的。这里picturePath的参数是不可改变的,即使是在重定向或在其它页面,都是有效的。同时我们默认的图片还是anonymous这张图片,这张图片是在src/mian/resources/images/下。
当文件上传时,我们需要更新对应的值。
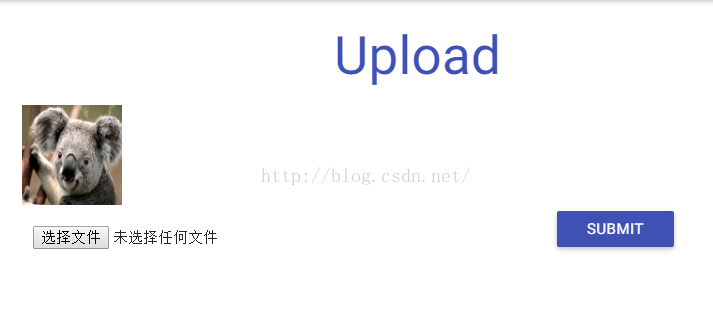
@RequestMapping(value = "/upload", method = RequestMethod.POST)
public String onUpload(MultipartFile file, RedirectAttributes redirectAttributes, Model model) throws IOException
{
   // throw new IOException("Some Message");
    if (file.isEmpty() || !isImage(file))
    {
        redirectAttributes.addFlashAttribute("error", "Incorrect file.Please upload a picture.");
        return "redirect:/upload";
    }

    Resource picturePath =  copyFileToPictures(file);
    //文件的路径放到session中
    model.addAttribute("picturePath", picturePath);
    return "profile/uploadPage";
    }

现在我们存在的问题就是,我们有两个方法,onUploadonUpload,它们将出现在不同的请求中,不幸的是,它们要被重置掉。为了解决这个问题,我们需要将图片的路径放到session中。
@Controller
@SessionAttributes("picturePath")
public class PictureUploadController {
}
你将会看到运行的结果如下:

源码下载:git@github.com:owenwilliam/masterSpringMVC.git


  • 0
    点赞
  • 0
    收藏
    觉得还不错? 一键收藏
  • 0
    评论
Spring MVC 6中上传文件的方式和Spring 5类似,也是通过MultipartFile来实现。 首先,在Spring MVC的配置文件中添加以下配置: ```xml <bean id="multipartResolver" class="org.springframework.web.multipart.commons.CommonsMultipartResolver"> <!-- 设置上传文件的最大大小为10MB --> <property name="maxUploadSize" value="10485760"/> </bean> ``` 然后,在Controller中添加以下代码: ```java @PostMapping("/upload") public String handleFileUpload(@RequestParam("file") MultipartFile file, RedirectAttributes redirectAttributes) { if (file.isEmpty()) { redirectAttributes.addFlashAttribute("message", "请选择要上传的文件!"); return "redirect:/uploadResult"; } try { // 获取上传文件的原始名称 String fileName = file.getOriginalFilename(); // 获取上传文件的字节数组 byte[] bytes = file.getBytes(); // 保存上传文件到指定目录下 Path path = Paths.get("path/to/save/directory/" + fileName); Files.write(path, bytes); redirectAttributes.addFlashAttribute("message", "文件上传成功!"); } catch (IOException e) { e.printStackTrace(); } return "redirect:/uploadResult"; } ``` 在html页面中,可以使用如下表单来上传文件: ```html <form method="post" action="/upload" enctype="multipart/form-data"> <input type="file" name="file" /> <input type="submit" value="上传" /> </form> ``` 注意:enctype属性必须设置为"multipart/form-data"。另外,由于使用了RedirectAttributes,需要在配置文件中添加以下配置: ```xml <bean class="org.springframework.web.servlet.mvc.support.RedirectAttributes"/> ``` 最后,在上传成功后跳转的页面中,可以通过以下方式来显示上传结果: ```html <p th:text="${message}"></p> ``` 其中,"th:text"是Thymeleaf模板引擎中的语法,用于将message变量的值显示在页面上。

“相关推荐”对你有帮助么?

  • 非常没帮助
  • 没帮助
  • 一般
  • 有帮助
  • 非常有帮助
提交
评论
添加红包

请填写红包祝福语或标题

红包个数最小为10个

红包金额最低5元

当前余额3.43前往充值 >
需支付:10.00
成就一亿技术人!
领取后你会自动成为博主和红包主的粉丝 规则
hope_wisdom
发出的红包
实付
使用余额支付
点击重新获取
扫码支付
钱包余额 0

抵扣说明:

1.余额是钱包充值的虚拟货币,按照1:1的比例进行支付金额的抵扣。
2.余额无法直接购买下载,可以购买VIP、付费专栏及课程。

余额充值