


Gitlab是一个代码托管平台,在实际工作中,对代码管理十分有用。废话不多说,下面是对我自己搭建的Gitlab环境做一记录:
1)安装
------------------------------------------------------------------------
或者直接下载bitnami-gitlab-7.1.1-0-linux-x64-installer.run
下载地址:http://pan.baidu.com/s/1i4RaCKH
提取密码:tcia
-------------------------------------------------------------------------
Gitlab的安装采用的是一键安装方式
[root@115 ~]#cd /opt
[root@115 ~]#wget https://bitnami.com/redirect/to/39039/bitnami-gitlab-8.8.4-0-linux-x64-installer.run
[root@115 ~]#chmod 755 bitnami-gitlab-8.8.4-0-linux-x64-installer.run
[root@115 ~]#./bitnami-gitlab-7.1.1-0-linux-x64-installer.run //一路回车
---------------------------------------------------------------------
Welcome to the Bitnami Gitlab Stack Setup Wizard.
---------------------------------------------------------------------
Select the components you want to install; clear the components you do
not want
to install. Click Next when you are ready to continue.
GitLab : Y (Cannot be edited)
GitLab CI [Y/n] :Y
Is the selection above correct? [Y/n]: Y
---------------------------------------------------------------------
Installation folder
Please, choose a folder to install Bitnami Gitlab Stack
Select a folder [/opt/gitlab-7.4.3-0]:
---------------------------------------------------------------------
Create Admin account
Bitnami Gitlab Stack admin user creation
Email Address [xschao@xxx.com]:
Login [xschao]:
Password :xxxxxxxxxxx
Please confirm your password :
---------------------------------------------------------------------
-------
Hostname that will be used to create internal URLs. If this value is
incorrect,
you may be unable to access your Gitlab installation from other computers.
It is
advisable to use a Domain instead of an IP address for compatibility with
different browsers.
Domain [127.0.0.1]: //这里最好写外网 ip 或者域名
Do you want to configure mail support? [y/N]: y
---------------------------------------------------------------------
Configure SMTP Settings
This is required so your application can send notifications via email.
Default email provider:
[1] GMail
[2] Custom
Please choose an option [1] : 1
---------------------------------------------------------------------
Configure SMTP Settings
This data is stored in the application configuration files and may be
visible to
others. For this reason, it is recommended that you do not use your
personal
account credentials.
GMail address []: xschao.test@gmail.com
GMail password :
Re-enter :
---------------------------------------------------------------------
Setup is now ready to begin installing Bitnami Gitlab Stack on your
computer.
Do you want to continue? [Y/n]: Y
---------------------------------------------------------------------
-------
Please wait while Setup installs Bitnami Gitlab Stack on your computer.
Installing
0% ______________ 50% ______________ 100%
2)启动命令
[root@115 ~]#/opt/gitlab-8.8.4-0/ctlscript.sh start/restart/stop
3)访问
http://ip:端口
在远程可以使用ssh方式连接gitlab并clone代码
需要先将远程客户端机器的公钥放到Gitlab的SSH Keys里面,做成无密码的信任关系
------------------------------------------------------------------------------------------------------------------------------------------
修改gitlab的访问端口,需要修改下面几个文件:
/opt/gitlab-8.8.4-0/apache2/conf/httpd.conf
/opt/gitlab-8.8.4-0/apache2/conf/bitnami/bitnami.conf
/opt/gitlab-8.8.4-0/apps/gitlab/gitlab-shell/config.yml
/opt/gitlab-8.8.4-0/apps/gitlab/htdocs/config/gitlab.yml
------------------------------------------------------------------------------------------------------------------------------------------
修改gitlab访问的ip或域名
/opt/gitlab-8.8.4-0/apps/gitlab/gitlab-shell/config.yml
/opt/gitlab-8.8.4-0/apps/gitlab/htdocs/config/gitlab.yml
例如我这里修改如下:之前是ip访问(假设端口是8081,ip为111.112.113.45),现在改为域名访问(假设域名为git.huanqiu.net)
[root@115 ~]# vim /opt/gitlab-8.8.4-0/apps/gitlab/gitlab-shell/config.yml
.......
gitlab_url: http://git.huanqiu.net:8081/
[root@115 ~]# vim /opt/gitlab-8.8.4-0/apps/gitlab/htdocs/config/gitlab.yml
.......
gitlab:
## Web server settings (note: host is the FQDN, do not include http://)
host: git.huanqiu.net
port: 8081 # Set to 443 if using HTTPS, see installation.md#using-https for additional HTTPS configuration details
https: false
最后重启服务
[root@115 gitlab-8.8.4-0]# pwd
/opt/gitlab-8.8.4-0
[root@115 gitlab-8.8.4-0]# ./ctlscript.sh restart
最好在/etc/hosts文件里做下映射(此步骤不是必须)
[root@115 ~]# vim /etc/hosts
111.112.113.45 git.huanqiu.net
--------------------------------------------------------------------------------------------------------------------------------------
linux客户端使用ssh方式连接gitlab
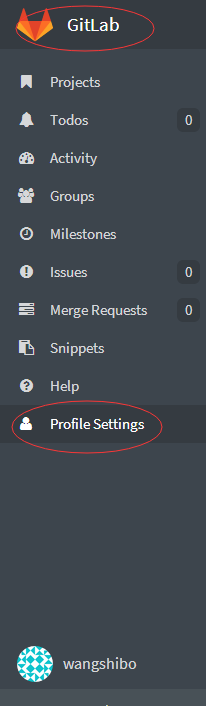
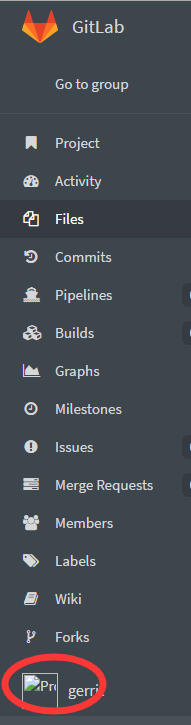
其实只需要将linux客户机的公钥内容拷贝到gitlab的“Profile Settings”->"SSH Keys"里
比如:
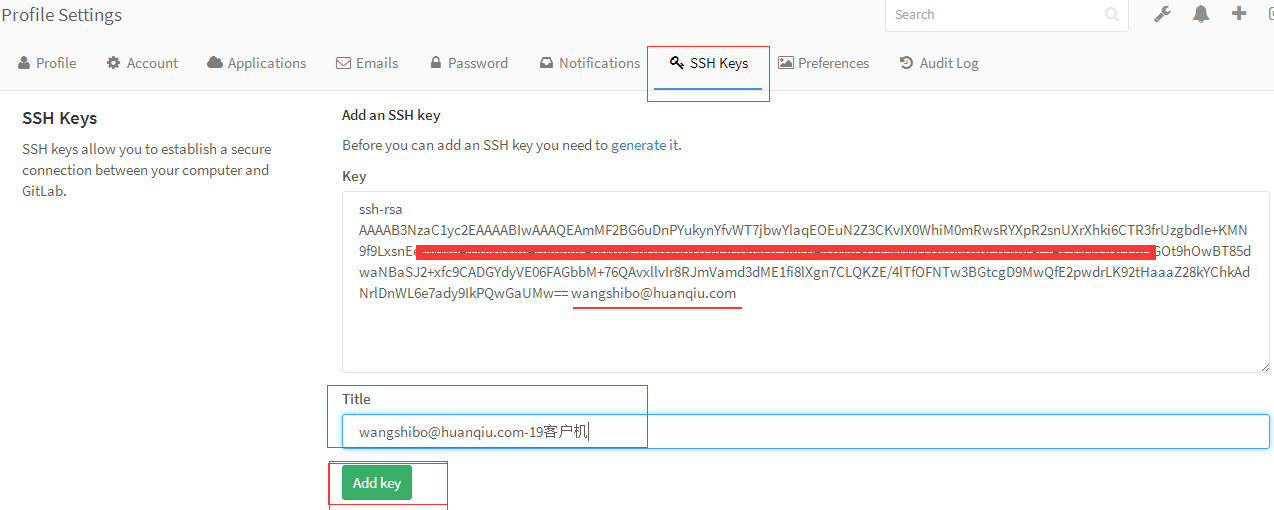
使用“王士博”账号登陆gitlab
同一个gitlab账号下可以添加多个Keys,也就是可以对应多台客户机的Keys,也可以是同一台客户机的不同账号下的Keys;
注意Keys中公钥内容可以通过邮件去识别,也可以不跟邮件识别(比如在linux客户机和windows本地都产生公私钥,公钥内容中的邮件可以都用wangshibo@huanqiu.com)。特别注意一点:添加不同客户机上的相关账号公钥后,就只能在这个账号状态下进行git代码下载。比如下面添加了客户机的wangshibo账号下的公钥,就只能在这台主机的wangshibo账号下进行git代码下载,在root账号下是下载不了的,会一直提示输入密码.....
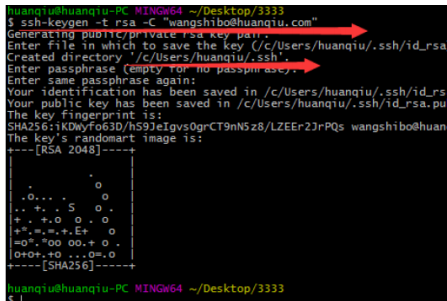
1)首先需要在linux客户机上生成公私钥
[root@test-huanqiu ~]# useradd wangshibo
[root@test-huanqiu ~]# su - wangshibo
[wangshibo@redmine ~]$ ssh-keygen -t rsa -C “wangshibo@huanqiu.com" //也可以不跟-C进行后面的邮件识别,一路回车
......
......
[wangshibo@test-huanqiu ~]$ cd .ssh/
[wangshibo@test-huanqiu .ssh]$ ls
id_rsa id_rsa.pub
[wangshibo@test-huanqiu .ssh]$ cp id_rsa.pub authorized_keys
[wangshibo@localhost .ssh]$ cat id_rsa.pub
ssh-rsa AAAAB3NzaC1yc2EAAAABIwAAAQEAmMF2BG6uDnPYukynYfvWT7jbwYlaqEOEuN2Z3CKvIX0WhiM0mRwsRYXpR2snUXrXhki6CTR3frUzgbdIe+KMN9f9LxsnEeyWWheiGdNj6nm4UgondFA0rW6N5zGXHbDz7Q/clr/jX6K7ChhLd4iH7yKsZFCwo827xIVD0D+oFTQKRaC/eXS5FVFgsEE8FlGOt9hOwBT85dwaNBaSJ2+xfc9CADGYdyVE06FAGbbM+76QAvxllvIr8RJmVamd3dME1fi8lXgn7CLQKZE/4lTfOFNTw3BGtcgD9MwQfE2pwdrLK92tHaaaZ28kYChkAdNrlDnWL6e7ady9IkPQwGaUMw== wangshibo@huanqiu.com
2)将上面产生的公钥内容添加到gitlab上,如下:

可以在下面的“Title”处注明公钥信息,方便管理
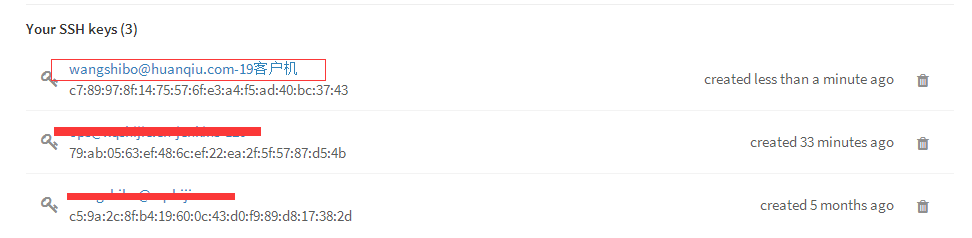
查看已添加的Keys
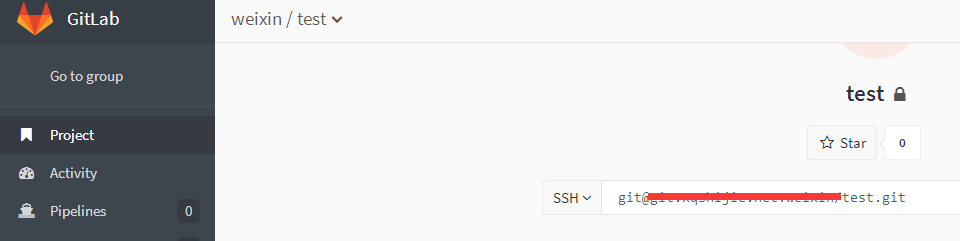
3)在客户机通过ssh连接gitlab,比如下载gitlab的test工程代码,进行操作。操作步骤如下:
注意下面在git clone代码前进行的”Git global setup“全局设置:
第一行对应的是gitlab的用户名
第二行对应的是这个用户下的Keys的名称(如果创建公私钥时,用-C “邮箱”方式进行秘钥识别,那么这里就用邮箱;如果创建公私钥时没有用-C “邮箱”识别,那么这里对应的就只是单纯的Keys的名称了,在gitlab控制台的SSH-Keys里能查看到)

注意:
使用ssh方式git clone下载代码时,本机必须要能连通gitlab机器的ssh服务端口(默认是22)。不然即便将公钥添加上,也是徒劳!
----------------------------------------------------------------------------------------------------------------------------------------------
解决Gitlab的Gravatar头像无法显示的问题,如下:
解决办法:
修改/opt/gitlab-8.8.4-0/apps/gitlab/htdocs/config/gitlab.yml文件的下面两行
.........
gravatar:
# gravatar urls: possible placeholders: %{hash} %{size} %{email}
#plain_url: "http://..." # default: http://www.gravatar.com/avatar/%{hash}?s=%{size}&d=identicon
plain_url: "http://gravatar.duoshuo.com/avatar/%{hash}?s=%{size}&d=identicon" //添加这一行
# ssl_url: "https://..." # default: https://secure.gravatar.com/avatar/%{hash}?s=%{size}&d=identicon
.........
gravatar:
enabled: false //由true改为false
重启服务
/opt/gitlab-8.8.4-0/ctlscript.sh restart
再次访问,gravatar图片就显示出来了
----------------------修改gitlab的logo图标----------------------
将下面路径下的gitlab_logo.png图片更换即可,注意图片名称不要变!
|
1
2
3
4
|
[root@localhost images]
# pwd
/opt/gitlab-8
.8.4-0
/apps/gitlab/htdocs/app/assets/images
[root@localhost images]
# ll gitlab_logo.png
-rw-rw-r--. 1 git git 5189 6月 10 2016 gitlab_logo.png
|
----------------------解决gitlab上上传头像图片不显示问题----------------------
如下,在gitlab登陆用户的设置里面上传头像

如果上传头像不显示,是因为目录权限的问题,解决办法如下:
|
1
2
3
|
[root@localhost gitlab-8.8.4-0]
# pwd
/opt/gitlab-8
.8.4-0
[root@localhost gitlab-8.8.4-0]
# chmod -R 777 apps/gitlab/htdocs/public/uploads
|
-----------------------------设置gitlab里对应group的图片----------------------------------------------
Edit编辑gitlab对应group,选择"Group avatar"->点击"Choose file",上传图片即可!
如果上传的group图片不显示,修改权限:
#chmod 777 -R /opt/gitlab-8.8.4-0/apps/gitlab/htdocs/public/uploads/group
----------------------------------------------------------------------------------------------------------
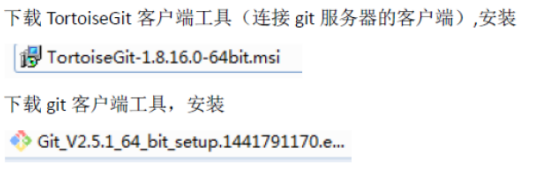
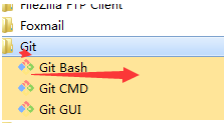
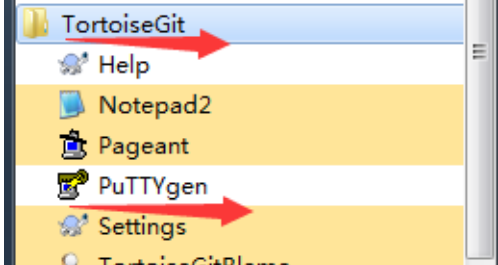
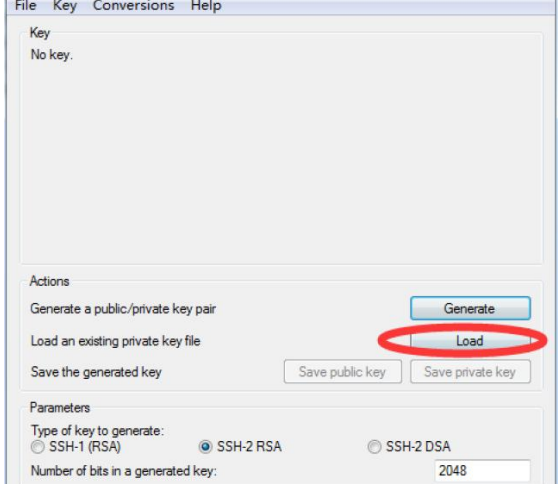
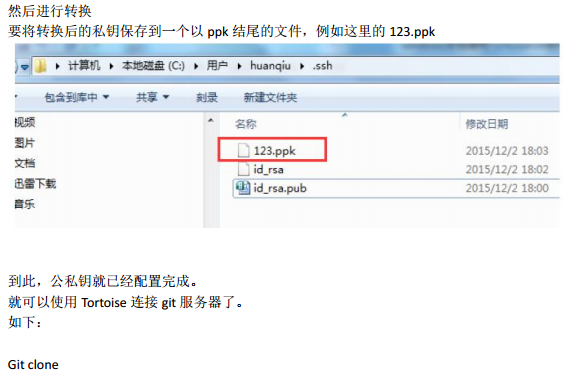
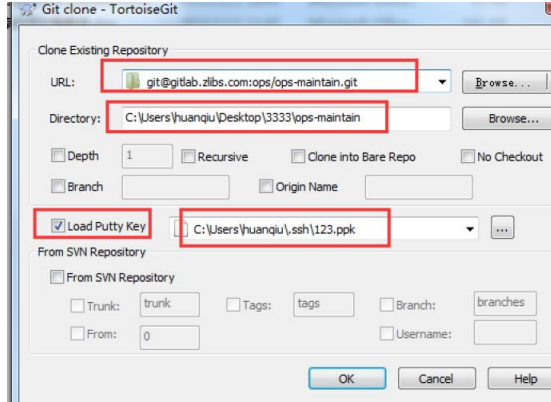
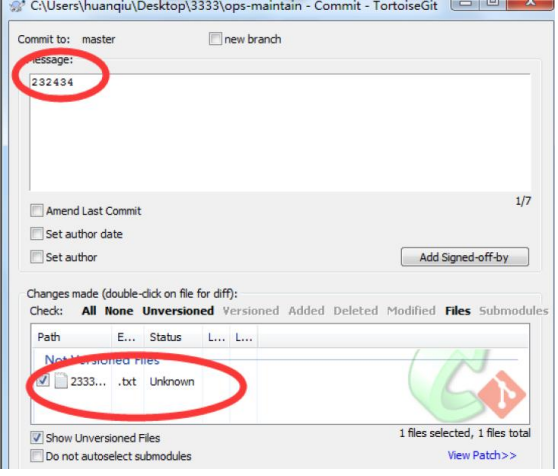
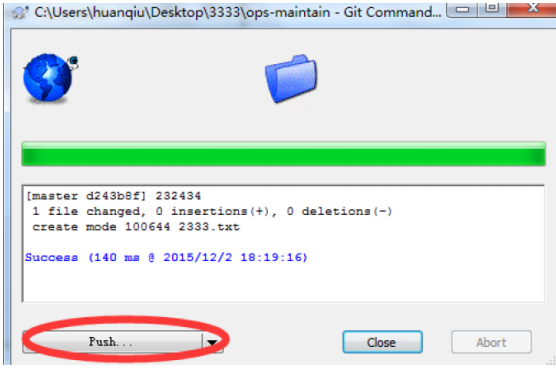
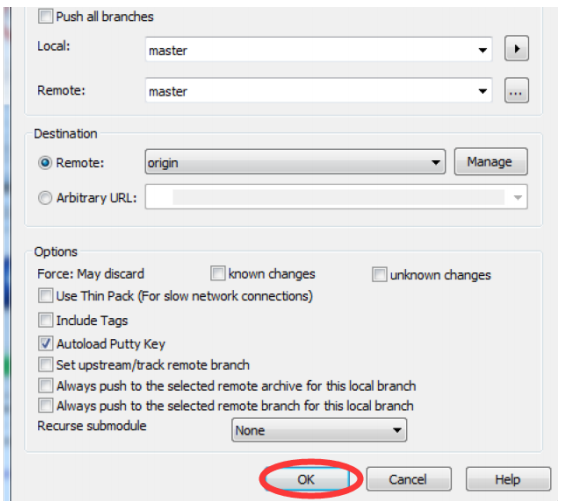
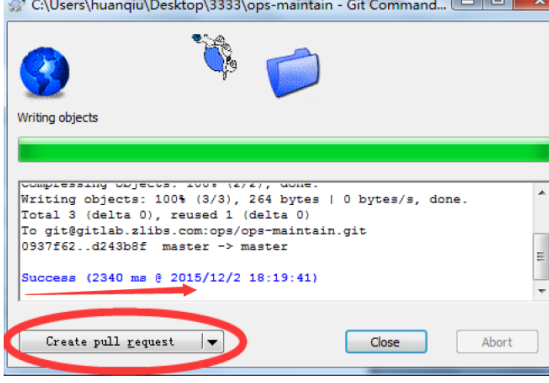
下面记录在windows客户端使用TortoiseGit的ssh方式连接gitlab的记录
下面两个客户端软件的下载地址是:http://pan.baidu.com/s/1slqxcMp (提取密码:keks)


 6657
6657


 被折叠的 条评论
为什么被折叠?
被折叠的 条评论
为什么被折叠?
 到【灌水乐园】发言


