


最近在研究Android系统的APK安装过程。由于是新手,所以在看源码时碰到很多基础问题。其中跨进程交互的问题就让我很纠结,于是干脆把Service和Activity之间的交互方式进行了一个总结。但由于网上相关帖子很多,不想重复造轮子,所以就将我认为写得挺好的两篇博客进行了融合。由于本文跟原文重合度大于80%,所以不敢称为原创。
原文1地址:http://blog.csdn.net/xiaanming/article/details/9750689
原文2地址:http://blog.csdn.net/stonecao/article/details/6425019
- 通过Binder对象
1.进程内通信
当Activity通过调用bindService(Intent service, ServiceConnection conn,int flags),我们可以得到一个Service的一个对象实例,然后我们就可以访问Service中的方法,我们还是通过一个例子来理解一下吧,一个模拟下载的小例子,带大家理解一下通过Binder通信的方式
首先我们新建一个工程Communication,然后新建一个Service类
- <span style="font-family:System;">package com.example.communication;
- import android.app.Service;
- import android.content.Intent;
- import android.os.Binder;
- import android.os.IBinder;
- public class MsgService extends Service {
- /**
- * 进度条的最大值
- */
- public static final int MAX_PROGRESS = 100;
- /**
- * 进度条的进度值
- */
- private int progress = 0;
- /**
- * 增加get()方法,供Activity调用
- * @return 下载进度
- */
- public int getProgress() {
- return progress;
- }
- /**
- * 模拟下载任务,每秒钟更新一次
- */
- public void startDownLoad(){
- new Thread(new Runnable() {
- @Override
- public void run() {
- while(progress < MAX_PROGRESS){
- progress += 5;
- try {
- Thread.sleep(1000);
- } catch (InterruptedException e) {
- e.printStackTrace();
- }
- }
- }
- }).start();
- }
- /**
- * 返回一个Binder对象
- */
- @Override
- public IBinder onBind(Intent intent) {
- return new MsgBinder();
- }
- public class MsgBinder extends Binder{
- /**
- * 获取当前Service的实例
- * @return
- */
- public MsgService getService(){
- return MsgService.this;
- }
- }
- }</span>
- Intent intent = new Intent("com.example.communication.MSG_ACTION");
- bindService(intent, conn, Context.BIND_AUTO_CREATE);
通过上面的代码我们就在Activity绑定了一个Service,上面需要一个ServiceConnection对象,它是一个接口,我们这里使用了匿名内部类
- <span style="font-family:System;"> ServiceConnection conn = new ServiceConnection() {
- @Override
- public void onServiceDisconnected(ComponentName name) {
- }
- @Override
- public void onServiceConnected(ComponentName name, IBinder service) {
- //返回一个MsgService对象
- msgService = ((MsgService.MsgBinder)service).getService();
- }
- };</span>
在onServiceConnected(ComponentName name, IBinder service) 回调方法中,返回了一个MsgService中的Binder对象,我们可以通过getService()方法来得到一个MsgService对象,然后可以调用MsgService中的一些方法,Activity的代码如下
- <span style="font-family:System;">package com.example.communication;
- import android.app.Activity;
- import android.content.ComponentName;
- import android.content.Context;
- import android.content.Intent;
- import android.content.ServiceConnection;
- import android.os.Bundle;
- import android.os.IBinder;
- import android.view.View;
- import android.view.View.OnClickListener;
- import android.widget.Button;
- import android.widget.ProgressBar;
- public class MainActivity extends Activity {
- private MsgService msgService;
- private int progress = 0;
- private ProgressBar mProgressBar;
- @Override
- protected void onCreate(Bundle savedInstanceState) {
- super.onCreate(savedInstanceState);
- setContentView(R.layout.activity_main);
- //绑定Service
- Intent intent = new Intent("com.example.communication.MSG_ACTION");
- bindService(intent, conn, Context.BIND_AUTO_CREATE);
- mProgressBar = (ProgressBar) findViewById(R.id.progressBar1);
- Button mButton = (Button) findViewById(R.id.button1);
- mButton.setOnClickListener(new OnClickListener() {
- @Override
- public void onClick(View v) {
- //开始下载
- msgService.startDownLoad();
- //监听进度
- listenProgress();
- }
- });
- }
- /**
- * 监听进度,每秒钟获取调用MsgService的getProgress()方法来获取进度,更新UI
- */
- public void listenProgress(){
- new Thread(new Runnable() {
- @Override
- public void run() {
- while(progress < MsgService.MAX_PROGRESS){
- progress = msgService.getProgress();
- mProgressBar.setProgress(progress);
- try {
- Thread.sleep(1000);
- } catch (InterruptedException e) {
- e.printStackTrace();
- }
- }
- }
- }).start();
- }
- ServiceConnection conn = new ServiceConnection() {
- @Override
- public void onServiceDisconnected(ComponentName name) {
- }
- @Override
- public void onServiceConnected(ComponentName name, IBinder service) {
- //返回一个MsgService对象
- msgService = ((MsgService.MsgBinder)service).getService();
- }
- };
- @Override
- protected void onDestroy() {
- unbindService(conn);
- super.onDestroy();
- }
- }</span><span style="font-family: simsun;">
- </span>
上面的代码就完成了在Service更新UI的操作,可是你发现了没有,我们每次都要主动调用getProgress()来获取进度值,然后隔一秒在调用一次getProgress()方法,你会不会觉得很被动呢?可不可以有一种方法当Service中进度发生变化主动通知Activity,答案是肯定的,我们可以利用回调接口实现Service的主动通知,不理解回调方法的可以看看http://blog.csdn.net/xiaanming/article/details/8703708
新建一个回调接口
- public interface OnProgressListener {
- void onProgress(int progress);
- }
- <span style="font-family:System;">package com.example.communication;
- import android.app.Service;
- import android.content.Intent;
- import android.os.Binder;
- import android.os.IBinder;
- public class MsgService extends Service {
- /**
- * 进度条的最大值
- */
- public static final int MAX_PROGRESS = 100;
- /**
- * 进度条的进度值
- */
- private int progress = 0;
- /**
- * 更新进度的回调接口
- */
- private OnProgressListener onProgressListener;
- /**
- * 注册回调接口的方法,供外部调用
- * @param onProgressListener
- */
- public void setOnProgressListener(OnProgressListener onProgressListener) {
- this.onProgressListener = onProgressListener;
- }
- /**
- * 增加get()方法,供Activity调用
- * @return 下载进度
- */
- public int getProgress() {
- return progress;
- }
- /**
- * 模拟下载任务,每秒钟更新一次
- */
- public void startDownLoad(){
- new Thread(new Runnable() {
- @Override
- public void run() {
- while(progress < MAX_PROGRESS){
- progress += 5;
- //进度发生变化通知调用方
- if(onProgressListener != null){
- onProgressListener.onProgress(progress);
- }
- try {
- Thread.sleep(1000);
- } catch (InterruptedException e) {
- e.printStackTrace();
- }
- }
- }
- }).start();
- }
- /**
- * 返回一个Binder对象
- */
- @Override
- public IBinder onBind(Intent intent) {
- return new MsgBinder();
- }
- public class MsgBinder extends Binder{
- /**
- * 获取当前Service的实例
- * @return
- */
- public MsgService getService(){
- return MsgService.this;
- }
- }
- }</span>
- <span style="font-family:System;">package com.example.communication;
- import android.app.Activity;
- import android.content.ComponentName;
- import android.content.Context;
- import android.content.Intent;
- import android.content.ServiceConnection;
- import android.os.Bundle;
- import android.os.IBinder;
- import android.view.View;
- import android.view.View.OnClickListener;
- import android.widget.Button;
- import android.widget.ProgressBar;
- public class MainActivity extends Activity {
- private MsgService msgService;
- private ProgressBar mProgressBar;
- @Override
- protected void onCreate(Bundle savedInstanceState) {
- super.onCreate(savedInstanceState);
- setContentView(R.layout.activity_main);
- //绑定Service
- Intent intent = new Intent("com.example.communication.MSG_ACTION");
- bindService(intent, conn, Context.BIND_AUTO_CREATE);
- mProgressBar = (ProgressBar) findViewById(R.id.progressBar1);
- Button mButton = (Button) findViewById(R.id.button1);
- mButton.setOnClickListener(new OnClickListener() {
- @Override
- public void onClick(View v) {
- //开始下载
- msgService.startDownLoad();
- }
- });
- }
- ServiceConnection conn = new ServiceConnection() {
- @Override
- public void onServiceDisconnected(ComponentName name) {
- }
- @Override
- public void onServiceConnected(ComponentName name, IBinder service) {
- //返回一个MsgService对象
- msgService = ((MsgService.MsgBinder)service).getService();
- //注册回调接口来接收下载进度的变化
- msgService.setOnProgressListener(new OnProgressListener() {
- @Override
- public void onProgress(int progress) {
- mProgressBar.setProgress(progress);
- }
- });
- }
- };
- @Override
- protected void onDestroy() {
- unbindService(conn);
- super.onDestroy();
- }
- }
- </span>
2.进程间通信(aidl方式)
1.什么是aidl:aidl是 Android Interface definition language的缩写,一看就明白,它是一种android内部进程通信接口的描述语言,通过它我们可以定义进程间的通信接口
icp:interprocess communication :内部进程通信
2.既然aidl可以定义并实现进程通信,那么我们怎么使用它呢?文档/android-sdk/docs/guide/developing/tools/aidl.html中对步骤作了详细描述:
--1.Create your .aidl file - This file defines an interface (YourInterface.aidl) that defines the methods and fields available to a client.
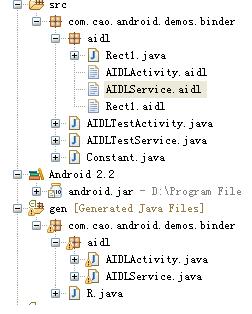
创建你的aidl文件,我在后面给出了一个例子,它的aidl文件定义如下:写法跟java代码类似,但是这里有一点值得注意的就是它可以引用其它aidl文件中定义的接口,但是不能够引用你的java类文件中定义的接口
- package com.cao.android.demos.binder.aidl;
- import com.cao.android.demos.binder.aidl.AIDLActivity;
- interface AIDLService {
- void registerTestCall(AIDLActivity cb);
- void invokCallBack();
- }
--2.Add the .aidl file to your makefile - (the ADT Plugin for Eclipse manages this for you). Android includes the compiler, called AIDL, in the tools/ directory.
编译你的aidl文件,这个只要是在eclipse中开发,你的adt插件会像资源文件一样把aidl文件编译成java代码生成在gen文件夹下,不用手动去编译:编译生成AIDLService.java如我例子中代码
--3.Implement your interface methods - The AIDL compiler creates an interface in the Java programming language from your AIDL interface. This interface has an inner abstract class named Stub that inherits the interface (and implements a few additional methods necessary for the IPC call). You must create a class that extends YourInterface.Stub and implements the methods you declared in your .aidl file.
实现你定义aidl接口中的内部抽象类Stub,public static abstract class Stub extends android.os.Binder implements com.cao.android.demos.binder.aidl.AIDLService
Stub类继承了Binder,并继承我们在aidl文件中定义的接口,我们需要实现接口方法,下面是我在例子中实现的Stub类:
- private final AIDLService.Stub mBinder = new AIDLService.Stub() {
- @Override
- public void invokCallBack() throws RemoteException {
- Log("AIDLService.invokCallBack");
- Rect1 rect = new Rect1();
- rect.bottom=-1;
- rect.left=-1;
- rect.right=1;
- rect.top=1;
- callback.performAction(rect);
- }
- @Override
- public void registerTestCall(AIDLActivity cb) throws RemoteException {
- Log("AIDLService.registerTestCall");
- callback = cb;
- }
- };
Stub翻译成中文是存根的意思,注意Stub对象是在被调用端进程,也就是服务端进程,至此,服务端aidl服务端得编码完成了。
--4.Expose your interface to clients - If you're writing a service, you should extend Service and override Service.onBind(Intent) to return an instance of your class that implements your interface.
第四步告诉你怎么在客户端如何调用服务端得aidl描述的接口对象,doc只告诉我们需要实现Service.onBind(Intent)方法,该方法会返回一个IBinder对象到客户端,绑定服务时不是需要一个ServiceConnection对象么,在没有了解aidl用法前一直不知道它是什么作用,其实他就是用来在客户端绑定service时接收service返回的IBinder对象的:
- AIDLService mService;
- private ServiceConnection mConnection = new ServiceConnection() {
- public void onServiceConnected(ComponentName className, IBinder service) {
- Log("connect service");
- mService = AIDLService.Stub.asInterface(service);
- try {
- mService.registerTestCall(mCallback);
- } catch (RemoteException e) {
- }
- }
- public void onServiceDisconnected(ComponentName className) {
- Log("disconnect service");
- mService = null;
- }
- };
mService就是AIDLService对象,具体可以看我后面提供的示例代码,需要注意在客户端需要存一个服务端实现了的aidl接口描述文件,但是客户端只是使用该aidl接口,不需要实现它的Stub类,获取服务端得aidl对象后mService = AIDLService.Stub.asInterface(service);,就可以在客户端使用它了,对mService对象方法的调用不是在客户端执行,而是在服务端执行。
4.aidl中使用java类,需要实现Parcelable接口,并且在定义类相同包下面对类进行声明:
上面我定义了Rect1类
之后你就可以在aidl接口中对该类进行使用了
package com.cao.android.demos.binder.aidl;
import com.cao.android.demos.binder.aidl.Rect1;
interface AIDLActivity {
void performAction(in Rect1 rect);
}
注意in/out的说明,我这里使用了in表示输入参数,out没有试过,为什么使用in/out暂时没有做深入研究。
5.aidl使用完整示例,为了清除说明aidl使用,我这里写了一个例子,例子参考了博客:
http://blog.csdn.net/saintswordsman/archive/2010/01/04/5130947.aspx
作出说明
例子实现了一个AIDLTestActivity,AIDLTestActivity通过bindservice绑定一个服务AIDLTestService,通过并获取AIDLTestActivity的一个aidl对象AIDLService,该对象提供两个方法,一个是registerTestCall注册一个aidl对象,通过该方法,AIDLTestActivity把本身实现的一个aidl对象AIDLActivity传到AIDLTestService,在AIDLTestService通过操作AIDLActivity这个aidl远端对象代理,使AIDLTestActivity弹出一个toast,完整例子见我上传的资源:
http://download.csdn.net/source/3284820
文章仓促而成,有什么疑问欢迎大家一起讨论。
- 通过broadcast(广播)的形式
当我们的进度发生变化的时候我们发送一条广播,然后在Activity的注册广播接收器,接收到广播之后更新ProgressBar,代码如下
- package com.example.communication;
- <span style="font-family:System;">
- import android.app.Activity;
- import android.content.BroadcastReceiver;
- import android.content.Context;
- import android.content.Intent;
- import android.content.IntentFilter;
- import android.os.Bundle;
- import android.view.View;
- import android.view.View.OnClickListener;
- import android.widget.Button;
- import android.widget.ProgressBar;
- public class MainActivity extends Activity {
- private ProgressBar mProgressBar;
- private Intent mIntent;
- private MsgReceiver msgReceiver;
- @Override
- protected void onCreate(Bundle savedInstanceState) {
- super.onCreate(savedInstanceState);
- setContentView(R.layout.activity_main);
- //动态注册广播接收器
- msgReceiver = new MsgReceiver();
- IntentFilter intentFilter = new IntentFilter();
- intentFilter.addAction("com.example.communication.RECEIVER");
- registerReceiver(msgReceiver, intentFilter);
- mProgressBar = (ProgressBar) findViewById(R.id.progressBar1);
- Button mButton = (Button) findViewById(R.id.button1);
- mButton.setOnClickListener(new OnClickListener() {
- @Override
- public void onClick(View v) {
- //启动服务
- mIntent = new Intent("com.example.communication.MSG_ACTION");
- startService(mIntent);
- }
- });
- }
- @Override
- protected void onDestroy() {
- //停止服务
- stopService(mIntent);
- //注销广播
- unregisterReceiver(msgReceiver);
- super.onDestroy();
- }
- /**
- * 广播接收器
- * @author len
- *
- */
- public class MsgReceiver extends BroadcastReceiver{
- @Override
- public void onReceive(Context context, Intent intent) {
- //拿到进度,更新UI
- int progress = intent.getIntExtra("progress", 0);
- mProgressBar.setProgress(progress);
- }
- }
- }
- </span>
- <span style="font-family:System;">package com.example.communication;
- import android.app.Service;
- import android.content.Intent;
- import android.os.IBinder;
- public class MsgService extends Service {
- /**
- * 进度条的最大值
- */
- public static final int MAX_PROGRESS = 100;
- /**
- * 进度条的进度值
- */
- private int progress = 0;
- private Intent intent = new Intent("com.example.communication.RECEIVER");
- /**
- * 模拟下载任务,每秒钟更新一次
- */
- public void startDownLoad(){
- new Thread(new Runnable() {
- @Override
- public void run() {
- while(progress < MAX_PROGRESS){
- progress += 5;
- //发送Action为com.example.communication.RECEIVER的广播
- intent.putExtra("progress", progress);
- sendBroadcast(intent);
- try {
- Thread.sleep(1000);
- } catch (InterruptedException e) {
- e.printStackTrace();
- }
- }
- }
- }).start();
- }
- @Override
- public int onStartCommand(Intent intent, int flags, int startId) {
- startDownLoad();
- return super.onStartCommand(intent, flags, startId);
- }
- @Override
- public IBinder onBind(Intent intent) {
- return null;
- }
- }</span>
总结:
1. Activity调用bindService (Intent service, ServiceConnection conn, int flags)方法,得到Service对象的一个引用,这样Activity可以直接调用到Service中的方法,如果要主动通知Activity,我们可以利用回调方法。
2. Service向Activity发送消息,可以使用广播,当然Activity要注册相应的接收器。比如Service要向多个Activity发送同样的消息的话,用这种方法就更好。
PS:
1. Service向Activity之间进行交互也可以在Service中注册一个aidl回调,在Service完成某个任务之后回调相应的接口。系统包管理服务PackageManagerService跟系统应用PackageInstaller交互时采用的就是这种方式。
2. 当在不同的应用程序之间需要共享数据时,可以使用Content Provider来实现。


 4277
4277


 被折叠的 条评论
为什么被折叠?
被折叠的 条评论
为什么被折叠?
 到【灌水乐园】发言


