


1.Intellij Idea创建Maven项目
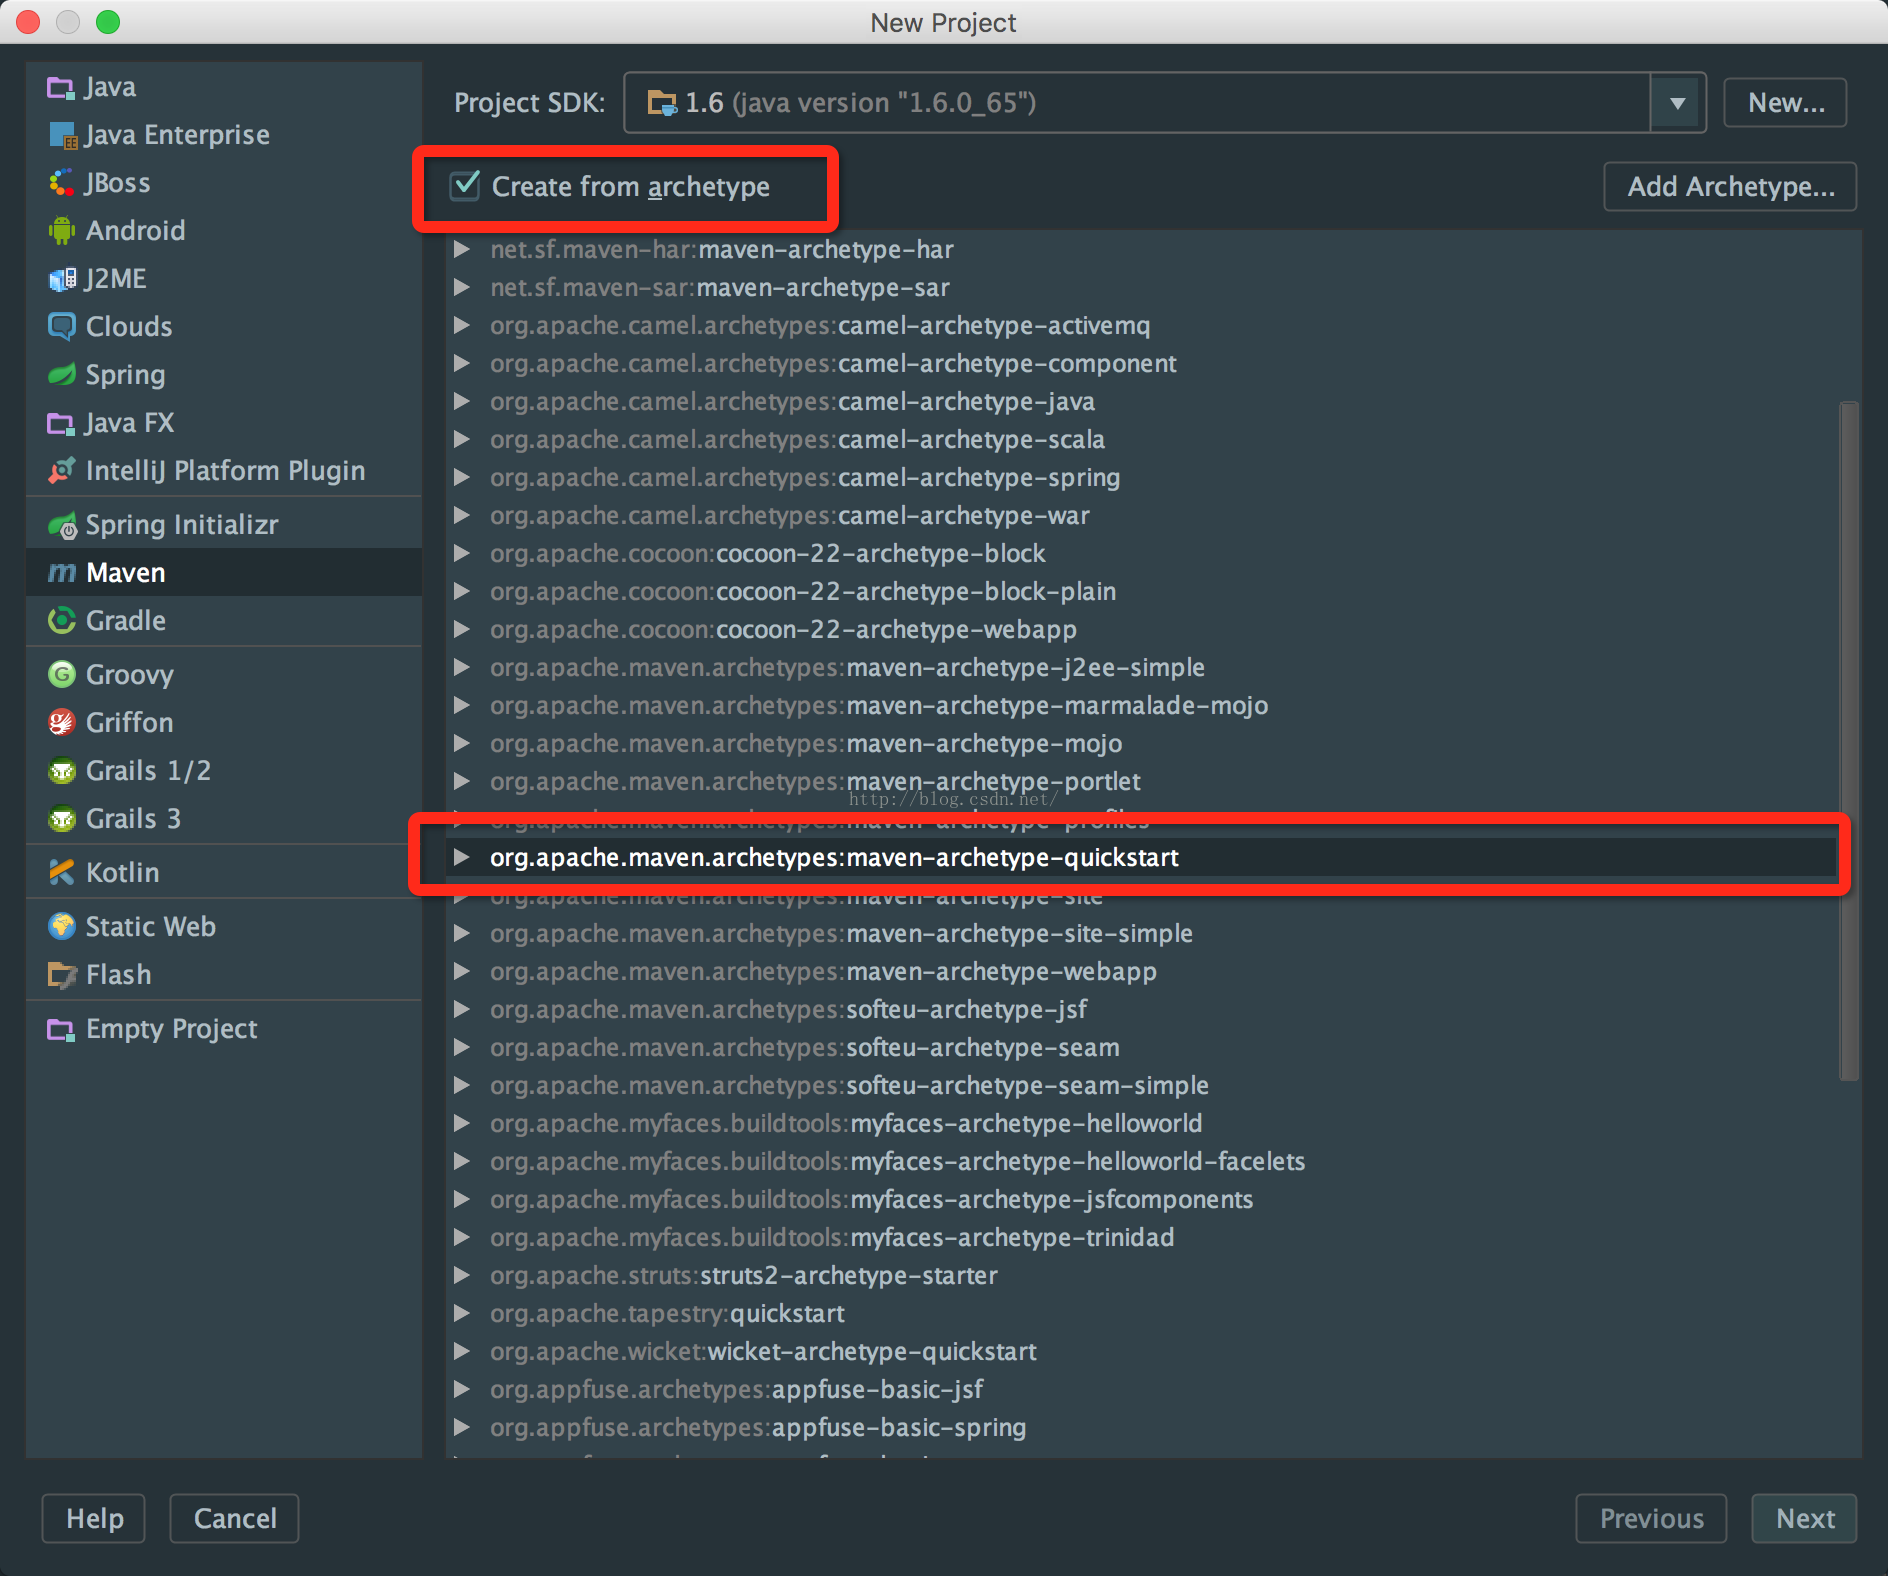
利用maven模板快速创建maven项目,如图操作,填写g(groupid)a(artifactid)v(version)。
maven home directory 选择系统默认或者自己下载下来的maven主目录。
2.将项目模块化
利用maven的依赖以及集成的特性,将项目模块化。
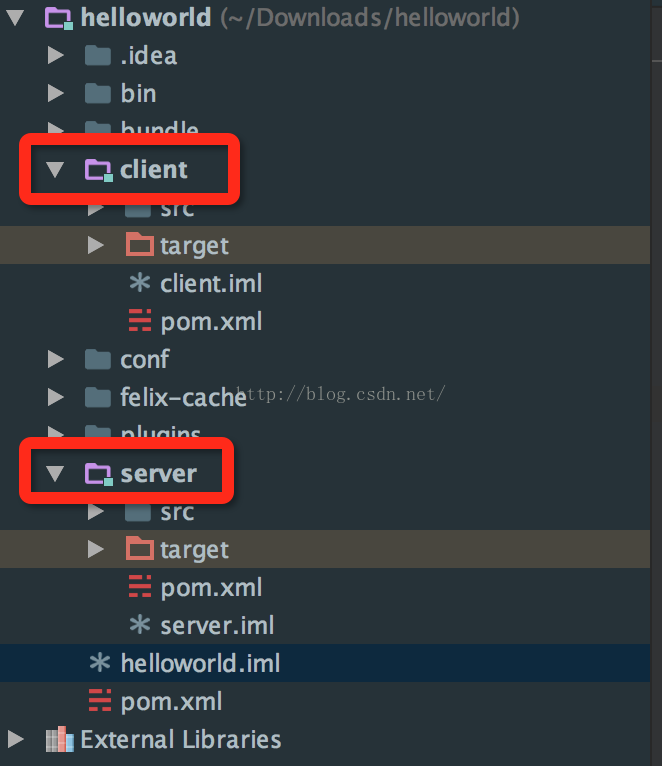
在主module下创建module并继承主module。
这里我创建了server以及client,项目结构如下图,先忽略红圈之外的文件夹:
主pom配置如下:
<project xmlns="http://maven.apache.org/POM/4.0.0"
         xmlns:xsi="http://www.w3.org/2001/XMLSchema-instance"
         xsi:schemaLocation="http://maven.apache.org/POM/4.0.0 http://maven.apache.org/xsd/maven-4.0.0.xsd">
    <modelVersion>4.0.0</modelVersion>

    <groupId>com.renming.osgi.helloworld</groupId>
    <artifactId>helloworld</artifactId>
    <version>1.0.0</version>
    <modules>
        <module>server</module>
        <module>client</module>
    </modules>
    <packaging>pom</packaging>

    <name>helloworld</name>
    <url>http://maven.apache.org</url>

    <properties>
        <project.build.sourceEncoding>UTF-8</project.build.sourceEncoding>
    </properties>

    <dependencyManagement>
        <dependencies>
            <dependency>
                <groupId>com.renming.osgi.helloworld</groupId>
                <artifactId>server</artifactId>
                <version>${project.version}</version>
            </dependency>
            <dependency>
                <groupId>org.eclipse</groupId>
                <artifactId>osgi</artifactId>
                <version>3.9.1-v20130814-1242</version>
                <scope>provided</scope>
            </dependency>
            <dependency>
                <groupId>junit</groupId>
                <artifactId>junit</artifactId>
                <version>3.8.1</version>
                <scope>test</scope>
            </dependency>
        </dependencies>
    </dependencyManagement>
</project>
server模块pom配置如下:
<project xmlns="http://maven.apache.org/POM/4.0.0" xmlns:xsi="http://www.w3.org/2001/XMLSchema-instance"
         xsi:schemaLocation="http://maven.apache.org/POM/4.0.0 http://maven.apache.org/xsd/maven-4.0.0.xsd">
    <parent>
        <artifactId>helloworld</artifactId>
        <groupId>com.renming.osgi.helloworld</groupId>
        <version>1.0.0</version>
    </parent>
    <modelVersion>4.0.0</modelVersion>

    <artifactId>server</artifactId>
    <packaging>bundle</packaging>

    <name>server</name>
    <url>http://maven.apache.org</url>

    <properties>
        <project.build.sourceEncoding>UTF-8</project.build.sourceEncoding>
    </properties>

    <dependencies>
        <dependency>
            <groupId>org.eclipse</groupId>
            <artifactId>osgi</artifactId>
        </dependency>
        <dependency>
            <groupId>junit</groupId>
            <artifactId>junit</artifactId>
            <version>3.8.1</version>
            <scope>test</scope>
        </dependency>
    </dependencies>

    <build>
        <plugins>
            <plugin>
                <groupId>org.apache.felix</groupId>
                <artifactId>maven-bundle-plugin</artifactId>
                <version>2.4.0</version>
                <extensions>true</extensions>
                <configuration>
                    <instructions>
                        <Bundle-Version>${project.version}</Bundle-Version>
                        <Bundle-SymbolicName>$(replace;${project.artifactId};-;_)</Bundle-SymbolicName>
                        <Export-Package>
                            com.renming.osgi.helloworld.server.inter;version="${project.version}"
                        </Export-Package>
                        <Import-Package>
                            org.osgi.framework
                        </Import-Package>
                        <Bundle-Activator>
                            com.renming.osgi.helloworld.Activator
                        </Bundle-Activator>
                    </instructions>
                </configuration>
            </plugin>
        </plugins>
    </build>
</project>
client模块pom配置如下:
<project xmlns="http://maven.apache.org/POM/4.0.0"
         xmlns:xsi="http://www.w3.org/2001/XMLSchema-instance"
         xsi:schemaLocation="http://maven.apache.org/POM/4.0.0 http://maven.apache.org/xsd/maven-4.0.0.xsd">
    <parent>
        <artifactId>helloworld</artifactId>
        <groupId>com.renming.osgi.helloworld</groupId>
        <version>1.0.0</version>
    </parent>
    <modelVersion>4.0.0</modelVersion>

    <artifactId>client</artifactId>
    <packaging>bundle</packaging>

    <name>client</name>
    <url>http://maven.apache.org</url>

    <properties>
        <project.build.sourceEncoding>UTF-8</project.build.sourceEncoding>
    </properties>

    <dependencies>
        <dependency>
            <groupId>com.renming.osgi.helloworld</groupId>
            <artifactId>server</artifactId>
        </dependency>
        <dependency>
            <groupId>org.eclipse</groupId>
            <artifactId>osgi</artifactId>
        </dependency>
        <dependency>
            <groupId>junit</groupId>
            <artifactId>junit</artifactId>
            <version>3.8.1</version>
            <scope>test</scope>
        </dependency>
    </dependencies>


    <build>
        <plugins>
            <plugin>
                <groupId>org.apache.felix</groupId>
                <artifactId>maven-bundle-plugin</artifactId>
                <version>2.4.0</version>
                <extensions>true</extensions>
                <configuration>
                    <instructions>
                        <Bundle-Version>${project.version}</Bundle-Version>
                        <Bundle-SymbolicName>$(replace;${project.artifactId};-;_)
                        </Bundle-SymbolicName>
                        <Import-Package>
                            org.osgi.framework,com.renming.osgi.helloworld.server.inter;version="${project.version}"
                        </Import-Package>
                        <Bundle-Activator>
                            com.renming.osgi.helloworld.Activator
                        </Bundle-Activator>
                    </instructions>
                </configuration>
            </plugin>
        </plugins>
    </build>
</project>
主pom和子pom拥有继承关系,同时进行了模块化。
3.编写简单的测试用例
通过实现BundleActivator接口,可以实现与osgi框架环境的通信。
这里需要实现start以及stop,分别在bundle启动以及终止的时候被调用。
这里让它在server bundle启动的时候注册一个简单的服务:
package com.renming.osgi.helloworld;

import java.util.ArrayList;
import java.util.List;

import com.renming.osgi.helloworld.server.impl.HelloImpl;
import com.renming.osgi.helloworld.server.inter.Hello;
import org.osgi.framework.BundleActivator;
import org.osgi.framework.BundleContext;
import org.osgi.framework.ServiceRegistration;

public class Activator implements BundleActivator {

    private List<ServiceRegistration> registrations = new ArrayList<ServiceRegistration>();

    private static BundleContext context;

    static BundleContext getContext() {
        return context;
    }

    public void start(BundleContext bundleContext) throws Exception {
        Activator.context = bundleContext;
        System.out.println("----------------hello start---------------------");
        //注册hello接口中的服务
        registrations.add(bundleContext
                .registerService(Hello.class.getName(), new HelloImpl("Hello, OSGi"), null));
        System.out.println("----------------hello start---------------------");
    }

    public void stop(BundleContext bundleContext) throws Exception {
        Activator.context = null;

        for (ServiceRegistration registration : registrations) {
            System.out.println("unregistering: " + registration);
            registration.unregister();
        }

    }

}
需要注意的是编写完代码后,需要配置server模块pom中打包插件,完整的上面已经列出了。
然后是cilent模块中测试代码,需要从bundleContext中获取到对应的服务,只需要提供服务名就可以了。具体代码如下:
package com.renming.osgi.helloworld;


import com.renming.osgi.helloworld.server.inter.Hello;
import org.osgi.framework.BundleActivator;
import org.osgi.framework.BundleContext;
import org.osgi.framework.ServiceReference;

public class Activator implements BundleActivator {

	public void start(BundleContext ctx) {
		System.out.println("----------------hello client start---------------------");
	    ServiceReference ref = ctx.getServiceReference(Hello.class.getName());
	    if (ref != null) {
	        Hello hello = null;
	        try {
	            hello = (Hello) ctx.getService(ref);
	            if (hello != null)
	                hello.sayHello();
	            else
	                System.out.println("Service:Hello---object null");
	        } catch (RuntimeException e) {
	            e.printStackTrace();
	        } finally {
	            ctx.ungetService(ref);
	            hello = null;
	        }
	    } else {
	        System.out.println("Service:Hello---not exists");
	    }
		System.out.println("----------------hello client start---------------------");
	}

	public void stop(BundleContext ctx) throws Exception {

	}

}
4.配置Apache felix环境
下载:http://felix.apache.org/downloads.cgi
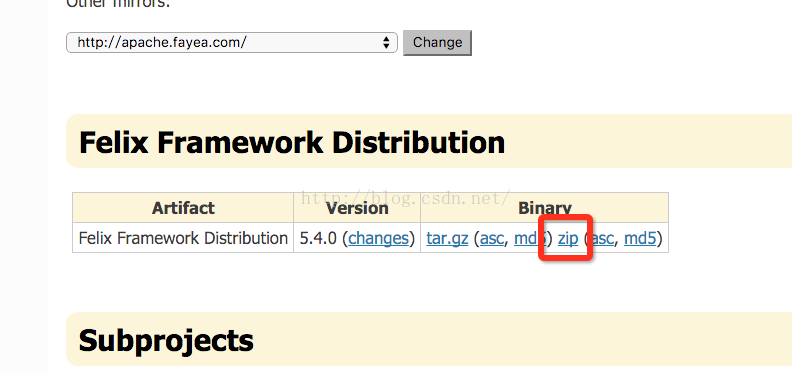
解压之后拷贝bin、conf、bundle目录到主目录下方便执行以及修改配置,同时创建plugins文件夹用于存放我们编写的bundle。
最后目录结构如下:
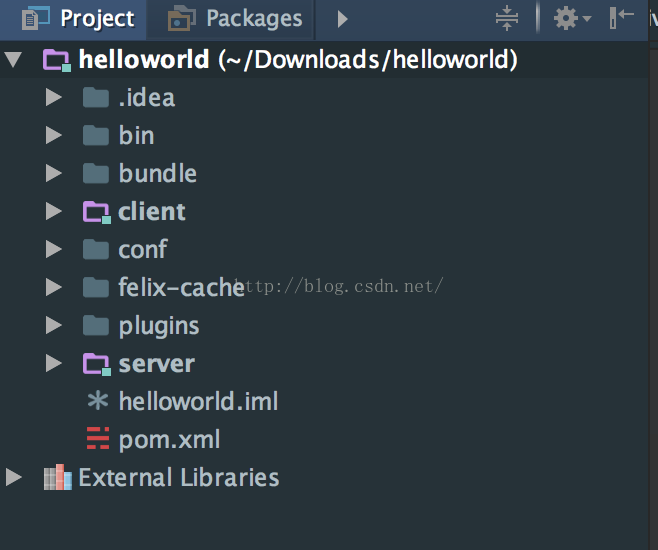
---执行bin中felix.jar
---控制台显示g!无报错信息则执行成功
---执行命令lb,可以查看已启动bundle
---然后打包client模块以及server模块,并将打包的jar包拷贝到plugins中
---执行命令 install file:plugins/XXX.jar,会显示ID,然后执行start ID,最后执行lb查看是否启动成功,并打印对应的信息
由于client以及server都是在本地调用,如果需要远程调用可以参考这篇文章:
http://www.cnblogs.com/lw900320/archive/2012/06/26/2563221.html


 1211
1211


 被折叠的 条评论
为什么被折叠?
被折叠的 条评论
为什么被折叠?
 到【灌水乐园】发言


