


以前用过mq,也早就听说过Kafka。
Kafka这个名字感觉好高大上,一直想着试试是怎样的,今天周末,正好有空,在家来尝试一下
以下是我今天搭建一个Kafka使用的主要步骤
环境:
1.centos7 x64(预先装好了JDK环境)
2.Kafka版本:kafka_2.10-0.10.2.1
1.Kafka下载
官方下载地址:http://kafka.apache.org/downloads
我这里选择目前最新的kafka_2.10-0.10.2.1
可用地址:https://www.apache.org/dyn/closer.cgi?path=/kafka/0.10.2.1/kafka_2.10-0.10.2.1.tgz
下载完毕后,解压
[ping@Hadoop kafka]$ ll
total 37524
-rw-r--r--. 1 ping ping 38424081 Jun 10 18:28 kafka_2.10-0.10.2.1.tgz
[ping@Hadoop kafka]$ tar -zxvf kafka_2.10-0.10.2.1.tgz
2.修改配置文件
[ping@Hadoop config]$ pwd
/home/ping/kafka/kafka_2.10-0.10.2.1/config
[ping@Hadoop config]$ ll
total 60
-rw-r--r--. 1 ping ping  906 Apr 21 09:23 connect-console-sink.properties
-rw-r--r--. 1 ping ping  909 Apr 21 09:23 connect-console-source.properties
-rw-r--r--. 1 ping ping 2760 Apr 21 09:23 connect-distributed.properties
-rw-r--r--. 1 ping ping  883 Apr 21 09:23 connect-file-sink.properties
-rw-r--r--. 1 ping ping  881 Apr 21 09:23 connect-file-source.properties
-rw-r--r--. 1 ping ping 1074 Apr 21 09:23 connect-log4j.properties
-rw-r--r--. 1 ping ping 2061 Apr 21 09:23 connect-standalone.properties
-rw-r--r--. 1 ping ping 1199 Apr 21 09:23 consumer.properties
-rw-r--r--. 1 ping ping 4369 Apr 21 09:23 log4j.properties
-rw-r--r--. 1 ping ping 1900 Apr 21 09:23 producer.properties
-rw-r--r--. 1 ping ping 5631 Apr 21 09:23 server.properties
-rw-r--r--. 1 ping ping 1032 Apr 21 09:23 tools-log4j.properties
-rw-r--r--. 1 ping ping 1023 Apr 21 09:23 zookeeper.properties
[ping@Hadoop config]$
为了快速演示方便,可以不用修改任何配置信息。如果需要针对不同的环境进行设置,需要做以下内容为主的修改
2.1 zookeeper配置文件
kafka的运行环境还需要zookeeper来进行协调,这里我采用默认的配置
对应的配置文件为zookeeper.properties
2.2 server.properties
Kafka程序主要的配置,在server.properties文件中修改与设置
主要关注的3点为此文件中的以下内容:
# The id of the broker. This must be set to a unique integer for each broker.
broker.id=0
# The address the socket server listens on. It will get the value returned from
# java.net.InetAddress.getCanonicalHostName() if not configured.
# FORMAT:
# listeners = listener_name://host_name:port
# EXAMPLE:
# listeners = PLAINTEXT://your.host.name:9092
#listeners=PLAINTEXT://:9092
# Zookeeper connection string (see zookeeper docs for details).
# This is a comma separated host:port pairs, each corresponding to a zk
# server. e.g. "127.0.0.1:3000,127.0.0.1:3001,127.0.0.1:3002".
# You can also append an optional chroot string to the urls to specify the
# root directory for all kafka znodes.
zookeeper.connect=localhost:2181
# Timeout in ms for connecting to zookeeper
zookeeper.connection.timeout.ms=6000
打开这个配置文件,上面也有较为详细的说明
为了演示方便,只将listeners=PLAINTEXT://:9092改为本地地址,如listeners=PLAINTEXT://192.168.0.95:9092
2.3 producer.properties
由producer这个名字可以得知,这是一个跟消息生产提供相关的配置
关心点:bootstrap.servers=localhost:9092
2.4 consumer.properties
与producer相对应,用于消费端的相关配置
关心点:
# Zookeeper connection string
# comma separated host:port pairs, each corresponding to a zk
# server. e.g. "127.0.0.1:3000,127.0.0.1:3001,127.0.0.1:3002"
zookeeper.connect=127.0.0.1:2181
# timeout in ms for connecting to zookeeper
zookeeper.connection.timeout.ms=6000
#consumer group id
group.id=test-consumer-group
#consumer timeout
#consumer.timeout.ms=5000
3.kafka启动
3.1 zookeeper启动
zookeeper作为kafka的协调者,需要在kafka运行前最先运行
运行bin目录下的如下shell,后面跟上配置文件的地址
bin/zookeeper-server-start.sh config/zookeeper.properties
[ping@Hadoop kafka_2.10-0.10.2.1]$ pwd
/home/ping/kafka/kafka_2.10-0.10.2.1
[ping@Hadoop kafka_2.10-0.10.2.1]$ ll
total 52
drwxr-xr-x. 3 ping ping  4096 Apr 21 09:24 bin
drwxr-xr-x. 2 ping ping  4096 Jun 10 19:45 config
drwxr-xr-x. 2 ping ping  4096 Jun 10 19:17 libs
-rw-r--r--. 1 ping ping 28824 Apr 21 09:23 LICENSE
drwxrwxr-x. 2 ping ping  4096 Jun 10 19:46 logs
-rw-r--r--. 1 ping ping   336 Apr 21 09:23 NOTICE
drwxr-xr-x. 2 ping ping    46 Apr 21 09:24 site-docs
[ping@Hadoop kafka_2.10-0.10.2.1]$ bin/zookeeper-server-start.sh config/zookeeper.properties &
3.2 kafka服务启动
kafka服务的启动主要执行如下shell
bin/kafka-server-start.sh config/server.properties
[ping@Hadoop kafka_2.10-0.10.2.1]$ bin/kafka-server-start.sh config/server.properties3.3创建topic
作为消息的创建与消费,需要制定一个topic,跟分组类似
bin/kafka-topics.sh --create --zookeeper localhost:2181 --replication-factor 1 --partitions 1 --topic test
最后的test代表topic的名字
[ping@Hadoop kafka_2.10-0.10.2.1]$ bin/kafka-topics.sh --create --zookeeper localhost:2181 --replication-factor 1 --partitions 1 --topic test
Created topic "test".
如要查看目前已经创建了的topic,用如下命令
bin/kafka-topics.sh --list --zookeeper localhost:2181
如:
[ping@Hadoop kafka_2.10-0.10.2.1]$  bin/kafka-topics.sh --list --zookeeper localhost:2181
test
4.kafka消息创建与消费测试
4.1 kafka消息生产启动
[ping@Hadoop kafka_2.10-0.10.2.1]$ bin/kafka-console-producer.sh --broker-list localhost:9092 --topic test
运行成功后,控制台将会进入阻塞状态,等待用户在此控制台上输入将要发送的内容,提交给kafka服务
如:
[ping@Hadoop kafka_2.10-0.10.2.1]$ bin/kafka-console-producer.sh --broker-list localhost:9092 --topic test
123
abc
haha
通过回车换行后,消息将会发送到kafka中,等待其消息
4.2 kafka消息消费启动
用以下命令来消费消息
bin/kafka-console-consumer.sh --zookeeper localhost:2181 --topic test --from-beginning
其中指定了kafka的协调者是哪个zookeeper和topic是哪个
运行上面的命令后,就会消费kafka中的test这个topic的消息了
如下:
[ping@Hadoop kafka_2.10-0.10.2.1]$ bin/kafka-console-consumer.sh --zookeeper localhost:2181 --topic test --from-beginning
Using the ConsoleConsumer with old consumer is deprecated and will be removed in a future major release. Consider using the new consumer by passing [bootstrap-server] instead of [zookeeper].
123
abc
haha
5.Java客户端程序调用
kafka的启动主要占用了如下端口,确保如下端口是运行了的,并且端口所开放的网卡是开放出来的
tcp6 0 0 :::9092 :::* LISTEN 33492/java
tcp6 0 0 :::2181 :::* LISTEN 33123/java
5.1 SpringBoot消费测试
在springBoot工程中添加maven依赖
		<dependency>
			<groupId>org.springframework.kafka</groupId>
			<artifactId>spring-kafka</artifactId>
		</dependency>
在application.yml中加入配置信息:
haiyang:
  kafka:
    binder:
      brokers: 192.168.31.222:9092
      zk-nodes: 192.168.31.222:2181
    group: test-group
创建kafkaProducersConfig
package com.haiyang.config;

import org.apache.kafka.clients.producer.ProducerConfig;
import org.apache.kafka.common.serialization.StringSerializer;
import org.springframework.beans.factory.annotation.Value;
import org.springframework.context.annotation.Bean;
import org.springframework.context.annotation.Configuration;
import org.springframework.kafka.annotation.EnableKafka;
import org.springframework.kafka.core.DefaultKafkaProducerFactory;
import org.springframework.kafka.core.KafkaTemplate;
import org.springframework.kafka.core.ProducerFactory;

import java.util.HashMap;
import java.util.Map;

@Configuration
@EnableKafka
public class KafkaProducersConfig {
    @Value("${haiyang.kafka.binder.brokers}")
    private String brokers;

    @Bean("kafkaTemplate")
    public KafkaTemplate<String, String> kafkaTemplate() {
        KafkaTemplate<String, String> kafkaTemplate = new KafkaTemplate<String, String>(producerFactory());
        return kafkaTemplate;
    }

    public ProducerFactory<String, String> producerFactory() {
        Map<String, Object> properties = new HashMap<String, Object>();
        properties.put(ProducerConfig.BOOTSTRAP_SERVERS_CONFIG, brokers);
        properties.put(ProducerConfig.BATCH_SIZE_CONFIG, 4096);
        properties.put(ProducerConfig.LINGER_MS_CONFIG, 1);
        properties.put(ProducerConfig.BUFFER_MEMORY_CONFIG, 40960);
        properties.put(ProducerConfig.KEY_SERIALIZER_CLASS_CONFIG, StringSerializer.class);
        properties.put(ProducerConfig.VALUE_SERIALIZER_CLASS_CONFIG, StringSerializer.class);
        return new DefaultKafkaProducerFactory<String, String>(properties);
    }
}
创建KafkaConsumerConfig
package com.haiyang.config;

import org.apache.kafka.clients.consumer.ConsumerConfig;
import org.apache.kafka.common.serialization.StringDeserializer;
import org.springframework.beans.factory.annotation.Value;
import org.springframework.context.annotation.Bean;
import org.springframework.context.annotation.Configuration;
import org.springframework.kafka.annotation.EnableKafka;
import org.springframework.kafka.config.ConcurrentKafkaListenerContainerFactory;
import org.springframework.kafka.config.KafkaListenerContainerFactory;
import org.springframework.kafka.core.ConsumerFactory;
import org.springframework.kafka.core.DefaultKafkaConsumerFactory;
import org.springframework.kafka.listener.ConcurrentMessageListenerContainer;

import java.util.HashMap;
import java.util.Map;

@Configuration
@EnableKafka
public class KafkaConsumerConfig {
    @Value("${haiyang.kafka.binder.brokers}")
    private String brokers;

    @Value("${haiyang.kafka.group}")
    private String group;

    @Bean
    public KafkaListenerContainerFactory<ConcurrentMessageListenerContainer<String, String>> kafkaListenerContainerFactory() {

        ConcurrentKafkaListenerContainerFactory<String, String> factory = new ConcurrentKafkaListenerContainerFactory<String, String>();
        factory.setConsumerFactory(consumerFactory());
        factory.setConcurrency(4);
        factory.getContainerProperties().setPollTimeout(4000);

        return factory;
    }

    @Bean
    public KafkaListeners kafkaListeners() {
        return new KafkaListeners();
    }

    public ConsumerFactory<String, String> consumerFactory() {

        Map<String, Object> properties = new HashMap<String, Object>();

        properties.put(ConsumerConfig.BOOTSTRAP_SERVERS_CONFIG, brokers);
        properties.put(ConsumerConfig.ENABLE_AUTO_COMMIT_CONFIG, false);
        properties.put(ConsumerConfig.AUTO_COMMIT_INTERVAL_MS_CONFIG, "100");
        properties.put(ConsumerConfig.SESSION_TIMEOUT_MS_CONFIG, "15000");
        properties.put(ConsumerConfig.KEY_DESERIALIZER_CLASS_CONFIG, StringDeserializer.class);
        properties.put(ConsumerConfig.VALUE_DESERIALIZER_CLASS_CONFIG, StringDeserializer.class);
        properties.put(ConsumerConfig.GROUP_ID_CONFIG, group);
        properties.put(ConsumerConfig.AUTO_OFFSET_RESET_CONFIG, "latest");

        return new DefaultKafkaConsumerFactory<String, String>(properties);
    }
}
创建KafkaListeners
用于监听Kafka,进行消费package com.haiyang.config;
import org.apache.kafka.clients.consumer.ConsumerRecord;
import org.springframework.kafka.annotation.KafkaListener;
import java.util.Optional;
public class KafkaListeners {
@KafkaListener(topics = {"test"})
public void testListener(ConsumerRecord<?, ?> record) {
Optional<?> messages = Optional.ofNullable(record.value());
if (messages.isPresent()) {
Object msg = messages.get();
System.out.println("get message from kafka: " + msg);
}
}
}
以上配置完成了一个简单的Kafka配置
发送测试controller
为了测试方便,再创建就一个controller,用于发送消息
package com.haiyang.controller;

import org.springframework.beans.factory.annotation.Autowired;
import org.springframework.kafka.core.KafkaTemplate;
import org.springframework.web.bind.annotation.RequestMapping;
import org.springframework.web.bind.annotation.RestController;

@RestController
public class FeignController {
    @Autowired
    KafkaTemplate kafkaTemplate;

    private static int index = 0;

    @RequestMapping("/testKafka")
    public void testkafka(String message) {
        kafkaTemplate.send("test", "haha" + index++);
    }
}
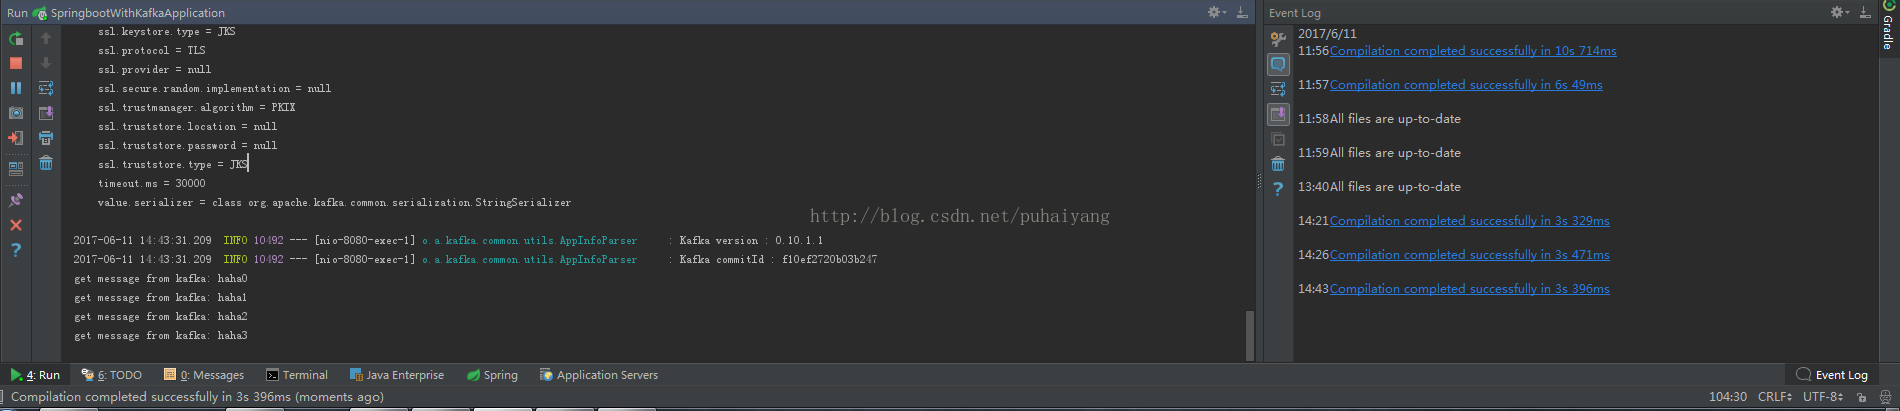
5.2测试
package com.haiyang;

import org.springframework.boot.SpringApplication;
import org.springframework.boot.autoconfigure.SpringBootApplication;

@SpringBootApplication
public class SpringbootWithKafkaApplication {

   public static void main(String[] args) {
      SpringApplication.run(SpringbootWithKafkaApplication.class, args);
   }
}


 5万+
5万+


 被折叠的 条评论
为什么被折叠?
被折叠的 条评论
为什么被折叠?
 到【灌水乐园】发言


