


要了解JdbcTemplate类与Spring JDBC框架相关的概念,下面通过编写一个简单的例子演示如何使用Spring JDBC框架,在这个示例中,将在以student表上实现插入数据和读取数据的操作。
CREATE TABLE student(
	id INT NOT NULL AUTO_INCREMENT,
	name VARCHAR(32) NOT NULL,
	age INT NOT NULL,
	PRIMARY KEY(id)
);
创建项目
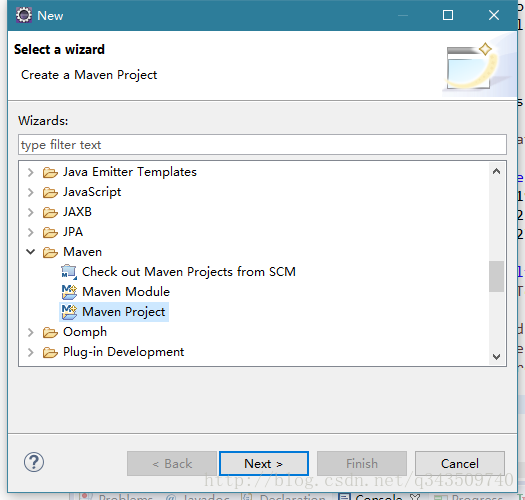
首先打开Eclipse,创建一个Maven项目,选择:File -> New -> Other… ,然后选择:Maven Project如下所示 -
下一步(Next>),如下所示 -
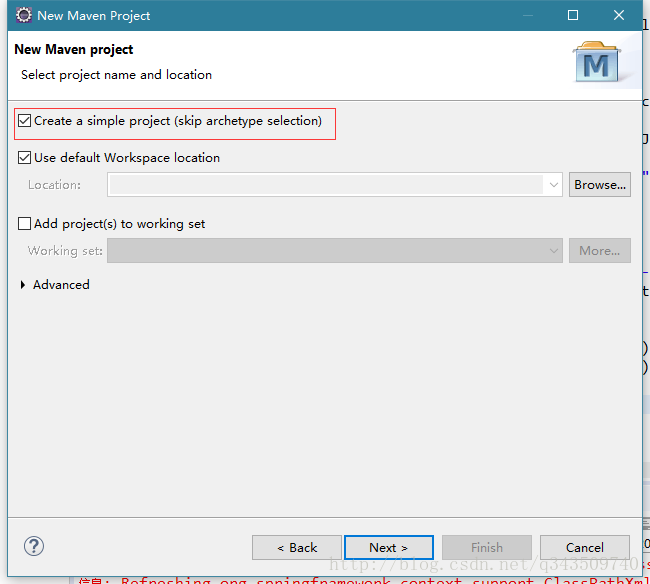
注意:第一个选项“Create a simple project(skip archetype selection)”选中。
下一步(Next>),如下所示 -
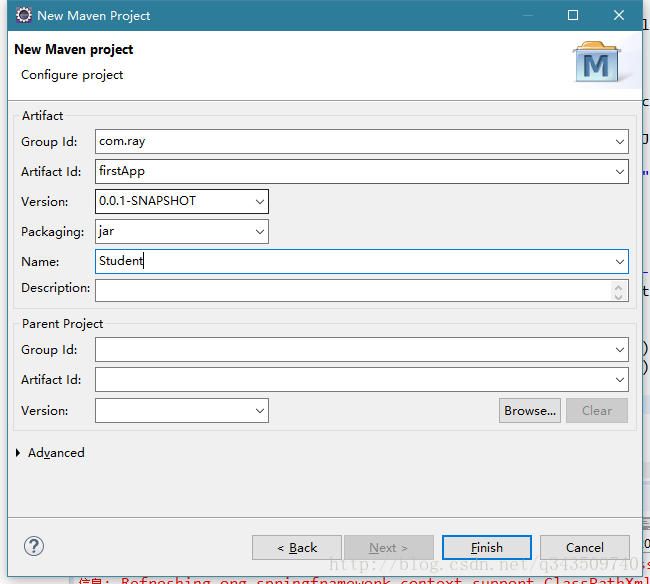
填入项目的一些必要信息,如项目名称,包的名称等。
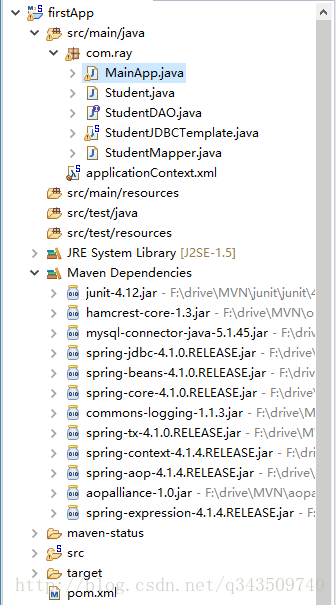
这样就创建好了一个名称为:firstApp 的java应用程序项目(在artifactId中指定)。更新pom.xml以包含Spring-JDBC依赖关系。添加以下几个类:Student.java,StudentMapper.java,MainApp.java,StudentDAO.java和StudentJDBCTemplate.java等文件,完整的项目结构如下所示 -
pom.xml 的完整内容 - 添加文件依赖
<project xmlns="http://maven.apache.org/POM/4.0.0" xmlns:xsi="http://www.w3.org/2001/XMLSchema-instance" xsi:schemaLocation="http://maven.apache.org/POM/4.0.0 http://maven.apache.org/xsd/maven-4.0.0.xsd">
  <modelVersion>4.0.0</modelVersion>
  <groupId>com.ray</groupId>
  <artifactId>firstApp</artifactId>
  <version>0.0.1-SNAPSHOT</version>
  <name>Student</name>

  <dependencies>
  	<dependency>
  		<groupId>junit</groupId>
  		<artifactId>junit</artifactId>
  		<version>4.12</version>
  	</dependency>

  	<dependency>
  		<groupId>mysql</groupId>
  		<artifactId>mysql-connector-java</artifactId>
  		<version>5.1.45</version>
  	</dependency>

  	<dependency>
  		<groupId>org.springframework</groupId>
  		<artifactId>spring-jdbc</artifactId>
  		<version>4.1.0.RELEASE</version>
  	</dependency>

  	<dependency>
  		<groupId>org.springframework</groupId>
  		<artifactId>spring-context</artifactId>
  		<version>4.1.4.RELEASE</version>
  	</dependency>
  </dependencies>

</project>
数据访问层:
StudentDAO.java的代码内容:
package com.ray;

import java.util.List;

import javax.sql.DataSource;

public interface StudentDAO {

    /**
     * This is the method to be used to initialize database resources ie.
     * connection.
     */
    public void setDataSource(DataSource ds);

    /**
     * This is the method to be used to create a record in the Student table.
     */
    public void create(String name, Integer age);

    public Student getStudent(Integer id);

    /**
     * This is the method to be used to list down all the records from the
     * Student table.
     */
    public List<Student> listStudents();
}
Student.java的代码内容:
package com.ray;

public class Student {

	private Integer age;
	private String name;
	private Integer id;

	public void setAge(Integer age) {
		this.age = age;
	}

	public Integer getAge() {
		return age;
	}

	public void setName(String name) {
		this.name = name;
	}

	public String getName() {
		return name;
	}

	public void setId(Integer id) {
		this.id = id;
	}

	public Integer getId() {
		return id;
	}
}
StudentMapper.java的代码内容:
package com.ray;

import java.sql.ResultSet;
import java.sql.SQLException;

import org.springframework.jdbc.core.RowMapper;


public class StudentMapper implements RowMapper<Student> {
    public Student mapRow(ResultSet rs, int rowNum) throws SQLException {
        Student student = new Student();
        student.setId(rs.getInt("id"));
        student.setName(rs.getString("name"));
        student.setAge(rs.getInt("age"));
        return student;
    }
}
StudentJDBCTemplate.java的代码内容:
package com.ray;

import java.util.List;

import javax.sql.DataSource;

import org.springframework.jdbc.core.JdbcTemplate;

public class StudentJDBCTemplate implements StudentDAO {
    private DataSource dataSource;
    private JdbcTemplate jdbcTemplateObject;

    public void setDataSource(DataSource dataSource) {
        this.dataSource = dataSource;
        this.jdbcTemplateObject = new JdbcTemplate(dataSource);
    }

    public void create(String name, Integer age) {
        String SQL = "insert into Student (name, age) values (?, ?)";

        jdbcTemplateObject.update(SQL, name, age);
        System.out.println("Created Record Name = " + name + " Age = " + age);
        return;
    }

    public List<Student> listStudents() {
        String SQL = "select * from Student";
        List<Student> students = jdbcTemplateObject.query(SQL, new StudentMapper());
        return students;
    }

    public Student getStudent(Integer id) {
        // TODO Auto-generated method stub
        return null;
    }
}
以下是Bean和数据库配置文件:applicationContext.xml的代码内容:
<?xml version="1.0" encoding="UTF-8"?>
<beans xmlns="http://www.springframework.org/schema/beans"
	xmlns:xsi="http://www.w3.org/2001/XMLSchema-instance"
	xsi:schemaLocation="http://www.springframework.org/schema/beans http://www.springframework.org/schema/beans/spring-beans.xsd">

	<!-- Initialization for data source -->
	<bean id="dataSource" class="org.springframework.jdbc.datasource.DriverManagerDataSource">
		<property name="driverClassName" value="com.mysql.jdbc.Driver"/>
		<property name="url" value="jdbc:mysql://localhost:3306/test"/>
		<property name="username" value="root"/>
		<property name="password" value="root"/>
	</bean>

	 <!-- Definition for studentJDBCTemplate bean -->
	 <bean id="studentJDBCTemplate" class="com.ray.StudentJDBCTemplate">
	 	<property name="dataSource" ref="dataSource"/>
	 </bean>
</beans>
注意: applicationContext.xml 文件的位置是:{workspace}/firstApp/src/main/java 目录,如果放置错了,程序可能会因为找不到此配置文件而出错。
以下是程序执行入口文件:MainApp.java的代码内容:
package com.ray;

import java.util.List;

import org.springframework.context.ApplicationContext;
import org.springframework.context.support.ClassPathXmlApplicationContext;

public class MainApp {

	public static void main(String[] args) {

		ApplicationContext context = new ClassPathXmlApplicationContext("applicationContext.xml");

		StudentJDBCTemplate studentJDBCTemplate = (StudentJDBCTemplate) context.getBean("studentJDBCTemplate");

		System.out.println("------Records Creation--------");
		studentJDBCTemplate.create("Allen", 17);
		studentJDBCTemplate.create("Ray", 18);
		studentJDBCTemplate.create("Mark", 20);

		 System.out.println("------Listing Multiple Records--------" );
		 List<Student> students = studentJDBCTemplate.listStudents();
		 for(Student record : students) {
			 System.out.print("ID : " + record.getId());
			 System.out.print(",Name : " + record.getName());
			 System.out.print(",Age : " + record.getAge());
		 }
	}
}
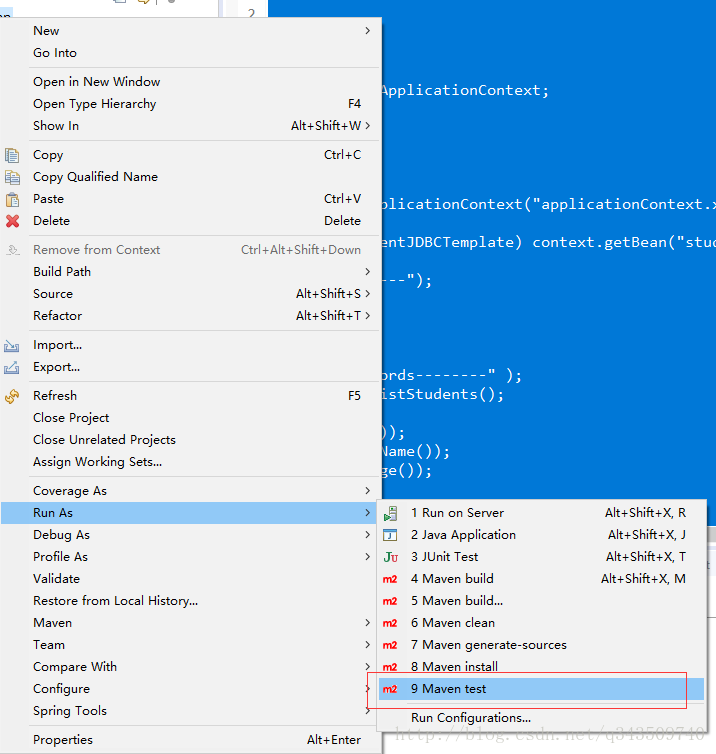
完成创建源代码和bean和数据库连接信息的文件配置后,运行应用程序。这里先简单说明一下运行的步骤,在项目名称(firstApp)上点击右键,在弹出的菜单中选择:【Run As】-> 【Maven test】,如下 -
在运行测试成功后,应该会输出类似以下内容(含有 BUILD SUCCESS 的信息) -
[INFO] Scanning for projects...
[INFO]
[INFO] ------------------------------------------------------------------------
[INFO] Building Student 0.0.1-SNAPSHOT
[INFO] ------------------------------------------------------------------------
[INFO]
[INFO] --- maven-resources-plugin:2.6:resources (default-resources) @ firstApp ---
[WARNING] Using platform encoding (GBK actually) to copy filtered resources, i.e. build is platform dependent!
[INFO] Copying 0 resource
[INFO]
[INFO] --- maven-compiler-plugin:3.1:compile (default-compile) @ firstApp ---
[INFO] Changes detected - recompiling the module!
[WARNING] File encoding has not been set, using platform encoding GBK, i.e. build is platform dependent!
[INFO] Compiling 5 source files to C:\Users\2018\eclipse-workspace\firstApp\target\classes
[WARNING] 读取F:\drive\MVN\junit\junit\4.12\junit-4.12.jar时出错; invalid LOC header (bad signature)
[INFO]
[INFO] --- maven-resources-plugin:2.6:testResources (default-testResources) @ firstApp ---
[WARNING] Using platform encoding (GBK actually) to copy filtered resources, i.e. build is platform dependent!
[INFO] Copying 0 resource
[INFO]
[INFO] --- maven-compiler-plugin:3.1:testCompile (default-testCompile) @ firstApp ---
[INFO] Nothing to compile - all classes are up to date
[INFO]
[INFO] --- maven-surefire-plugin:2.12.4:test (default-test) @ firstApp ---
[INFO] ------------------------------------------------------------------------
[INFO] BUILD SUCCESS
[INFO] ------------------------------------------------------------------------
[INFO] Total time: 2.552 s
[INFO] Finished at: 2018-03-07T17:31:50+08:00
[INFO] Final Memory: 15M/164M
[INFO] ------------------------------------------------------------------------
接下来,点击类文件:MainApp.java 选择【Run As】->【Java Application】,如果应用程序一切正常,这将打印以下消息:
三月 07, 2018 5:33:17 下午 org.springframework.context.support.ClassPathXmlApplicationContext prepareRefresh
信息: Refreshing org.springframework.context.support.ClassPathXmlApplicationContext@37f8bb67: startup date [Wed Mar 07 17:33:17 CST 2018]; root of context hierarchy
三月 07, 2018 5:33:17 下午 org.springframework.beans.factory.xml.XmlBeanDefinitionReader loadBeanDefinitions
信息: Loading XML bean definitions from class path resource [applicationContext.xml]
三月 07, 2018 5:33:17 下午 org.springframework.jdbc.datasource.DriverManagerDataSource setDriverClassName
信息: Loaded JDBC driver: com.mysql.jdbc.Driver
------Records Creation--------
Wed Mar 07 17:33:18 CST 2018 WARN: Establishing SSL connection without server's identity verification is not recommended. According to MySQL 5.5.45+, 5.6.26+ and 5.7.6+ requirements SSL connection must be established by default if explicit option isn't set. For compliance with existing applications not using SSL the verifyServerCertificate property is set to 'false'. You need either to explicitly disable SSL by setting useSSL=false, or set useSSL=true and provide truststore for server certificate verification.
Created Record Name = Allen Age = 17
Wed Mar 07 17:33:18 CST 2018 WARN: Establishing SSL connection without server's identity verification is not recommended. According to MySQL 5.5.45+, 5.6.26+ and 5.7.6+ requirements SSL connection must be established by default if explicit option isn't set. For compliance with existing applications not using SSL the verifyServerCertificate property is set to 'false'. You need either to explicitly disable SSL by setting useSSL=false, or set useSSL=true and provide truststore for server certificate verification.
Created Record Name = Ray Age = 18
Wed Mar 07 17:33:18 CST 2018 WARN: Establishing SSL connection without server's identity verification is not recommended. According to MySQL 5.5.45+, 5.6.26+ and 5.7.6+ requirements SSL connection must be established by default if explicit option isn't set. For compliance with existing applications not using SSL the verifyServerCertificate property is set to 'false'. You need either to explicitly disable SSL by setting useSSL=false, or set useSSL=true and provide truststore for server certificate verification.
Created Record Name = Mark Age = 20
------Listing Multiple Records--------
Wed Mar 07 17:33:18 CST 2018 WARN: Establishing SSL connection without server's identity verification is not recommended. According to MySQL 5.5.45+, 5.6.26+ and 5.7.6+ requirements SSL connection must be established by default if explicit option isn't set. For compliance with existing applications not using SSL the verifyServerCertificate property is set to 'false'. You need either to explicitly disable SSL by setting useSSL=false, or set useSSL=true and provide truststore for server certificate verification.
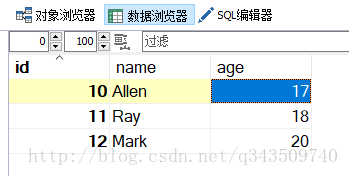
ID : 10,Name : Allen,Age : 17ID : 11,Name : Ray,Age : 18ID : 12,Name : Mark,Age : 20数据库有数据


 1231
1231


 被折叠的 条评论
为什么被折叠?
被折叠的 条评论
为什么被折叠?
 到【灌水乐园】发言


